Kett AN-820 User manual

Near Infrared Grain Tester AN-820
Operating Manual


Contents
1. Features ................................................................................................ 4
2. Main unit & Parts names ........................................................................ 5
3. Specifications ......................................................................................... 7
4. Keypad (Explanation) ............................................................................. 8
5. Preparation............................................................................................. 9
5-11 . Power ON ............................................................................................ 9
5-21 . Calibration Selection............................................................................ 10
6. Measuring Procedure ............................................................................. 11
6-11 . Measurement....................................................................................... 11
6-21 . Average Display................................................................................... 13
6-3-1. Setup the Display Conditions............................................................... 14
6-3-2. Setup the Indication Range.................................................................. 15
(1) Protein CM Display......................................................................... 16
6-41 . Bias Adjustment................................................................................... 16
(1) Manual adjustment mode ............................................................... 17
(2) Automatic adjustment mode........................................................... 19
7. Time settings .......................................................................................... 21
8. Communication.............................................................................................. 22
9. Replacment for lamp .............................................................................. 23
10.Cleaning ................................................................................................ 24
<Appendix> Guidelines for using AN-820 with maximum accuracy............... 25

4
The Model AN-820 composition analyzer is a desk top grain tester
(Transmittance type) that utilizes applied near-infrared rice analysis
technology.
It employs total-grain measurement formulas for measuring without
crushing the sample grain to pieces, so it makes it possible to analyze
grain quickly and easily.
By utilizing tungsten lamp, grating system and NMOS photo-diode array
detector, and the result is that we are able to achieve high stability.
1. Features

5
2. Main unit & Parts names
Cover
Contrast adjustment control
Key functions
Cover
Printer output port
Serial output port(RS-232C)
Power cable connection
Power switch
Fuse holder
Measurement chamber
Display
< Rear side >
< Front side >

6
[ Accessories ]
Sample case
Power cable
Sampling cup Fuse
Operating manual
Operating Manual
Near Infrared Grain Tester AN-820
Standard samples
(Brown rice / Milled rice)
Storage container for standard samples
Standard samples
Storage container

7
3. Specifications
Measurement Method : Near Infrared Transmittance
Light Source : Tungsten lamp (lamp life 20,000hrs)
Applications : Short Brown Rice, Short Milled Rice, H-Moist Short B.R., R.F.R-B.G.,
R.F.R-TWR, Long Brown Rice, Long Milled Rice
Constituents : Protein, Moisture, Amylose (reference value)
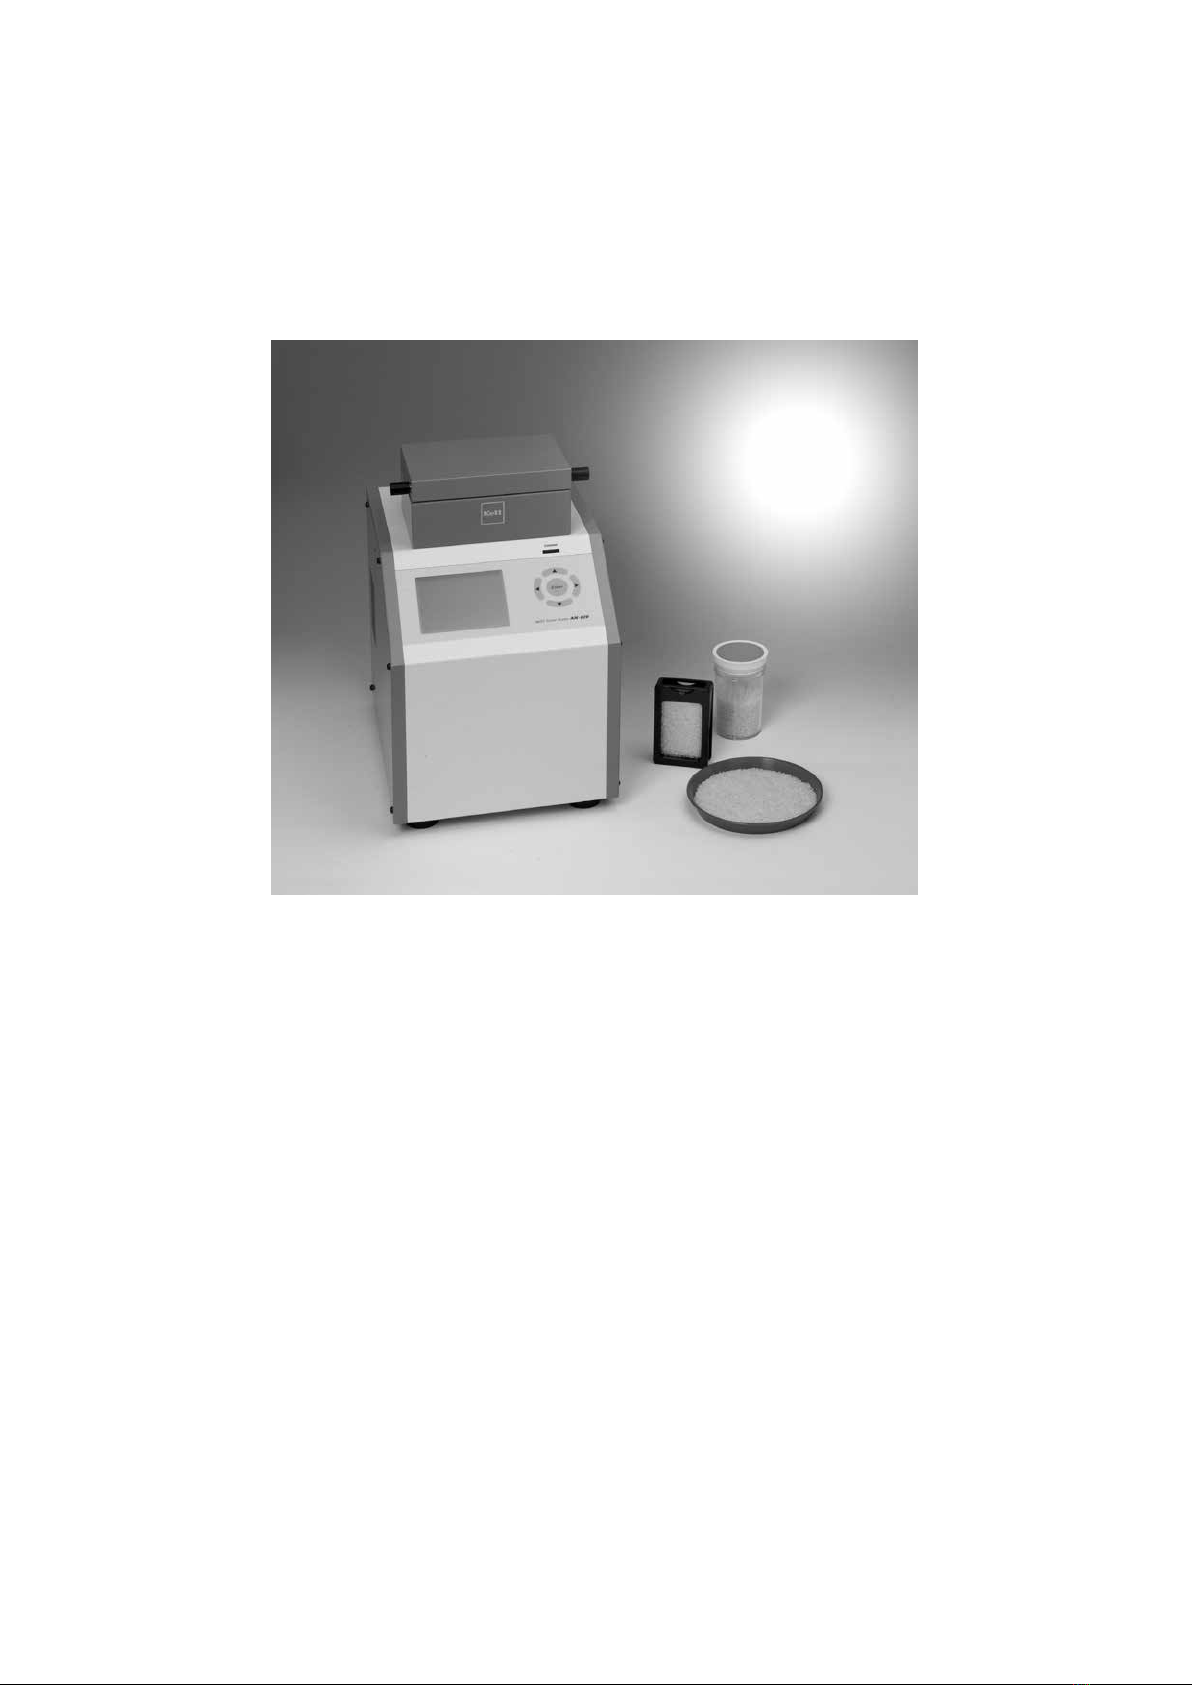
Sample Volume : Approx. 60mL
Calibration Memory : 4 constituents ×8 channels
Measurement Time : Approx. 40 sec
Operating Environment : 10~35℃(Non-condensation)
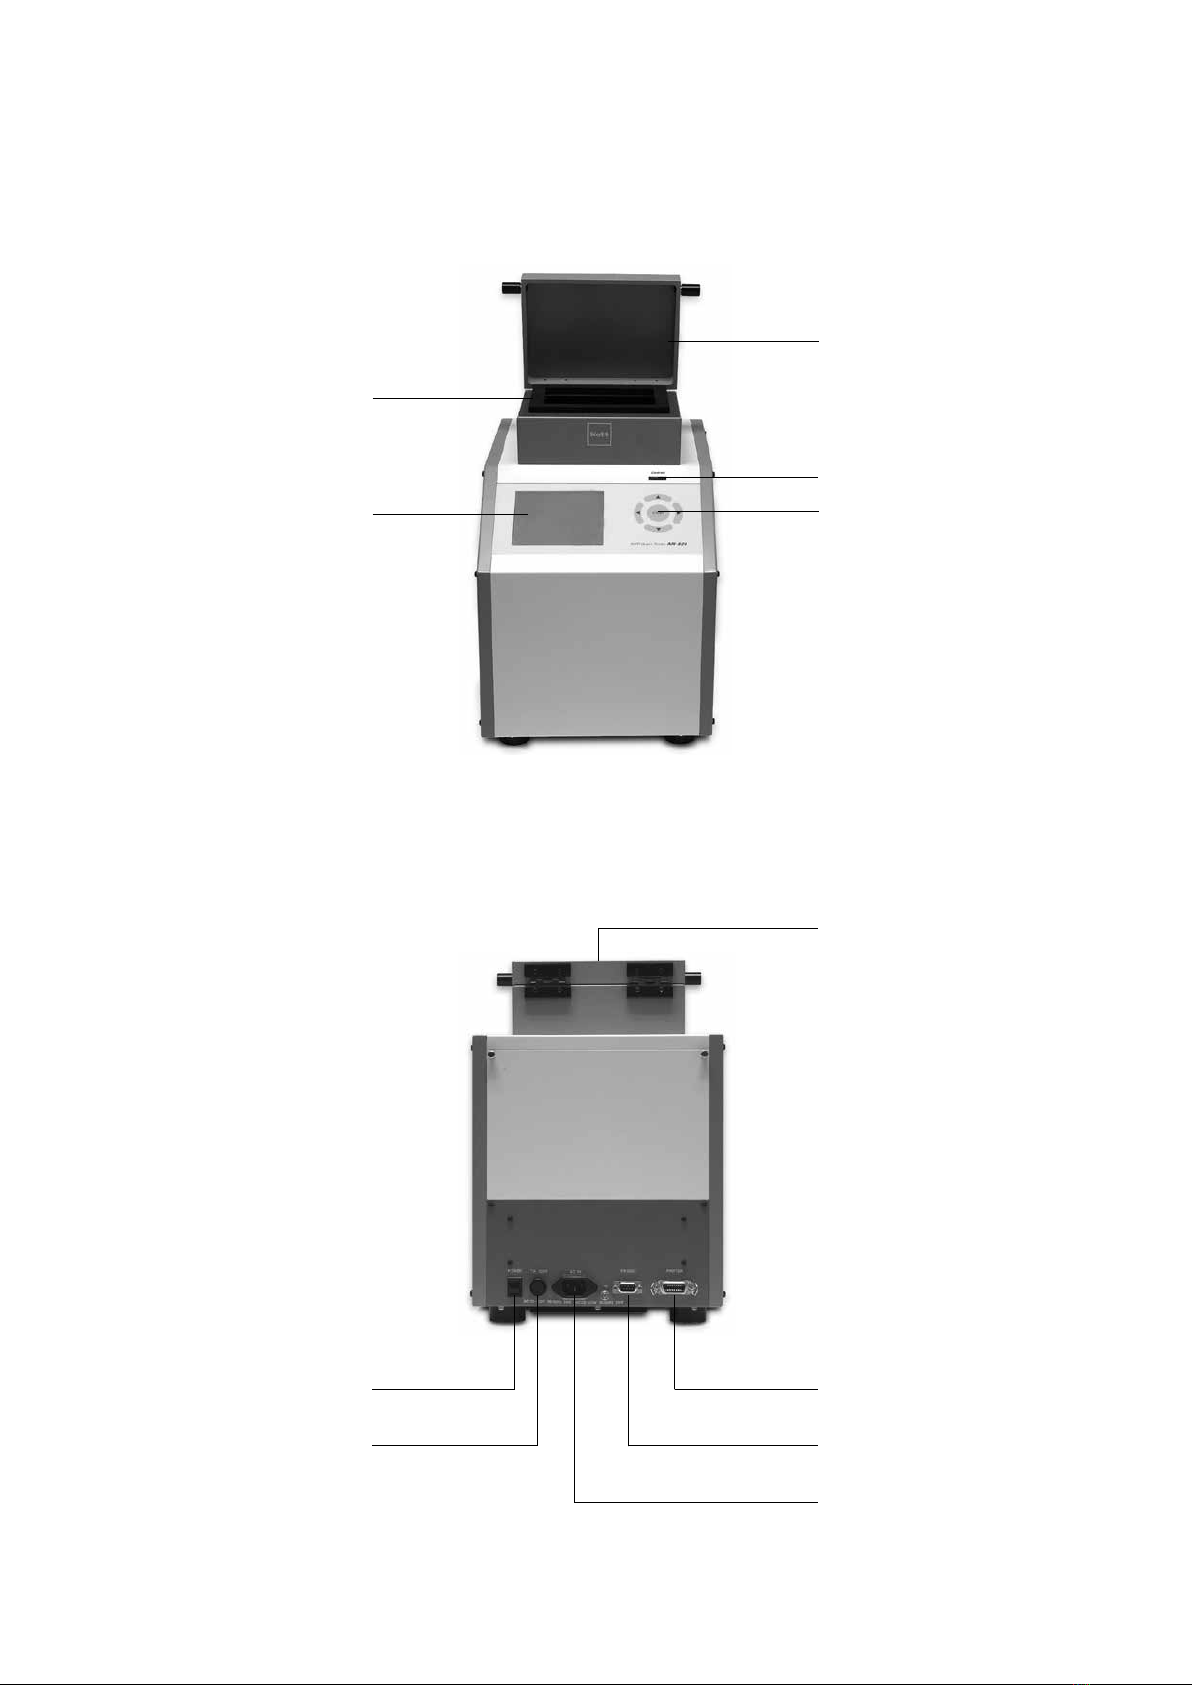
Display Format : 320 ×240 dot-matrix large-size LCD
Displays Content : Calibration settings / names, Protein, Moisture,
Amylose (reference value), Quality Evaluation Value (Q.E.V)
Power Source : AC100V~240V (50/60Hz)
Dimensions : 260(W) ×350(D) ×380(H)mm
Weight : 13kg
Accessories : Power cable 1pc
Sample case 1pc
Sampling cup 1pc
Fuse 1pc
Operation manual 1pc
Standard samples (Brown Rice, Milled Rice) 2pc. (per each)
Storage container for standard samples 1pc
Option : Printer model VZ-330 (100V/220V)
Note : AN-820 should be used below 35℃in environment condition. If the environment temperature is
over 50℃, the precision spectroscope would be damaged. And The AN-820 should be also stor-
aged below 50℃environment condition.
Note : Pre-calibration with recommended conditions are as below.
Display range Protein : 4 ~ 12%
Moisture : 10 ~ 20%
Amylose(Reference) : 10 ~ 40%
Recommnedation conditions : 15~30℃(Non-condensation)
Note : A backup battery has been built to this unit so that even if the electricity is cut-off, the calibration
in memory will not be lost. Please contact the service desk of our company regarding an replace of
backup battery.

8
Scroll key
Function key
Enter key
Return key
4. Keypad Explanation
Enter key : Press this key when you begin measuring or you want to execute or confirm
a selected item.
Return key : Press this key when you want to return to a previous screen or when you
want to invalidate a selected item.
Scroll key : Press this key when you are selecting an item at the top of the screen or
when you want to increase or decrease a numerical value.
Function key : Press this key when you will use a function that was specially set-up at the
top of the screen.

9
5. Preparation
5-1. Power ON
Power cable Outlet
Power Connector
Power switch
Ground
Note : Approximately one hour before operation, turn the power “On”, and begin warming up the device.
[ Measurement ]
[ Application ] 1ShortBrown
[ Display ]
[ Adjustment ] Serialnumber
[ Time ] AB01234
[ Communication] VER1.00
2009-05-31 2 3: 59
Operation Display Explanation
1. Plug the power cable into this
unit and connect it to outlet.
2. Turn the power switch “ON”,
which is located rear side.
Initial screen will be displayed. [ ] means, turn [ON]
[] means, turn [OFF]
In case that the screen isn’t
Showing or is hard too see, ad-
just the “Contrast set dial” on the
bottom of unit by turning it until
thr screen is easy to see.

10
5-2. Calibration Selection
With near-infrared composition analyzers similar to this unit, you prepare each pre-
calibration and then analysis compositions. AN-820 has an eight channel capacities
and pre-calibrations is done by our company. Before starting analysis, please select
a proper calibration according to the grain you want to measure.
Note : A backup battery has been built to this unit so that even if the electricity is cut-off, the calibration in
memory will not be lost. Please contact the service desk of our company regarding an replace of
backup battery.
[ Measurement ]
[ Application ] 1ShortBrown
[ Display ]
[ Adjustment ] Serialnumber
[ Time ] AB01234
[ Communication] VER1.00
2009-05-31 2 3: 59
[Application]
1ShortBrownRice
2ShortMilledRice
3H-MoistShortB.R.
4R.F.R-B.G
5R.F.R-TWR
6LongBrownRice
7LongMilledRice
8
Selecttheapplication.
[Application]
1ShortBrownRice
2ShortMilledRice
3H-MoistShortB.R.
4R.F.R-B.G
5R.F.R-TWR
6LongBrownRice
7LongMilledRice
8
Selecttheapplication.
[ Measurement ]
[ Application ] 1ShortBrown
[ Display ]
[ Adjustment ] Serialnumber
[ Time ] AB01234
[ Communication] VER1.00
2009-05-31 2 3: 59
Operation Display Explanation
1. By using keys, select
the “Calibration” setting.
2. Press the key.
The list of pre-calibration is
displayed.
The existing, selected Calibration is
diplayed.
3. Select a calibration by using
keys.
4. Press the key.
Calibration will be selected and
back to initial screen.

11
6. Measuring Procedure
6-1. Measuring
[Measurement]Application1ShortBrown
Measurementinprogress...
Dark
[Measurement]Application1ShortBrown
Measurementinprogress...
Reference
[Measurement]Application1ShortBrown
Measurementinprogress...
Sample1/5
[ Measurement ]
[ Application ] 1ShortBrown
[ Display ]
[ Adjustment ] Serialnumber
[ Time ] AB01234
[ Communication] VER1.00
2009-05-31 2 3: 59
Operation Display Explanation
1. By using keys, select
the “Measurement” setting.
2. Set the sample case and close
the cover, and press the
key.
Pouring the sample
into the sample case.
Strongly tap the
bottom of the sample
case approx. 10 times
in order to make the sample settle
firmly. Add additional sample, if thre
is empty space at the top.
Never open the cover during
Measurement.
Measurement of built-in standard is
in progress.
Measurement of sample grain is
in progress. Five different parts of
sample grain should be measured at
one measurement.
Remove the sample case after
measuring compositions.
Press the key, if you want to
measure next sample continiously.
If press the key, initial screen will
be displayed.
[Measurement]Application1ShortBrown
Numberofmeasurementtimes =1
Q.E.V 76
Protein 6. 0 %
Protein CM @15.0 5. 9 %
Protein DM 7. 0 %
Moisture 14. 0 %
Amilose 20. 7 %
Displaytheaverage.

12
Note : During and /or measurement, there are times when the following messages will be displayed.
In whichever case except Error 09, press key, and redo the measurement from the very beginning.
This message appears when stepping motor which works for
transporting sample grain case for measurement is wrong thus
sample case may stop moving on the way for measurement.
This message appears when built-in standard is wrong.
This message appears when the penetration rate of light from
the sample is either greater or less than the permissible range.
This message appearts when the temperature of the operating
environment is either higher or lower than the permissible range.
This message appears when the temperature of the sample is
either higher or lower than the permissible range.
This message appears when the temperature in Spectropho-
tometer is over 45℃and the power is forcibly turned off. In this
case, the instrument should be cooled down by leaving it under
airy place until it reached to the ambient temperature. The power
should be on after confirming that the instrument temperature is
cooled down to the ambient temperature.
Error 01:
Steppingmotorwrong.
Error 02:
Standardmeasurementwrong.
Error 03:
(04)
Sampletoobright.
(dark)
Error 05:
(06)
Instrumenttemp.toohigh.
(low)
Error 07:
(08)
Sampletemp.toohigh.
(low)
Error 09:
Instrumenttemp.toohigh.
Cooltheinstrumentdown
toambienttemp.

13
Note : AN-820 utilizes a transmittance measurement method, empty space in the sample cases will lead
to measurement errors. It is important into the sample case firmly in such a way that there are no
empty spaces.
Note : A temperature sensing element is inserted into an opening in the bottom of the sample case in
order to measure the temperature of the sample and perform temeprature compensation. However,
in order to obtain the most precise measurement results, it is best if different temperarure between
the sample and the environment in which the unit is installed are kept to a minimum.
Note : AN-820 should be used below 35℃in enviroment condition in order to equip precision spectro-
scope which would be damaged in high enviroment condition.
++.+ : Over the upper limited of
Display range.
--.-
: Under the lower limited of
Display range.
** : When the caliculation is
not available.
6-2. Average Display
[Measurement]Application1ShortBrown
AverageNumberofmeasurementtimes =1
Q.E.V 75
Protein 6. 2 %
Protein CM @15.0 6. 1 %
Protein DM 7. 2 %
Moisture 14. 1 %
Amilose 21. 1 %
Displayingtheaverage.
Operation Display Explanation
1. When performing repeated
measurements the number of
times measured increase. (1~9)
Following the 9th measurement, the
counter will automatically reset and
start over at 1. In addition, at the
times when you press the key or
keys, the next measurement will
become the first.
2. Press the key, the average
value based on those repeated
measurements will be displayed.
On this screen, if the key is
pressed, a new measurement can
be performed. When the average
value is displayed, the counter resets
and the next measurement becomes
the first one. If the key is pressed,
the initial screen will be displayed.
[Measurement]Application1ShortBrown
Numberofmeasurementtimes =1
Q.E.V **
Protein ++. + %
Protein CM @15.0 ** . * %
Protein DM ** . * %
Moisture 11. 9 %
Amilose 20. 7 %
Displaytheaverage.
[Measurement]Application1ShortBrown
Numberofmeasurementtimes =1
Q.E.V 74
Protein 6. 3 %
Protein CM @15.0 6. 3 %
Protein DM 7. 3 %
Moisture 14. 2 %
Amilose 21. 5 %
Displaytheaverage.

14
6-3-1. Setup the Dislay Conditions
CM(Constant Moisture basis)
DM(Dry Moisture basis)
[Display]Application1ShortBrown
Q.E.V ON
Protein ON
Protein CM ON@Moisture15. 0%
Protein DM OFF
Moisture ON
Amilose ON
Indicationrange
Selecttheitem.
[Display]Application1ShortBrown
Q.E.V ON
Protein OFF
Protein CM ON@Moisture15. 0%
Protein DM OFF
Moisture ON
Amilose ON
Indicationrange
Changethesetting.
[Display]Application1ShortBrown
Q.E.V ON
Protein OFF
Protein CM ON@Moisture15. 0%
Protein DM OFF
Moisture ON
Amilose ON
Indicationrange
Selecttheitem.
[ Measurement ]
[ Application ] 1ShortBrown
[ Display ]
[ Adjustment ] Serialnumber
[ Time ] AB01234
[ Communication] VER1.00
2009-05-31 23: 59
[Display]Application1ShortBrown
Q.E.V ON
Protein OFF
Protein CM ON@Moisture15. 5%
Protein DM OFF
Moisture ON
Amilose ON
Indicationrange
Changethesetting.
Operation Display Explanation
1. By using keys, select
the “Display” setting.
2. Press the key. And select
a item you want to change by
using keys.
In case “Display” is ON.
3. Press the key, and select
either the “Display” or “Don’t
Display” choice for each item by
using keys.
In case “Display” is OFF.
4. Press the key.
If you want to set another choices,
repeat operation procedure 2~4.
If you press the key, the initial
screen will be displayed.
In addition to the protein CM
ON, pressing key will allow
you to set the “@ moisture %”
for calculating the protein CM by
using key. And press
the key.
“@ Moisture %” is changeable.
While you press the key, you can
increase and decrease the values
quickly with keys.

15
6-3-2. Setup the Indication Range
[Indicationrange]Application1Short
Protein Upperlimit12. 0 %
Lowerlimit04. 0%
Moisture Upperlimit20. 0%
Lowerlimit10. 0%
Amilose Upperlimit40. 0%
Lowerlimit10. 0%
Selecttheitem.
[Display]Application1ShortBrown
Q.E.V ON
Protein ON
Protein CM ON@Moisture15. 0%
Protein DM OFF
Moisture ON
Amilose ON
Indicationrange
Selecttheitem.
[Indicationrange]Application1Short
Protein Upperlimit12. 0 %
Lowerlimit04. 0%
Moisture Upperlimit20. 0%
Lowerlimit10. 0%
Amilose Upperlimit40. 0%
Lowerlimit10. 0%
Selecttheitem.
[Indicationrange]Application1Short
Protein Upperlimit12. 0 %
Lowerlimit04. 0%
Moisture Upperlimit20. 0%
Lowerlimit10. 0%
Amilose Upperlimit40. 0%
Lowerlimit10. 0%
Changethesetting.
Operation Display Explanation
1. By using keys, select
the “Indication range” setting.
2. Press the key.
3. By using keys, and
choose items, and press the
key.
In case “Protein Upper” is selected.
4. Change the value by using
keys until the fixed and
press the key.
If you want to set another choices,
repeat operation procedure 2~4.
If you press the key, the initial
screen will be displayed.

16
6-4. BIAS Adjustment
With a rice-analysis device that applies Near-Infrared method like this unit, there
are times when the extended use of light-emitting parts, sensors, etc. experiences
minor changes that happen over time that can cause the measurement value to
change. The difference between AN-820 ’s measurement value and composition
values of standard samples (The known sample from the previous correct
composition value) is referred to as the bias.
To adjust bias of the unit, there are two models manual or automatic.
To set unit manually, prepare several standard samples which should be different
values per each composition, performing measurement as usually several times.
And then calculate requested bias per composition by manual.
To set unit automatically, prepare one standard sample, and as you measure
according to display, the automatic bias adjustment should run smoothly.
Note : With the automatic adjustment, you need only one standard sample, so it is often convenience
to do, but you need to be careful of doing the adjustment incorrectly when making mistakes with
standard sample or doing other things to throw off the results.
(1) Protein CM Display (CM : Constant Moisture basis)
AN-820 ’s protein content shows the percentage contain in terms of whole grain, including
moisture. This altenative is convenient at times, when you are, for example, calculating the
weight of protein inside grain that was measured. But when you compare proteins among
many different moisture is contained, there are times when it is convenient to assume the fixed
moisture content. This consideration is “CM Protein” which is displayed as protein conversion
by assuming the fixed moisture content (with AN-820, this is the same as the “@ Moisture %” is
specified). When the fixed moisture content is assumed to be “ 0% ”, this is referred to as a “dry
conversion” (DM : Dry Moisture Basis)
The conversion formula is as follows, so if Protein, Moisture, and / or “@ Moisture %” are set
incorrectly, The “CM Protein” conversion value will not be displayed correctly.
(2) Calculation of Q.E.V. (Quality Evaluation Value)
Calculation of Q.E.V is based on moisture and Protein (as is) when “Protein CM” is not set.
When moisture is set under 10% and “Protein CM” , Q.E.V is calculated based on Moisture and
CM (as is). When Moisture is set over 10%, and “Protein CM” , Q.E.V is calculated based on
preset Moisture and Protein (CM).
Protein × (100 -@ Moisture %)
100-Moisture
Protein CM =

17
(1) Manual adjustment mode
With manual setting, prepare 3 or 5 samples and calculate the difference between
average value of AN-820 and average value of standard samples for each composition.
Because this alternative uses multiple samples to perform the bias adjustment, it is
able to perform more accurate bias adjustment than automatic adjustment.
Example of calculating Protein value and Performing Manual setting
In case of 3 type of sample (as Standard Samples)
• Measure samples to be tested 3 times each by AN-900 and culculation
Protein Values A B C
1th time 6.3 5.4 7.0
2th time 6.4 5.3 7.0
3th time 6.2 5.3 7.1
Average 6.3 5.3 7.0
Average of 3 sample’ s average (6.3+5.3+7.0)/3= 6.2
• Calculate average of standard sample’ s values (as standard samples)
A B C
Protein of standard sample 6.8 5.6 7.4
Average of satandard sample’ s (6.8+5.6+7.4)/3= 6.6
• Calculate BIAS value
BIAS value = AV. standard samples - AV. measurements
0.4 = 6.6 - 6.2
0.4 is diecided as BAIS value
BIAS procedure is shown on the next page
When you can not prepare more than one standard sample
In order to perform accuracy and successful bias adjustment, we recom-
mend the alternative where you need 3 or 5 samples as standard samples,
as is mentioned above. However, in case that you only have one standard
sample, as s simple alternative, you measure it three time, and calculate av-
erage, and decide BIAS value.
• Measure samples to be tested 3 times each by AN-900 and culculation
Protein average of measured values by AN-900 6.3
• Refer to standard sample protein value 6.8
• Calculation bias value
BIAS value = Standard value of sample - AV. measurements
0.5 = 6.8 - 6.3
0.5 is diecided as BAIS value

18
Note : Sometimes, BIAS adjustment doesn’t run correctly - For example when the windows on sample
case is dirty or when the sample becomes rather damaged. If it get dirty, measure after wiping the
dirt off of it. In case that the sample is damaged, you would be replaced new standard sample.
Note : BIAS value is also acceptable with minus, instead of plus.
BIAS = AV. Standard - AV. Measurements
- 0.5 = 6.1 - 6.6
In case of BIAS value is mius -0.5
[Adjustment]Application1ShortBrown
BIAS / Protein -00. 1%
/ Moisture + 00. 1%
/ Amilose + 00. 1 %
BIASAuto-adjustmentwithSTD.sample.
Selecttheitem.
[Adjustment]Application1ShortBrown
BIAS / Protein -00. 2%
/ Moisture + 00. 1%
/ Amilose + 00. 1 %
BIASAuto-adjustmentwithSTD.sample.
Changethesetting.
[Adjustment]Application1ShortBrown
BIAS / Protein -00. 2%
/ Moisture + 00. 1%
/ Amilose + 00. 1 %
BIASAuto-adjustmentwithSTD.sample.
Selecttheitem.
[ Measurement ]
[ Application ] 1ShortBrown
[ Display ]
[ Adjustment ] Serialnumber
[ Time ] AB01234
[ Communication] VER1.00
2009-05-31 23: 59
Operation Display Explanation
1. By using keys, select
the “Adjustment” setting.
2. Press the key.
And select item by using
key.
3. Press the key.
And change bias value by using
keys.
While you press the key, you can
increase and decrease the values
quickly with keys.
4. Press the key. If you want to set another choices,
repeat operation procedure 2~4.
If you press the key, the initial
screen will be displayed.

19
(2) Automatic adjustment mode
[Adjustment]Application1ShortBrown
Ingredientvaluesoftheregistered
standardsample.
Protein 06. 0 %
Moisture 15. 5 %
Amilose 20. 0 %
Changethesetting.
[Adjustment]Application1ShortBrown
BIAS / Protein -00. 1%
/ Moisture + 00. 1%
/ Amilose + 00. 1 %
BIASAuto-adjustmentwithSTD.sample.
Selecttheitem.
[ Measurement ]
[ Application ] 1ShortBrown
[ Display ]
[ Adjustment ] Serialnumber
[ Time ] AB01234
[ Communication] VER1.00
2009-05-31 23: 59
Operation Display Explanation
1. By using keys, select
the “Adjustment” setting.
2. Press the key, and select
“Automatic adjustment” by using
keys.
3. Press the key.
When you want to adjust
individual composition values,use
keys, and change the
highlighted composition. Then
press the key. Using
keys, you will be able to
revise the values. When they are
to your selection, press the
key.
While you press the key, you can
increase and decrease the values
quickly with keys.
[Adjustment]Application1ShortBrown
Ingredientvaluesoftheregistered
standardsample.
Protein 06. 0 %
Moisture 15. 5 %
Amilose 20. 0 %
StartBIASauto-adjustment.

20
[Adjustment]Application1ShortBrown
Measurementinprogress...
Dark
BIASAuto-adjustmentinprogress...
[Adjustment]Application1ShortBrown
Measurementinprogress...
Reference
BIASAuto-adjustmentinprogress...
[Adjustment]Application1ShortBrown
Measurementinprogress...
Sample1/5
BIASAuto-adjustmentinprogress...
Note : Sometimes, BIAS adjustment doesn’t run correctly - For example when the windows on sample
case is dirty or when the sample becomes rather damaged. If it get dirty, measure after wiping the
dirt off of it. In case that the sample is damaged, you would be replaced new standard sample.
Operation Display Explanation
4. After confirming both composition
values are correct, and press the
key.
Never open the cover during
Measurement.
Measurement of built-in standard is
in progress.
Measurement of sample grain is
in progress. Five different parts of
sample grain should be measured at
one measurement.
After completing Auto Adjustment,
the screen will be back to initinal
screen.
[ Measurement ]
[ Application ] 1ShortBrown
[ Display ]
[ Adjustment ] Serialnumber
[ Time ] AB01234
[ Communication] VER1.00
2009-05-31 23: 59
Table of contents
Other Kett Test Equipment manuals
Popular Test Equipment manuals by other brands

Renco
Renco PREG-ALERT PRO instruction manual

Solaxx
Solaxx SafeDip operating instructions

Keysight Technologies
Keysight Technologies N7700 user guide

Teledyne Lecroy
Teledyne Lecroy T3AWG3K Series Operator's manual

Hella Gutmann
Hella Gutmann BMA-Tool user manual

Spectracom
Spectracom GSG-5 series User Manual with SCPI Guide