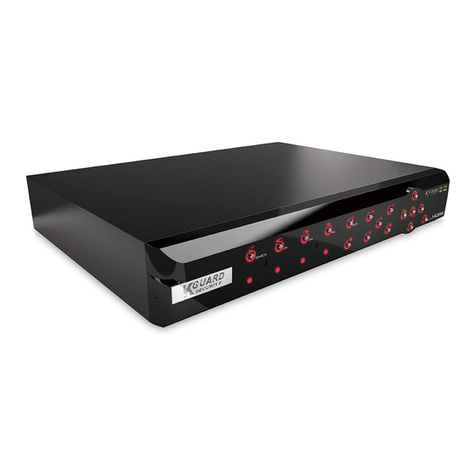
Kguard 4CH DVR User manual

Quad Camera Stand Alone System
DVR Security System
User’s Guide
INFORMATION SUBJECT TO CHANGE

Quad Camera DVR
2
Table of Contents
Safety Information ........................................................................................... 3
P
Pa
ac
ck
ka
ag
ge
e
C
Co
on
nt
te
en
nt
ts
s.
..
..
..
..
..
..
..
..
..
..
..
..
..
..
..
..
..
..
..
..
..
..
..
..
..
..
..
..
..
..
..
..
..
..
..
..
..
..
..
..
..
..
..
..
..
..
..
..
..
..
..
..
..
..
..
..
..
..
..
..
..
..
..
..
..
..
..
..
..
..
..
..
..
..
..
..
..
..
..
..
..
..
..
..
..
..
..
..
..
..
..
.3
3
1
1.
.
I
In
nt
tr
ro
od
du
uc
ct
ti
io
on
n.
..
..
..
..
..
..
..
..
..
..
..
..
..
..
..
..
..
..
..
..
..
..
..
..
..
..
..
..
..
..
..
..
..
..
..
..
..
..
..
..
..
..
..
..
..
..
..
..
..
..
..
..
..
..
..
..
..
..
..
..
..
..
..
..
..
..
..
..
..
..
..
..
..
..
..
..
..
..
..
..
..
..
..
..
..
..
..
..
..
..
..
..
..
..
..
..
..
.4
4
1
1.
.1
1
P
Pr
ro
od
du
uc
ct
t
O
Ov
ve
er
rv
vi
ie
ew
w.
..
..
..
..
..
..
..
..
..
..
..
..
..
..
..
..
..
..
..
..
..
..
..
..
..
..
..
..
..
..
..
..
..
..
..
..
..
..
..
..
..
..
..
..
..
..
..
..
..
..
..
..
..
..
..
..
..
..
..
..
..
..
..
..
..
..
..
..
..
..
..
..
..
..
..
..
..
..
..
..
..
..
..
..
..
.4
4
1
1.
.2
2
F
Fr
ro
on
nt
t
P
Pa
an
ne
el
l.
..
..
..
..
..
..
..
..
..
..
..
..
..
..
..
..
..
..
..
..
..
..
..
..
..
..
..
..
..
..
..
..
..
..
..
..
..
..
..
..
..
..
..
..
..
..
..
..
..
..
..
..
..
..
..
..
..
..
..
..
..
..
..
..
..
..
..
..
..
..
..
..
..
..
..
..
..
..
..
..
..
..
..
..
..
..
..
..
..
..
..
..
..
..
..
..
.5
5
1
1.
.3
3
R
Re
ea
ar
r
P
Pa
an
ne
el
l.
..
..
..
..
..
..
..
..
..
..
..
..
..
..
..
..
..
..
..
..
..
..
..
..
..
..
..
..
..
..
..
..
..
..
..
..
..
..
..
..
..
..
..
..
..
..
..
..
..
..
..
..
..
..
..
..
..
..
..
..
..
..
..
..
..
..
..
..
..
..
..
..
..
..
..
..
..
..
..
..
..
..
..
..
..
..
..
..
..
..
..
..
..
..
..
..
..
.6
6
1
1.
.4
4
R
Re
em
mo
ot
te
e
C
Co
on
nt
tr
ro
ol
l.
..
..
..
..
..
..
..
..
..
..
..
..
..
..
..
..
..
..
..
..
..
..
..
..
..
..
..
..
..
..
..
..
..
..
..
..
..
..
..
..
..
..
..
..
..
..
..
..
..
..
..
..
..
..
..
..
..
..
..
..
..
..
..
..
..
..
..
..
..
..
..
..
..
..
..
..
..
..
..
..
..
..
..
..
..
..
..
..
..
.6
6
2
2.
.
I
In
ns
st
ta
al
ll
la
at
ti
io
on
n.
..
..
..
..
..
..
..
..
..
..
..
..
..
..
..
..
..
..
..
..
..
..
..
..
..
..
..
..
..
..
..
..
..
..
..
..
..
..
..
..
..
..
..
..
..
..
..
..
..
..
..
..
..
..
..
..
..
..
..
..
..
..
..
..
..
..
..
..
..
..
..
..
..
..
..
..
..
..
..
..
..
..
..
..
..
..
..
..
..
..
..
..
..
..
..
..
..
..
..
.7
7
2
2.
.1
1
I
In
ns
st
ta
al
ll
li
in
ng
g
a
a
H
Ha
ar
rd
d
D
Dr
ri
iv
ve
e.
..
..
..
..
..
..
..
..
..
..
..
..
..
..
..
..
..
..
..
..
..
..
..
..
..
..
..
..
..
..
..
..
..
..
..
..
..
..
..
..
..
..
..
..
..
..
..
..
..
..
..
..
..
..
..
..
..
..
..
..
..
..
..
..
..
..
..
..
..
..
..
..
..
..
..
..
..
.7
7
2
2.
.2
2
C
Ca
am
me
er
ra
a
C
Co
on
nn
ne
ec
ct
ti
io
on
ns
s
a
an
nd
d
C
Ca
ab
bl
li
in
ng
g.
..
..
..
..
..
..
..
..
..
..
..
..
..
..
..
..
..
..
..
..
..
..
..
..
..
..
..
..
..
..
..
..
..
..
..
..
..
..
..
..
..
..
..
..
..
..
..
..
..
..
..
..
..
..
..
..
..
.8
8
3
3.
.
S
St
ta
ar
rt
ti
in
ng
g
u
up
p
t
th
he
e
D
DV
VR
R
S
Sy
ys
st
te
em
m.
..
..
..
..
..
..
..
..
..
..
..
..
..
..
..
..
..
..
..
..
..
..
..
..
..
..
..
..
..
..
..
..
..
..
..
..
..
..
..
..
..
..
..
..
..
..
..
..
..
..
..
..
..
..
..
..
..
..
..
..
..
..
..
..
..
..
..
..
..
..
.9
9
3
3.
.1
1
D
De
et
te
ec
ct
ti
in
ng
g
a
an
n
I
In
ns
st
ta
al
ll
le
ed
d
H
Ha
ar
rd
d
D
Dr
ri
iv
ve
e.
..
..
..
..
..
..
..
..
..
..
..
..
..
..
..
..
..
..
..
..
..
..
..
..
..
..
..
..
..
..
..
..
..
..
..
..
..
..
..
..
..
..
..
..
..
..
..
..
..
..
..
..
..
..
..
..
..
..
..
..
.9
9
3
3.
.2
2
R
Re
ec
co
ov
ve
er
ri
in
ng
g
L
Lo
os
st
t
D
Da
at
ta
a.
..
..
..
..
..
..
..
..
..
..
..
..
..
..
..
..
..
..
..
..
..
..
..
..
..
..
..
..
..
..
..
..
..
..
..
..
..
..
..
..
..
..
..
..
..
..
..
..
..
..
..
..
..
..
..
..
..
..
..
..
..
..
..
..
..
..
..
..
..
..
..
..
..
..
..
..
..
..
..
.9
9
3
3.
.3
3
R
Re
es
st
to
or
ri
in
ng
g
t
th
he
e
R
Re
ec
co
or
rd
di
in
ng
g
P
Pr
ro
oc
ce
es
ss
s.
..
..
..
..
..
..
..
..
..
..
..
..
..
..
..
..
..
..
..
..
..
..
..
..
..
..
..
..
..
..
..
..
..
..
..
..
..
..
..
..
..
..
..
..
..
..
..
..
..
..
..
..
..
..
..
..
..
.1
10
0
3
3.
.4
4
M
Ma
ai
in
n
S
Sc
cr
re
ee
en
n.
..
..
..
..
..
..
..
..
..
..
..
..
..
..
..
..
..
..
..
..
..
..
..
..
..
..
..
..
..
..
..
..
..
..
..
..
..
..
..
..
..
..
..
..
..
..
..
..
..
..
..
..
..
..
..
..
..
..
..
..
..
..
..
..
..
..
..
..
..
..
..
..
..
..
..
..
..
..
..
..
..
..
..
..
..
..
..
..
..
..
..
..
..
.1
10
0
4
4.
.
D
DV
VR
R
S
Sy
ys
st
te
em
m
S
Se
et
tu
up
p.
..
..
..
..
..
..
..
..
..
..
..
..
..
..
..
..
..
..
..
..
..
..
..
..
..
..
..
..
..
..
..
..
..
..
..
..
..
..
..
..
..
..
..
..
..
..
..
..
..
..
..
..
..
..
..
..
..
..
..
..
..
..
..
..
..
..
..
..
..
..
..
..
..
..
..
..
..
..
..
..
..
..
..
..
.1
11
1
4
4.
.1
1
S
Se
et
tu
up
p
M
Me
en
nu
u.
..
..
..
..
..
..
..
..
..
..
..
..
..
..
..
..
..
..
..
..
..
..
..
..
..
..
..
..
..
..
..
..
..
..
..
..
..
..
..
..
..
..
..
..
..
..
..
..
..
..
..
..
..
..
..
..
..
..
..
..
..
..
..
..
..
..
..
..
..
..
..
..
..
..
..
..
..
..
..
..
..
..
..
..
..
..
..
..
..
..
..
..
..
.1
11
1
4
4.
.2
2
C
Ca
am
me
er
ra
a
S
Se
el
le
ec
ct
t.
..
..
..
..
..
..
..
..
..
..
..
..
..
..
..
..
..
..
..
..
..
..
..
..
..
..
..
..
..
..
..
..
..
..
..
..
..
..
..
..
..
..
..
..
..
..
..
..
..
..
..
..
..
..
..
..
..
..
..
..
..
..
..
..
..
..
..
..
..
..
..
..
..
..
..
..
..
..
..
..
..
..
..
..
..
..
..
..
..
.1
12
2
4
4.
.3
3
R
Re
ec
co
or
rd
d
S
Se
el
le
ec
ct
t.
..
..
..
..
..
..
..
..
..
..
..
..
..
..
..
..
..
..
..
..
..
..
..
..
..
..
..
..
..
..
..
..
..
..
..
..
..
..
..
..
..
..
..
..
..
..
..
..
..
..
..
..
..
..
..
..
..
..
..
..
..
..
..
..
..
..
..
..
..
..
..
..
..
..
..
..
..
..
..
..
..
..
..
..
..
..
..
..
..
..
.1
12
2
4
4.
.4
4
R
Re
ec
co
or
rd
d
M
Mo
od
de
e.
..
..
..
..
..
..
..
..
..
..
..
..
..
..
..
..
..
..
..
..
..
..
..
..
..
..
..
..
..
..
..
..
..
..
..
..
..
..
..
..
..
..
..
..
..
..
..
..
..
..
..
..
..
..
..
..
..
..
..
..
..
..
..
..
..
..
..
..
..
..
..
..
..
..
..
..
..
..
..
..
..
..
..
..
..
..
..
..
..
..
..
.1
12
2
4
4.
.5
5
R
Re
ec
co
or
rd
d
F
Fr
ra
am
me
e
R
Ra
at
te
e.
..
..
..
..
..
..
..
..
..
..
..
..
..
..
..
..
..
..
..
..
..
..
..
..
..
..
..
..
..
..
..
..
..
..
..
..
..
..
..
..
..
..
..
..
..
..
..
..
..
..
..
..
..
..
..
..
..
..
..
..
..
..
..
..
..
..
..
..
..
..
..
..
..
..
..
..
..
..
..
..
..
.1
13
3
4
4.
.6
6
R
Re
ec
co
or
rd
d
Q
Qu
ua
al
li
it
ty
y.
..
..
..
..
..
..
..
..
..
..
..
..
..
..
..
..
..
..
..
..
..
..
..
..
..
..
..
..
..
..
..
..
..
..
..
..
..
..
..
..
..
..
..
..
..
..
..
..
..
..
..
..
..
..
..
..
..
..
..
..
..
..
..
..
..
..
..
..
..
..
..
..
..
..
..
..
..
..
..
..
..
..
..
..
..
..
..
..
.1
13
3
4
4.
.7
7
R
Re
ec
co
or
rd
d
S
Sc
ch
he
ed
du
ul
le
e.
..
..
..
..
..
..
..
..
..
..
..
..
..
..
..
..
..
..
..
..
..
..
..
..
..
..
..
..
..
..
..
..
..
..
..
..
..
..
..
..
..
..
..
..
..
..
..
..
..
..
..
..
..
..
..
..
..
..
..
..
..
..
..
..
..
..
..
..
..
..
..
..
..
..
..
..
..
..
..
..
..
..
..
..
..
.1
14
4
4
4.
.8
8
S
Su
ub
b
M
Me
en
nu
u
-
-
A
Au
ut
to
o
R
Re
ec
co
or
rd
d.
..
..
..
..
..
..
..
..
..
..
..
..
..
..
..
..
..
..
..
..
..
..
..
..
..
..
..
..
..
..
..
..
..
..
..
..
..
..
..
..
..
..
..
..
..
..
..
..
..
..
..
..
..
..
..
..
..
..
..
..
..
..
..
..
..
..
..
..
..
..
..
..
.1
14
4
4
4.
.9
9
S
Su
ub
b
M
Me
en
nu
u
-
-
P
Pa
as
ss
sw
wo
or
rd
d
S
Se
et
tu
up
p.
..
..
..
..
..
..
..
..
..
..
..
..
..
..
..
..
..
..
..
..
..
..
..
..
..
..
..
..
..
..
..
..
..
..
..
..
..
..
..
..
..
..
..
..
..
..
..
..
..
..
..
..
..
..
..
..
..
..
..
..
..
..
..
..
..
..
.1
15
5
4
4.
.1
10
0
S
Su
ub
b
M
Me
en
nu
u
-
-
P
Pa
as
ss
sw
wo
or
rd
d
C
Ch
ha
an
ng
ge
e.
..
..
..
..
..
..
..
..
..
..
..
..
..
..
..
..
..
..
..
..
..
..
..
..
..
..
..
..
..
..
..
..
..
..
..
..
..
..
..
..
..
..
..
..
..
..
..
..
..
..
..
..
..
..
..
..
..
..
..
..
.1
15
5
4
4.
.1
11
1
S
Su
ub
b
M
Me
en
nu
u
-
-
P
Pi
ic
ct
tu
ur
re
e
S
Se
et
tu
up
p.
..
..
..
..
..
..
..
..
..
..
..
..
..
..
..
..
..
..
..
..
..
..
..
..
..
..
..
..
..
..
..
..
..
..
..
..
..
..
..
..
..
..
..
..
..
..
..
..
..
..
..
..
..
..
..
..
..
..
..
..
..
..
..
..
..
..
..
..
.1
15
5
4
4.
.1
12
2
S
Su
ub
b
M
Me
en
nu
u
-
-
T
Ti
im
me
e
S
Se
et
tu
up
p.
..
..
..
..
..
..
..
..
..
..
..
..
..
..
..
..
..
..
..
..
..
..
..
..
..
..
..
..
..
..
..
..
..
..
..
..
..
..
..
..
..
..
..
..
..
..
..
..
..
..
..
..
..
..
..
..
..
..
..
..
..
..
..
..
..
..
..
..
..
..
..
..
.1
16
6
4
4.
.1
13
3
H
Ha
ar
rd
d
D
Di
is
sk
k
S
Se
et
tu
up
p.
..
..
..
..
..
..
..
..
..
..
..
..
..
..
..
..
..
..
..
..
..
..
..
..
..
..
..
..
..
..
..
..
..
..
..
..
..
..
..
..
..
..
..
..
..
..
..
..
..
..
..
..
..
..
..
..
..
..
..
..
..
..
..
..
..
..
..
..
..
..
..
..
..
..
..
..
..
..
..
..
..
..
..
..
.1
16
6
4
4.
.1
14
4
M
Mo
ot
ti
io
on
n
S
Se
et
tu
up
p.
..
..
..
..
..
..
..
..
..
..
..
..
..
..
..
..
..
..
..
..
..
..
..
..
..
..
..
..
..
..
..
..
..
..
..
..
..
..
..
..
..
..
..
..
..
..
..
..
..
..
..
..
..
..
..
..
..
..
..
..
..
..
..
..
..
..
..
..
..
..
..
..
..
..
..
..
..
..
..
..
..
..
..
..
..
..
..
..
..
.1
17
7
4
4.
.1
15
5
N
NT
TS
SC
C
/
/
P
PA
AL
L
O
Ou
ut
tp
pu
ut
t
S
Se
el
le
ec
ct
t.
..
..
..
..
..
..
..
..
..
..
..
..
..
..
..
..
..
..
..
..
..
..
..
..
..
..
..
..
..
..
..
..
..
..
..
..
..
..
..
..
..
..
..
..
..
..
..
..
..
..
..
..
..
..
..
..
..
..
..
..
..
..
..
..
..
..
..
..
.1
18
8
4
4.
.1
16
6
R
Re
es
st
to
or
re
e
F
Fa
ac
ct
to
or
ry
y
D
De
ef
fa
au
ul
lt
ts
s.
..
..
..
..
..
..
..
..
..
..
..
..
..
..
..
..
..
..
..
..
..
..
..
..
..
..
..
..
..
..
..
..
..
..
..
..
..
..
..
..
..
..
..
..
..
..
..
..
..
..
..
..
..
..
..
..
..
..
..
..
..
..
..
..
..
..
..
..
..
.1
19
9
5
5.
.
R
Re
ec
co
or
rd
di
in
ng
g.
..
..
..
..
..
..
..
..
..
..
..
..
..
..
..
..
..
..
..
..
..
..
..
..
..
..
..
..
..
..
..
..
..
..
..
..
..
..
..
..
..
..
..
..
..
..
..
..
..
..
..
..
..
..
..
..
..
..
..
..
..
..
..
..
..
..
..
..
..
..
..
..
..
..
..
..
..
..
..
..
..
..
..
..
..
..
..
..
..
..
..
..
..
..
..
..
..
..
.1
19
9
5
5.
.1
1
S
St
ta
ar
rt
t
R
Re
ec
co
or
rd
di
in
ng
g.
..
..
..
..
..
..
..
..
..
..
..
..
..
..
..
..
..
..
..
..
..
..
..
..
..
..
..
..
..
..
..
..
..
..
..
..
..
..
..
..
..
..
..
..
..
..
..
..
..
..
..
..
..
..
..
..
..
..
..
..
..
..
..
..
..
..
..
..
..
..
..
..
..
..
..
..
..
..
..
..
..
..
..
..
..
..
..
.1
19
9
5
5.
.2
2
S
St
to
op
p
R
Re
ec
co
or
rd
di
in
ng
g.
..
..
..
..
..
..
..
..
..
..
..
..
..
..
..
..
..
..
..
..
..
..
..
..
..
..
..
..
..
..
..
..
..
..
..
..
..
..
..
..
..
..
..
..
..
..
..
..
..
..
..
..
..
..
..
..
..
..
..
..
..
..
..
..
..
..
..
..
..
..
..
..
..
..
..
..
..
..
..
..
..
..
..
..
..
..
..
.2
20
0
5
5.
.3
3
F
Fo
or
rc
ce
e
R
Re
ec
co
or
rd
d
M
Mo
od
de
e.
..
..
..
..
..
..
..
..
..
..
..
..
..
..
..
..
..
..
..
..
..
..
..
..
..
..
..
..
..
..
..
..
..
..
..
..
..
..
..
..
..
..
..
..
..
..
..
..
..
..
..
..
..
..
..
..
..
..
..
..
..
..
..
..
..
..
..
..
..
..
..
..
..
..
..
..
..
..
..
..
.2
20
0
5
5.
.4
4
R
Re
ec
co
or
rd
di
in
ng
g
L
Le
en
ng
gt
th
h.
..
..
..
..
..
..
..
..
..
..
..
..
..
..
..
..
..
..
..
..
..
..
..
..
..
..
..
..
..
..
..
..
..
..
..
..
..
..
..
..
..
..
..
..
..
..
..
..
..
..
..
..
..
..
..
..
..
..
..
..
..
..
..
..
..
..
..
..
..
..
..
..
..
..
..
..
..
..
..
..
..
..
..
.2
20
0
6
6.
.
P
Pl
la
ay
yb
ba
ac
ck
k.
..
..
..
..
..
..
..
..
..
..
..
..
..
..
..
..
..
..
..
..
..
..
..
..
..
..
..
..
..
..
..
..
..
..
..
..
..
..
..
..
..
..
..
..
..
..
..
..
..
..
..
..
..
..
..
..
..
..
..
..
..
..
..
..
..
..
..
..
..
..
..
..
..
..
..
..
..
..
..
..
..
..
..
..
..
..
..
..
..
..
..
..
..
..
..
..
..
..
..
..
.2
21
1
7
7.
.
C
Co
on
nn
ne
ec
ct
ti
in
ng
g
t
th
he
e
D
DV
VR
R
U
Un
ni
it
t
t
to
o
a
a
P
PC
C.
..
..
..
..
..
..
..
..
..
..
..
..
..
..
..
..
..
..
..
..
..
..
..
..
..
..
..
..
..
..
..
..
..
..
..
..
..
..
..
..
..
..
..
..
..
..
..
..
..
..
..
..
..
..
..
..
..
..
..
..
.2
22
2
7
7.
.1
1
I
In
ns
st
ta
al
ll
li
in
ng
g
S
So
of
ft
tw
wa
ar
re
e.
..
..
..
..
..
..
..
..
..
..
..
..
..
..
..
..
..
..
..
..
..
..
..
..
..
..
..
..
..
..
..
..
..
..
..
..
..
..
..
..
..
..
..
..
..
..
..
..
..
..
..
..
..
..
..
..
..
..
..
..
..
..
..
..
..
..
..
..
..
..
..
..
..
..
..
..
..
..
..
..
..
..
.2
22
2
7
7.
.2
2
P
Pr
ro
og
gr
ra
am
m
I
In
nt
te
er
rf
fa
ac
ce
e.
..
..
..
..
..
..
..
..
..
..
..
..
..
..
..
..
..
..
..
..
..
..
..
..
..
..
..
..
..
..
..
..
..
..
..
..
..
..
..
..
..
..
..
..
..
..
..
..
..
..
..
..
..
..
..
..
..
..
..
..
..
..
..
..
..
..
..
..
..
..
..
..
..
..
..
..
..
..
..
..
..
..
..
.2
23
3
8
8.
.
S
Sp
pe
ec
ci
if
fi
ic
ca
at
ti
io
on
n.
..
..
..
..
..
..
..
..
..
..
..
..
..
..
..
..
..
..
..
..
..
..
..
..
..
..
..
..
..
..
..
..
..
..
..
..
..
..
..
..
..
..
..
..
..
..
..
..
..
..
..
..
..
..
..
..
..
..
..
..
..
..
..
..
..
..
..
..
..
..
..
..
..
..
..
..
..
..
..
..
..
..
..
..
..
..
..
..
..
..
..
..
..
.2
27
7
9
9.
.
A
Ap
pp
pe
en
nd
di
ix
x.
..
..
..
..
..
..
..
..
..
..
..
..
..
..
..
..
..
..
..
..
..
..
..
..
..
..
..
..
..
..
..
..
..
..
..
..
..
..
..
..
..
..
..
..
..
..
..
..
..
..
..
..
..
..
..
..
..
..
..
..
..
..
..
..
..
..
..
..
..
..
..
..
..
..
..
..
..
..
..
..
..
..
..
..
..
..
..
..
..
..
..
..
..
..
..
..
..
..
..
.2
28
8
9
9.
.1
1
S
Sy
ys
st
te
em
m
C
Co
on
nn
ne
ec
ct
ti
io
on
n
S
Sk
ke
et
tc
ch
h
M
Ma
ap
p.
..
..
..
..
..
..
..
..
..
..
..
..
..
..
..
..
..
..
..
..
..
..
..
..
..
..
..
..
..
..
..
..
..
..
..
..
..
..
..
..
..
..
..
..
..
..
..
..
..
..
..
..
..
..
..
..
..
..
..
.2
28
8
9
9.
.2
2
B
Bo
ox
xe
ed
d
C
Co
on
nt
te
en
nt
ts
s.
..
..
..
..
..
..
..
..
..
..
..
..
..
..
..
..
..
..
..
..
..
..
..
..
..
..
..
..
..
..
..
..
..
..
..
..
..
..
..
..
..
..
..
..
..
..
..
..
..
..
..
..
..
..
..
..
..
..
..
..
..
..
..
..
..
..
..
..
..
..
..
..
..
..
..
..
..
..
..
..
..
..
..
..
..
..
.2
28
8
9
9.
.
A
Ap
pp
pe
en
nd
di
ix
x
I
II
I
(
(T
Tr
ro
ou
ub
bl
le
es
sh
ho
oo
ot
ti
in
ng
g)
).
..
..
..
..
..
..
..
..
..
..
..
..
..
..
..
..
..
..
..
..
..
..
..
..
..
..
..
..
..
..
..
..
..
..
..
..
..
..
..
..
..
..
..
..
..
..
..
..
..
..
..
..
..
..
..
..
..
..
..
..
..
..
..
..
..
.2
29
9
Digital Video Recorder

Quad Camera DVR
3
S
Sa
af
fe
et
ty
y
I
In
nf
fo
or
rm
ma
at
ti
io
on
n
zFor your safety, unplugging the power before moving the DVR, installing, or replacing
any parts including the hard drive.
zMake sure all the power cable and wires are properly set up before using the DVR.
zTo avoid a short circuit, don’t leave any unnecessary parts inside the DVR.
zPlease avoid dramatic changes of the environment, such as dust, temperature, and
humidity. Keep the DVR in a temperature ranging from 5℃~50℃.
zKeep the DVR in a well-ventilated place and away from any heat-generating objects.
zDo not block the DVR’s fan and vent.
zDo not expose this unit to the sun directly.
zIf you are not sure of the installation and setup, please consult a technician.
zDon’t fix it yourself if there’s any damage to this unit or the power supply, Consult a
technician or the distributor.
P
Pa
ac
ck
ka
ag
ge
e
C
Co
on
nt
te
en
nt
ts
s
zDVR Main unit x 1
z250GB Hard Drive (Pre-installed) x 1
zSecurity Cameras x 4
z18 Meter BNC Camera Cables x 4
zMounting Brackets x 4
zPower Adapter x 1
zAC Power Cord x 1
z5 to 1 Splitter x 1
zRemote Control x 1
zManual x 1
zSoftware CD x 1
If there is any damage, shortage or inappropriate item in the package, please contact
your local dealer.
Digital Video Recorder

Quad Camera DVR
4
1
1.
.
I
In
nt
tr
ro
od
du
uc
ct
ti
io
on
n
1. Product Overview
zHigh quality pictures by digital recording with 4 video inputs (NTSC / PAL).
zProvides one BNC connector for video output.
zOperations: Recording / Playback / Backup.
zVideo compressive mode: Modified MJPEG (recording).
zRecording mode by Continuous, Schedule, Sensor / Motion Trigger.
zOne front accessible 3.5” Hard Drive caddy.
zEnhanced USB disk backup.
zPlayback searching by Time or Event.
zPC Operating System: Windows 2000 / XP / Vista.
zTwo- levels password protection: User password / Master Password.
zMouse operation available.
z+12VDC, 60Watt 5Amp power adapter (AC100~240V, 50/60Hz),
zDimension (Width x Height x Depth): 250 x 38 x 232mm.
zDisplay/Recording frame rate and resolution:
Models 4CH DVR
Display Frame Rate 25x4fps (PAL) / 30x4fps (NTSC)
Recording Frame Rate 25fps (PAL) / 30fps (NTSC)
Display Resolution 720x576 (PAL) / 720x480 (NTSC)
Recording Resolution 640x272 (PAL) / 640x224 (NTSC)
Digital Video Recorder

Quad Camera DVR
5
2. Front Panel
Controls:
Name Function
CH1 View Camera 1.
CH2 View Camera 2.
CH3 View Camera 3.
CH4 View Camera 4.
Q DUA Press to select 1/4 screen display.
WW REW Backward search through a time-shifted or recorded video.
II PAUSE Pause video playback.
XPLAY Start video playback.
XX FWD Forward search through a time-shifted or recorded video.
STOP Stop playback or backup.
●REC Start or stop recording / backup.
MENU Enter menu or back to previous menu list.
Ç/ SUP Moves up through the list of menu. Also used to select menu options or
change the DVR configuration values.
È/ TDOWN Moves down through the list of menu. Also used to select menu options
or change the DVR configuration values.
SEL Use this button to change values on main menu or sub menu setting.
Indicators:
Name Function
Power LED The DVR unit is powered up and running (Green color).
Hard disk Actived LED LED indicator flashes when hard disk is active (Red color).
Digital Video Recorder

Quad Camera DVR
6
3. Rear Panel
No. Function
Video Output (BNC) BNC connector for attaching to Monitor.
Video Input (BNC) BCN Inputs for 4x Video Cameras.
DC Input DC-IN (12V)
Grounding Screw for attaching grounding cable (if required).
Cooling Fan Vent Vent for cooling fan (do not cover).
4. Remote Control
1. CH1 Select or enlarge CH1
2. CH2 Select or enlarge CH2
3. CH3 Select or enlarge CH3
4. CH4 Select or enlarge CH4
5. QUAD Quad View
6. REW Rewind
7. PLAY Play record list
8. FWD Forward
9. RECORD Record
10. PAUSE Pause
11. STOP Stop recording or playing
12. MENU Enter or exit setup menu
13. Select / Edit Modify item
14. UP Move up prompt
15. DOWN Move down prompt
Digital Video Recorder

Quad Camera DVR
7
2
2.
.
I
In
ns
st
ta
al
ll
la
at
ti
io
on
n
Be sure power is not connected before starting the installation!
1. Install the Hard Disk Drive
There is a caddy supplied, into which the Hard Drive is installed, this caddy is then inserted into
the drive bay at the front of the DVR.
Note: Make sure the jumper on the HDD is set to “Master” to make sure it operates correctly.
Step1: Remove caddy from the front of DVR unit.
Step2: Attach drive to the caddies IDE and Power connectors, and then screw the HDD into caddy
using the 4 supplied screws.
Setp3: Insert caddy back into DVR unit and press the latch until locked in place. The caddy can
then be locked if necessary.
Digital Video Recorder

Quad Camera DVR
8
2. Camera Connections and Cabling
There are four Cameras included with this unit, each of whichhas aBNC connector topass
the image data into the DVR unit and a power connector to provide power for the Camera.
There are four BNC cables (18 meters long) provided to attach the Cameras to the DVR
unit.
There is one 5 to 1 Splitter supplied, which has five connectors for attaching to each of the
cameras and one connector for the DVR unit.
The DVR unit has five BNC connectors on the rear panel CH1, CH2, CH3 and CH4. The
Cameras attach to one of these four connecters.
The fifth connector is labelled video out. This is used to attach an external monitor, in order
to display the video output from the DVR unit.
Note: The system needs to be connected to a TV or Monitor and the hard drive must be
formatted before the unit can be connected to a PC via the USB cable. Otherwise you
will see an error stating “no vineyard drives or devices detected”.
You will need a cable and possibly an adapter to connect your DVR unit to a TV
or Monitor depending on what input connection the TV or Monitor requires.
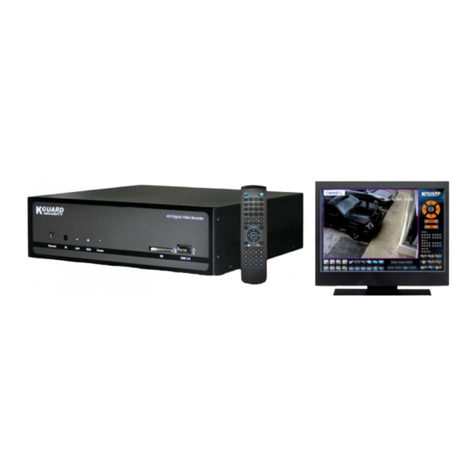
Input Required Adapter Required Maplin Part Code
VGA CCTV to VGA Adaptor N78CQ
Composite BNC-Phono Video Lead L47BA
SCART SCART-Phono Adapter + BNC-Phono Lead L83BA + L47BA
Digital Video Recorder

Quad Camera DVR
9
3
3.
.
S
St
ta
ar
rt
ti
in
ng
g
u
up
p
t
th
he
e
D
DV
VR
R
S
Sy
ys
st
te
em
m
3.1 Detecting an Installed Hard Drive
After the unit is properly installed, the DVR unit will be ready to record and playback.
Turn the unit on using the power switch.
After the unit is powered on, the unit will check the HDD for several seconds, and then
the unit will enter into real-time display mode shown in the following screen:
3.2 Recovering Lost Data
If the DVR unit suffers a power cut, there is the potential for a data error to occur, if this is
the case the unit will ask if you want to recover the data.
Press the SEL button to proceed with recovering the data.
Digital Video Recorder
Quad Camera DVR
10
3.3 Restoring the Recording Process
If a power-error (very short power outage) occurs during the recording process, the
system will automatically restart and restart the recording process.
3.4 Main Screen
Once the system has booted, the main screen will be displayed. If the four cameras
have been attached their images will be displayed as shown below:
The ratio of Hard Drive space which has been used is shown in the top left hand corner
of the screen.
The Channel number for each Camera image is shown in the middle of the screen.
The Date and Time are shown in the bottom right hand corner of the screen.
To show the setup screen click the MENU button.
Digital Video Recorder
Quad Camera DVR
11
4
4.
.
D
DV
VR
R
S
Sy
ys
st
te
em
m
S
Se
et
tu
up
p
4.1 Setup Menu
Click the MENU button to enter the Main Menu. Use the Ç/ SUP and È/ TDOWN
keys to move through the menu and press the SEL button to confirm an option.
Digital Video Recorder
Quad Camera DVR
12
4.2 Camera Select
This DVR system can display 4 pictures in one screen (Quad Mode) or can be
configured to display a single camera.
To choose which Camera(s) to view press the CH1, CH2, CH3, CH4
or QUAD buttons.
If a camera is not connected to a channel, the image for that channel will display “OFF”
4.3 Record Select
This menu option allows you to configure which channels are set to record.
4.4 Record Mode
There are two modes available for video recording:
Each Mode
This mode compresses and records each video channel separately, this allows each
channel to be played back separately if necessary and allows the image to be viewed
full screen. This mode allows one or more channels to be recorded separately, without
the need to record on all four channels.
Digital Video Recorder

Quad Camera DVR
13
In playback mode pressing CH1, CH2, CH3 or CH4 allows you to
switch between the channel being viewed.
In either recording or playback mode, pressing and holding the QUAD button for
over 3 seconds will set the cycle through all of the channels one after the other in full
screen display mode.
Quad Mode
This mode compresses and records all 4 channels into one video file. This has the
advantage of saving space and will allow more video to be stored to the hard drive.
The disadvantage of this mode is that it will only playback in Quad mode and individual
channels cannot be expanded for viewing in full screen display mode.
4.5 Record Frame Rate
The record frame rate menu option allows the frame rate to be selected, the options
are: 25, 12, 8, 6, 4, 3, 2, 1 frames per second.
The higher the frame rate selected the better the quality of played back video will be,
will more smooth movement of any moving objects on screen. The drawback to this is
that the higher the frame rate, the more Hard Drive space will be used when recording.
4.6 Record Quality
There are three levels of recording quality which can be selected: High, Normal and
Low. The higher the recording quality, the more Hard Drive space will be used when
recording.
Note: The Record Mode, Record Frame Rate and Record Quality will all affect the
amount of Hard Disk space which is used when recording. This will affect the total
recording time of the system based on the capacity of Hard Drive which is being used.
Digital Video Recorder
Quad Camera DVR
14
4.7 Record Schedule
This menu option allows the Schedule to be set, with the channels set to Not Record,
Record or Motion Triggered (recording will only be triggered if the camera detects
motion within it’s filed of view).
Use the Ç/ SUP and È/ TDOWN buttons to move the prompt up and down the
Schedule timeline and press the SEL button to change the record method at any
given point.
The options for the method are:
“-“ Not Record
“T”Record
“A” Motion Triggered
Note: Setting the schedule correctly can allow for a much greater overall recording
time for the DVR system.
4.8 Sub Menu – Auto Record
When this option is set to “ON” the DVR will start recording automatically if it has not
been operated within the last five minutes.
When this option is set to “OFF” the DVR will not start recording until the ● REC
record button is pressed.
Digital Video Recorder

Quad Camera DVR
15
4.9 Sub Menu – Password Setup
When the password is set to “ON”, to stop the DVR from recording, or to enter the Menu
screen will require the system password to be entered.
If set to off, then the system password will not be needed to operate the system.
4.10 Sub Menu – Password Change
The system password is made up of a number of different menu keys. The default
password is entered by pressing the CH1 button six times.
The password can be changed to any combination of front panel button presses, using
all the available buttons except the MENU button which is used for confirming and
exiting from this menu option.
4.11 Sub Menu – Picture Setup
This menu allows the picture Hue, Saturation, Contrast and Brightness to be
configured on each channel.
Select the channel to edit using the CH1, CH2, CH3, CH4 or Q
buttons.
Use the Ç/ SUP and È/ TDOWN buttons to move between picture options.
Use the WW REW and XX FWD buttons to decrease and increase the value.
The default value is 50 for all four options. Available values are 0 – 99.
UAD
Digital Video Recorder
Quad Camera DVR
16
Press the MENU button to confirm and exit.
4.12 Sub Menu – Time Setup
The systems time and date can be setup within this sub menu.
Use the Ç/ SUP and È/ TDOWN buttons to move the prompt and press the
SEL button to change the entry. When finished press the MENU button to confirm
and exit.
4.13 Hard Disk Setup
This menu option shows information about the Hard Drive which is installed in the
system and also allows you to choose whether Overwrite is enabled.
Overwrite Enabled:
If this is set to YES, then when the Hard Drive becomes full, the video recording will
loop over and start recording over the earliest recorded data on the disk.
If set to NO then recording will stop as soon as the Hard Drive becomes full.
Digital Video Recorder
Quad Camera DVR
17
HDD Size:
This shows the capacity of the Hard Drive which is installed in the system.
Note: Hard Drives always show a capacity which is less than their actual size. A 1TB
drive will report as a 976GB drive.
HDD Used:
This shows the amount of Hard Drive space used and the percentage of total drive
space used.
HDD Format:
This option is used to configure a Hard Drive for use with the DVR system.
Note: When a Hard Drive is first used with the DVR, this option must be used to
configure the drive. Until a drive has been formatted for use with the system an error
will occur when trying to access the DVR unit from a PC using the USB connection.
The Format option doesn’t perform a true format on the drive and this option can’t be
used to wipe the drive clean of data.
4.14 Motion Setup
The Motion Setup menu allows the recording duration and the sensitivity of the motion
detection to be configured.
Motion Record Duration:
The number within this setting is the number of seconds a channel will record for after
motion has been detected.
Digital Video Recorder

Quad Camera DVR
18
Motion Alarm Duration:
This setting controls how long the Motion symbol will be displayed on screen after
motion has been detected.
Motion Setup:
This sub menu allows the Motion Detection to be fine tuned.
Channel Sensitivity:
The sensitivity can be set for each channel, the options are from 1 (High Sensitivity) to
9 (Low Sensitivity) and Off which will not allow the channel to be triggered by
movement.
Channel Area Set::
By pressing the SEL button on a channel you will be shown a picture of that
channel divided into 144 (12 x 12) blocks. Each one of these blocks can be set as an
active or inactive area for motion detection. Use the Ç/ SUP, È/ TDOWN, WW
REW and XX FWD buttons to move Up, Down, Left and Right within the image.
Pressing the
SEL button while on a block will make it active (transparent) or
inactive (shadowed). When finished press the MENU button to confirm and exit.
Pressl the ● REC record button to start recording.
4.15 NTSC / PAL Output Select
To switch between NTSC or PAL video
format, change the jumper J10 on the
system board.
Digital Video Recorder

Quad Camera DVR
19
4.16 Restore Factory Defaults
Press the MENU button and select the “Restore factory default” option to reset the
system to it’s factory default settings.
Note: If you forget the system password, turn off the system and remove the Hard Drive.
Power the system up again and press the II PAUSE button ten times. This will reset the
system to it’s factory default settings.
5
5.
.
R
Re
ec
co
or
rd
di
in
ng
g
5.1 Start Recording
Press the ● REC record button to start recording. On screen some of the system
information will be shown as well as the current feed from the cameras on each channel.
Note: Single channels are only able to be viewed separately in full screen if the record
mode is set to Each Mode.
①Hard Disk Usage Percentage ⑤Status (REC, Play, FF1, FF2, FF3, REW, PAUSE)
②Recording Symbol ⑥Hard Drive Information
③Channel Names ⑦Record Schedule: (T) Continuous, (A) Motion, (-) Not Recording
④Mode (QUAD or EACH) ⑧The Time and Date set in the DVR
Digital Video Recorder

Quad Camera DVR
20
5.2 Stop Recording
Press the STOP button to stop recording, if there is a system password, this will need
to be entered to allow the recording process to stop.
5.3 Force Record Mode
If the DVR is not set to record because the schedule has been set to “-“ for the current
time, you can force the system to record by pressing and holding the ● REC record
button for more than 3 seconds. To stop the system from recording in forced mode,
press the STOP button.
5.4 Recording Length
The table below give the estimated record time in hours based on a 250GB Hard Drive
recording in Quad Mode.
Format Quality Frame Rate 30 15 7 1
HIGH 20 116 234 502 3496
NORMAL 15 156 310 666 4660
NTSC
LOW 12 194 388 832 5826
Format Quality Frame Rate 25 12 6 1
HIGH 20 140 292 582 3496
NORMAL 15 186 388 776 4660
PAL
LOW 12 234 486 970 5826
Digital Video Recorder
Table of contents
Other Kguard DVR manuals

Kguard
Kguard KG-SH122E.V2 User manual

Kguard
Kguard KG-SHA104 User manual

Kguard
Kguard BR401 User manual

Kguard
Kguard NS401 User manual

Kguard
Kguard KG-SH130 User manual

Kguard
Kguard SHA28 User manual

Kguard
Kguard BR421 User manual

Kguard
Kguard KG-SHA116 User manual

Kguard
Kguard 340Z User manual

Kguard
Kguard Easy Link PRO EL822 User manual
Popular DVR manuals by other brands

Appro
Appro DVR-3254S Installation & operation manual

Toshiba
Toshiba Symbio 160HD4 owner's manual

Zxtech
Zxtech Mini DVR & IP Camera user manual

LTS
LTS 7200-FH Series Quick operation guide

EasyCap
EasyCap EasyCAP001 Quick installation guide

Digital Barriers
Digital Barriers EDGEVIS HD-IP250 installation guide