Congratulations On Your New Kia!
Your new Kia vehicle has been designed, engineered and manufactured to provide you with years of comfortable,
safe and dependable driving. Kia is committed to quality, innovation, safety and – above all – your satisfaction.
Using This Guide
The information contained in this guide will help you become familiar with the operation and features of
your new Kia vehicle. The ipbook format facilitates information access, while the detailed illustrations
ensure the instructions are easy to follow.
This Features & Functions Guide provides an overview of vehicle operation and equipment. It is not
meant as a substitute for your Owner’s Manual. Your Owner’s Manual contains specic information
about the operation and maintenance of your Kia vehicle, including safety information, cautions and
warnings that you need to know. In the interests of your safety and that of your family, and to help
you avoid risks that may result in death or serious injury, Kia reminds you to carefully read your
Owner’s Manual in order to fully familiarize yourself with the important information it contains.
While the information contained in this guide is accurate at the time of printing, Kia may change
vehicle specications without notice in advance or after the fact, and assumes no liability in
connection with such changes.
SPECTRA
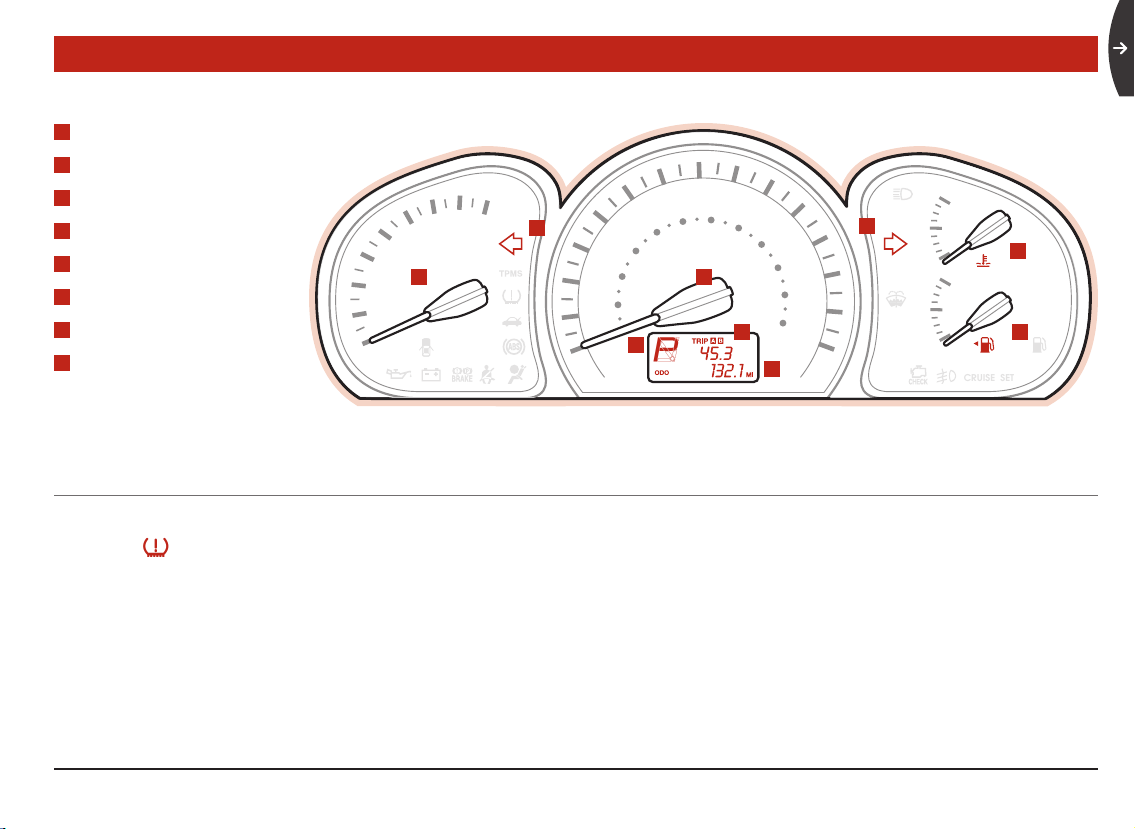
Instrument
Cluster
Steering Wheel/
Panel/Stalk
Controls
Center Panel
Controls
Roof Panel
Controls
Safety Driver’s
Controls
Maintenance
Schedules Seating