7
7. Once the desired weld or repair has been completed, you can use the hot welding tip (5 or 6) as a smoothing
tool to flatten or shape the plastic into the desired shape.
8. When your welding or repair job is complete, turn OFF the gas soldering iron (as per gas soldering iron instructions)
and allow all parts of the project and gas soldering iron to cool down fully before changing tips, performing
maintenance or packing them away into the cases EVA tray.
Note: Thermoplastics may be heated & cooled multiple times, so don’t be afraid to start/stop your welding or repair operation
at any time.
Option 2 - Using the Soldering Irons Blower Output
You can also plastic weld using hot air produced by the gas soldering irons blower feature.
1. Below instructions based on fully assembled soldering iron.
2. Remove the SOLDER TIP from the SOLDERING TIP ASSEMBLY by rotating the SOLDER TIP counter-clockwise.
3. Gas soldering iron is now ready for hot air blower operation and can be used to plastic weld.
4. Use the supplied wire brush (1) to clean the plastic surface in preparation for any plastic welding or repair materials
to be applied. Preparation of the surface is a critical step of the process, as contaminated or unclean surfaces
can result in an un-successful weld or unsightly weld or repair finishes.
5. Using the correct plastic material for your weld or repair, rest the applicable plastic welding rod on
the area where you want to weld or repair, then using the hot air from the soldering irons blower output
to heat both the welding rod & plastic surface.
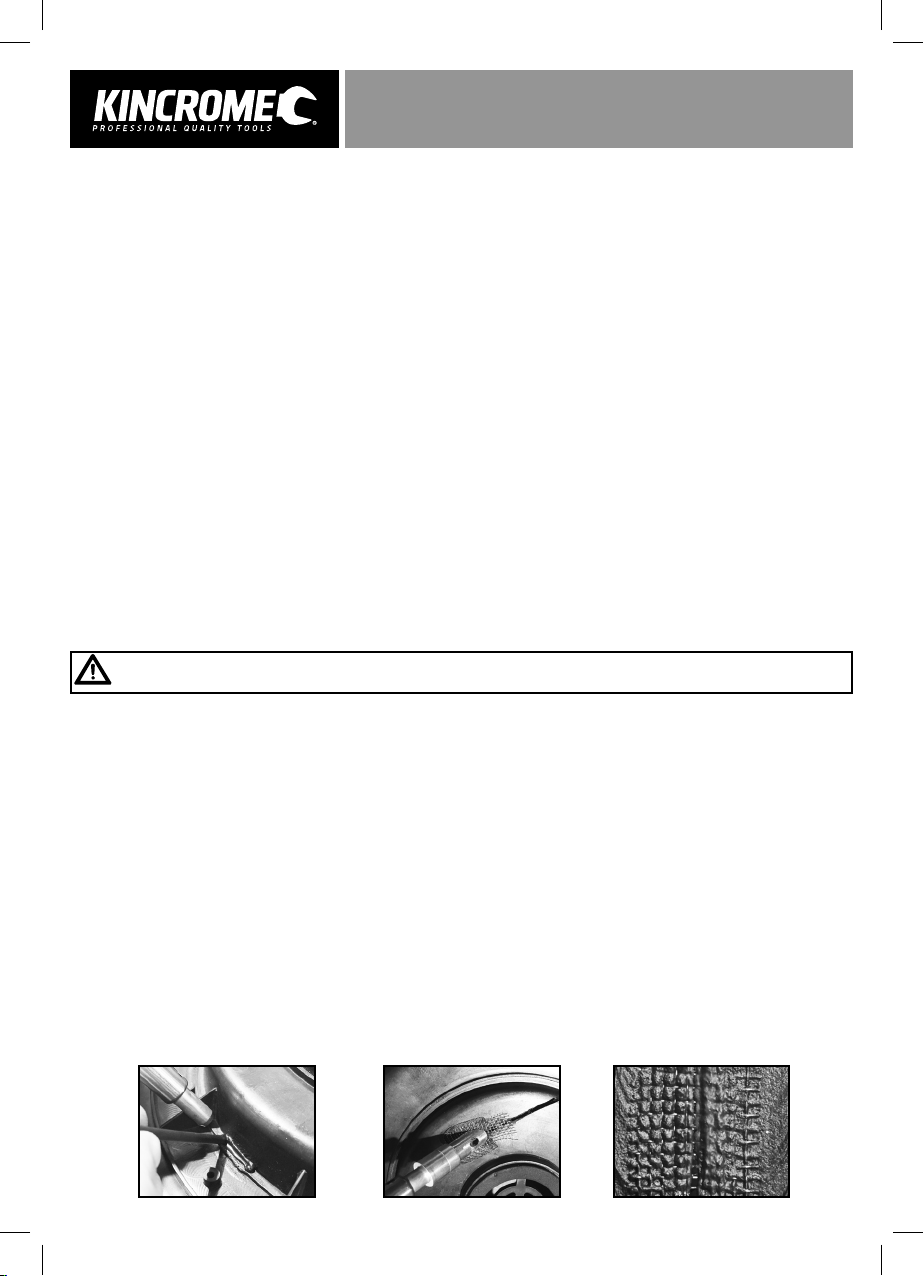
6. With both plastic materials heated to the same temperature and in a pliable state, feed the plastic welding rod to create
the desired weld or repair ensuring to continually heat both plastic materials at the same time (Fig 5).
7. Once the desired weld or repair has been completed, you can attach the welding tip (4 or 5) onto the soldering iron
and use the tip as a smoothing tool to flatten or shape the plastic into the desired shape.
8. When your welding or repair job is complete, turn OFF the gas soldering iron (as per gas soldering iron instructions)
and allow all parts of the project or gas soldering iron to cool down fully before changing tips, performing maintenance
or packing them away into the cases EVA tray.
Plastic Repairs Using the Reinforcing Mesh
Warning: Take care when operating the plastic welding operation, as both the soldering iron, welding tips & plastic
materials will become very hot during use.
The K15353 Plastics Welding Kit is supplied with 3 sheets of stainless steel reinforcing mesh, that can be used to reinforce
larger repairs such as cracks, holes or deep gouges in your project. The stainless steel reinforcing mesh sheets can be cut,
shaped or moulded into almost any shape to suit your repair needs. If cutting of the reinforcing mesh is required, always ensure
that your use a cutting tool that is designed for cuttings stainless steel materials to avoid any damage to your cutting tool
(eg tin snips NOT kitchen scissors).
1. Use the supplied wire brush (1) to clean the plastic surface in preparation for any plastic welding or repair materials
to be applied. Preparation of the surface is a critical step of the process, as contaminated or unclean surfaces
can result in an un-successful weld or unsightly weld or repair finishes.
2. Cut the reinforcing mesh sheet into the appropriate size suitable for your repair requirements. Always ensure to cut the
welding mesh approx. 20-30% larger in size to the crack, hole or gouge size you are trying to repair, this enabling
enough support of the mesh when melted into the plastic.
3. Using the appropriate welding tip (4 or 5) for your repair needs, turn ON the gas soldering iron (as per gas soldering
iron instructions) and preheat the welding tip in preparation for your plastic repair.
4. Pre-heat the plastic area where you will apply the stainless steel reinforcing mesh until soft & pliable,
then apply the reinforcing mesh to the area. Press the mesh into the soft plastic using the welding tip (Fig 6).
5. With the reinforcing mesh set in its location, use the welding tip to continue to heat the mesh so that the remaining mesh
can be melted and be pressed into the surrounding plastic (Fig 7).
6. With the reinforcing mesh set into the correct location, you can use the welding tip to smooth the surrounding plastic
or use the correct supplied filler rods to add additional plastic material to end up with a smooth repaired finish.
If needed use additional tools & sandpaper (not supplied) to adjust or finish the surface to the desired look.
(Fig 5) (Fig 6) (Fig 7)