Warranty given by Kincrome Australia Pty Ltd of 3 Lakeview Drive, Caribbean Park, Scoresby, Victoria (Tel 1300 657 528). The applicable warranty
period (12 months) commences on the date that the product is purchased. If this product has materials or workmanship defects (other than defects
caused by abnormal or non warranted use) you can, at your cost, send the product to place of purchase, an authorised Kincrome service agent or one
of Kincromes addresses for repair or replacement. Your rights under this warranty are in addition to any other rights you have under the Australian
Consumer Law or other applicable laws. Our goods come with guarantees that cannot be excluded under the Australian Consumer Law. You are
entitled to a replacement or refund for a major failure and compensation for any other reasonably foreseeable loss or damage. You are also entitled
to have the goods repaired or replaced if the goods fail to be of acceptable quality and the failure does not amount to a major failure. For further
details please visit www.kincrome.com.au or call us. Due to minor changes in design or manufacture, the product you purchase may sometimes
differ from the one shown on the packaging.
SCAN QR FOR PRODUCT VIDEO
Australian Office Contact Details
Phone: 1300 657 528
Fax: 1300 556 005
Website: www.kincrome.com.au
UK Office Contact Details
Mail: Kincrome UK Ltd PO Box 646
Eastleigh S050 ONA
Website: www.kincrome.com.au
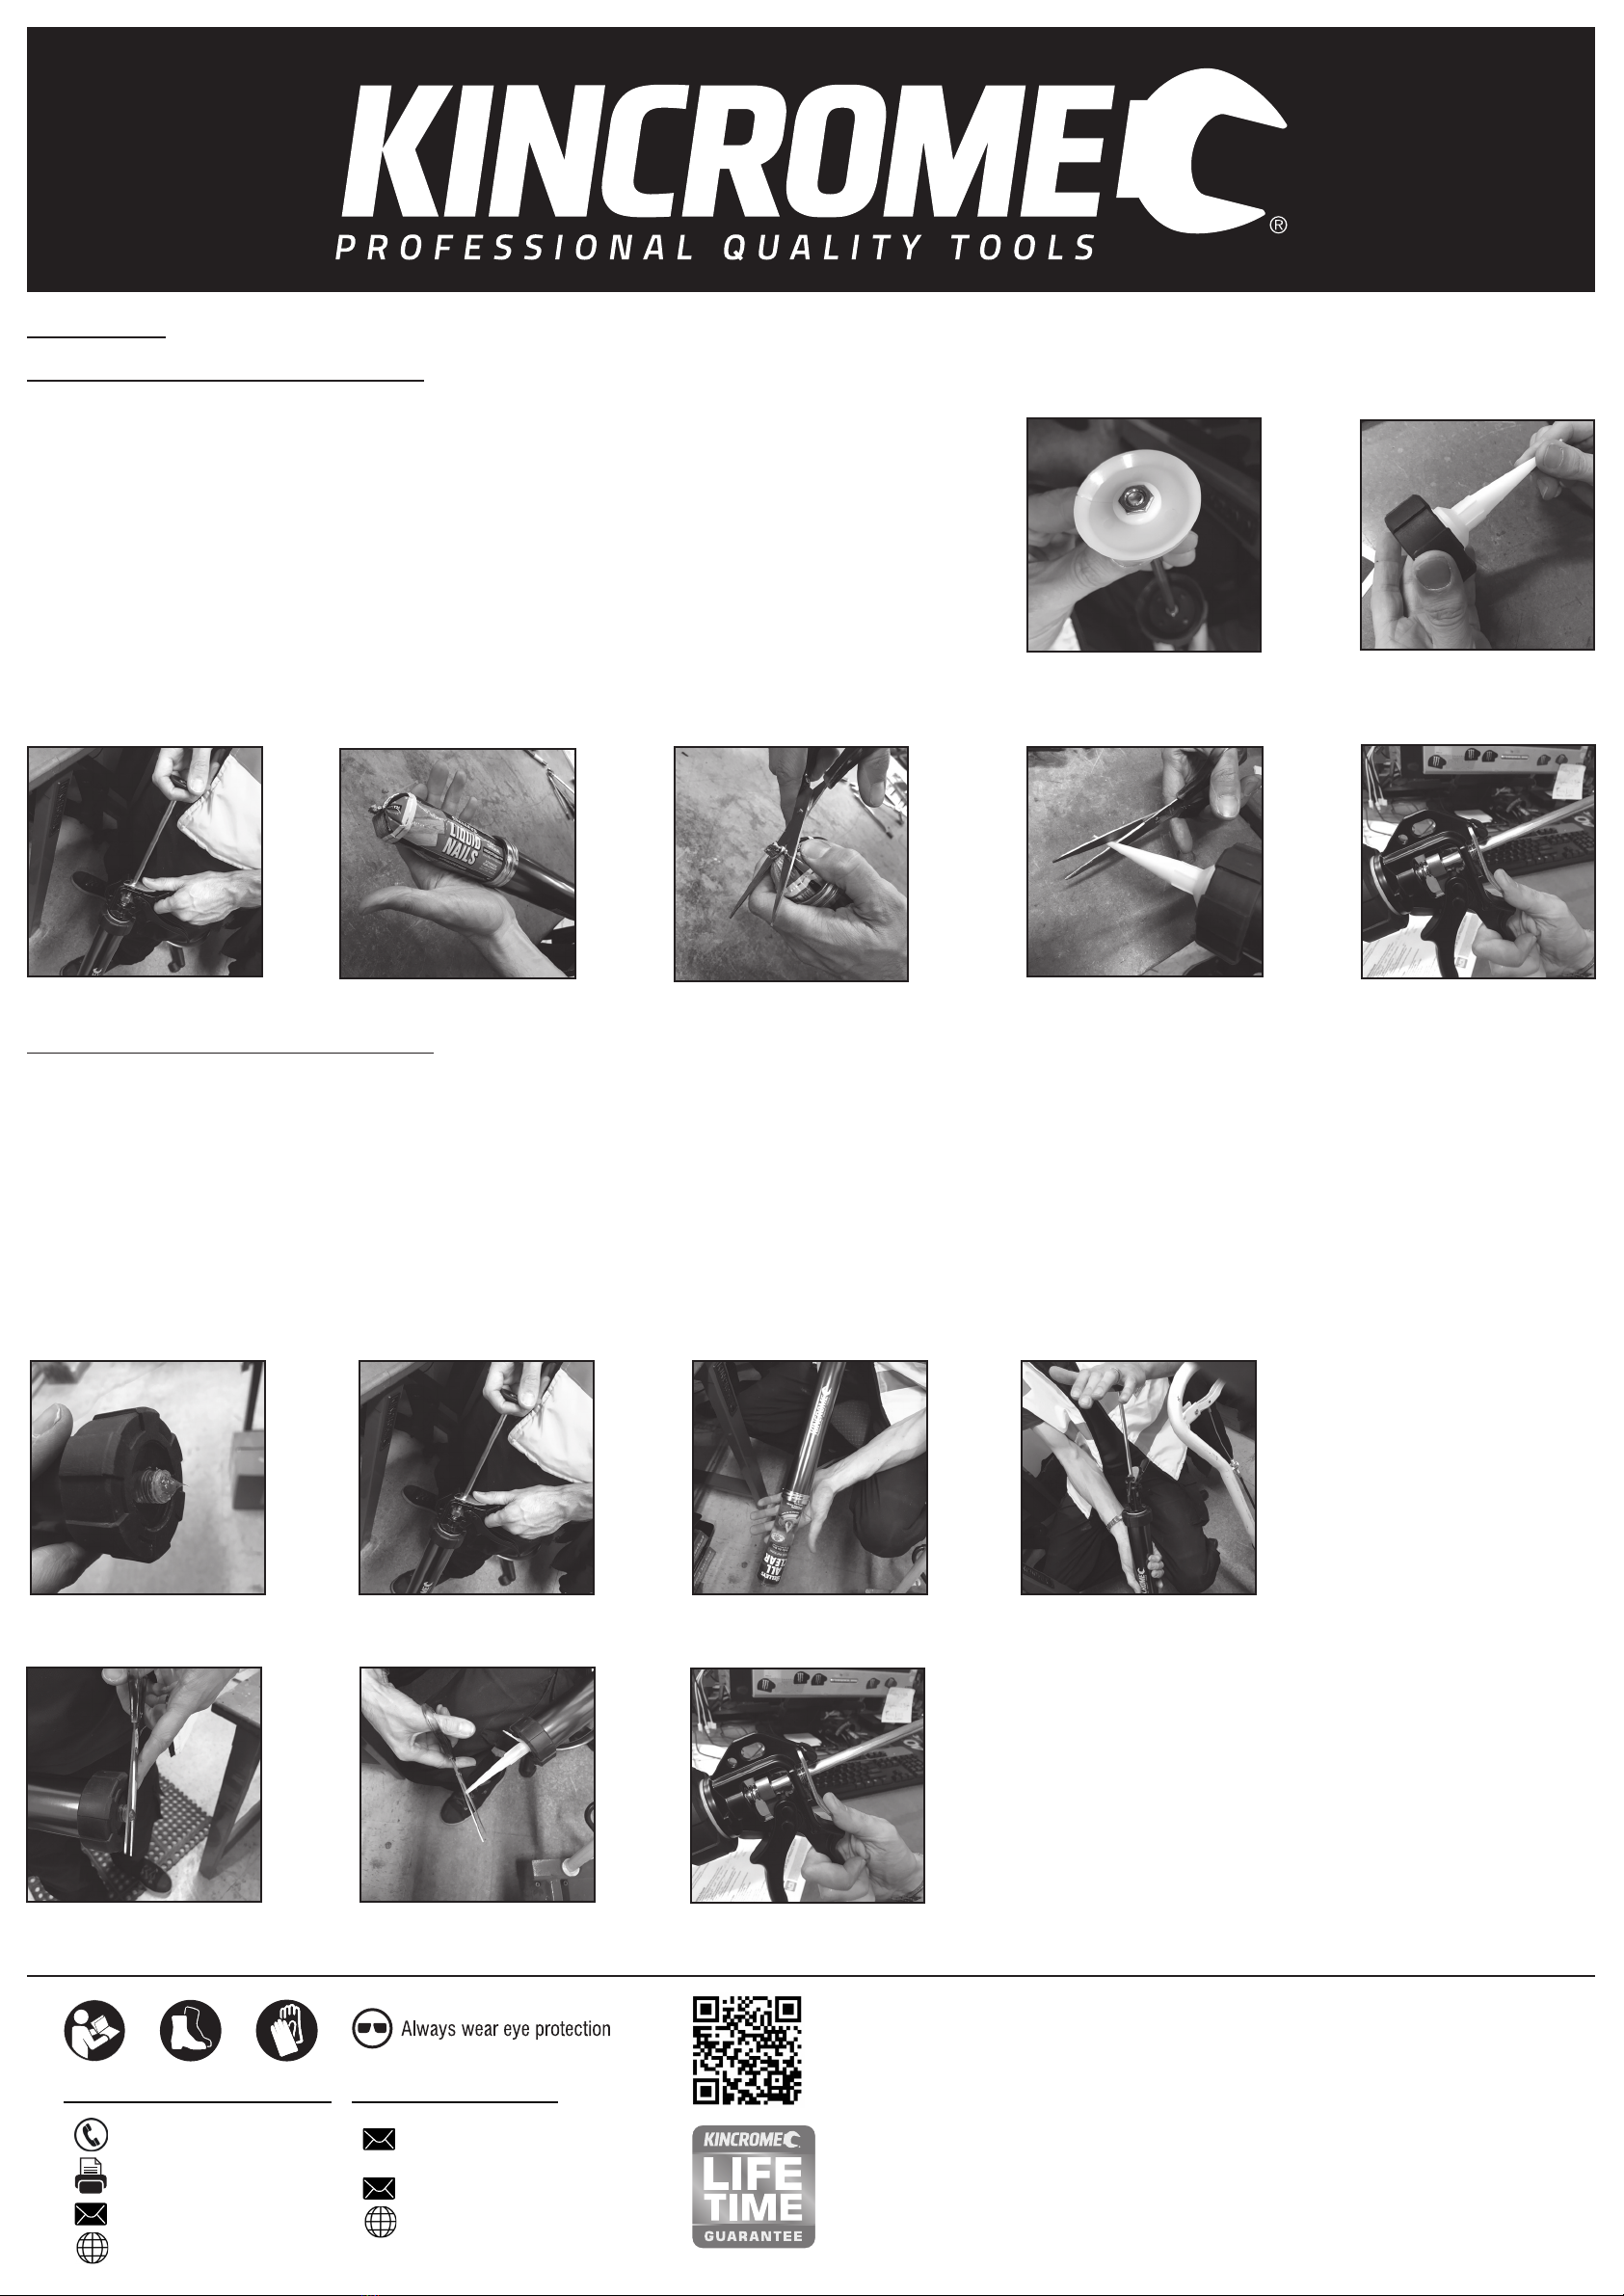
OPERATION
Operation - When using a Sausage
1. Ensure white plastic plunger is fitted (Fig 11)
2. Unscrew the front end cap, fix the new nozzle into the cap (Fig 12)
3. Pull back the plunger handle whilst holding the metal plate down until fully extended (Fig 13)
4. Place the sausage inside the gun barrel (Fig 14)
5. Use scissors to cut the end clip off the sausage whilst it’s in the gun barrel (Fig 15)
6. Screw the front end cap including nozzle back onto the gun barrel
7. Use scissors to cut the nozzle open (Fig 16)
8. Extrude product by squeezing the trigger repetedly until product comes out of the nozzle
9. Tool is now ready for use
10.Release flow pressure by pressing the metal release plate with your thumb & pulling plunger back
5cm (Fig 17)
11.Remove the spent sausage after use and clean out any excess product from tool
12. Replace spent product as required and repeat all steps
Fig 11
Fig 22
Fig 12
Fig 19Fig 18
Fig 23
Fig 13
Fig 20
Fig 16
Fig 14 Fig 17
Fig 15
Fig 24
Fig 21
Operation - when using a Cartridge
1. Ensure metal plunger disc is fitted (Fig 10)
2. Unscrew and remove the front end cap and pull back the plunger with metal plate down until fully extended (Fig 19)
3. Insert the new cartridge (Fig 20)
4. Screw the front end cap back onto the gun barrel
5. Push the plunger handle in while holding the metal plate down (Fig 21) until cartridge is seated against front end cap (Fig 18)
6. Cut off the cartridge nipple with scissors (Fig 22)
7. Screw on the nozzle and trim/cut the nozzle to the desired size (Fig 23)
8. Extrude product by squeezing the trigger repetedly until product comes out of nozzle
9. Tool is now ready for use
10.Release flow pressure by pressing the metal release plate with your thumb & pulling plunger back 5cm (Fig 24)
11.Remove the spent cartridge after use and replace it with a new one as required


