kincrome K8081 User manual

GENERAL SAFETY INFORMATION
1. This service instruction sheet contains important warnings and otherinformation. READ & KEEP FOR REFERENCE
2. The informationinthis manual has been carefully checked and is believed to be entirely reliable and consistent with the product described.
However, no responsibility is assumed for inaccuracies, or for liability arising out of the application and use of the equipment described.
3. Should the equipment be usedin a manner not specified, the protection provided by the equipment may be impaired and the warranty voided.
4. Always wear safety glasses when using a grease gun. Keep work area clean & remove excess grease from tools, hands & clothing after use.
Do not use grease gun hose for other applications orat pressure levels above rated pressures.
Caution: Excess grease, if leftonfloors, toolsorequipment can create surfaces that become slippery.
UNPACKING
1. Unpack all the components from the box.
When unpacking the Grease Gun, carefully inspect for any damage that may have occurred during transit or storage.
Check for tears, loose parts, missing parts ordamaged parts.
2. Ensure all packaging material are disposed of as per your local council guide lines.
ASSEMBLY
The K8081 Smart Grease Gun requires the extension hose or extension pipe to be assembled prior to use.
Choose ether the rigid orflexible extension hose.
Connect the desired Extensionhose and Coupler onto the Grease Gun Outlet of the Grease Gun Head using a thread sealant such as Teflon(not included), to make aseal-proof connection.
(DO NOT over tighten as this may fracture the Grease Gun Outlet which could result in an air leak).
OPERATION
Priming Grease Guns
A common occurrence with all grease guns is trapped air pockets within grease. Trapped air causes No or reduced grease discharge.
Removing Air Pockets from Grease is referred to as Priming or Bleeding.
It is highly recommended to prime your grease gun, before it is used, if grease stops coming out, the most probable cause is trapped air in grease.
If your grease gun is regularly used, Priming can be done without having to remove the Grease Gun Extension & Coupler from the Grease Gun Head.
1. Screw and fully tighten the Grease Gun Head onto the Barrel in a Clockwise direction.
2. Place the plunger handle on a flat surface while depressing the bleeder valve and the plunger release and push down firmly on the grease gun.
Some grease will appear before air is expelled.
3. Start operating the Handle till grease starts flowing out continuously. (Note that the first discharge of grease may have some air bubbles).
If grease is accompanied with air
bubbles, repeat steps 5, 6, 7 to Prime the Grease Gun.
Greasing A Grease Fitting / Nipple
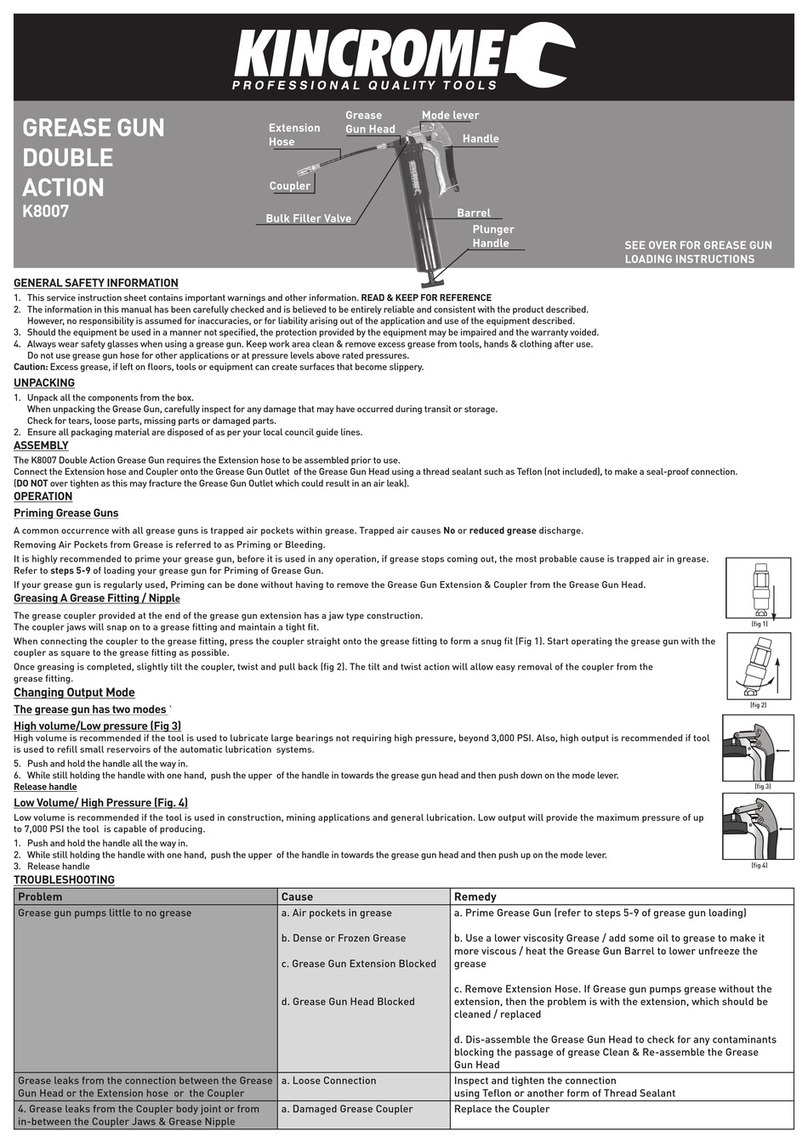
The grease coupler provided at the end of the grease gun extension has a jaw type construction.
The coupler jaws will snap on to a grease fitting and maintain a tight fit. When connecting the coupler to the grease fitting, press the coupler straight onto the grease
fitting to form a snug fit (Fig 1). Start operating the grease gun with the coupler as square to the grease fitting as possible.
Once greasing is completed, slightly tilt the coupler, twist and pull back (fig 2). The tilt and twist action will allow easy removal of the coupler from the grease fitting.
Changing Output Mode
The grease gun has two modes
Pistol Grip (Fig3)
Pistol Grip mode is used to lubricate large bearings not requiring high pressure, beyond 3,000 PSI. Also, high output is recommended if tool is used to refill small
reservoirs of the automatic lubrication systems.
If in Lever Action Mode:
1. Push and hold the handle release button all the way in.
2. While still holding the handle with one hand, push the handle up. Release handle
Lever Action (Fig. 4)
Changing to lever action mode will allow a greater working pressure up to 6,000 PSI.
If in Pistol Grip mode:
1. Push and hold the handle release button all the way in.
2. While still holding the handle with one hand, pull the handle down.
TROUBLESHOOTING
Problem Cause Remedy
Grease gun pumps little to no grease a. Air pockets in grease
b. Dense or Frozen Grease
c. Grease Gun Extension Blocked
d. Grease Gun Head Blocked
a. Prime Grease Gun (refer to steps 5-9 of grease gun loading)
b. Use a lower viscosity Grease / add some oil to grease to make it more
viscous / heat the Grease Gun Barrel to lower unfreeze the grease
c. Remove Extension Hose. If Grease gun pumps grease without the extension, then
the problem is with the extension, which should be cleaned / replaced
d. Dis-assemble the Grease Gun Head to check for any contaminants blocking the pas-
sage of grease Clean & Re-assemble the Grease Gun Head
Grease leaks from the connection between the Grease
Gun Head or the Extension hose or the Coupler
a. Loose Connection a. Inspect and tighten the connection using Teflon or another form of Thread Sealant.
Grease leaks from the Coupler body joint or from in-be-
tween the Coupler Jaws & Grease Nipple
a. Damaged Grease Coupler Replace the Coupler
(fig 1)
(fig 2)
SMART
GREASE GUN
PISTOL/LEVER
K8081
Coupler
Extension
Pipe
Grease
Gun Head
Handle
Handle
Release Button
Barrel
(fig 3)
(fig 4)
Bulk Filler Valve
Plunger
Handle
Plunger
release SEE OVER FOR GREASE GUN
LOADING INSTRUCTIONS
Coupler
Extension
Hose
Bleeder Valve
GREASE GUN LOADING
Caution must beobserved wheneither unscrewing the barrel or unscrewing the pull handle from the
follower rod as the large follower spring inside the barrel is energised.
Grease guns have multiple loading optionssuch asCartridge Loading, Bulk Loading and SuctionLoading
Cartridge Loading
1. Unscrew Grease Gun Head from the Barrel counter-clockwise.
2. Pull back the Plunger Handle all the way back until the plunger handle locks.
3. Remove the plastic cap from the open end of the Grease Cartridge & fully insert into the
empty Barrel.
4. Remove the metal pull tab seal from the Grease Cartridge.
5. Screw and fully tighten the Grease Gun Head onto the Barrel in a Clockwise direction.
6. Place the plunger handle on a flat surface while depressing the bleeder valve and the plunger
release push down firmly on the grease gun. Some grease will appear before air is expelled.
7. Start operating the Handle till grease starts flowing out continuously. (Note that the first dis-
charge of grease may have some air bubbles). If grease is accompanied with air bubbles, repeat steps 5, 6, 7
to Prime the Grease Gun.
Bulk Loading
1. Unscrew Grease Gun Head from the Barrel counter-clockwise.
2. Pull back the Plunger Handle all the way back until the plunger handle locks.
3. Scoop out clean Grease from the Bulk Grease Container into the empty Grease Gun Barrel.
4. Once the Barrel is full, shake the Barrel to allow grease to settle down. Fill with more grease if
Barrel is not completely full.
5. Screw and fully tighten the Grease Gun Head onto the Barrel in a Clockwise direction.
6. Place the plunger handle on a flat surface while depressing the bleeder valve and the
plunger release push down firmly on the grease gun. Some grease will appear before
air is expelled.
7. Start operating the Handle till grease starts flowing out continuously. (Note that the first
discharge of grease may have some air bubbles). If grease is accompanied with air bubbles,
repeat steps 5, 6, 7 to Prime the Grease Gun.
Suction Loading
1. Unscrew Grease Gun Head from the Barrel counter-clockwise.
2. Insert the open end of the Barrel into the Grease bucket to about 2”(50 mm) deep.
3. Slowly pull back the Plunger Handle all the way back, to draw in grease into the empty Barrel and the
handle plunger locks.
4. Shake the Grease Gun Barrel to allow the Grease to settle at the bottom of the Barrel.
5. Screw and fully tighten the Grease Gun Head onto the Barrel in a Clockwise direction.
6. Place the plunger handle on a flat surface while depressing the bleeder valve and the plunger release and
push down firmly on the grease gun. Some grease will appear before air is expelled.
7. Start operating the Handle till grease starts flowing out continuously.
Note that the first discharge of grease may have some air bubbles. If grease is accompanied with air bubbles,
repeat steps 5, 6, 7 to Prime the Grease Gun.
Filler Pump
1. Pull back the Plunger Handle all the way back until the plunger handle locks. Ensure the Grease Gun Head is
screwed tightly onto the barrel.
2. Check compatibility of Bulk Filler Valve on your grease gun with your Filler Pump, to make sure they are
compatible. Wipe the Bulk Filler Nipple clean of any dirt before starting.
3. Insert the Bulk Filler Valve onto the Female Loader Valve of the Grease Filler Pump. Start operating the Filler
Pump, keeping your handon the Grease Gun, lightly pushing itdown onto the Filler Pump.
4. Disengage the Grease Filler Valve from the Female Loader Valve of Grease Filler Pump. Unscrew Grease Gun
Head from the Barrel by a few turns, such that it is about2-3 turns loose.
5. Once the Grease Gun Barrel is filled, pumping would get very hard. Stop at this time.
Warranty given by Kincrome Australia Pty Ltd of 3 Lakeview Drive, Caribbean Park, Scoresby, Victoria (Tel 1300 657 528). The applicable
warranty period (12 months) commences on the date that the product is purchased. If this product has materials or workmanship defects
(other than defects caused by abnormal or non warranted use) you can, at your cost, send the product to place of purchase, an authorised
Kincrome service agent or one of Kincromes addresses for repair or replacement. Your rights under this warranty are in addition to
any other rights you have under the Australian Consumer Law or other applicable laws. Our goods come with guarantees that cannot
be excluded under the Australian Consumer Law. You are entitled to a replacement or refund for a major failure and compensation for
any other reasonably foreseeable loss or damage. You are also entitled to have the goods repaired or replaced if the goods fail to be of
acceptable quality and the failure does not amount to a major failure. For further details please visit www.kincrome.com.au or call us.
Due to minor changes in design or manufacture, the product you purchase may sometimes differ from the one shown on the packaging.
SCAN FOR
HOW TO VIDEO
Table of contents
Other kincrome Tools manuals

kincrome
kincrome K8058 User manual

kincrome
kincrome K15145 User manual

kincrome
kincrome K13225 User manual

kincrome
kincrome K15054 User manual

kincrome
kincrome K7748GT User manual

kincrome
kincrome KP15201 User manual

kincrome
kincrome K12140 User manual

kincrome
kincrome K7561 User manual

kincrome
kincrome EZI RIV-NUT KP45003 User manual

kincrome
kincrome K8183 User manual