13.2 - Selection of device connected to “AUX” output
Default = electric lock
This procedure allows for setting the “AUX” output for the operation as:
ELECTRIC LOCK: the control unit closes the AUX contact (terminals 3-4) whenever a command is received.
By default the contact is closed for 2 seconds (electric lock mode ). To change the work mode, see Paragraph 12.3.
COURTESY LIGHT: the control unit closes the AUX contact (terminal 3-4) whenever a radio command is received (the AUX button must be
programmed – see Paragraph 12.1). By default the command is monostable. To change the work mode, see Paragraph 12.3.
To control the AUX output when it has been set as a courtesy light output, you need to register a transmitter by following
the procedure in paragraph 12.1 and connect a suitable relay.
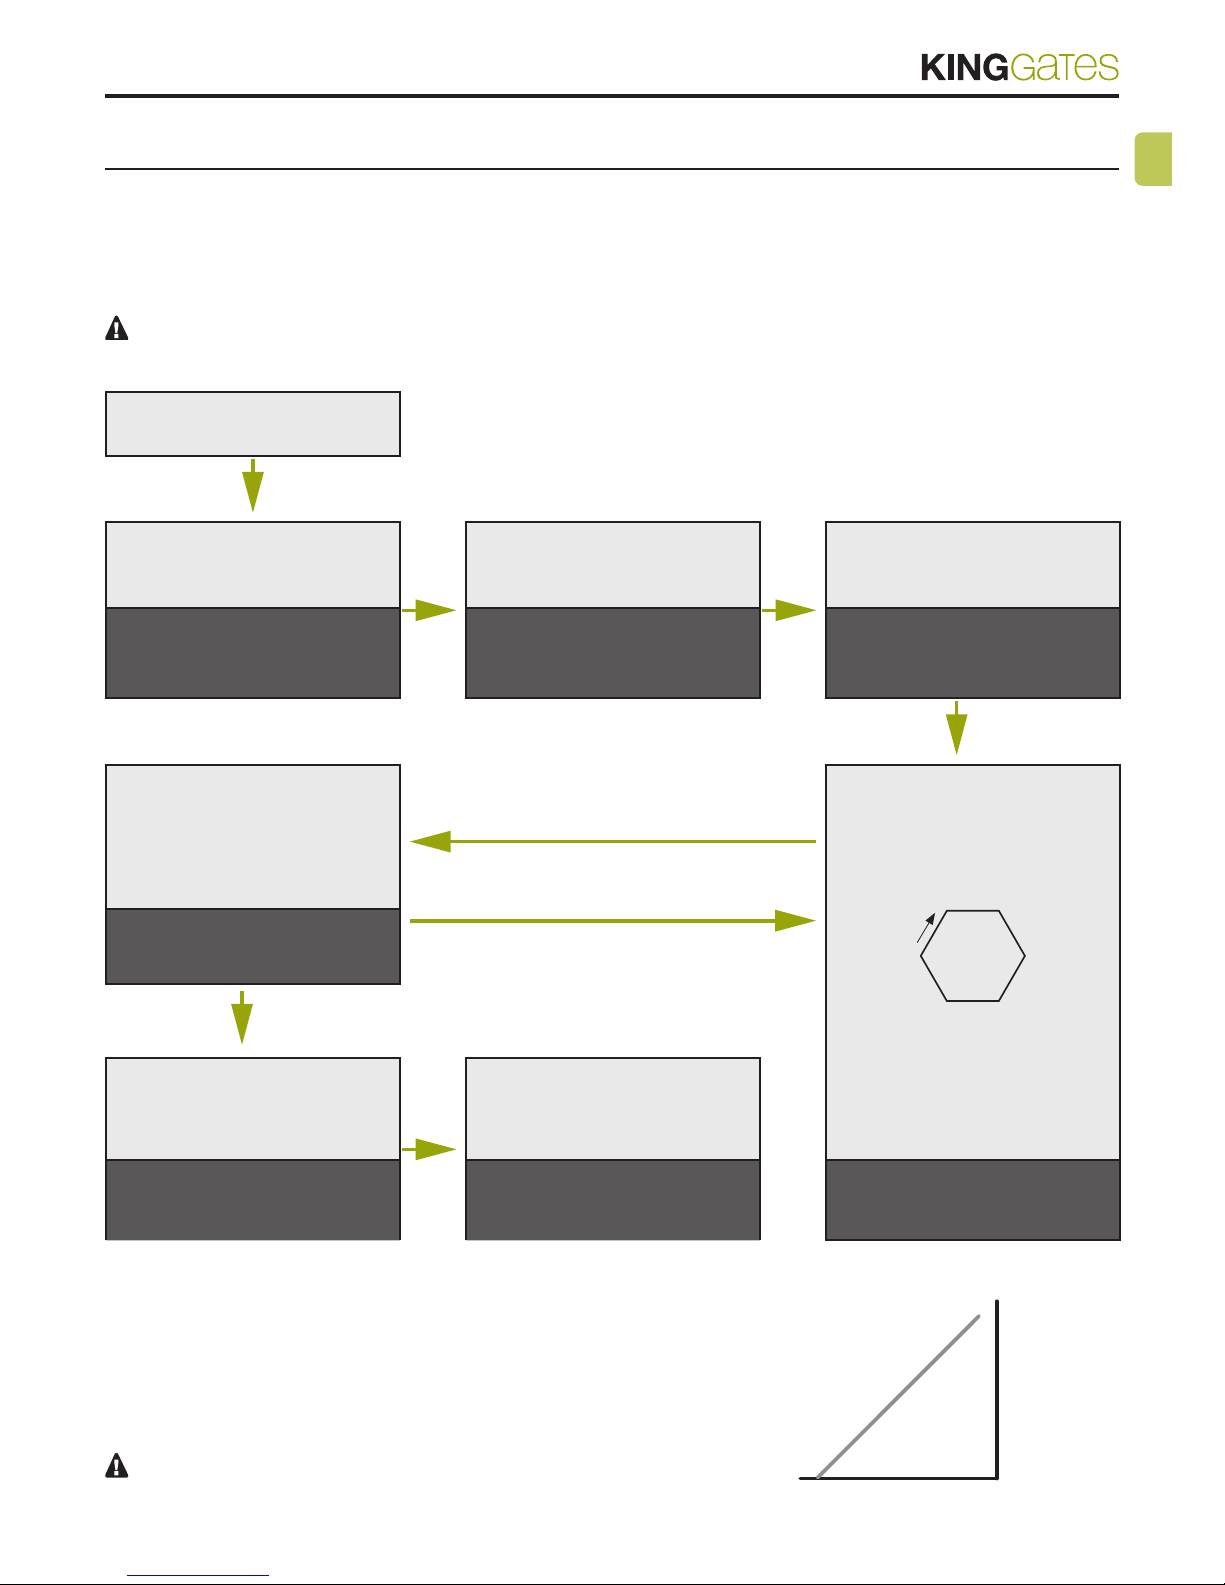
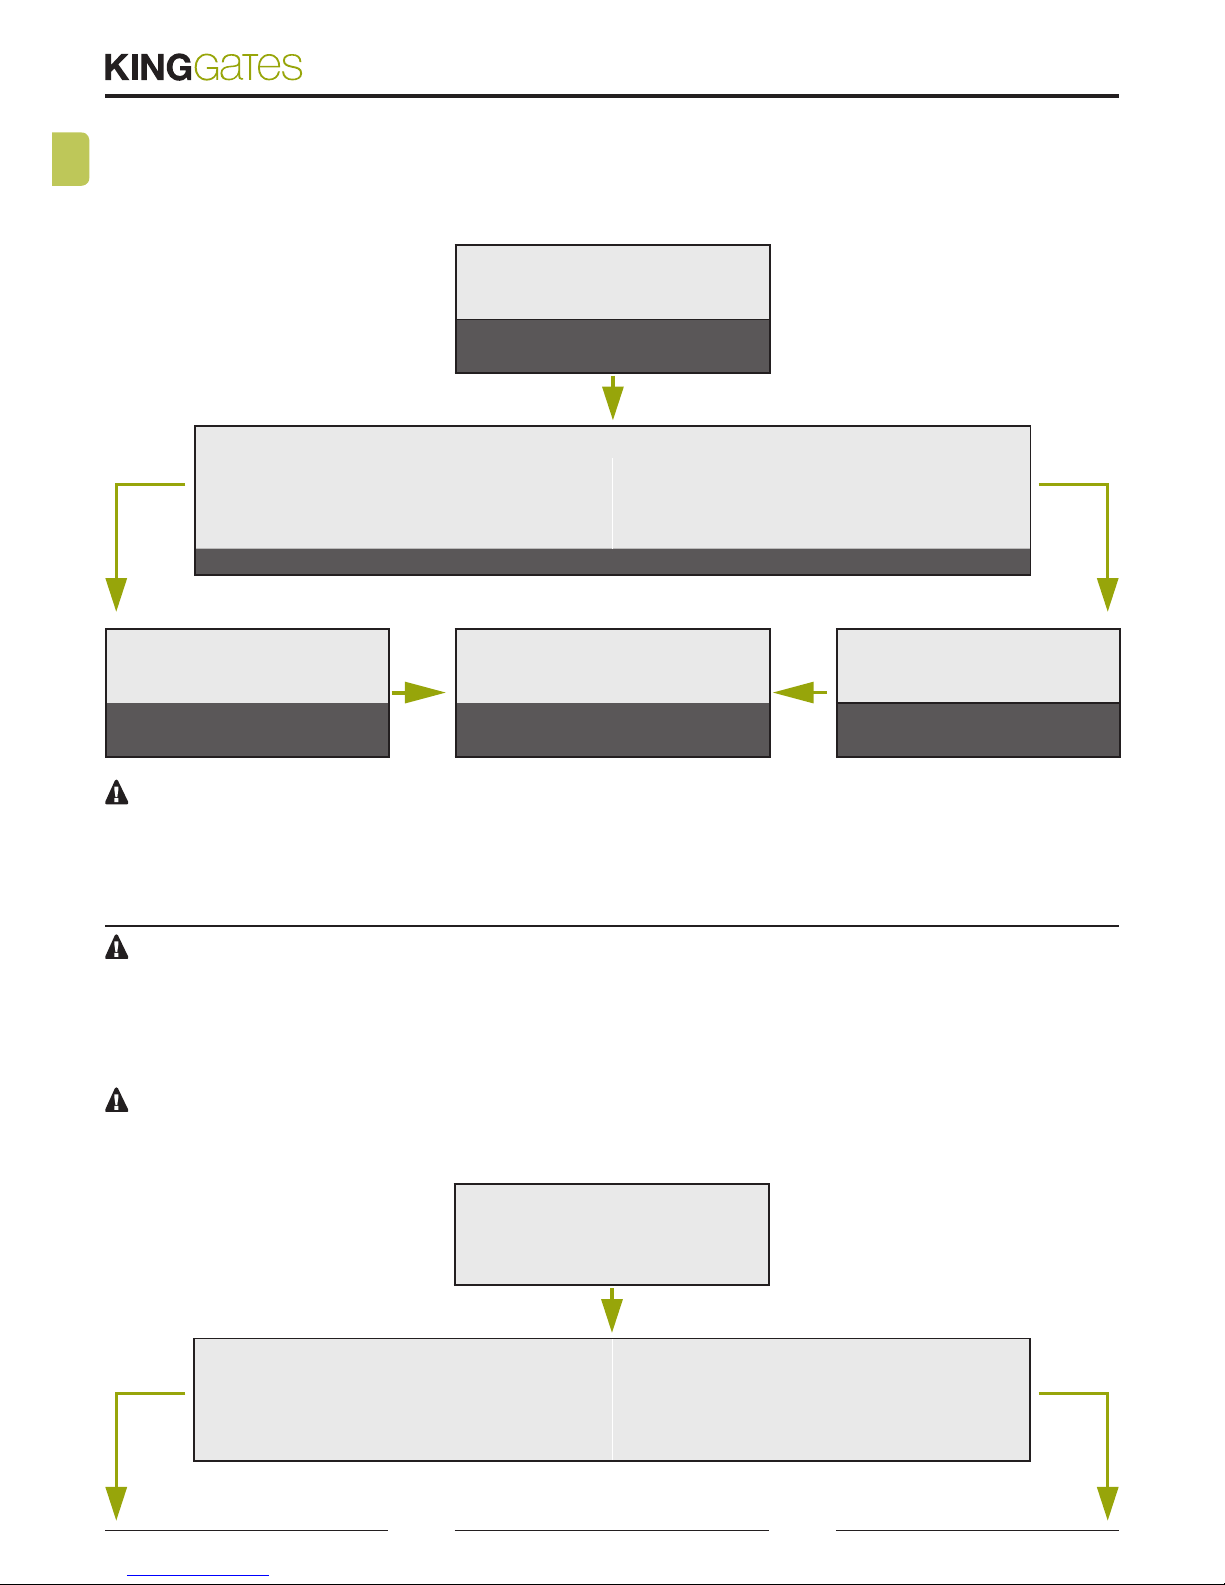
1. SIMULTANEOUSLY PRESS THE SET,
RADIO AND START BUTTONS FOR 3
SECONDS
All the LEDs turn off
(if not, consult Paragraph 15.2)
2. PRESS THE RADIO BUTTON FOR 1 SECOND:
If the red “photo” LED is on
AUX = Electric lock
(if the setting is correct, go to Point 5; if not, pro-
ceed to Point 3)
If the red “photo” LED is off
AUX = Courtesy light
(if the setting is correct, go to Point 5; if not, pro-
ceed to Point 4)
The red “radio” LED turns on in the xed mode
courtesy light
setting
electric lock
setting
3. PRESS THE “SET” BUTTON FOR
1 SECOND
5. PRESS THE SET AND RADIO BUTTONS
SIMULTANEOUSLY OR WAIT 10 SECONDS
TO EXIT THE PROCEDURE
4. PRESS THE “SET” BUTTON FOR
1 SECOND
The red “radio” LED remains lit in the xed
mode and the red “photo” LED turns off
The LEDs return to the normal operation
conguration
The red “radio” LED remains lit in the xed
mode and the red “photo” LED turns on
13.3 - Selection of “AUX” output operating mode
IF THE “AUX” OUTPUT IS SET AS LOCK (see Paragraph 12.2)
Default = electric lock
The work mode (i.e. how the contact behaves at every wired or radio START command) can be set as:
ELECTRIC LOCK: at every command, the control unit closes the contact for 2 seconds
MAGNETIC LOCK: the control unit closes the contact only when the automation is fully closed
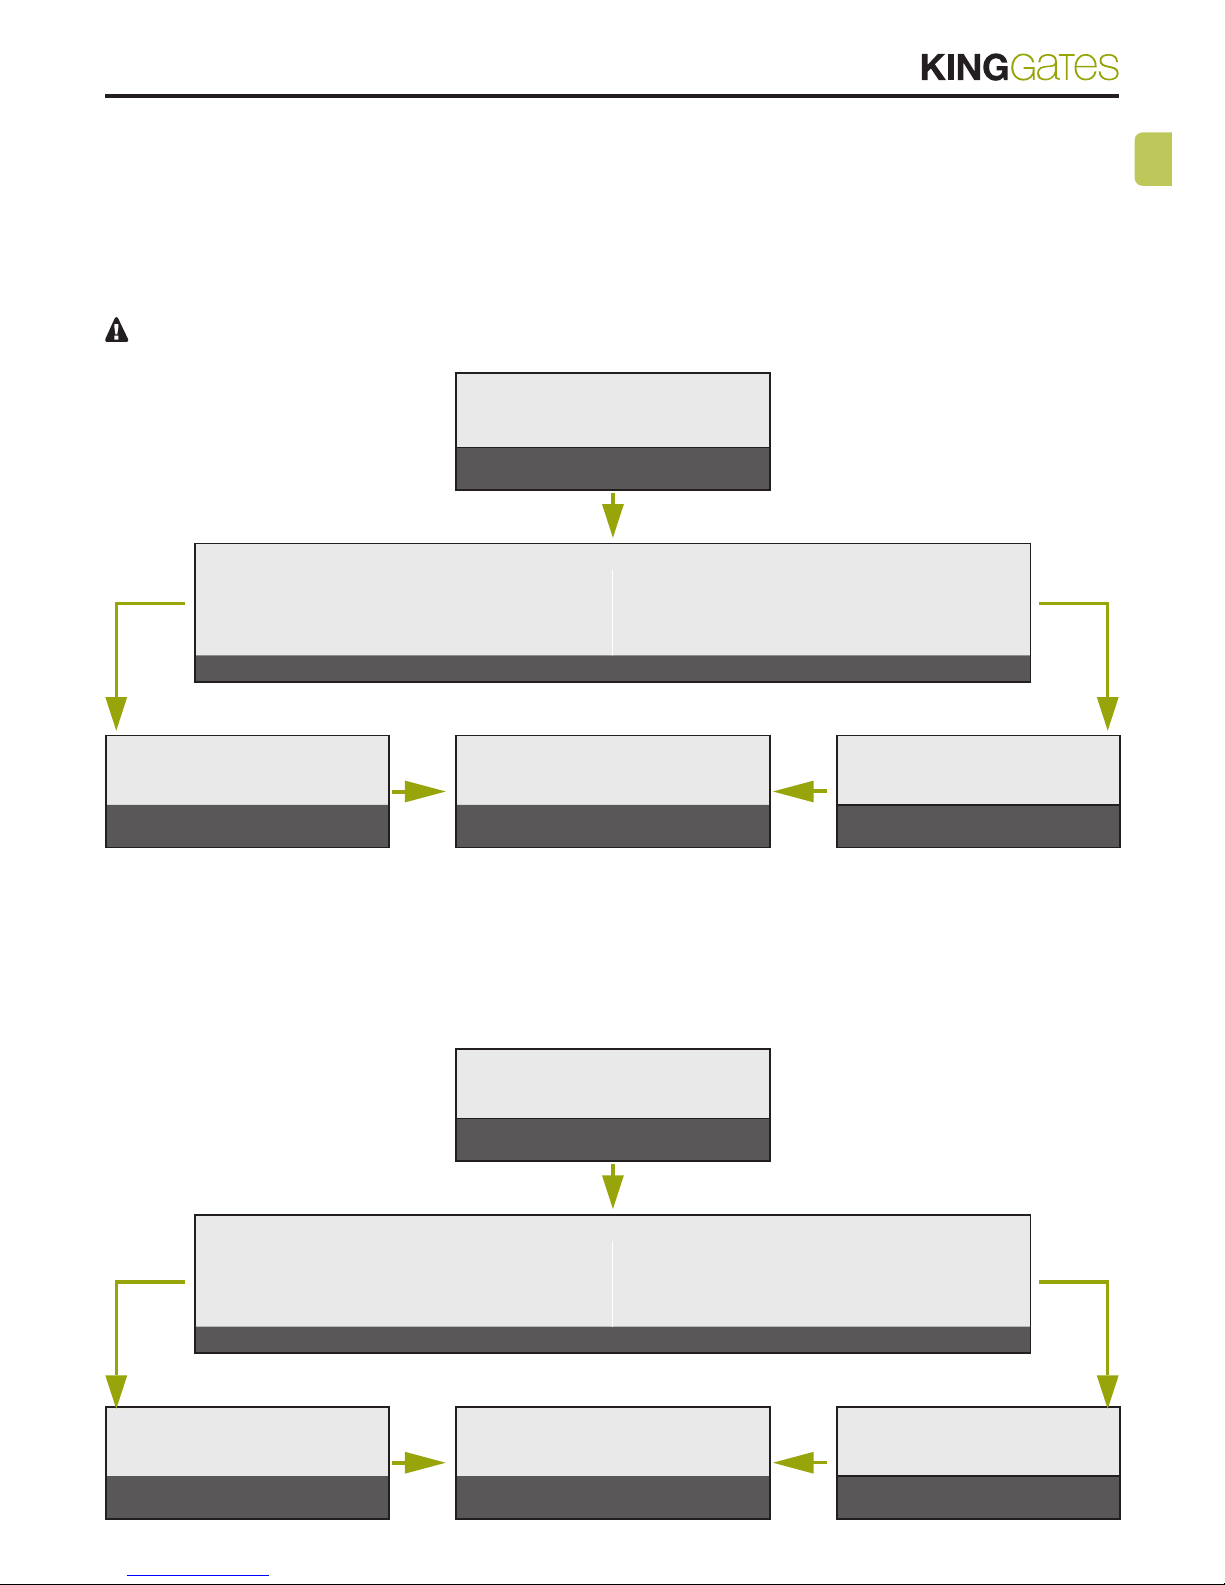
1. SIMULTANEOUSLY PRESS THE SET,
RADIO AND START BUTTONS FOR 3
SECONDS
All the LEDs turn off
(if not, consult Paragraph 15.2)
2. PRESS THE RADIO BUTTON FOR 1 SECOND:
If the red “stop” LED is on
AUX = Magnetic lock
(if the setting is correct, go to Point 5;
if not, proceed to Point 3)
If the red “stop” LED is off
AUX = Electric lock
(if the setting is correct, go to Point 5;
if not, proceed to Point 4)
The red “radio” LED turns on in the xed mode
magnetic lock
setting
electric lock
setting
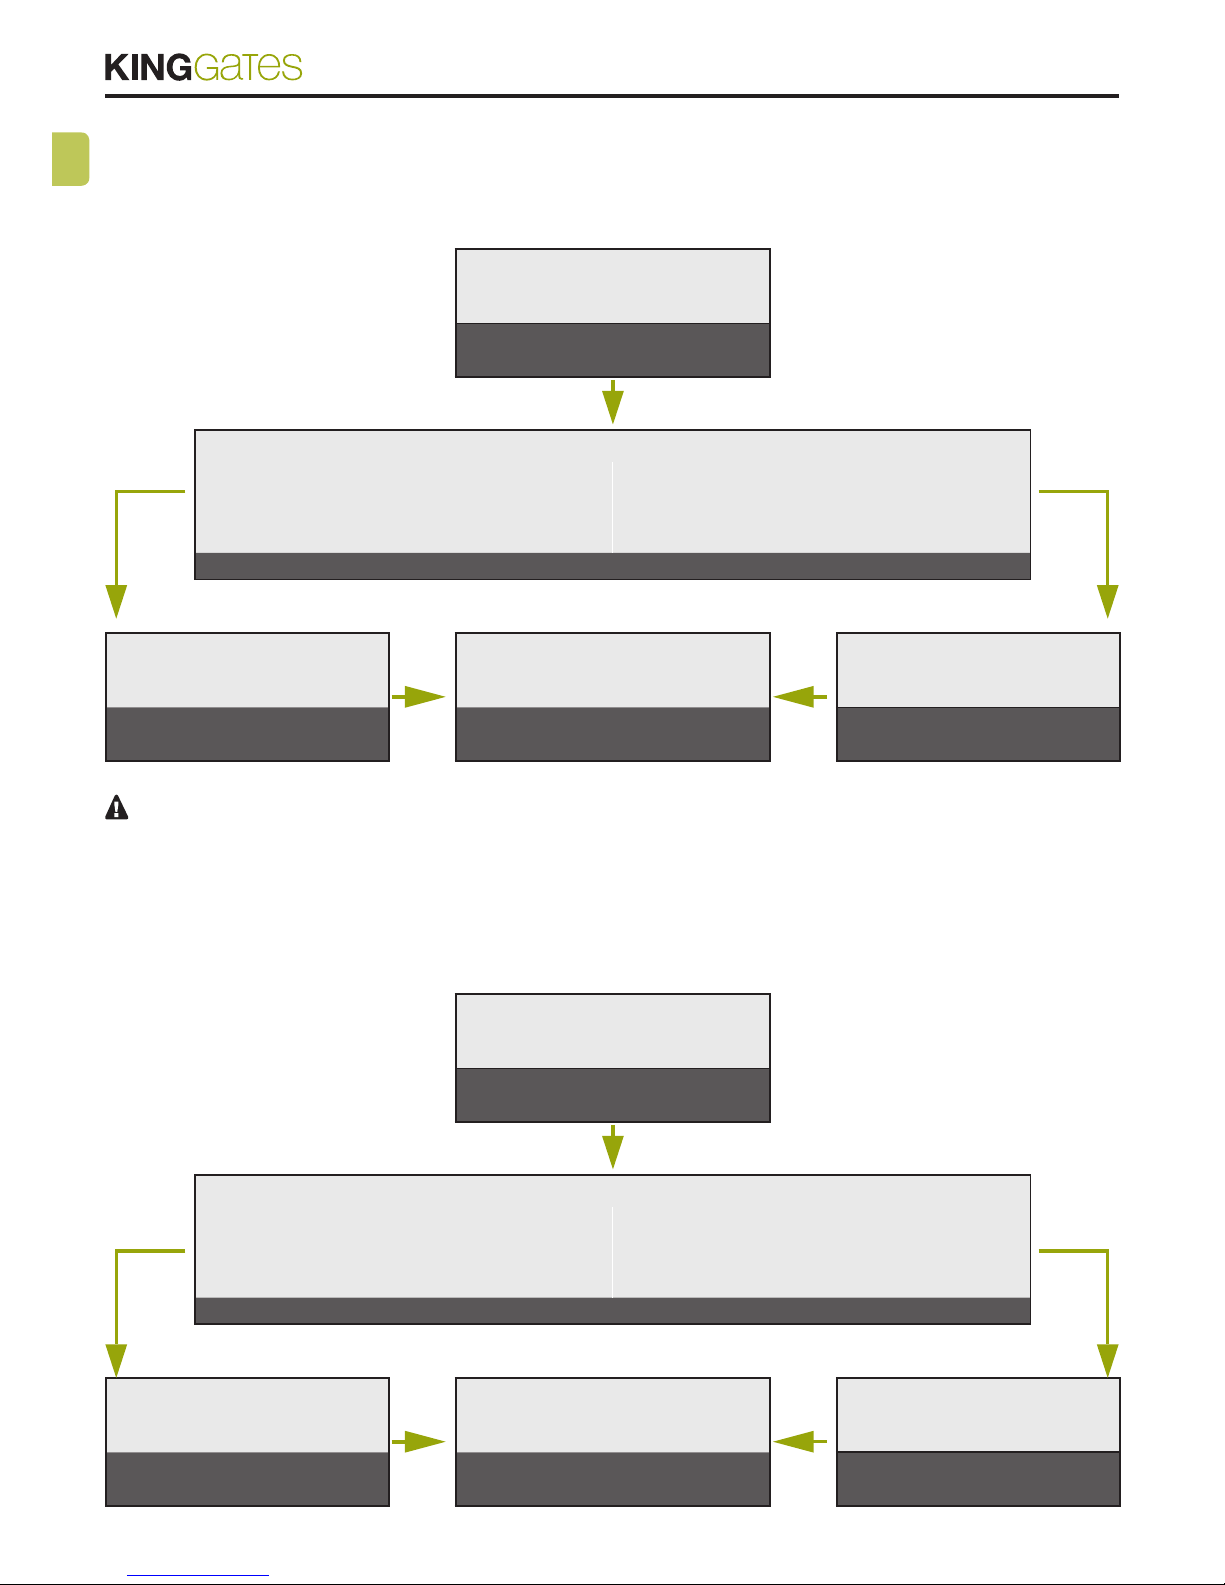
3. PRESS THE “RADIO” BUTTON
FOR 1 SECOND
5. PRESS THE SET AND RADIO BUT-
TONS SIMULTANEOUSLY OR WAIT 10
SECONDS TO EXIT THE PROCEDURE
4. PRESS THE “RADIO” BUTTON
FOR 1 SECOND
The red “radio” LED remains lit in the xed
mode and the red “stop” LED turns off
The LEDs return to the normal operation
conguration
The red “radio” LED remains lit in the xed
mode and the red “stop” LED turns on