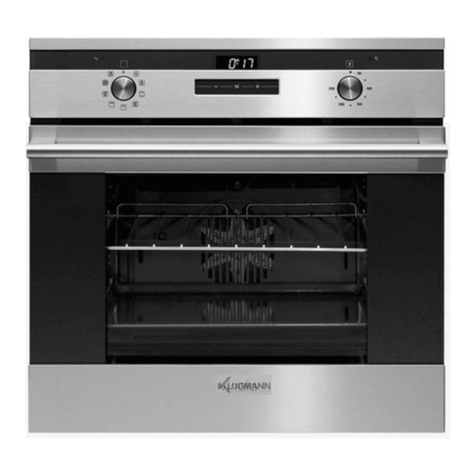
Klugmann KGO600GGFX User manual

KGO600GGFX
Oven
INSTRUCTION MANUAL
Klugmann Hausgeraete GmbH.
Gropiusstraße 7,
48163 Münster, Deutschland
+49 (0)2501 - 963 5732
+49 (0)2501 - 963 1834
service@klugmann-hausgeraete.de
www.klugmann-hausgeraete.de

~ 1 ~
Important
This appliance is designed and manufactured for home cooking only, and it
is not for any applicaon outside the house and thus should not be used in
commercial environments.
In case the appliance is used somewhere outside a house; meaning being
used semi-commercially, commercially or in public space, it's warranty will
be void.
Klugmann cannot be held responsible for the injuries or losses caused
by misuse or wrong installaon of the product. Klugmann reserves the
right to void the warranty delivered with the product due to wrong
installaon or misuse of the appliance.
Appliance Information:
Please note below the informaon on appliance plate for reference to
record the warranty of the appliance and help Customer Call Center
during an appliance malfuncon. Klugmann
Klugmann
appliances carry only one year
parts and one year labour guarantee.
Appliance Model
Serial No.
CE Conformity Statement
This oven is designed for cooking only.
All kinds of other uses (i.e. to heat the room) are inappropriate and
dangerous.
This oven is designed and manufactured in conformance with the direcves
below, and is marketed in accordance with them:
- "Gas" EU Direcve 2009/142/EC safety condions
- "Low Voltage" EU Direcve 2006/95/EC safety condions
- EU Direcve 93/68/EEC condions

~ 2 ~
Before First Use
- Read the instructions carefully before setting up and using the appliance.
- Make sure the appliance is not damaged, after removing it from the
packaging. In case of doubt, do not use the appliance and consult your
supplier or a competent engineer.
- Remove all packaging materials. Do not store the packaging materials in
places that children can reach, as they can cause serious injuries (plastic
bags, polystyrene, tapes, etc.). Packaging materials are recyclable.
- The appliance should be installed in accordance with the regulations in
force and following the instructions of the manufacturer, by a competent
engineer and gas/power connections should also made by a competent
engineer.
- Do not attempt to change the technical characteristics of the appliance as
its use can be dangerous.
Important Precautions and Advices Regarding Use of Electrical Appliances
Using any electrical appliance requires compliance with a set of basic rules.
Especially:
-- Never touch the appliance with wet hands or feet;
-- Do not operate the appliance with bare feet;
-- Do not allow children or handicapped people to operate the appliance
without supervision.
Manufacturer cannot be held responsible for any damage caused by
inappropriate, wrong or unreasonable use of the appliance.
Using The Oven For The First Time
We recommend you do the following:
-- Install the inner part of the oven as described under "Cleaning and
Maintenance".
-- Operate the oven empty for maximum temperature for two hours to
remove the oil stains and smell from the parts.

~ 3 ~
-- Let the oven cool down, turn off the power, and then clean the interior
of the oven with a cloth dipped in neutral detergent, and wipe dry well.
Important Safety Precautions and Recommendations
- Do not perform any cleaning or maintenance operation without unplugging the
appliance.
- Some parts might get very hot during or after using the oven. Do not touch the hot
parts.
- After use, make sure all controls are in closed position.
- Home appliance is not for children's play.
- Keep children away when using the oven.
- For children and people who have a handicap that prevent them to use the
appliance, a responsible person must be present to supervise them about the oven's
use. The person who supervises them has to make sure that they can use the oven in
a way not to damage themselves or the environment.
- WARNING
When installed correctly, your product meets all the safety conditions foreseen for
this product category. But special care should be given to the rear and bottom sides of
the appliance, since it can have sharp or hard corners that can cause injuries and
these areas should not be touched.
- Risk of Fire! Do not store flammable materials in the oven.
- Always use oven mittens when removing racks or trays from the oven while hot.
- Clean the oven regularly and do not allow oil to gather in oven floor or trays. Clean
the spills right away.
- Do not cover the oven walls with aluminum. Do not place cake molds and grill on the
oven surface.
- To allow steam and hot air out before taking food out, always stay away from the
oven when opening the oven door.
- Do not hang towel, drying cloth or other things inside the oven or on the oven
handle. It might cause fire.
- Make sure that the power cords of other nearby appliances cannot get stuck in
oven's door.
- We recommend that an unwanted appliance be rendered inoperable and all parts
that can cause danger to be made not dangerous.

~ 4 ~
- Important: This appliance is designed for home use only. It is NOT fit for use in semi-
commercial, commercial or common area uses.
- Cooking Safely: Keep the foods inside the oven for short durations before and after
cooking. This is to prevent contamination by organisms that can cause poisoning. Take
special care in hot weather.
Control Panel
Introduction to Controls
1. Oven lamp and fan control knob
2. Mechanical timer control knob
3. Upper and lower gas burner control knob
Note:
- Electrical ignition is integrated to thermostat control knob.
- Appliance is equipped with a safety valve system. Gas flow will be cut off
if flame is extinguished by accident.
CAUTION:
When the burner goes off by accident, turn off the gas from the control
knob and wait at least for one (1) minute before trying to light it again.
CAUTION:
Gas appliances cause heat and humidity in their environment. Ensure that
the cooking area is ventilated well, by opening the natural ventilation grids
or mounting an aspirator to the exit channel.
Fig.-1

~ 5 ~
CAUTION:
Additional ventilation might be required by opening a window or increasing
the suction power of the aspirator (if any) when the appliance is used for
excessive durations.
Gas Oven
Technical Specifications
Oven is delivered completely clean.
Again, it is recommended that the oven is set to maximum temperature in
first use to remove the possible oil stains from the oven burner.
The same must be applied with the gas grill as well.
This oven has the following equipment:
-- One gas oven burner (2.50 kW) mounted on the floor which provides
automatic ignition and safety device
-- One gas grill burner (1.80 kW) mounted on the ceiling provides
automatic ignition and safety device
Cooling Fan Motor
This appliance is equipped with a safety cooling fan motor that enables the
maintain lower temperatures for most efficient operation of the controls
and cooling the internal parts. Cooling fan motor automatically starts
running when oven or grill burner is ignited.
It can keep running (for a few minutes) after the oven or grill is turned off.
This duration is dependent on the previous cooking temperature and
duration.
CAUTION:

~ 6 ~
Oven might get very hot during operation and very hot steam might come
out of the area under the control panel. Keep children away.
Door is hot, so use the handle.
Appliance gets hot while running.
Avoid touching the heating elements inside the oven.
How To Use The Oven
IMPORTANT INFORMATION:
- Do not use the appliance if there is an electrical malfunction or if the cooling fan motor
is damaged.
The appliance may overheat and be damaged due to cooling fan motor not operating.
- In case the cooling fan motor is damaged during gas oven or gas grill operation, oven or
grill burner automatically shuts down after approximately 20 minutes. In that case, do
not use the appliance and call Post-Sale Service.
- If the cooling fan motor is running correctly, an air flow is formed above the appliance
(Figure 2).
Oven Burner
The gas flow of the burner is regulated with a thermostat that allows the oven
temperature to e kept stable.
Heat is controlled by a thermostat probe inside the oven.
The probe must always be kept clean and inside its case. A wrong location or crustation
might cause changes in heat control.
Thermostat is also equipped with a safety valve that automatically shuts off the gas when
the flame goes out.
Thermostat
Fig.-2

~ 7 ~
The indicator on the control panel (Figure 3) shows the increasing oven temperature.
To regulate the heat, bring the knob onto the selected number. The symbol closest to the
maximum position indicates that electrical ignition is built in the knob (it is activated by
the knob itself).
Igniting the Oven Burner
IMPORTANT: The oven door will be open during this operation.
To ignite the oven burner:
1. Completely open the oven door.
Do not continue igniting the oven unless you do this.
2. Press the thermostat knob to start electrical ignition and while keeping the knob
pressed, turn it counter-clockwise (Figure 4) until it reaches the Maximum position (Figure
3).
Never keep this operation up longer than 15 seconds. If the burner is still not ignited,
wait for around one (1) minute and repeat the ignition.
To operate the oven manually in case of an electrical malfunction, bring a flame close to
the point "A" on the floor (Figure 5) and then press and turn the thermostat knob (Figure
4).
3. Wait for about 10 seconds after igniting the burner to release the knob (duration for
thermal connection to start).
4. Make sure the burner is ignited. If not, turn the knob clockwise again to the "O" (Closed)
position and repeat the operation from step one.
5. Slowly close the oven door and bring the thermostat knob to the desired setting.
If the flame goes out for any reason, the safety valve will automatically cut off the gas
supply to the burner.
To reignite the burner, first bring the control knob to the OFF ("O") position, wait for at
least one (1) minute and repeat the ignition procedure.
For correct use of the gas oven, see "COOKING WITH GAS OVEN" chapter.
Min.
Max.
Fig.-3

~ 8 ~
Some parts might be very hot during and after using the oven.
Keep children away.
CAUTION: Never turn the thermostat before approaching the "A" hole on the floor in
case of a manual ignition.
Igniting The Grill Burner
IMPORTANT: The oven door must be open after this operation.
To ignite the burner:
1. Completely open the oven door.
Do not continue igniting the oven unless you do this.
2. Press the thermostat knob to start electrical ignition and while keeping the knob
pressed, turn it clockwise (Figure 6) until it reaches the GRILL position (Figure 3).
Never keep this operation up longer than 15 seconds. If the burner is still not ignited,
wait for around one (1) minute and repeat the ignition.
To operate the oven manually in case of an electrical malfunction, bring a flame close to
the left and right side of the burner (Figure 7) and then press and turn the thermostat
knob (Figure 6).
3rd Wait for about 10 seconds after igniting the burner to release the knob (duration for
thermal connection to start).
4th Make sure the burner is ignited. If not, turn the knob clockwise again to the "O"
(Closed) position and repeat the operation from step one.
5th The oven door will be kept half-open throughout the grill use.
For correct use see. "TRADITIONAL GRILL" chapter.
If the flame goes out for any reason, the safety valve will automatically cut off the gas
supply to the burner.

~ 9 ~
To reignite the burner, first bring the control knob of the grill to the OFF ("O") position,
wait for at least one (1) minute and repeat the ignition procedure.
Some parts might be very hot during and after using the grill.
Keep children away.
CAUTION: Never turn the thermostat before approaching the burner with a flame in
case of a manual ignition.
Fig.-6
Fig.-7

~ 10 ~
Cooking With Gas Oven
Heat the oven to the desired temperature before putting the food in the
oven.
For correct pre-heating operation, remove the tray and place it with the
food after the oven reaches the desired temperature.
Check the cooking time and turn the oven 5 minutes before the actual time
to use the stored heat.
Oven Light
Oven has a built-in lamp for visual inspection
during cooking.
To turn on the oven lamp, bring the knob
seen in Figure 8 to position.
Traditional Grill
Warning: Grill burner is used only when the door is open.
Leave it to heat up for approximately 5 minutes when the door is half-
open.
Place the food on the grill, while the rack is as close to the grill as possible.
Place the tray on the suitable rack to collect the juice dripping from the
food during grilling.
Grill should not be operated for longer than 30 minutes.
Caution: Oven door gets very hot while running.
Keep children away.
Fig.-8

~ 11 ~
Cooking Guide
Your gas oven has a burner located under the burner cap.
If you are accustomed to cook with gas from before, you might have to
change your cooking methods slightly. The oven floor is hot and it is ideal
for baking the bottom of flat cake molds and pizzas.
Other foods must be cooked closer to the upper part of the oven.
When making cake, pita bread etc. over more than one racks, you can get
the best results by switching the racks in the middle of cooking time.
Safety
NEVER allow oil to gather on the oven floor.
As in all ovens, clean the oil from walls and oven floor regularly to prevent
oil from flaming.
The oven is equipped with a safety cooling fan motor that enables the
maintain lower surface temperatures for most efficient operation of the
controls and cooling the internal parts.
Oven door might get hot - keep children away.
Never place something on the oven floor.
Do not cover the walls of the oven with aluminum.
Do not place racks or dripping tray on the oven floor.

~ 12 ~
Heat Guide
SIGN
OVEN HEAT
FOOD TO BE COOKED
½th Region
Very cold oven
Meringue cakes, foods
cooked in low
temperature
1. Region
Cold oven
Rice pudding, cakes with
lots of fruit, i.e. Christmas
2. Region
Cold or slow oven
Stew, casserole, foods
cooked in low fire, rich
fruit cakes, i.e. Dundee
3rd Region
Cold or slow oven
Biscuits, flat cakes, i.e.
Madeira, frying in low
temperature
4th Region
Warm oven
Flat cakes, Victorian
sandwich, mince pie,
chicken
5th Region
Medium-warm oven
Small cakes, pies, fish
6th Region
Somewhat hot oven
Flat cakes, fruit cakes,
frying in high temperature
7th Region
Hot oven
Bread and loaves of bread,
etc. pita bread, flat puff
pastry, frying in high
temperature
8th Region
Medium-hot oven
Sausages, pastry, puff
pastry, pizza, meat
9th Region
Very hot oven
Food ready to be fried

~ 13 ~

~ 14 ~

~ 15 ~

~ 16 ~
Maintenance
We recommend that you clean the appliance when it is cold, especially the enamel parts. Avoid
using alkaline or acidic materials (lemon juice, vinegar, etc.) on the surfaces.
Do not use chlorine or acid-based cleaning agents.
WARNING
When installed correctly, your product meets all the safety conditions foreseen for this product
category. But special care should be given to the rear and bottom sides of the appliance, since it
can have sharp or hard corners that can cause injuries and these areas should not be touched.
Inside the Oven
The oven must always be cleaned when cold after use. Clean the gap with a mild detergent solution
and warm water.
Appropriate chemicals can be used after consulting the recommendations of the manufacturer and
trying it on a small part of the gap. Abrasive cleaning agents or abrasive clothes must not be used on
the surfaces of the gap.
NOTE: The manufacturer of this appliance does not take responsibility for damages caused by
chemicals or abrasive cleaning.
Enamel Parts
All enamel parts are cleaned only with sponge and soap water, or otherwise non-abrasive products.
Drying with a microfiber or soft cloth is preferred.
Stainless Steel, Aluminum, Painted Parts and Silkscreen Surfaces
Clean using an appropriate product. Always dry thoroughly.
IMPORTANT: These parts must be cleaned very carefully to prevent scratches and wear. Use a soft
cloth and acid-free soap.
Glass Control Panel (Only in some models)
Clean using an appropriate product. Always dry thoroughly.
Do not use hard abrasive cleaning agents or sharp-edged metal scratchers to clean the control panel
as they may scratch the surface and cause the glass to break.
IMPORTANT:
Cut off the appliance's power
before you start cleaning.
CAUTION:
Wait for the oven to cool
down and take care not to
touch the hot heating
elements inside the oven gap.
WARNING:
Do not use abrasive materials
or acidic detergents as they
will scratch the surface
without repair.
IMPORTANT:
Do not use steam cleaning
appliances as the humidity can
get into the oven and make
the appliance unreliable.
CAUTION:
Do not store foreign materials
inside the oven.
WARNING:
Do not use hard abrasive
materials or sharp-edged
metal scratchers as they will
scratch the surface beyond

~ 17 ~
repair and may cause the glass
to break.
Replacing the Oven Lamp
WARNING: To prevent electric shock, make sure the appliance is turned
off before replacing the lamp.
- Leave the oven gap and heating elements to
cool down.
- Cut off the power connection.
- Remove the protective cover "A" (Figure 10).
- Remove the bulb "B" and replace with
a bulb suitable for high temperatures (300°C)
that is 230 V or 220-240 V, E14 specifications
(Check the Watt power on the
bulb).
- Replace the protective cover "A".
Note: Replacing the oven bulb is not covered under warranty.
Installation and Removal of Side Rail Frames
- Place the side rail frames into the holes on the side walls inside the oven (Figure
11).
- Place the racks as shown.
- Follow the reverse order to remove.
Fig.-10
Fig.-11

~ 18 ~
Removing the Oven Door
Be careful, oven door is heavy. When in doubt, do not try to remove the
door.
Oven door can be removed as follows:
- Open the door to the end (Figure 13)
- Completely open the A arm on the left and right hinges (Figure 14).
- Hold the door as shown in Figure 12.
- Close the door slowly (Figure 15) until the left and right hinge arms A lock
on the B part of the door (Figure 14).
- Follow Ok C and remove the hinge hooks from their places (Figure 16).
- Place the door on a soft surface.
Fig.-12
Fig.-13
Fig.-15
Fig.-16
Fig.-13
Fig.-14

~ 19 ~
Placing the Oven Door Back
- Hold the door fast (Figure 17).
- Place the hinge latches in the gaps
and make sure that the gap is fitted into place
as in figure 18.
- Open the door to the end.
- As seen in Figure 19, completely close the
"A" arms on the left and right side.
- Close the door and make sure it fitted
into place.
Removing and Reinstalling the Inner Door Pane for Cleaning
If you want to clean the inner glass of the door, closely follow the precautions and
instructions.
Replacing the glass pane and the door wrongfully causes the oven to be damaged and
voids the warranty.
IMPORTANT!
- Oven door is heavy, take care. When in doubt, do not try to remove the door.
- Make sure the oven and all its parts are cooled down. Do not attempt to replace the
parts of a hot oven.
- Exercise maximum caution when working with the glass pane. Ensure the glass edges to
not crash into any surface. Glass might break.
- Do not use hard abrasive cleaning agents or sharp-edged metal scratchers to clean the
control panel - as they may scratch the surface and cause the glass to break.
- Do not use the oven if you see any damage (crack or break) on the glass pane. Call
Authorized Service or Customer Services.
- Make sure you replaced the glass pane correctly. Do not use the oven when glass pane is
not correctly placed.
- Do not force the glass pane if you are having difficulty removing or replacing it. Call
Authorized Service or Customer Service for help.
Note: The visits made for use or maintenance of the oven are not covered under warranty.
Fig.-17
Table of contents
Other Klugmann Oven manuals

Klugmann
Klugmann KO613TCX-PRO User manual

Klugmann
Klugmann KO613TCX User manual

Klugmann
Klugmann KO1076TFX User manual

Klugmann
Klugmann KSO6612.5ICX User manual

Klugmann
Klugmann KO612.8ICBL User manual

Klugmann
Klugmann KO611TCBM User manual

Klugmann
Klugmann KO609TFTX User manual

Klugmann
Klugmann KO611TCBM User manual

Klugmann
Klugmann KO610.1TCX User manual

Klugmann
Klugmann KO608TCX User manual
Popular Oven manuals by other brands

Miele
Miele DGC 6300 Operating and installation instructions

Frigidaire
Frigidaire FEB27T5DBC parts catalog

The Fire Brick
The Fire Brick P85 Instruction booklet

Viking
Viking VGSO260TLSS installation guide

Atag
Atag CSX46 D Series Instructions for use

Avantco Equipment
Avantco Equipment 177CVROV10RA user manual