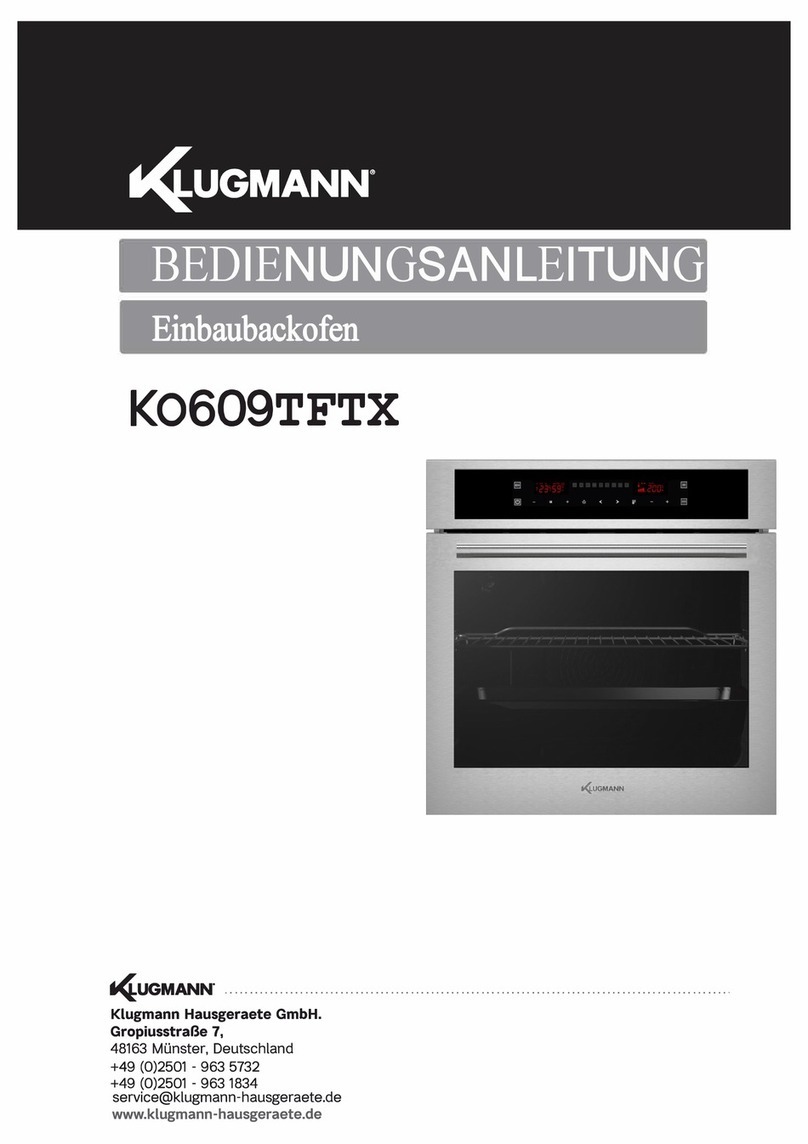
Klugmann KSO6612.5ICX User manual

KSO6612.5ICX
Steam Oven
INSTRUCTION MANUAL
Klugmann Hausgeraete GmbH.
Gropiusstraße 7,
48163 Münster, Deutschland
408-594060250149+
service@klugmann-hausgeraete.de
www.klugmann-hausgeraete.de

2
DEAR CUSTOMER,
The oven is exceptionally easy to use and extremely efcient. After reading the instruction
manual, operating the oven will be easy.
Before being packaged and leaving the manufacturer, the oven was thoroughly checked with
regard to safety and functionality.
Before using the appliance, please read the instruction manual carefully.
By following these instructions carefully you will be able to avoid any problems in using the
appliance.
It is important to keep the instruction manual and store it in a safe place so that it can be
consulted at any time.
It is necessary to follow the instructions in the manual carefully in order to avoid possible
accidents.
Caution!
Do not use the oven until you have read this instruction manual.
The oven is intended for household use only.
The manufacturer reserves the right to introduce changes which do not affect the
operation of the appliance.

3
Safety instructions ............................................................................................................. 4
Description of the appliance ............................................................................................. 8
Installation......................................................................................................................... 10
Operation........................................................................................................................... 12
Baking in the oven – practical hints ............................................................................... 48
Cleaning and maintenance.............................................................................................. 49
Specication ..................................................................................................................... 55
TABLE OF CONTENTS

4
SAFETY INSTRUCTIONS
Warning: The appliance and its accessible parts become hot
during use. Care should be taken to avoid touching heating
elements. Children less than 8 years of age shall be kept
away unless continuously supervised.
This appliance can be used by children aged from 8 years
and above and persons with reduced physical, sensory or
mental capabilities or lack of experience and knowledge if
they have been given supervision or instruction concerning
use of the appliance in a safe way and understand the ha-
zards involved. Children shall not play with the appliance.
Cleaning and user maintenance shall not be made by chil-
dren without supervision.
During use the appliance becomes hot. Care should be taken
to avoid touching heating elements inside the oven.
Accessible parts may become hot during use. Young children
should be kept away.
Warning: Do not use harsh abrasive cleaners or sharp metal
scrapers to clean the oven door glass since they can scratch
the surface, which may result in shattering of the glass.
Warning: Ensure that the appliance is switched off before re-
placing the lamp to avoid the possibillity of electric shock.
Use only original temperature probe supplied with the ap-
pliance
You should not use steam cleaning devices to clean the
appliance.

5
SAFETY INSTRUCTIONS
● Ensurethatsmallitemsofhouseholdequipment,includingconnectionleads,do
nottouchthehotovenastheinsulationmaterialofthisequipmentisusuallynot
resistant to high temperatures.
● Donotleavetheovenunattendedwhenfrying.Oilsandfatsmaycatchredue
to overheating or boiling over.
● Donotputpansweighingover15kgontheopeneddooroftheoven.
● Donotuseharshcleaningagentsorsharpmetalobjectstocleanthedooras
they can scratch the surface, which could then result in the glass cracking.
● Donotusetheovenintheeventofatechnicalfault.Anyfaultsmustbexedby
anappropriatelyqualiedandauthorisedperson.
● Intheeventofanyincidentcausedbyatechnicalfault,disconnectthepower
and report the fault to the service centre to be repaired.
● Therulesandprovisionscontainedinthisinstructionmanualshouldbestrictly
observed. Do not allow anybody who is not familiar with the contents of this
instruction manual to operate the oven.
● Theappliancehasbeendesignedonlyforcooking.Anyotheruse(forexample
forheating)doesnotcomplywithitsoperatingproleandmaycausedanger.
Danger of burns! Hot steam may escape when you open
the oven door. Be careful when you open the oven door du-
ring or after cooking. Do NOT lean over the door when you
open it. Please note that depending on the temperature the
steam can be invisible.

6
HOW TO SAVE ENERGY
Using energy in a respon-
sible way not only saves
money but also helps the
environment. So let’s save
energy! And this is how you
can do it:
●Do not uncover the pan too often (a wat-
ched pot never boils!).
Do not open the oven door unnecessarily
often.
●Only use the oven when cooking larger
dishes.
Meat of up to 1 kg can be prepared more
economically in a pan on the cooker hob.
●Make use of residual heat from the
oven.
If the cooking time is greater than 40 minutes
switch off the oven 10 minutes before the
end time.
Important! When using the timer, set appro-
priately shorter cooking times according to
the dish being prepared.
●Make sure the oven door is properly
closed.
Heat can leak through spillages on the door
seals. Clean up any spillages immediately.
●Do not install the cooker in the direct
vicinity of refrigerators/freezers.
Otherwise energy consumption increases
unnecessarily.

7
During transportation, pro-
tective packaging was used
to protect the appliance
against any damage. After
unpacking, please dispose
of all elements of packaging
in a way that will not cause
damage to the environment.
All materials used for packaging the applian-
ce are environmentally friendly; they are
100% recyclable and are marked with the
appropriate symbol.
Caution! During unpacking, the packaging
materials (polythene bags, polystyrene
pieces, etc.) should be kept out of reach of
children.
UNPACKING DISPOSAL OF THE APPLIANCE
Old appliances should not sim-
ply be disposed of with normal
household waste, but should
be delivered to a collection and
recycling centre for electric and
electronicequipment.Asymbol
shown on the product, the
instruction manual or the packaging shows
that it is suitable for recycling.
Materials used inside the appliance are
recyclable and are labelled with information
concerning this. By recycling materials or
other parts from used devices you are making
asignicantcontributiontotheprotectionof
our environment.
Information on appropriate disposal centres
for used devices can be provided by your
local authority.

8
Oven door
handle
Electronic pro-
grammer
On/off switch
Child Lock
Water container
drawer
DESCRIPTION OF THE APPLIANCE
Built-in USB
connector

9
Cookerttings::
Baking tray
Grill grate
(drying rack)
Roasting tray
Temperature probe
Shelf supports Steam generator
Perforated bowl
Solid bowl
SPECIFICATIONS OF THE APPLIANCE

10
INSTALLATION
Installing the oven
● Thekitchenareashouldbedryandaired
and equipped with efcient ventillation.
When installing the oven, easy access to
all control elements should be ensured.
● This is aY–type design built–in oven,
which means that its back wall and one
side wall can be placed next to a high
piece of furniture or a wall. Coating or
veneerusedonttedfurnituremustbe
applied with a heat–resistant adhesive
(100°C). This prevents surface deforma-
tion or detachment of the coating.
● Hoodsshouldbeinstalledaccordingto
the manufacturer’s instructions.
● Make an opening with the dimensions
given in the diagram for the oven to be
tted.
● Makesurethemainsplugisdisconnected
and then connect the oven to the mains
supply.
● Inserttheovencompletelyintotheope-
ning without allowing the four screws in
the places shown in the diagram to fall
out.

11
INSTALLATION
● Theovenismanufacturedtoworkwith
a one-phase alternating current (230V
1N~50 Hz) and is equipped with a 3
x 1,5 mm2connection lead of 1.5 mm
length with a plug including a protection
contact.
● Aconnectionsocketforelectricitysupply
should be equipped with a protection
pin and may not be located above the
cooker. After the cooker is positioned, it is
necessary to make the connection socket
accessible to the user.
● Beforeconnectingtheoventothesocket,
check if:
- the fuse and electricity supply are able to
withstand the cooker load,
- theelectricitysupplyisequippedwithan
efcaciousgroundsystemwhichmeets
therequirements ofcurrent standards
and provisions,
- the plug is within easy reach.
Electrical connection
Important!
Ifthexedpowersupplycableisdamaged,
it should be replaced at the manufacturer
or at an authorized servicing outlet, or by a
qualiedpersontoavoiddanger.

12
OPERATION
Before using the appliance for
the rst time
Important!
To clean the oven chamber use only
warm water and a small amount of
washing-upliquid.
There is a special PC application that will
help you use the appliance and update
its rmware.
This application allows to upload and up-
date the recipes, photos, as well as apply
appliance rmware updates. To do the
above you also need a USB Flash Drive,
which is enclosed with the appliance.
Every time if you wish to make any chang-
es to the appliance you must rst save the
existing oven data on the ash drive. To do
this insert the ash drive into the USB port
in the oven. Then enter Settings on the
control panel, and then rmware update
and follow the on-screen messages.
The application installer can be found on
the supplied ash drive or can be down-
loaded from Amica's website at www.
amicasmart.com after logging.
l Remove packaging, clean the interior of
the oven,
l Takeoutandwashtheoventtingswith
warmwater anda littlewashing-up liq-
uid,
l Switch on the ventilation in the room or
open a window,
l Heat up the oven (to a temperature of
250°C for approximately 30 minutes),
remove any stains and wash the interior
carefully. (See section: Using the control
panel),
Important!
The oven is equipped with a touch
screen display control panel. The
control panel includes two touch
sensors:
On/off switch
Child Lock
To activate each touch sensor, touch
the glass above the sensor (indicated
by a pictogram). An acoustic signal
will be heard, which was selected in
the menu. (See section: Using the
control panel),
Touch sensor surfaces must be
kept clean.

13
OPERATION
Using the control panel
Notications bar
Thenotications bar shows the following
information:
- The symbol and / or name of the function
-Fivenoticationicons,
- The current time.
Noticationiconsarealwaysdisplayednear
the current time. If there are icons displayed
on positions 2, 3, and 4, and during the ap-
pliance operation icon on position 3 disap-
pears, then icon on position 2 will move to
position 3.
Actions bar
1 BACK - touch to go back to the previous
page/menu or up one level
2 COOK BOOK - touch to open the cook
book,
3 SLIDE SHOW - touch to open the slide
show,
3 OVEN LIGHTING - touch to turn the oven
lighting on/off,
4 SHORTCUTS - touch to display the default
and user programmable shortcuts, as
shown below,
5 USER INSTRUCTIONS - touch to open the
user instructions,
6 FREEZE - touch to freeze the touch screen
display if you want to wipe it clean during
the appliance operation
7 START/STOP/OK - touch to start/stop a
fuctionorconrmasetting

14
OPERATION
Off mode, current time, operation
In off mode, the display is off and only the
touch sensor is back-lit on the control
panel.
Touch to display the current time. Touch
sensor backlight is turned off. The current
time and date are displayed. The residual
heat indicator is also displayed when oven
temperature exceeds 50°C.
When the appliance displays current time,
touch the screen anywhere to activate the
appliance and display the main menu. All
touch sensors will light up.
When the appliance is activated, touch to
display the current time and date.

15
OPERATION
Select Language
After connecting the appliance to the mains,
the user is prompted to select the menu
language.
Select your preferred language from the
rotating carousel display by swiping your
ngerleftorrightacrossthescreen.Stopthe
carouselandtouchthechosencountryag
(within the box) and touch OK to select the
menu language.
After a power outage (or when the mains
power is cut and restored), the appliance
remembers the last language setting.
Set current time
Once your preferred language is set you
now need to confirm the current time by
touching or set the time using the slider
orthe+/-softkeys.TouchOKtoconrmthe
current time.
Time can be set in the range from 0:00 to
23:59 for 24-hour clock system or from 0:00
to 12:00 for the 12-hour clock system.
When current time is set, the appliance dis-
plays the current time.
Touch in standby to display current time.
Touch the screen anywhere to activate
the appliance and display the main menu.
Rotate the carousel and select the Settings
and then Time. Touch the icon on the front
positiondirectlyortouchOKtoconrmyour
selection.

16
OPERATION
Set the current date
Oncethecurrenttimeisconrmed,thecur-
rentdate is displayed. Conrm the current
time by touching OK or set the date using
the slider or the +/- soft keys.
Whensettingthedateyourstsettheyear
(highlighted in black), then months and days.
Touch +/- soft keys or use the slider bar to set
the year. When the desired year is set, touch
the month, at which point it becomes active,
while the year and day are inactive. When the
desired month is set, touch the day, at which
point it becomes active, while the year and
monthareinactive.TouchOKtoconrmthe
current date. When the date is set, the appli-
ance displays current time.
Main Menu
Touch in standby to display current time.
Touch the screen anywhere to activate the
appliance and display the main menu.
Select the desired main menu item from the
rotating carousel display by swiping your
ngerleftorrightacrossthescreen.Stopthe
carousel and touch the chosen menu item
to enter the submenu. Another way to select
the main menu item is to touch OK when the
carousel is stopped.
If you do not take any action within 60 sec-
onds, the appliance will display the current
time. Touch the BACK icon to exit the Main
Menu and display the current time.
The following main menu items are avail-
able:
- Settings
- Heating functions
- Preset programmes
- User programmes
- Cookbook
- Cleaning,
- Slide show,
- Firmware update

17
OPERATION
Main Menu \ Settings
Stop the carousel and touch the Settings
menu item to enter the submenu. Another
way to select the Settings menu item is to
touch OK when the carousel has stopped.
The following Settings menu items are avail-
able:
- Language
- Time
- Lighting
- Tones
- Themes
- Brightness
- Service
- Special settings.
Swipeyourngeracrossthescreen to ro-
tate the menu items. Stop the carousel and
touch the chosen menu item to enter the
submenu. Another way to select the chosen
menu item is to touch OK when the carousel
is stopped.
If the user takes no action within 60 seconds,
the appliance will display the current time.
Touch the BACK icon to exit the Settings
menu to the main menu and then display the
current time.
Main Menu \ Settings \ Language
Stop the carousel and touch the Language
menu item to enter the submenu. Another
way to select the Settings menu item is to
touch OK when the carousel has stopped.
The following language menu items are
available:
- Deutsch,
- English,
- Polski,
-Пopyccки,
-Česky,
- Srbski,
- Lietuviškai,
- Eesti,
- Latviski,
- Français,
- Español,
- Türkçe,
- Svenska,
- Norsk,
- Suomi,
- Dansk,
- Italiano.
For details on how to select the menu lan-
guage, please refer to the Select language
section.
If you do not take any action within 60 sec-
onds, the appliance will display the current
time. Touch the BACK icon to exit from
the Language menu to the Settings menu,
the Main Menu and then display the current
time.
Main Menu \ Settings \ Time
Stop the carousel and touch the Time menu
item to enter the submenu. Another way to
select the Settings menu item is to touch OK
when the carousel has stopped.
The following Time menu items are avail-
able:

18
OPERATION
Setting Duration (for a heating function)
When you select any heating function the
display will look as shown below (before
setting the Duration or End time) - the screen
is dimmed.
If you do not start the programme or modify
the Duration setting within 60 seconds, the
appliance will display the current time. Touch
the BACK icon to exit the current screen.
When you start the programme the START
icon is replaced with the STOP icon.
Touch the screen within the box to set Dura-
tion. This will bring up the Duration screen,
as shown below.
The symbol will flash in the top right
corner.
If you do not set or accept Duration within 10
seconds, the selected heating function screen
will be displayed. Touch to exit the Time
setting screen at any time.
- Calendar
- Date
- Time
- Timer
- Clock type
- Time format
Swipeyourngeracrossthescreen to ro-
tate the menu items. Stop the carousel and
touch the chosen menu item to enter the
submenu. Another way to select the chosen
menu item is to touch OK when the carousel
is stopped.
If the user takes no action within 60 seconds,
the appliance will display the current time.
Touch the BACK icon to exit from the Time
menu to the Settings menu, the Main Menu
and then display the current time.
Main Menu \ Settings \ Date
For details on how to set current date, please
refer to the Set the current date section.
Main Menu \ Settings \ Time / current
time
For details on how to set current time, please
refer to the Set the current time section.

19
OPERATION
Touch +/- soft keys or use the slider bar to set
therequiredDuration.TouchOKtoconrm
the Duration setting. The Duration setting
screen will close. The icon will be shown
inthe upper corner on the notication bat.
The appliance will show time countdown
and the animated red progress bar below
End Time.
Once the Duration has elapsed, an acoustic
signal is sounded (2 beeps / pause / 2 beeps)
and the display backlight is ashing. The
sequenceisrepeatedevery3seconds.The
iconisashingaswell.Themaximum
duration of an acoustic signal is 5 minutes.
Touch OK or any place on the screen to
acknowledge and mute the acoustic signal.
Afterwards the appliance will display the
inactive Duration screen. If you do not start
the programme again within 60 seconds, the
appliance will display the current time.
Set Duration and End Time (for a heating
function)
A) Set the Duration.
For more details on how to Set the Duration,
please prefer to the Set the Duration (for the
heating function) section.
B) Set the End Time.
To set the End Time, Duration must be set on
the Duration setting screen. The symbol
will be displayed.
Touch to edit End Time. The symbol
willash.Iftheusertakesnoactionwithin
10 seconds, the selected heating function
screen will be displayed with the previously
set Duration
Touch again while isstillashing.You
will now be able to set End Time. The sym-
bolstopsashingandthe symbol starts
toash.Iftheusertakesnoactionwithin
10 seconds, the selected heating function
screen will be displayed with the previously
set Duration
Touch +/- soft keys or use the slider bar to
settherequiredEndTime.Touch to con-
rmtheEndTimesetting.TheEndTime
setting screen will close. Current time will
be shown.
The and symbols will be shown in the
upper right corner and the time remaining
to start is shown on the animated progress
bar.
This is show on the on the animated progress
bar below the time.
If the user takes no action within 60 seconds,
the appliance will display the current time (the
settings are retained). On the current time
screen, the End Time and Duration
iconsareshownonthenoticationbar.Both
iconashuntiltheovenprogrammeisstarted.
When you touch the screen anywhere the ap-
pliance will display the last edited settings.

20
OPERATION
C) Appliance operation in selected mode
When the current time reaches the start time,
the appliance will start the selected heating
function. The display will show the Duration
screen. When the programme is started the
icon is extinguished and the icon con-
tinues to be displayed. Once the Duration has
elapsed, an acoustic signal is sounded and
thedisplaybacklightisashing.The icon
isashingaswell.Themaximumduration
of an acoustic signal is 5 minutes.
Touch OK or any place on the screen to
acknowledge and mute the acoustic signal.
Afterwards the appliance will display the inac-
tive Duration screen and the START button
will be displayed.
If you do not start the programme again within
60 seconds, the appliance will display the
current time.
Main Menu \ Settings \ Time \ Timer
Stop the carousel and touch the Timer menu
item to enter the submenu. Another way to
select the Timer menu item is to touch OK
when the carousel has stopped.
This will bring up the Duration screen, as
shown below, with the iconashing.
If you do not set or accept Duration within 10
seconds, the Timer screen will be displayed.
Touch the BACK icon to exit the Timer
menu.
Table of contents
Other Klugmann Oven manuals

Klugmann
Klugmann KO613TCX-PRO User manual

Klugmann
Klugmann KO611TCBM User manual

Klugmann
Klugmann KO612.8ICBL User manual

Klugmann
Klugmann KO1772TFT User manual

Klugmann
Klugmann KO609TCX User manual

Klugmann
Klugmann KO1676TCPI User manual

Klugmann
Klugmann KO609TFTX User manual

Klugmann
Klugmann KGO600GGFX User manual

Klugmann
Klugmann KO608TCX User manual
Klugmann
Klugmann KO613TCX User manual