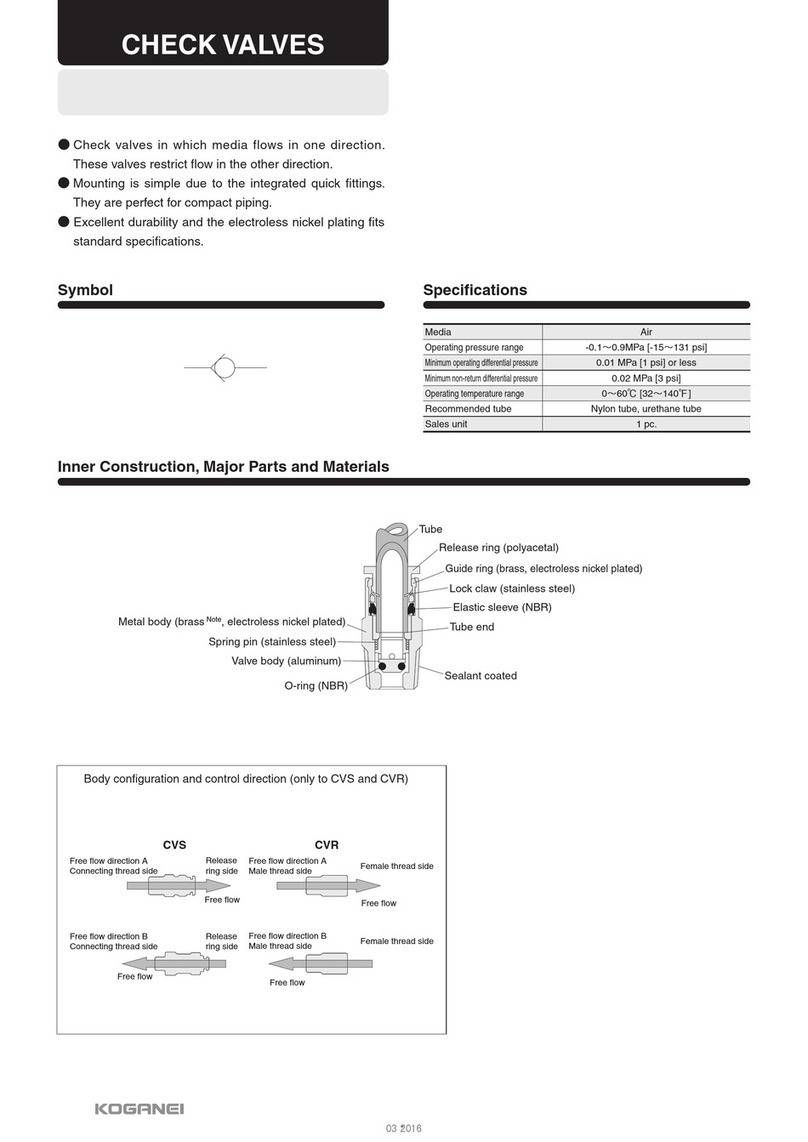
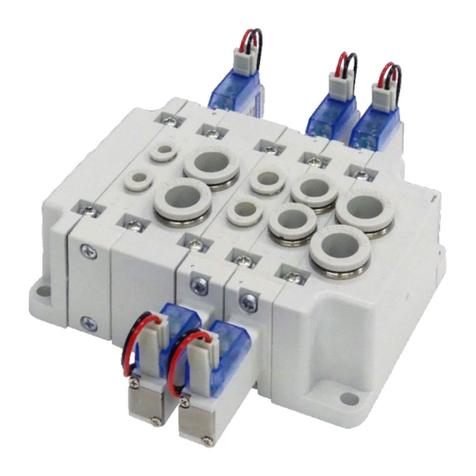
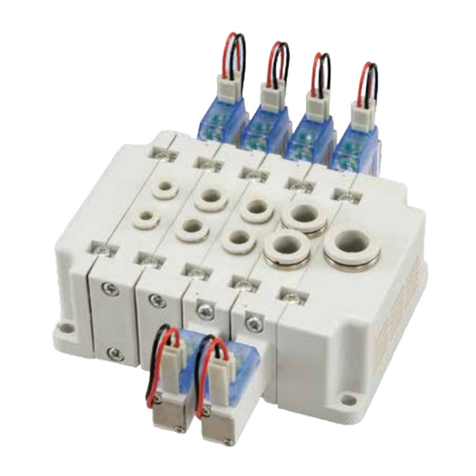
Koganei F Series User manual

Machine Automation Controller NJ/NX-series
EtherNet/IPTM
Connection Guide
KOGANEI CORPORATION
Manifold Solenoid Valve
(F Series)
P691-E1-01

About Intellectual Property Rights and Trademarks
Microsoft product screen shots reprinted with permission from Microsoft Corporation.
Windows is a registered trademark of Microsoft Corporation in the USA and other countries.
ODVA and EtherNet/IPTM are trademarks of ODVA.
EtherCAT® is registered trademark and patented technology, licensed by Beckhoff Automation
GmbH, Germany.
Sysmac is a trademark or registered trademark of OMRON Corporation in Japan and other
countries for OMRON factory automation products.
Company names and product names in this guide are the trademarks or registered trademarks
of their respective companies.

Table of Contents
1. Related Manuals.......................................................................................... 1
2. Terms and Definitions ................................................................................ 2
3. Precautions.................................................................................................. 3
4. Overview ...................................................................................................... 4
5. Applicable Devices and Device Configuration........................................ 5
5.1. Applicable Devices.................................................................................. 5
5.2. Device Configuration............................................................................... 6
6. EtherNet/IP Settings.................................................................................... 8
6.1. Parameters.............................................................................................. 8
6.2. Global Variable........................................................................................ 9
6.3. Tag Set.................................................................................................... 9
7. EtherNet/IP Connection Procedure......................................................... 10
7.1. Work Flow ............................................................................................. 10
7.2. KOGANEI Manifold Solenoid Valve Setup ........................................... 12
7.3. Controller Setup.................................................................................... 19
7.4. Network Settings................................................................................... 28
7.5. EtherNet/IP Communication Status Check........................................... 38
8. Initialization Method.................................................................................. 43
8.1. Initializing a Controller........................................................................... 43
8.2. Initializing a KOGANEI Manifold Solenoid Valve.................................. 44
9. Revision History........................................................................................ 45

1.Related Manuals
1
1. Related Manuals
To ensure system safety, make sure to always read and follow the information provided in all
Safety Precautions and Precautions for Safe Use in the manuals for each device which is
used in the system.
The table below lists the manuals provided by KOGANEI CORPORATION (hereinafter
referred to as "KOGANEI") and OMRON Corporation (hereinafter referred to as "OMRON"),
which pertain to this guide.
Manufacturer
Cat. No.
Model
Manual name
OMRON
W500
NJ501-[]5[][]
NJ501-[]4[][]
NJ501-[]3[][]
NJ301-12[][]
NJ301-11[][]
NJ101-10[][]
NJ101-90[][]
NJ-series CPU Unit
Hardware User's Manual
OMRON W535 NX701-17[][]
NX701-16[][]
NX-series CPU Unit
Hardware User's Manual
OMRON W578
NX1P2-11[][][][]
NX1P2-10[][][][]
NX1P2-90[][][][]
NX-series NX1P2 CPU Unit
Hardware User's Manual
OMRON
W501
NX701-17[][]
NX701-16[][]
NX1P2-11[][][][]
NX1P2-10[][][][]
NX1P2-90[][][][]
NJ501-[]5[][]
NJ501-[]4[][]
NJ501-[]3[][]
NJ301-12[][]
NJ301-11[][]
NJ101-10[][]
NJ101-90[][]
NJ/NX-series CPU Unit
Software User's Manual
OMRON W506 NJ/NX-series
CPU Unit Built-in EtherNet/IPTM Port
User's Manual
OMRON W504 SYSMAC-SE2[][][] Sysmac Studio Version 1
Operation Manual
OMRON 0969584-7 W4S1-05[]
W4S1-03B Switching Hub W4S1-series
Users Manual
KOGANEI BK-HV045 YS7M1[] (16 outputs)
YS7M3[] (32 outputs) EtherNet/IP Compliant
Serial Transmission Compatible Manifold
User’s Manual
KOGANEI Y142171
F10 Series
F15 Series
Solenoid Valves F Series
Serial Transmission Compatible Manifold
Instruction Manual

2.Terms and Definitions
2
2. Terms and Definitions
Term Explanation and Definition
Node A controller and a device are connected to an EtherNet/IP network via
EtherNet/IP ports. EtherNet/IP recognizes each EtherNet/IP port connected
to the network as one node. When a device with two EtherNet/IP ports is
connected to the EtherNet/IP network, EtherNet/IP recognizes this device as
two nodes.
EtherNet/IP achieves the communications between controllers or the
communications between a controller and a device by exchanging data
between these nodes connected to the network.
Tag A minimum unit of the data that is exchanged on the EtherNet/IP network is
called a tag. The tag is defined as a network variable or as a physical
address, and it is assigned to the memory area of each device.
Tag set In the EtherNet/IP network, a data unit that consists of two or more tags can
be exchanged. The data unit consisting of two or more tags for the data
exchange is called a tag set.
Up to eight tags can be configured per tag set for OMRON controllers.
Tag data link In EtherNet/IP, the tag and tag set can be exchanged cyclically between
nodes without using a user program. This feature is called a tag data link.
Connection A connection is used to exchange data as a unit within which data
concurrency is maintained. The connection consists of tags or tag sets.
Creating a concurrent tag data link between specified nodes is called a
"connection establishment". When a connection is established, tags or tag
sets that configure the connection are exchanged between specified nodes
concurrently.
Connection
type There are two kinds of connection types for the tag data link connection.
One is a multi-cast connection, and the other is a unicast (point-to-point)
connection. The multi-cast connection sends an output tag set in one packet
to more than one node. The unicast connection separately sends one output
tag set to each node. Therefore, multi-cast connections can reduce a
communications load if one output tag set is sent to more than one node.
Originator and
target To perform tag data links, one node requests the opening of a
communications line called a "connection".
The node that requests to open the connection is called an "originator", and
the node that receives the request is called a "target".
Tag data link
parameter A tag data link parameter is the setting data to perform tag data links.
It includes the data to set tags, tag sets, and connections.
EDS file A file that describes the number of I/O points for an EtherNet/IP device and
parameters that can be set via EtherNet/IP.

3.Precautions
3
3. Precautions
(1) Understand the specifications of devices which are used in the system. Allow some
margin for ratings and performance. Provide safety measures, such as installing a safety
circuit, in order to ensure safety and minimize the risk of abnormal occurrence.
(2) To ensure system safety, make sure to always read and follow the information provided
in all Safety Precautions and Precautions for Safe Use in the manuals for each device
which is used in the system.
(3) The user is encouraged to confirm the standards and regulations that the system must
conform to.
(4) It is prohibited to copy, to reproduce, and to distribute a part or the whole of this guide
without the permission of OMRON Corporation.
(5) The information contained in this guide is current as of October 2017. It is subject to
change for improvement without notice.
The following notations are used in this guide.
Indicates a potentially hazardous situation which, if not avoided,
may result in minor or moderate injury, or may result in serious
injury or death. Additionally there may be significant property
damage.
Indicates a potentially hazardous situation which, if not avoided,
may result in minor or moderate injury or property damage.
Precautions for Correct Use
Precautions on what to do and what not to do to ensure proper operation and performance.
Additional Information
Additional information to read as required.
This information is provided to increase understanding or make operation easier.
Symbol
The filled circle symbol indicates operations that you must do.
The specific operation is shown in the circle and explained in the text.
This example shows a general precaution for something that you must do.

4.Overview
4
4. Overview
This guide describes procedures for connecting a KOGANEI Solenoid Valve F Series Serial
Transmission Compatible Manifold (hereinafter referred to as the "Manifold Solenoid Valve")
to an OMRON NJ/NX-series Machine Automation Controller (hereinafter referred to as the
"Controller") via EtherNet/IP and for checking their communication status.
Refer to Section 6. EtherNet/IP Settings and Section 7. EtherNet/IP Connection Procedure to
understand setting methods and key points to operate EtherNet/IP tag data links.

5.Applicable Devices and Device Configuration
5
5. Applicable Devices and Device Configuration
5.1. Applicable Devices
The applicable devices are as follows:
Manufacturer
Name
Model
OMRON
NJ/NX-series CPU Unit
NX701-17[][]
NX701-16[][]
NX1P2-11[][][][]
NX1P2-10[][][][]
NX1P2-90[][][][]
NJ501-[]5[][]
NJ501-[]4[][]
NJ501-[]3[][]
NJ301-12[][]
NJ301-11[][]
NJ101-10[][]
NJ101-90[][]
KOGANEI EtherNet/IP Compliant
Serial Transmission Block YS7M1[]
YS7M3[]
KOGANEI Manifold Solenoid Valve F10 Series
F15 Series
Precautions for Correct Use
In this guide, the devices with models and versions listed in 5.2. Device Configuration are
used as examples of applicable devices to describe the procedures for connecting the
devices and checking their connection.
You cannot use devices with versions lower than the versions listed in 5.2.
To use the above devices with models not listed in 5.2. or versions higher than those listed in
5.2., check the differences in the specifications by referring to the manuals before operating
the devices.
Additional Information
This guide describes the procedures for establishing the network connection.
It does not provide information on operation, installation, wiring method, device functionality,
or device operation, which is not related to the connection procedures.
Refer to the manuals or contact the device manufacturer.
Additional Information
Contact the device manufacturer for Manifold Solenoid Valves connectable to the Serial
Transmission Blocks.

5.Applicable Devices and Device Configuration
6
5.2. Device Configuration
This guide describes the connection procedures using an NJ-series Controller.
The hardware components to reproduce the connection procedures are as follows:
Manufacturer
Name
Model
Version
OMRON
NJ-series CPU Unit
(Built-in EtherNet/IP port)
NJ501-1500 Ver.1.14
OMRON
Power Supply Unit
NJ-PA3001
OMRON Switching hub W4S1-05C Ver.1.0
- Switching hub power supply (24 VDC) -
OMRON
Sysmac Studio
SYSMAC-SE2[][][]
Ver.1.18
OMRON
Network Configurator
(Included in
Sysmac Studio)
Ver.3.61
-
Personal computer (OS: Windows 7)
-
- USB cable
(USB 2.0 type B connector) -
- LAN cable (STP (shielded,
twisted-pair) cable of Ethernet
category 5 or higher)
-
KOGANEI EtherNet/IP Compliant
Serial Transmission Block
YS7M3L Ver.1.1
KOGANEI
Manifold Solenoid Valve
F10M16SJ
KOGANEI
EDS file (for 32 outputs)*
YS7M3_v1_1.eds
Ver.1.0
KOGANEI icon file YS7Mn.ico
- Power supply for
Manifold Solenoid Valve (24 VDC) -
Rockwell
Automation, Inc.
BOOTP/DHCP Tool
(BootP DHCP EtherNet/IP Tool)
- Ver.3.01.00
*If you use a Serial Transmission Block with 16 outputs, use the EDS file for 16 outputs
"YS7M1_v1_1.eds".
Precautions for Correct Use
Prepare the EDS file listed above beforehand.
To obtain the EDS file, contact KOGANEI CORPORATION.
NJ501-1500
(Built-in EtherNet/IP port)
USB cable
LAN cable
W4S1-05C YS7M3L + F10M16SJ
Personal computer
(Sysmac Studio and
BOOTP/DHCP Tool installed,
OS: Windows 7)
Power supply for
Manifold Solenoid Valve
Switching hub power supply
LAN cable

5.Applicable Devices and Device Configuration
7
Precautions for Correct Use
When there is an icon file specific to the device, the icon file and the EDS file must be stored
in the same folder.
Precautions for Correct Use
Update Sysmac Studio and Network Configurator to the versions specified in this Clause 5.2.
or to higher versions. If you use a version higher than the one specified, the procedures and
related screenshots described in Section 7. and subsequent sections may not be applicable.
In that case, use the equivalent procedures described in this guide by referring to the Sysmac
Studio Version 1 Operation Manual (Cat. No. W504) and Network Configurator Online Help.
Additional Information
For power supply specifications for the switching hub, refer to the Switching Hub
W4S1-series Users Manual (Cat. No. 0969584-7).
Additional Information
For power supply specifications for the Manifold Solenoid Valve, refer to the EtherNet/IP
Compliant Serial Transmission Compatible Manifold User’s Manual (BK-HV045).
Additional Information
The system configuration in this guide uses USB for the connection between the personal
computer and the Controller. For information on how to install the USB driver, refer to A-1
Driver Installation for Direct USB Cable Connection of the Sysmac Studio Version 1
Operation Manual (Cat. No. W504).
For NX1P2 Controllers, there is no need to install the USB driver because they do not have a
USB port.
Additional Information
The NX1P2 Controller, if used, should be connected to your personal computer with an
Ethernet cable. For information on how to connect the cable, refer to 6-2 Going Online with a
Controller of the Sysmac Studio Version 1 Operation Manual (Cat. No. W504).
Additional Information
In this guide, ''BOOTP/DHCP Tool'' by Rockwell Automation Inc. is used to set the IP address
of the Manifold Solenoid Valve.
"BOOTP/DHCP Tool" can be downloaded from the Rockwell Automation Inc. website.

6.EtherNet/IP Settings
8
6. EtherNet/IP Settings
This section describes the parameters, global variable and tag set that are all defined in this
guide.
6.1. Parameters
The parameters set in this guide are shown below.
6.1.1. EtherNet/IP Communications Settings
The parameters required to connect the Controller and the Manifold Solenoid Valve via
EtherNet/IP are shown below.
Setting item Controller (Node 1) Manifold Solenoid Valve (Node 2)
IP address 192.168.250.1 192.168.250.2
Subnet mask 255.255.255.0 255.255.255.0

6.EtherNet/IP Settings
9
6.2. Global Variable
The Controller treats the data in tag data links as global variables.
The following shows the global variable and related settings.
Name Data type Network
Publish Manifold Solenoid Valve
data allocation Data size
(bytes)
EIP002_OUT BOOL[32] Output Solenoid output 4
■Relationship between the global variable and solenoid numbers
EIP002_OUT
Array No.
[15]
[14]
[13]
[12]
[11]
[10]
[9] [8] [7] [6] [5] [4] [3] [2] [1] [0]
Solenoid No. 16 15 14 13 12 11 10 9 8 7 6 5 4 3 2 1
Array No.
[31]
[30]
[29]
[28]
[27]
[26]
[25]
[24]
[23]
[22]
[21]
[20]
[19]
[18]
[17]
[16]
Solenoid No. 32 31 30 29 28 27 26 25 24 23 22 21 20 19 18 17
Additional Information
For details on setting the data in tab data links for the Manifold Solenoid Valve, refer to 7
Relationship between I/O data allocation and solenoid valves of the EtherNet/IP Compliant
Serial Transmission Compatible Manifold User’s Manual (BK-HV045).
Additional Information
With Sysmac Studio, two methods can be used to specify an array for a data type.
After specifying, (1) is converted to (2), and the data type is always displayed as (2).
(1)BOOL[32] / (2) ARRAY[0..31] OF BOOL
In this guide, the data type is simplified by displaying BOOL[32].
(The example above means a BOOL data type with thirty-two array elements.)
6.3. Tag Set
The tag set for the originator device to perform tag data links is shown below.
■Output area (Controller to Manifold Solenoid Valve)
Tag set name (Originator variable) Data size (byte)
EIP002_OUT* 4
Tag name (Global variable) Data size (byte)
EIP002_OUT 4
*The tag name is used as a tag set name in this guide as only one tag is assigned to the tag
set.

7.EtherNet/IP Connection Procedure
10
7. EtherNet/IP Connection Procedure
This section describes the procedures for connecting the Manifold Solenoid Valve and the
Controller via EtherNet/IP. The explanations of the procedures for setting up the Controller
and the Manifold Solenoid Valve given in this guide are based on the factory default settings.
For the initialization, refer to Section 8. Initialization Method.
7.1. Work Flow
Take the following steps to connect the Manifold Solenoid Valve and the Controller via
EtherNet/IP to perform tag data links.
7.2. KOGANEI Manifold Solenoid
Valve Setup Set up the KOGANEI Manifold Solenoid Valve.
↓
7.2.1. Hardware Settings Connect the cables to the Manifold Solenoid Valve.
↓
7.2.2. Parameter Settings Set the IP address of the Manifold Solenoid Valve.
↓
7.3. Controller Setup Set up the Controller.
↓
7.3.1. IP Address Settings Start Sysmac Studio and set the IP address of the
Controller.
↓
7.3.2. Setting Global Variables Set a global variable to use for tag data links, and
create and export a CSV file in order to use as a tag
with Network Configurator.
↓
7.3.3. Transferring the Project Data Go online with Sysmac Studio and transfer the
project data to the Controller.
↓
7.4. Network Settings Set EtherNet/IP tag data links.
↓
7.4.1. Starting Network Configurator
and Installing the EDS file Start Network Configurator and install the EDS file.
↓
7.4.2. Uploading the Network
Configuration Go online with Network Configurator and upload the
network configuration.
↓
7.4.3. Tag Registration Import the created CSV file for use with Network
Configurator, and register a tag.
↓

7.EtherNet/IP Connection Procedure
11
7.4.4. Setting a Connection Associate the tag of the target device with the tag of
the originator device.
↓
7.4.5. Transferring the Tag Data Link
Parameters Transfer the tag data link parameters to the
Controller.
↓
7.5. EtherNet/IP Communication
Status Check Confirm that the EtherNet/IP tag data links perform
normally.
↓
7.5.1. Checking the Connection
Status Check the connection status of the EtherNet/IP
network.
↓
7.5.2. Checking Sent Data Check that correct data is sent.

7.EtherNet/IP Connection Procedure
12
7.2. KOGANEI Manifold Solenoid Valve Setup
Set up the KOGANEI Manifold Solenoid Valve.
7.2.1. Hardware Settings
Connect the cables to the Manifold Solenoid Valve.
Precautions for Correct Use
Make sure that the power supplies are OFF when you set up.
If either of them is ON, the settings described in the following steps and subsequent
procedures may not be applicable.
1
Make sure that Switching hub
power supply and Power supply
for Manifold Solenoid Valve are
OFF.
2
Check the position of the
connectors by referring to the
figure on the right.
Power supply, communication, and FG sections
3
Connect Switching hub and
Communication connector (L/A
IN) on Manifold Solenoid Valve
with a LAN cable.
Connect Switching hub and
Personal computer with a LAN
cable.
4
Connect Power supply for
Manifold Solenoid Valve to
Power supply connector (PWR)
on Manifold Solenoid Valve.
*For details on power supply
specifications and connections
for Manifold Solenoid Valve,
refer to the EtherNet/IP
Compliant Serial Transmission
Compatible Manifold User’s
Manual (BK-HV045).
LAN cable LAN cable
Personal computer
Switching hub
Manifold Solenoid Valve
Power supply for Manifold Solenoid Valve
Manifold Solenoid Valve

7.EtherNet/IP Connection Procedure
13
5
Connect Switching hub power
supply to Switching hub.
Power supply for Manifold Solenoid Valve
Switching hub
Switching hub power supply

7.EtherNet/IP Connection Procedure
14
7.2.2. Parameter Settings
Set the IP address of the Manifold Solenoid Valve.
The IP Address is set using the BOOTP/DHCP Tool.
Install the Tool on your personal computer beforehand.
1
Make sure that Manifold
Solenoid Valve and Switching
hub are powered OFF.
2
Set the IP address and subnet
mask of Personal computer as
shown below.
・IP address: 192.168.250.10
・Subnet mask: 255.255.255.0
*It is necessary to set the IP
address of Personal computer
to "192.168.250.* " so that the
IP address of Manifold
Solenoid Valve can be set to
"192.168.250.2".
The IP address set in this guide
is "192.168.250.10".
Screenshot of Windows network settings
3
Check the positions of LEDs and
Host address setting switch by
referring to the figure on the
right.
4
Check that Host address setting
switch is set to 000 (Set the IP
address by software).
*If not, set the switch to 000.

7.EtherNet/IP Connection Procedure
15
5
Turn ON Switching hub.
*BOOTP/DHCP Tool cannot be
started when Switching hub is
OFF.
6
Start BOOTP/DHCP Tool on
Personal computer.
7
Select Network Settings from
the Tools Menu.
8
The Network Settings Dialog
Box is displayed.
Enter the subnet mask in the
Subnet Field.
Subnet: 255.255.255.0
Click OK.
Power supply for Manifold Solenoid Valve
Switching hub
Switching hub power supply

7.EtherNet/IP Connection Procedure
16
9
Turn ON Manifold Solenoid
Valve. Check that the MS
indicator (LED) on Manifold
Solenoid Valve flashes green
(IP address setting in progress).
*A DHCP request will start to be
sent by Manifold Solenoid
Valve once turning it ON.
*If the MS indicator (LED) on
Manifold Solenoid Valve does
not flash green, it means that
Manifold Solenoid Valve does
not send a DHCP request.
In that case, restore the
settings of Manifold Solenoid
Valve to factory defaults, and
repeat from step 1. For
information on how to restore
the settings of Manifold
Solenoid Valve, refer to
Section 8. Initialization Method.
10
With BOOTP/DHCP Tool, the
DHCP request sent by Manifold
Solenoid Valve is displayed in
the Discovery History Field as
shown in the figure on the right.
Double-click the DHCP request.
*If Manifold Solenoid Valve
stops sending continuous
DHCP requests due to a
timeout, turn OFF Manifold
Solenoid Valve, then turn it
back ON.
11
The New Entry Dialog Box is
displayed.
Enter the IP address of Manifold
Solenoid Valve in the IP Field as
shown on the right. Click OK.
*The IP address is set to
"192.168.250.2" in this guide.
LEDs
Power supply for Manifold Solenoid Valve
Switching hub
Switching hub power supply

7.EtherNet/IP Connection Procedure
17
12
Check that the IP address set in
step 11 is added to the Entered
Relations Field as shown on the
right.
13
Check that, after a few seconds,
the IP address is displayed in
the IP Address Column of the
Discovery History Field as
shown on the right.
14
Right-click the row that displays
the added IP address of
Manifold Solenoid Valve in the
Entered Relations Field.
Select Disable BOOTP/DHCP
from the menu.
*The IP address is assigned to
Manifold Solenoid Valve.
Other manuals for F Series
1
This manual suits for next models
2
Table of contents
Other Koganei Control Unit manuals

Koganei
Koganei 180 Series User manual

Koganei
Koganei ib-ZERO User manual

Koganei
Koganei KFPV050 Series User manual

Koganei
Koganei KFPV050 Series User manual

Koganei
Koganei 010 SERIES User manual

Koganei
Koganei CVR01 Series User manual

Koganei
Koganei FVN01-01 Series User manual

Koganei
Koganei IB Series User manual