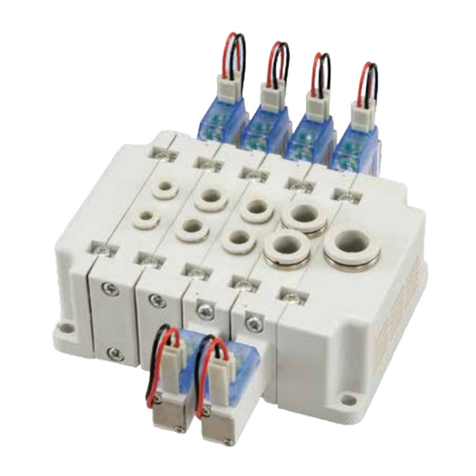
Koganei 180 Series User manual

INSTRUCTION MANUAL Ver.1.0
BK-UV002Ver.1.0
SOLENOID VALVES 180 SERIES
Air Valve
BK-UV002 Ver.1.1
Ver.1.1

33
Insert the tube to connect as far as the
tube stopper contacts the tubes. Pull the
tube to confirm the connection.
For tube removal, push the release ring
forward parallel to the ring, and pull the
tube out.
Tube installation and removal
Either nylon or urethane tubes can be
used. Use tubes that are not scratched on
their outer surface.
The tube’s outer diameter tolerance
should be within ±0.1mm [±0.004in.] of
the nominal dimension, and within 0.2mm
[0.008in.] for the ellipticity (difference
between long and short diameter).
Tubes
Caution: Do not excessively bend the tube near
fittings.
Subsonic speed flow when
P1+0.1013<1.89 (P2+0.1013)
Q=226S ΔP (P2+0.1013)
Sonic speed flow when
P1+0.1013≧1.89 (P2+0.1013)
Q=113S (P1+0.1013)
Q: Air flow rate〔R/min (ANR)〕
S: Effective area〔mm2〕
ΔP: Pressure drop P1−P2〔MPa〕
P1: Upstream pressure〔MPa〕
P2: Downstream pressure〔MPa〕
※
Corrections for variances in air temperature
Multiply the flow rate calculated in the formula
above by the coefficients in the table below.
Since the 1(P) and exhaust ports are on
both ends of the manifold, piping direction
can be selected depending on the
application (excluding some models).
At shipping, plugs are temporarily
screwed in ports at one end, but are not
firmly tightened. Regardless of which end
piping is connected, always remove the
plugs, use sealing tape or apply other
sealing agent, and securely tighten the
plugs into the unused ports.
1. Sealing tape wrapping method
qBefore piping, use air blowing (flushing)
or cleaning to eliminate any machining
chips, cutting oil, or dust, etc., remain-
ing inside the pipes.
wWhen screwing in piping or fittings,
caution should be taken to avoid letting
machining chips or sealing materials
from entering into the valves. When
using sealing tape, wrap it so that 1.5〜
2 screw threads remain.
Piping
Remain about 2 screw theads
Sealing tape
Wrapping direction
How to find the flow rate
Air temperature
°C [°F]
Correction
coefficient
–20
[–4]
1.08
–10
[14]
1.06
0
[32]
1.04
10
[50]
1.02
30
[86]
0.98
40
[104]
0.97
50
[122]
0.95
60
[140]
0.94
M3
M5×0.8
Rc (PT )1/8
Rc (PT)1/4
Rc (PT) 3/8
Rc (PT) 1/2
Rc (PT) 3/4
Rc (PT) 1
Rc (PT) 1 1/4
Rc (PT) 1 1/2
59 (6) [5.2]
157 (16) [13.9]
686〜883 (70〜90) [60.8〜78.1]
1177〜1373 (120〜140) [104〜122]
2157〜2354 (220〜240) [191〜208]
2746〜2942 (280〜300) [243〜260]
2746〜2942 (280〜300) [243〜260]
3530〜3727 (360〜380) [313〜330]
3923〜4119 (400〜420) [347〜365]
4707〜4903 (480〜500) [417〜434]
2. Tightening torque for piping
1. While any mounting direction is
allowed, be sure to avoid strong shocks
or vibrations applied directly to the
body. Also, avoid strong shocks in the
lateral direction when using a mounting
base for installation. For the order code,
see the Additional Parts item under
each series.
2. Avoid using in the locations and
environment listed below, as it could
result in malfunction of the valve. If use
in such conditions is unavoidable,
always provide a cover or other
adequate protective measures.
●Location directly exposed to water
drops or oil drops
●Environment where a valve body is
subject to dew condensation
●Location directly exposed to machining
chips, dust, etc
3. Install a muffler, etc. in the exhaust port
to prevent dust from entering into the
piping.
4.In piping connection with valves, flush
the tube completely (by blowing
compressed air) before piping.
Intrusion of machining chips or sealing
tape, rust, etc., generated during
plumbing could result in air leaks and
other defective operations.
5. When mounting a valve unit inside the
control panels or when the operation
requires long energizing periods,
consider providing heat radiation
measure such as ventilation.
6. Never use the valve with the 4(A) and
2(B) ports vent to atmosphere.
Mounting
Can be used without lubrication. When the
actuator requires lubrication, use Turbine
Oil Class 1 (ISO VG32) or the equivalent.
Avoid using spindle oil or machine oil.
Lubrication
1. Use air for the media. For the use of
any other media, consult us.
2. Air used for the cylinder should be
clean air that contains no deteriorated
compressor oil, etc. Install an air filter
(filtration of 40 µm or less) near the
valve to remove collected liquid or dust.
In addition, drain the air filter
periodically.
3. When supply pressure is low, use
piping for the 1(P) port with sufficient
tube size.
Media
The product cannot be used when the
media or ambient atmosphere contains
any of the substances listed below.
Organic solvents, phosphate ester type
hydraulic oil, sulphur dioxide, chlorine gas,
or acids, etc.
Atmosphere
To close the unused stations, use a block-
off plate.
For the order code, see the Additional
Parts item under each series.
Block-off plate
Cautions: 1. For the 1(P) port piping, use a size
that matches the manifold’s piping
connection port.
2. When installing piping or mufflers to
the exhaust port, ensure there will
be minimum exhaust resistance.
3. On rare occasions, exhaust can
interfere with other valves and
actuators. In this case, let exhaust
from the R ports on both ends.
4. When a multiple number of valves
are operating simultaneously on a
multi-unit manifold, or during high
frequency applications, supply air
from the 1(P) ports on both ends,
and let exhaust from the R ports on
both ends.
5. Since the twin solenoid valve uses 2
stations, it cannot be mounted on
the final station.
6. In the 025 series, the seal between
the valve and manifold is used
reversed top-to-bottom, in accord-
ance with the valve function (NC or
NO). Install the seal as the mark
(NC or NO) is located on the valve
side and matches the valve function.
General Precautions
Suitable tightening torque
N・cm (kgf・cm) [in・lbf]
Connection
thread

Handling Instructions and Precautions
Solenoid
●DC12V, DC24V
Standard solenoid (Surge suppression)
Solenoid with LED indicator
(Surge suppression)
Order code:-PSL, -PLL
●AC100V, AC200V
Standard solenoid (Surge suppression)
Solenoid with LED indicator
(Surge suppression)
Order code:-PSL, -PLL
Plug connector
Use fingers to insert the connector into the
pin, push it in until the lever claw latches
onto the protruded section of the connector
housing, and complete the connection.
To remove the connector, squeeze the lever
along with the connector, lift the lever claw
up from the protruded section of the
connector housing, and pull it out.
To crimp lead wires into contacts, strip off
4mm [0.16in.] of the insulation from the end
of the lead wire, insert it into the contact,
and crimp it. Be sure to avoid catching the
insulation on the exposed wire crimping
section.
Insert the contact with a lead wire into a plug
connector □hole until the contact hook
latches on the connector and is secured to
the plug connector. Confirm that the lead
wire cannot be easily pulled out.
To remove it, insert a tool with a fine tip (such
as a small screwdriver) into the rectangular
hole on the side of the plug connector to
push up on the hook, and then pull out the
lead wire.
Common terminal pre-wired
plug connector
1. Pre-wired common terminal at DC
positive side or AC.
Order code
With straight connector: -CPSL
With L connector: -CPLL
2. Pre-wired common terminal at DC
negative side
Order code
With straight connector: -CMSL
With L connector: -CMLL
C
Protruded section
Pin
Lever
Connector housing
Connector
Indication
of polarity
(DC)
Contact
Connector
assembly
Hock Exposed wire
crimping section
Insulation crimp tab
Insulation(Maximum
outer diameterφ1.7)
Lead wire
Equivalent to
AWG22〜26
Exposed wire 4mm
Contact
※Illustration shows the 110 series.
(−)(−)(−)
(−)
(−)
(−) COM
(
+
)
ColorofCOM, crossover wire
DC12V: Brown
DC24V: Red
AC100V: Yellow
AC200V: White
Polarity is for DC.
Crossover wire
Connector
Connector housing
(+)(+)(+)
(+)(+)
(+) COM
(
−
)
Crossover wire
Connector
Connector housing
ColorofCOM, crossover wire
DC12V: Black
DC24V: Black
w and eare for with DIN connector (Order code : -39).
(+)
(−)
w
e
Short circuit protection diode
Solenoid
Flywheel diode
Lead wire: DC12V: Brown
Lead wire: Black
DC24V: Red
(+)
(−)
LED indicator: Red
Lead wire: Black
Lead wire: DC12V: Brown
LED indicator
(Light Emitting Diode)
DC24V: Red
Solenoid
Lead wire: AC100V: Yellow
Varistor
orwe
ew
or
AC200V: White
Lead wire:
AC100V: Yellow
AC200V: White
AC100V: Yellow
AC200V: Green
LED indicator
(Light Emitting Diode)
Diode
LED indicator:
Internal circuit
Cautions: 1. Do not apply megger between the
lead wires.
2. The DC solenoid will not short
circuit even if the wrong polarity is
applied, but the valve will not
operate.
3. Leakage current inside the circuit
could result in failure of the
solenoid valve to return, or in other
erratic operation. Always use it
within the range of the allowable
leakage current. If circuit condi-
tions, etc. cause the leakage
current to exceed the allowable
leakage current, consult us.
4. For double solenoid and twin
solenoid, avoid energizing both
solenoids simultaneously. The
valve could fall into a neutral
position.
Attaching and removing plug connector
Crimping of connecting lead wire and contact
Cautions: 1.
Do not pull hard on the lead wire.
2.
Always use a dedicated tool for crimping of
connecting lead wire and contact.
Contact: Model 702062-2M
Manufactured by Sumiko Tech, Inc.
Crimping tool: Model F1-702062
Manufactured by Sumiko Tech, Inc.
Attaching and removing contact and connector
Cautions: 1. Do not pull hard on the lead wire.It
could result in defective contacts,
breaking wires, etc.
2. If the pin is bent, use a small
screwdriver, etc. to gently
straighten out the pin, and then
complete the connection to the
plug connector.
Cautions: 1. The diagrams show the straight
connector configuration.
While the connector’s orientation is
different in the case of the L
connector, in every case the first
COM lead wire comes from the last
station’s mounted valve.
2. Since the COM terminal is connected
to a crossover terminal inside the
connector housing, the connector
cannot be switched between a
positive common and a negative
common by changing the connectors.
●DC24V
Tandem solenoid
ACOM
SOL.A
B
SOL.B
Manual override
To operate the manual override, press it all the way
down. The single solenoid valve works the same as
when in the energized state as long as the manual
override is pushed down, and returns to the normal
position upon release.
For the double solenoid and twin solenoid valves,
pressing the manual override on the 12(S1) side
switches the 12(S1) to enter the energized position,
and the unit remains in that state even after the
manual override is released. To return it to the
normal position, operate the manual override on the
14(S2) side. This is the same for the solenoid
14(S2).
※Illustration shows the 110 series.
Use a small screwdriver to turn the adjusting
knob several times in the clockwise direction,
and lock the manual override in place. When
locked, turning the adjusting knob several times
in the counterclockwise direction releases a
spring on the manual override, returns it to the
normal position, and releases the lock.
For the locking protruding type, when the
adjusting knob is not turned, this type acts just
like the non-locking type, like the valve is the
energized position as long as the manual
override is pushed down, and it returns to the
normal position upon release.
※Illustration shows the 110 series.
Manual override (Tandem solenoid)
To lock the locking type manual override, use a
small screwdriver to push down the manual
override in all the way, then set the 0 position as
the reference point and turn it in the clockwise
direction as far as position A. This achieves the
same conditions as when the 14(SA) side is
energized, and the manual override is locked in
place. For the 12(SB) side, turn it in the
counterclockwise direction as far as position B.
To release the lock, return the manual override
to the 0 position. A spring mechanism returns the
manual override to its normal position, and the
lock is released. Care should be taken to avoid
excessive turning of the manual override, which
could damage it.
To lock the locking protruding type manual override
or locking manual lever type, use either a small
screwdriver or your fingertips to push the manual
override button (manual lever) all the way down, then
set the 0 position as the reference point and turn it in
the clockwise direction as far as position A. This
achieves the same conditions as when the 14(SA)
side is energized, and the manual override button
(manual lever) is locked in place. For the 12(SB)
side, turn it in the counterclockwise direction as far
as position B. To release the lock, return the manual
override button (manual lever) to the 0 position. A
spring mechanism returns the manual override
button (manual lever) to its normal position, and the
lock is released. Care should be taken to avoid
excessive turning of the manual override button
(manual lever), which could damage it.
B
A
Locking protruding type manual override
Locking manual lever type
PUSH
PUSH
Locking typeNon-locking type
Locking protruding type, locking manual lever type
Locking protruding type
Cautions: 1.
The 110 series valves are internal pilot
type solenoid valves. As a result, the
manual override cannot switch the main
valve without air supplied from the 1(P)
port.
2.
Always release the lock of the locking type
and locking protruding type manual override
before commencing normal operation.
3. Do not attempt to operate the manual
override with a pin or other object
having an extremely fine tip. It could
damage the manual override button.
4. Do not turn the adjusting knob more
than needed. It could result in
defective operation.
Mounting base 110-21
When installing a mounting base to the valve,
always use the provided screws. The recom-
mended tightening torque for the screws is
49N・cm {5kgf・cm} [4.3in・lbf].
Mounting valves on manifold
When mounting valves on manifold,
apply the recommended tightening torque of
39.2N・cm {4kgf・cm} [3.5in・lbf] for the valve
mounting screws.
Cautions: 1.
The 110 series valves are internal pilot
type solenoid valves. As a result, the
manual override cannot switch the main
valve without air supplied from the 1(P)
port.
2. Always release the lock of the
locking protruding type manual
override before commencing normal
operation.
3. Do not attempt to operate the manual
override with a pin or other object
having an extremely fine tip. It could
damage the manual override button.
4. Do not turn the adjusting knob more
than needed. It could result in
defective operation.
Mounting base 180-21
When mounting valves on manifold,
apply the recommended tightening torque of
49N・cm{5kgf・cm}[ 4.3in・lbf]for the valve
mounting screws.
The 180 series valves are internal pilot

Made to Order
The 110 series Solenoid Valves include a variety of made to order
solenoids for application in a wider range of control and wiring types.
Straight connector
with LED indicator
●Without lead wire
●
Connector and contacts included
●When ordering, enter -PSLN or -PSLL in place of the
normal option code for the wiring type.
-PSLN
Lead wire length
●
For plug connector
●Length mm [in.]
-1L:1000 [39]
-3L:3000 [118]
●For lead wire length, -1L is 1000mm [39in.] and -3L is
3000mm [118in.].
When ordering, enter -1L or -3L following the wiring type
option code.
-1L
-3L
L connector
with LED indicator
●Without lead wire
●
Connector and contacts included
-PLLN
-39
A compact connector that is highly resistant to
dust and water splashes.
Employs a self-stripping method that
eliminates the need for de-sheathing the lead
wire.
LED indicator
-L
The LED indicator for confirmation of
operation is also available without a plug
connector. This creates a clean monoblock
look with a compact cover.
●When ordering, enter -39 in place of the normal option code for
the wiring type.
●A varistor for surge suppression is also equipped.
(For the AC100V and AC200V only. For DC12V and DC24V, a
flywheel diode for surge suppression is installed as standard
equipment.)
●LED indicator is not available.
●When ordering, enter -L in place of the normal option code for
the wiring type.
●A varistor for surge suppression is also equipped.
(For the AC100V and AC200V only. For the DC12V and
DC24V, a flywheel diode for surge suppression is installed as
standard equipment.)
Wiring instructions
●Solenoid with DIN connector
When de-sheathing (only the outer sheath of the cabtyre), pay attention
to the lead wire direction. The cover will be easily mounted when the
lead wire on the outer side of the terminal cover is set about 8mm
[0.31in.] longer than the inner side.
Without stripping off the sheath, insert the lead until it contacts the lead
wire stopper on the terminal body, and then place the contact from the
upper side. Then use pliers to press the lead wire further to ensure that
the contact is firmly touching the core wire.
2
1
3
+
_
Cable
Cable gland
Cable gasket
Washer
Gasket
Gasket
Cover mounting
screw
Terminal cover
Lead wire
Terminal body Pliers
Solenoid terminal
arrangement
J
IS C3306
VCTF Conductor 0.75mm2[0.00116in.
2]
Finished outside 6.6mm [0.260in.](2 leads)
7.0mm [0.276in.](3 leads)
Contact
Lead wire
stopper
Note Terminal body
Lead wire
Note:
The appropriate tightening torque for the cover mounting screw is
29.4N
G
cm {3kgf
G
cm} [2.6in
G
lbf].
Plug connector DIN connector
■CE Marking compliant product
*Excluding tandem solenoid valves.
The 180 series Solenoid Valves include a variety of made to order
solenoids for application in a wider range of control and wiring types.
Made to Order
The 110 series Solenoid Valves include a variety of made to order
solenoids for application in a wider range of control and wiring types.
Straight connector
with LED indicator
●Without lead wire
●
Connector and contacts included
●When ordering, enter -PSLN or -PSLL in place of the
normal option code for the wiring type.
-PSLN
Lead wire length
●
For plug connector
●Length mm [in.]
-1L:1000 [39]
-3L:3000 [118]
●For lead wire length, -1L is 1000mm [39in.] and -3L is
3000mm [118in.].
When ordering, enter -1L or -3L following the wiring type
option code.
-1L
-3L
L connector
with LED indicator
●Without lead wire
●
Connector and contacts included
-PLLN
-39
A compact connector that is highly resistant to
dust and water splashes.
Employs a self-stripping method that
eliminates the need for de-sheathing the lead
wire.
LED indicator
-L
The LED indicator for confirmation of
operation is also available without a plug
connector. This creates a clean monoblock
look with a compact cover.
●When ordering, enter -39 in place of the normal option code for
the wiring type.
●A varistor for surge suppression is also equipped.
(For the AC100V and AC200V only. For DC12V and DC24V, a
flywheel diode for surge suppression is installed as standard
equipment.)
●LED indicator is not available.
●When ordering, enter -L in place of the normal option code for
the wiring type.
●A varistor for surge suppression is also equipped.
(For the AC100V and AC200V only. For the DC12V and
DC24V, a flywheel diode for surge suppression is installed as
standard equipment.)
Wiring instructions
●Solenoid with DIN connector
When de-sheathing (only the outer sheath of the cabtyre), pay attention
to the lead wire direction. The cover will be easily mounted when the
lead wire on the outer side of the terminal cover is set about 8mm
[0.31in.] longer than the inner side.
Without stripping off the sheath, insert the lead until it contacts the lead
wire stopper on the terminal body, and then place the contact from the
upper side. Then use pliers to press the lead wire further to ensure that
the contact is firmly touching the core wire.
2
1
3
+
_
Cable
Cable gland
Cable gasket
Washer
Gasket
Gasket
Cover mounting
screw
Terminal cover
Lead wire
Terminal body Pliers
Solenoid terminal
arrangement
J
IS C3306
VCTF Conductor 0.75mm2[0.00116in.
2]
Finished outside 6.6mm [0.260in.](2 leads)
7.0mm [0.276in.](3 leads)
Contact
Lead wire
stopper
Note Terminal body
Lead wire
Note:
The appropriate tightening torque for the cover mounting screw is
29.4N
G
cm {3kgf
G
cm} [2.6in
G
lbf].
Plug connector
DIN connector
■CE Marking compliant product
*Excluding tandem solenoid valves.
■CE Marking compliant product
*Excluding tandem solenoid valves.
●When ordering,enter -39 in place of the normal
option code for the wiring type.
●LED indicator is not available.
Wiring Outline
1. Loosen the mounting thread of the connector, and remove it from the
valve.
2. After removing the mounting thread from the connector, pry the cutout-
part from terminal block with the screwdriver to separate the terminal
block and the housing.
3. Thread gland nut, washer, grommet to the cable, and plug into the
wiring port of housing. Insert the conductor to the contact of terminal
block, and tighten the terminal thread to x the lead wire.
Wiring Port Direction
1. In order to alter the direction of wiring port, change the direction of
terminal body by 90 degrees when putting the terminal body into
terminal cover.
●Use φ4-φ7 outer diameter cable.
(REFERENCE)Equal to JISC3306 0.5mm2double core cable and triple
core cable
Contact
Terminal Screw
Mounting Screw
(ー)
(+)
Grommet
Washer
Ground nut
Cutout-part
Terminal Block
Housing
Ground
②
①
1
ー
2
+
(Electrical ground)
DIN connector
Plug connector
Wiring Outline
Wiring Port Direction
Compatible Cab Tire Cord
LED indicator
The 180 series Solenoid Valves include a variety of made to order
solenoids for application in a wider range of control and wiring types.
Made to Order
The 110 series Solenoid Valves include a variety of made to order
solenoids for application in a wider range of control and wiring types.
Straight connector
with LED indicator
●Without lead wire
●
Connector and contacts included
●When ordering, enter -PSLN or -PSLL in place of the
normal option code for the wiring type.
-PSLN
Lead wire length
●
For plug connector
●Length mm [in.]
-1L:1000 [39]
-3L:3000 [118]
●For lead wire length, -1L is 1000mm [39in.] and -3L is
3000mm [118in.].
When ordering, enter -1L or -3L following the wiring type
option code.
-1L
-3L
L connector
with LED indicator
●Without lead wire
●
Connector and contacts included
-PLLN
-39
A compact connector that is highly resistant to
dust and water splashes.
Employs a self-stripping method that
eliminates the need for de-sheathing the lead
wire.
LED indicator
-L
The LED indicator for confirmation of
operation is also available without a plug
connector. This creates a clean monoblock
look with a compact cover.
●When ordering, enter -39 in place of the normal option code for
the wiring type.
●A varistor for surge suppression is also equipped.
(For the AC100V and AC200V only. For DC12V and DC24V, a
flywheel diode for surge suppression is installed as standard
equipment.)
●LED indicator is not available.
●When ordering, enter -L in place of the normal option code for
the wiring type.
●A varistor for surge suppression is also equipped.
(For the AC100V and AC200V only. For the DC12V and
DC24V, a flywheel diode for surge suppression is installed as
standard equipment.)
Wiring instructions
●Solenoid with DIN connector
When de-sheathing (only the outer sheath of the cabtyre), pay attention
to the lead wire direction. The cover will be easily mounted when the
lead wire on the outer side of the terminal cover is set about 8mm
[0.31in.] longer than the inner side.
Without stripping off the sheath, insert the lead until it contacts the lead
wire stopper on the terminal body, and then place the contact from the
upper side. Then use pliers to press the lead wire further to ensure that
the contact is firmly touching the core wire.
2
1
3
+
_
Cable
Cable gland
Cable gasket
Washer
Gasket
Gasket
Cover mounting
screw
Terminal cover
Lead wire
Terminal body Pliers
Solenoid terminal
arrangement
J
IS C3306
VCTF Conductor 0.75mm2[0.00116in.
2]
Finished outside 6.6mm [0.260in.](2 leads)
7.0mm [0.276in.](3 leads)
Contact
Lead wire
stopper
Note Terminal body
Lead wire
Note:
The appropriate tightening torque for the cover mounting screw is
29.4N
G
cm {3kgf
G
cm} [2.6in
G
lbf].
Plug connector DIN connector
■CE Marking compliant product
*Excluding tandem solenoid valves.
■CE Marking compliant product
*Excluding tandem solenoid valves.
●When ordering,enter -39 in place of the normal
option code for the wiring type.
●LED indicator is not available.
Wiring Outline
1. Loosen the mounting thread of the connector, and remove it from the
valve.
2. After removing the mounting thread from the connector, pry the cutout-
part from terminal block with the screwdriver to separate the terminal
block and the housing.
3. Thread gland nut, washer, grommet to the cable, and plug into the
wiring port of housing. Insert the conductor to the contact of terminal
block, and tighten the terminal thread to x the lead wire.
Wiring Port Direction
1. In order to alter the direction of wiring port, change the direction of
terminal body by 90 degrees when putting the terminal body into
terminal cover.
●Use φ4-φ7 outer diameter cable.
(REFERENCE)Equal to JISC3306 0.5mm2double core cable and triple
core cable
Contact
Terminal Screw
Mounting Screw
(ー)
(+)
Grommet
Washer
Ground nut
Cutout-part
Terminal Block
Housing
Ground
②
①
1
ー
2
+
(Electrical ground)
DIN connector
Plug connector
Wiring Outline
Wiring Port Direction
Compatible Cab Tire Cord
LED indicator
The 180 series Solenoid Valves include a variety of made to order
solenoids for application in a wider range of control and wiring types.
Table of contents
Other Koganei Control Unit manuals

Koganei
Koganei IB Series User manual

Koganei
Koganei CVR01 Series User manual

Koganei
Koganei ib-ZERO User manual

Koganei
Koganei KFPV050 Series User manual

Koganei
Koganei KFPV050 Series User manual

Koganei
Koganei FVN01-01 Series User manual

Koganei
Koganei 010 SERIES User manual

Koganei
Koganei F Series User manual
Popular Control Unit manuals by other brands

GOK
GOK 0271 Assembly and operating manual

AWG
AWG 30277633 instruction manual

Siemens
Siemens GAMMA 5WG1118-4AB01 Operating and mounting instructions

GESTRA
GESTRA BW 31A installation instructions

Asco
Asco 8210 series Installation and maintenance instructions

Electroline
Electroline Control Unit IV Reference manual