manuals.online logo
Brands
  1. Home
  2. •
  3. Brands
  4. •
  5. Konica Minolta
  6. •
  7. Measuring Instrument
  8. •
  9. Konica Minolta CM-512M3 User manual

Konica Minolta CM-512M3 User manual

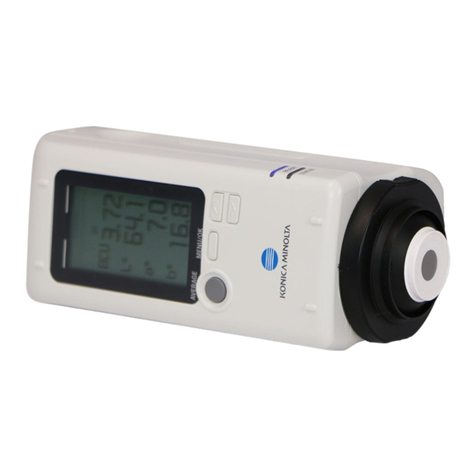
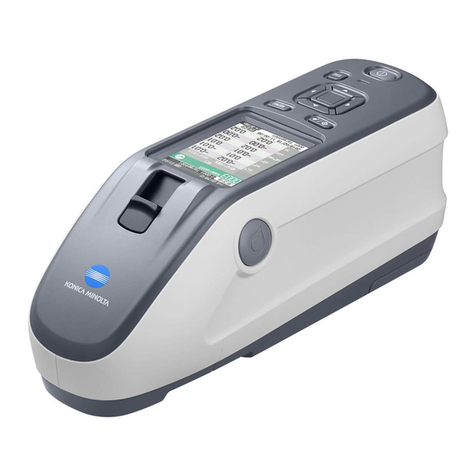
Multi-Angle Spectrophotometer
CM-512m3
Ideal for On-site Operation &
Curved Surface Measurement!
Multi-angle type
spectrophotometer
The color of metallic/pearl coatings
can be inspected easily.
Measurement sample
Viewing
Illumination 2
45º
Illumination 1
Illumination 3
75º
Shade direction
25º
Highlight direction
The CM-512m3 measures colors by illuminating subjects from three
angles simultaneously (25º, 45º and 75º), making it suitable for subjects
such as metallic/pearl coatings used for automotive exteriors or for the
textured materials used for automotive interiors and allowing the
changes in color according to the illumination angle to be measured.
Unlike conventional spectrophotometers, correlation of the measurement
results with visual evaluation of such subjects can be achieved.
The ring-shaped illumination ensures stable
measurement without being affected by the ori-
entation (rotational deviation) of the instrument.
Measurement is stable even for curved sur-
faces, such as automotive components.
Not only flat surfaces but also curved surfaces can be
measured stably with the large measurement area, the
two extension feet and the optional grip attached to the
instrument.
The graph display function enables easy
color judgment even on production sites
without using a personal computer.
Tolerance (allowable range) can be set for each target
data.
Original development
Evaluation equation suitable for measure-
ments of metallic/pearl coating correlates
well with visual evaluation.
With the conventional ∆E*ab equation, the values in the
highlight direction (25º) become larger and do not corre-
lated well with the results of visual evaluation. With the
CM-512m3, the ∆E00 (CIEDE2000) equation is used with
parameters fine-tuned based on proprietary knowhow to
provide measurement data for metallic/pearl coatings
which correlate well with visual evaluation.
Extension feet
Measurement button
Grip
CM-A42
(optional)
Multi-angle method (Ring illumination from three angles / Light reception in one direction)
Illumination: 25º, 45º, 75º
Light reception: 0º
The measurement sample is illuminated from three angles and the reflection in one direction is received. Metallic/pearl colors may result
in great differences in color appearance depending on the observation angle. Like visual evaluation, the multi-angle method obtains
measured data by applying illumination from three different angles. Consequently, it is suitable for the evaluation of metallic/pearl colors.
Measurement Principle
Illuminating/viewing optical system
Illumination is applied in the form of rings at angles of 25º, 45º and 75º away
from the perpendicular to the sample surface. The light reflected in the direction
perpendicular to the sample surface is received.
25º: Corresponds to the highlight direction of visual evaluation
75º: Corresponds to the shade direction of visual evaluation
Pre-flash function
Pre-flash (at 2% of the intensity of full emission) is performed at the beginning of
measurement to determine the optimal intensity for measurement according to
the reflectance of the sample. This function reduces power consumption and im-
proves repeatability when measuring samples with low reflectance.
Applications for texture measurements
Textured materials used for automotive interiors
With the recently popular textured materials that have large
and deep geometrical patterns, it is difficult to obtain color
differences with integrating sphere (d/0) or 45/0 instruments.
The CM-512m3 allows evaluation that correlates well with visual
evaluation by obtaining data at the angles of 25º and 75º.
Applications for coating measurements
Automotive exterior
The portable, handheld design ensures
easy and stable measurement on
production sites.
The instrument can be held easily
and firmly, and measurements can be
taken without being concerned about
its orientation (rotational deviation).
Personal computers and home appliances
Construction materials such as exterior
walls and kitchen panels
Office furniture
Even curved surfaces of car bodies or bumpers
can be measured stably.
PASS/FAIL displayColor difference display
∆L* ∆C* ∆H* ∆E00
Vertical
full-scale
value
±0 line
25º 45º 75º
∆L*∆C*∆H*∆E00 display example
Line graph display
Color difference tolerance
setting example: ∆E00=0.5
Measurement sample
Viewing
Illumination 2
45º
Illumination 1
Illumination 3
75º
Shade direction
25º
Highlight direction
The CM-512m3 measures colors by illuminating subjects from three
angles simultaneously (25º, 45º and 75º), making it suitable for subjects
such as metallic/pearl coatings used for automotive exteriors or for the
textured materials used for automotive interiors and allowing the
changes in color according to the illumination angle to be measured.
Unlike conventional spectrophotometers, correlation of the measurement
results with visual evaluation of such subjects can be achieved.
The ring-shaped illumination ensures stable
measurement without being affected by the ori-
entation (rotational deviation) of the instrument.
Measurement is stable even for curved sur-
faces, such as automotive components.
Not only flat surfaces but also curved surfaces can be
measured stably with the large measurement area, the
two extension feet and the optional grip attached to the
instrument.
The graph display function enables easy
color judgment even on production sites
without using a personal computer.
Tolerance (allowable range) can be set for each target
data.
Original development
Evaluation equation suitable for measure-
ments of metallic/pearl coating correlates
well with visual evaluation.
With the conventional ∆E*ab equation, the values in the
highlight direction (25º) become larger and do not corre-
lated well with the results of visual evaluation. With the
CM-512m3, the ∆E00 (CIEDE2000) equation is used with
parameters fine-tuned based on proprietary knowhow to
provide measurement data for metallic/pearl coatings
which correlate well with visual evaluation.
Extension feet
Measurement button
Grip
CM-A42
(optional)
Multi-angle method (Ring illumination from three angles / Light reception in one direction)
Illumination: 25º, 45º, 75º
Light reception: 0º
The measurement sample is illuminated from three angles and the reflection in one direction is received. Metallic/pearl colors may result
in great differences in color appearance depending on the observation angle. Like visual evaluation, the multi-angle method obtains
measured data by applying illumination from three different angles. Consequently, it is suitable for the evaluation of metallic/pearl colors.
Measurement Principle
Illuminating/viewing optical system
Illumination is applied in the form of rings at angles of 25º, 45º and 75º away
from the perpendicular to the sample surface. The light reflected in the direction
perpendicular to the sample surface is received.
25º: Corresponds to the highlight direction of visual evaluation
75º: Corresponds to the shade direction of visual evaluation
Pre-flash function
Pre-flash (at 2% of the intensity of full emission) is performed at the beginning of
measurement to determine the optimal intensity for measurement according to
the reflectance of the sample. This function reduces power consumption and im-
proves repeatability when measuring samples with low reflectance.
Applications for texture measurements
Textured materials used for automotive interiors
With the recently popular textured materials that have large
and deep geometrical patterns, it is difficult to obtain color
differences with integrating sphere (d/0) or 45/0 instruments.
The CM-512m3 allows evaluation that correlates well with visual
evaluation by obtaining data at the angles of 25º and 75º.
Applications for coating measurements
Automotive exterior
The portable, handheld design ensures
easy and stable measurement on
production sites.
The instrument can be held easily
and firmly, and measurements can be
taken without being concerned about
its orientation (rotational deviation).
Personal computers and home appliances
Construction materials such as exterior
walls and kitchen panels
Office furniture
Even curved surfaces of car bodies or bumpers
can be measured stably.
PASS/FAIL displayColor difference display
∆L* ∆C* ∆H* ∆E
00
Vertical
full-scale
value
±0 line
25º 45º 75º
∆L*∆C*∆H*∆E00 display example
Line graph display
Color difference tolerance
setting example: ∆E00=0.5
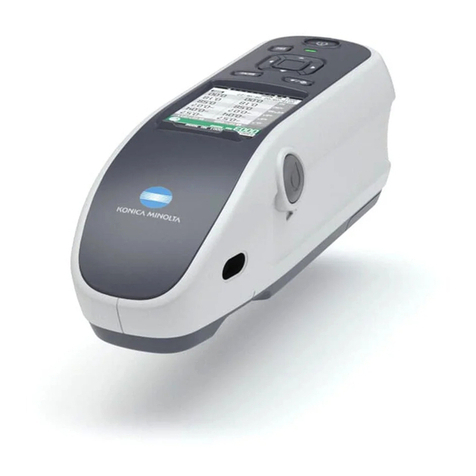
Major specifications
Outer dimensions (Unit: mm)
System Configuration
115 164
257
10043
48
40
By using the Color Data Software CM-S100w (optional), you can display the data for the
3 different illumination angles simultaneously. Or, you can create a line graph that visually
shows the angle characteristics specific to a multi-angle spectrophotometer.
Color Data Software CM-S100w (optional)
• Specifications and drawings are subject to change without prior notice.
Illumination 3 angle circumferential illumination / 1 angle perpendicular viewing:
/viewing system 25ºc: 0º, 45ºc: 0º, 75ºc: 0º
Detector Silicon photodiode array with spectral filter array
Wavelength range 400 to 700 nm
Wavelength pitch 20 nm
Reflectance range 25º: 0% to 300%, 45º and 75º: 0% to 200% (Resolution: 0.01%)
Light source Three pulsed xenon lamps
Minimum measurement
7 seconds (when measuring a white calibration plate at 23ºC)
interval
Battery life Approx. 400 measurements at 10-second intervals
(when a dark color is measured with alkaline batteries at 23ºC)
Measurement ø12 mm /ø20 mm
/illumination area
Repeatability Spectral reflectance: Within 0.3% (standard deviation)
Chromaticity value: Within ∆E*ab 0.05 (standard deviation)
(When a white calibration plate is measured 30 times at 11-second
intervals after white calibration) ; When AC adapter is used
Interface RS-232C Terminal: D-Sub 9-pin (female)/IrDA
Display Dot-matrix reflective LCD with 21 characters x 7 lines (128 x 56 dots)
With contrast control slide
Displayed data Colorimetric data: L*a*b*, L*C*h
Color difference data: ∆(L*a*b*), ∆(L*C*H*), ∆E*ab, CMC(l:c), ∆E00(CIEDE2000)
Other data display: FF value, line graph, temperature
Storable data sets 440 data sets max. (total of sample and target data)
Illuminant Light source: A, C, D50, D65, F2, F6, F7, F8, F10, F11, F12
/Observer conditions
Observer: 2º, 10º
Temperature detection
Detector: Thermopile
Wavelength: 8 to 13 µm
Measurement/display range: -10º to 80ºC (0.1ºC increments)
Measurement diameter: ø20 mm
Measurement rating: 0º to 50ºC: ±2.5ºC ±1digit
(when an object of 0.93 emissivity is measured at ambient temperatures of 18º to 28ºC)
Operating temperature
0ºC to 40ºC, relative humidity 85% or less (at 35ºC) with no condensation
/humidity range (*1)
Storage temperature
-20ºC to 45ºC, relative humidity 85% or less (at 35ºC) with no condensation
/humidity range
Power Four AA-size batteries or special AC adapter
Size 115 (W) x 257 (H) x 164 (D) mm
Weight Approx. 1.4 kg (without batteries)
A
G
M
C
P
K
Printed in Japan9242-4843-10
©2005 KONICA MINOLTA SENSING, INC. 4
SAFETY PRECAUTIONS
For correct use and for your safety, be sure to read the instruction
manual before using the instrument.
Always connect the instrument to the specified power supply
voltage. Improper connection may cause a fire or electric shock.
Be sure to use the specified batteries. Using improper batteries
may cause a fire or electric shock.
Certificate No : JQA-E-80027
Registration Date : March 12, 1997
Certificate No : YKA 0937154
Registration Date : March 3, 1995
Spectrophotometer
CM-512m3
Accessory Switch
CM-A23
Hand Strap
CM-A24
Zero Calibration Box
CM-A32
White Calibration Cap
CM-A87
Grip
CM-A42
Hard Case
CM-A64
Color Data Software CM-S100w
Printer
(commercial product)
Europe only:
RS-232C Cable IF-A20 (5 m)
Connecting Cable
Standard accessories
Optional accessories
Personal computer
(commercial product)
Worldwide (except Europe):
RS-232C Cable IF-A13 (5 m)
Europe only:
RS-232C Cable IF-A19 (2 m)
Europe only:
AC adapter AC-A12
(Not evaluated by UL.)
Worldwide (except Europe):
RS-232C Cable IF-A12 (2 m)
Worldwide (except Europe):
AC adapter AC-A21
Four AA-size batteries
*1 Operating temperature/humidity range of products for North America : 5 to 40°C, relative humidity 80% or less (at 31°C) with no condensation
Supports Windows®2000/XP  

Other Konica Minolta Measuring Instrument manuals

Konica Minolta CM-36dGV User manual

Konica Minolta

Konica Minolta CM-36dGV User manual

Konica Minolta CA-410 Series User manual

Konica Minolta

Konica Minolta CA-410 Series User manual

Konica Minolta VIVID 9i User manual

Konica Minolta

Konica Minolta VIVID 9i User manual

Konica Minolta bizhub C3100i User manual

Konica Minolta

Konica Minolta bizhub C3100i User manual

Konica Minolta CM-26dG User manual

Konica Minolta

Konica Minolta CM-26dG User manual

Konica Minolta CM-25cG User manual

Konica Minolta

Konica Minolta CM-25cG User manual

Konica Minolta FD-5 User manual

Konica Minolta

Konica Minolta FD-5 User manual

Konica Minolta CS-150 User manual

Konica Minolta

Konica Minolta CS-150 User manual

Konica Minolta CL-70F User manual

Konica Minolta

Konica Minolta CL-70F User manual

Konica Minolta REGIUS 110 HQ User manual

Konica Minolta

Konica Minolta REGIUS 110 HQ User manual

Konica Minolta REGIUS 190 User manual

Konica Minolta

Konica Minolta REGIUS 190 User manual

Konica Minolta CM-23d User manual

Konica Minolta

Konica Minolta CM-23d User manual

Konica Minolta CS-2000 User manual

Konica Minolta

Konica Minolta CS-2000 User manual

Konica Minolta CM-3600D User manual

Konica Minolta

Konica Minolta CM-3600D User manual

Konica Minolta CR-20 User manual

Konica Minolta

Konica Minolta CR-20 User manual

Konica Minolta CA-210 User manual

Konica Minolta

Konica Minolta CA-210 User manual

Konica Minolta CR-14 User manual

Konica Minolta

Konica Minolta CR-14 User manual

Konica Minolta CM-2600d User manual

Konica Minolta

Konica Minolta CM-2600d User manual

Konica Minolta CR-400 User manual

Konica Minolta

Konica Minolta CR-400 User manual

Konica Minolta CM-600d User manual

Konica Minolta

Konica Minolta CM-600d User manual

Konica Minolta BC-10 Plus User manual

Konica Minolta

Konica Minolta BC-10 Plus User manual

Konica Minolta cm-5 User manual

Konica Minolta

Konica Minolta cm-5 User manual

Konica Minolta CS-7 User manual

Konica Minolta

Konica Minolta CS-7 User manual

Konica Minolta CR-10 User manual

Konica Minolta

Konica Minolta CR-10 User manual

Popular Measuring Instrument manuals by other brands

Aeroflex 3030 Series user manual

Aeroflex

Aeroflex 3030 Series user manual

ATAGO 4440 instruction manual

ATAGO

ATAGO 4440 instruction manual

PCB Piezotronics 353B03 Installation and operating manual

PCB Piezotronics

PCB Piezotronics 353B03 Installation and operating manual

Motrona TouchMATRIX DM350 operating manual

Motrona

Motrona TouchMATRIX DM350 operating manual

Summit Technology PowerSight PS4500 user manual

Summit Technology

Summit Technology PowerSight PS4500 user manual

Boyo VTM7012QFHD user manual

Boyo

Boyo VTM7012QFHD user manual

IOtech 640e quick start

IOtech

IOtech 640e quick start

Berner Easy operating instructions

Berner

Berner Easy operating instructions

Environnement CO12M Technical manual

Environnement

Environnement CO12M Technical manual

UV-technik KUV 2.4 WR MD Technical description and user manual

UV-technik

UV-technik KUV 2.4 WR MD Technical description and user manual

Nidec DT-205LR Operation manual

Nidec

Nidec DT-205LR Operation manual

Hach DR/2010 Instrument manual

Hach

Hach DR/2010 Instrument manual

TESTO 545 instruction manual

TESTO

TESTO 545 instruction manual

Adeunis RF COMFORT Serenity user guide

Adeunis RF

Adeunis RF COMFORT Serenity user guide

Pentax R-315EX(NX) instruction manual

Pentax

Pentax R-315EX(NX) instruction manual

Trotec TD120 manual

Trotec

Trotec TD120 manual

South Galaxy G1 user manual

South

South Galaxy G1 user manual

Dr.Meter LX1330B Operation manual

Dr.Meter

Dr.Meter LX1330B Operation manual

manuals.online logo
manuals.online logoBrands
  • About & Mission
  • Contact us
  • Privacy Policy
  • Terms and Conditions

Copyright 2025 Manuals.Online. All Rights Reserved.