manuals.online logo
Brands
  1. Home
  2. •
  3. Brands
  4. •
  5. Konica Minolta
  6. •
  7. Printer Accessories
  8. •
  9. Konica Minolta EK-608 User manual

Konica Minolta EK-608 User manual

E-1
EK-608 Local Interface Kit
INSTALLATION MANUAL
A88A-9550-00
Applied Machines: C368/C308/367/287/227
COLOR MFP: 36 ppm/30 ppm
MFP: 36 ppm/28 ppm/22 ppm
Product Code: A7PU/A7PY/A789/A7AH/A7AK
1. Accessory parts
* This part is used only when this option is
installed to 367/287/227.
Note:
• When installing the keyboard, connect its cable
to the USB port added to the machine.
• If none of the later steps instruct you to use the
parts including screw and cover that you
removed following the instructions described in
this manual, discard them.
• This manual provides the illustrations of the
accessory parts and machine that may be
slightly different in shape from yours. In that
case, instead of the illustrations, use the
appearance of your machine to follow the
installation procedure. This does not cause any
significant change or problem with the proce-
dure.
2. Installation procedures
<Installations to models C368/C308>
(1) Turn OFF the power switch and unplug the
power cord from the power outlet.
(2) Open the right door of the machine.
(3) Remove the control panel right cover.
(Two screws)
No. Name Shape Q’ty
1. Local interface
board unit
1
2. Harness
1
3. Wire saddle *
3
4. Screw 1
5. Label
1
6. Installation
manual
1 set
Keep this bag away from babies and
children. Do not use in cribs, beds,
carriages, or playpens.
The thin film may cling to nose and
mouth and prevent breathing. This bag is
not a toy.
<Installations to models C368/C308>
Follow the installation procedures starting on page
E-1.
<Installations to models 367/287/227>
Follow the installation procedures starting on page
E-4.
E-2
(4) Remove the two seals from the control panel
right cover.
(5) Remove the two caps from the control panel left
cover.
(6) Remove the five screws and two tabs and
remove the control panel front cover.
Note:
Do not use too much force to remove the cover as
the harness is connected.
(7) Disconnect the connector from the board on the
control panel front cover.
(8) Connect the supplied harness to the local inter-
face board unit and route the harness inside the
edge cover.
Note:
• Insert the black connector into the local inter-
face board unit connector.
• Route the harnesses so that the cable tie is
located at the position shown in the illustration.
(9) Remove the USB cable from the main body.
(Two screws)
Note:
The two removed screws are used in later step.
Do not discard them.
Tab
Cable tie
E-3
(10) Connect the USB cable removed in step (9) to
the local interface board unit.
(11) Attach the Local interface board unit to the
main body. (One supplied screw and two
screws removed in step (9))
Note:
Be careful not to pinch the harness.
(12) Connect the harness connector to the main
body relay connector and route the harness
inside the wire saddle.
(13) To install the covers, connector, and others
removed in steps (2) to (7), reverse the removal
procedure.
(14) Affix the label furnished with the local interface
kit to the position shown below.
* The installation procedure for models C368/
C308 is complete.
Label
E-4
<Installations to models 367/287/227>
(1) Turn OFF the power switch and unplug the
power cord from the power outlet.
(2) Connect the supplied harness to the local inter-
face board unit and route the harness inside the
edge cover.
Note:
• Insert the black connector into the local inter-
face board unit connector.
• Route the harness so that the cable tie is
located at the position shown in the illustration.
(3) Install the three supplied wire saddles to the local
interface board unit.
Note:
Install the wire saddles so that the lock faces out-
ward.
(4)
<When the optional Keypad KP-101 is mounted>
Remove the two screws and remove the cover
on the back side of the keypad. Disconnect the
connector and remove the keypad.
<When the optional Keypad KP-101 is not
mounted>
Remove the cover from the main body as shown
in the illustration. (Two screws)
(5) Open the front door of the main body.
Cable tie
E-5
(6) Remove the three screws, release the six tabs,
and remove the control panel assembly.
Note:
Do not use too much force when removing as the
cable is connected.
(7) Remove the cable from the control panel assem-
bly.
(8) Remove the bracket shown in the illustration.
(Two screws)
Note:
Discard the removed screws.
(9) Remove the bracket from the USB cable.
(Two screws)
Note:
The two removed screws are used in later step.
Do not discard them.
(10) Connect the USB cable removed in step (9) to
the local interface board unit.
(11)
<When mounting the Authentication Unit AU-201S
to the Working Table WT-506>
Refer to the installation manual for the Authenti-
cation Unit AU-201S and install the authentica-
tion unit.
<When mounting the Authentication Unit AU-102 to
the Working Table WT-506>
Refer to the installation manual for the Authenti-
cation Unit AU-102 and install the authentication
unit.
(12)
<When installing the Upgrade Kit UK-212 at the
same time>
Refer to the installation manual for the Upgrade
Kit UK-212 and install the upgrade kit.
E-6
(13) Attach the local interface board unit to the main
body.(One supplied screw and two screws
removed in step (9))
Note:
• Be careful not to pinch the harness.
• Route the control panel cable through toward
the front of the unit.
(14) Connect the harness of the local interface
board unit to the main body.
(15)
<When installing the AU-201S by using the Mount
Kit MK-735>
Refer to the installation manual for the Mount Kit
MK-735 and install the authentication unit.
(16) To install the covers and other parts removed in
steps (4) to (7), reverse the removal procedure.
(17) Affix the label supplied with the local interface
kit to the position shown below.
Cable

Other Konica Minolta Printer Accessories manuals
Konica Minolta JS-506 User manual

Konica Minolta

Konica Minolta JS-506 User manual

Konica Minolta FS-110 User manual

Konica Minolta

Konica Minolta FS-110 User manual

Konica Minolta PI-506 User manual

Konica Minolta

Konica Minolta PI-506 User manual

Konica Minolta LU-204 User manual

Konica Minolta

Konica Minolta LU-204 User manual

Konica Minolta HD-524 User manual

Konica Minolta

Konica Minolta HD-524 User manual

Konica Minolta KIP Color 80 User manual

Konica Minolta

Konica Minolta KIP Color 80 User manual

Konica Minolta bizhub 361 User manual

Konica Minolta

Konica Minolta bizhub 361 User manual

Konica Minolta FS-532 User manual

Konica Minolta

Konica Minolta FS-532 User manual

Konica Minolta AFR-12 Configuration guide

Konica Minolta

Konica Minolta AFR-12 Configuration guide

Konica Minolta DB-209 How to use

Konica Minolta

Konica Minolta DB-209 How to use

Konica Minolta PC-101 User manual

Konica Minolta

Konica Minolta PC-101 User manual

Konica Minolta Pi3505e User manual

Konica Minolta

Konica Minolta Pi3505e User manual

Konica Minolta HT-509 User manual

Konica Minolta

Konica Minolta HT-509 User manual

Konica Minolta LU-302 User manual

Konica Minolta

Konica Minolta LU-302 User manual

Konica Minolta DF-704 User manual

Konica Minolta

Konica Minolta DF-704 User manual

Konica Minolta FS-505 User manual

Konica Minolta

Konica Minolta FS-505 User manual
Konica Minolta IT-101 How to use

Konica Minolta

Konica Minolta IT-101 How to use

Konica Minolta AD-509 User manual

Konica Minolta

Konica Minolta AD-509 User manual

Konica Minolta VI-506 User manual

Konica Minolta

Konica Minolta VI-506 User manual

Konica Minolta PK-511 User manual

Konica Minolta

Konica Minolta PK-511 User manual
Konica Minolta ViZion DR+ 1417V2 Use and care manual

Konica Minolta

Konica Minolta ViZion DR+ 1417V2 Use and care manual

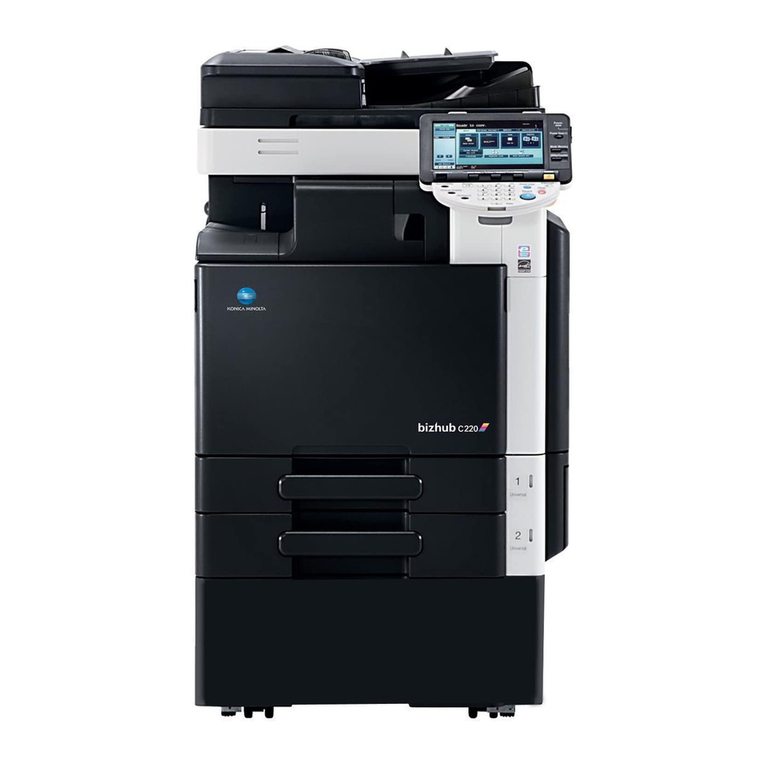
Konica Minolta bizhub C220 Series User manual

Konica Minolta

Konica Minolta bizhub C220 Series User manual

Konica Minolta bizhub 223 User manual

Konica Minolta

Konica Minolta bizhub 223 User manual
Konica Minolta DF-633 User manual

Konica Minolta

Konica Minolta DF-633 User manual

Popular Printer Accessories manuals by other brands

DataCard ImageCard series datasheet

DataCard

DataCard ImageCard series datasheet

DataCard SP75 Plus supplementary guide

DataCard

DataCard SP75 Plus supplementary guide

Sony CPPM-NR40 operating instructions

Sony

Sony CPPM-NR40 operating instructions

Oki LP441s instructions

Oki

Oki LP441s instructions

Canon DADF-N1 Service manual

Canon

Canon DADF-N1 Service manual

Epson DX5 X 1 Calibration and Maintenance

Epson

Epson DX5 X 1 Calibration and Maintenance

Epson T537120 Material safety data sheet

Epson

Epson T537120 Material safety data sheet

Sharp MX-FR46U Operation guide

Sharp

Sharp MX-FR46U Operation guide

HP CF410A instructions

HP

HP CF410A instructions

TROY Group 1320 user guide

TROY Group

TROY Group 1320 user guide

Kyocera DF-420 Service manual

Kyocera

Kyocera DF-420 Service manual

Epson T096620 Material safety data sheet

Epson

Epson T096620 Material safety data sheet

Canon LK-62 user guide

Canon

Canon LK-62 user guide

TonerRefillKits ReChargX RX077 instructions

TonerRefillKits

TonerRefillKits ReChargX RX077 instructions

Martin Yale 959 Installation, operation & maintenance instructions

Martin Yale

Martin Yale 959 Installation, operation & maintenance instructions

Canon Color UFRII Printer Kit-L1 Service manual

Canon

Canon Color UFRII Printer Kit-L1 Service manual

Xerox Phaser 5335 installation guide

Xerox

Xerox Phaser 5335 installation guide

Xerox 5500DN - Phaser B/W Laser Printer instruction sheet

Xerox

Xerox 5500DN - Phaser B/W Laser Printer instruction sheet

manuals.online logo
manuals.online logoBrands
  • About & Mission
  • Contact us
  • Privacy Policy
  • Terms and Conditions

Copyright 2025 Manuals.Online. All Rights Reserved.