KRAMER: SIMPLE CREATIVE TECHNOLOGY
Your VP-715 / VP-716 Scaler
2
3.1 VP-715/6 Scaler
The Kramer VP-715 and VP-716 are high quality converters for up-scaling
composite video, s-Video (YC) and component video to VGA and HD, with
both analog and digital outputs (the VP-716 only
1
).
In particular, the VP-715 and VP-716:
Can scale to VGA (640x480), SVGA (800x600), XGA (1024x768), WXGA
(1366x768), and SXGA (1280x1024) resolutions, with a wide range of refresh rates
Can also scale to HD resolutions (480p, 576p, 720p and 1080i)
2
at refresh
rates of 50Hz and 60Hz (user-selectable)
Has ProcAmp
3
control for video adjustment
Lets you select (in all resolutions) whether to work in RGB or in YUV
colorspace
Produces the scaled output on an HD-15 connector (VGA), on 3 RCA
connectors (HD), and on a DVI-D connector (the VP-716 only)
Has a user-friendly, menu-driven, OSD (on-screen display) interface for
control, as well as dedicated buttons for input and resolution selection
Is fed from an external 12V DC source
4
Is housed in a half 19" 1U rack-mountable enclosure
3.2 Achieving the Best Performance
Achieving the best performance means:
Connecting only good quality connection cables, thus avoiding
interference, deterioration in signal quality due to poor matching, and elevated
noise levels (often associated with low quality cables)
Avoiding interference from neighboring electrical appliances
Positioning your VP-715 / VP-716 away from moisture, excessive
sunlight and dust
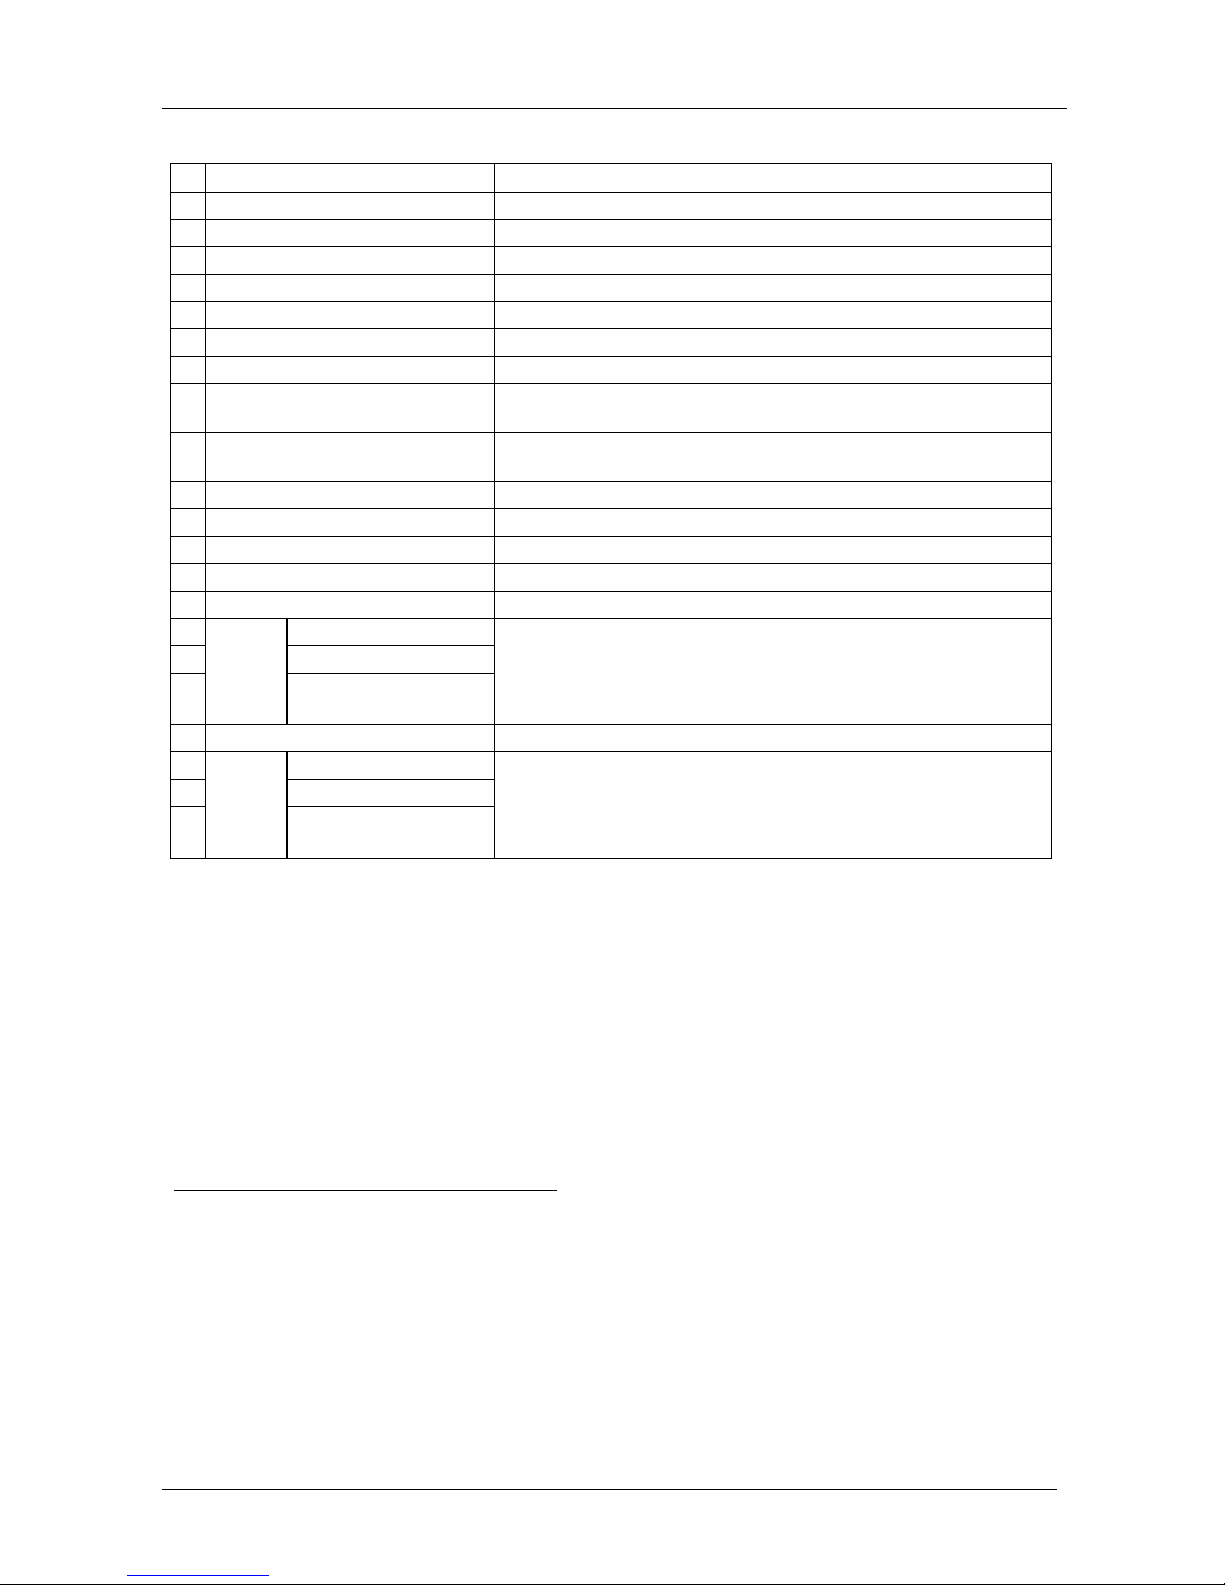
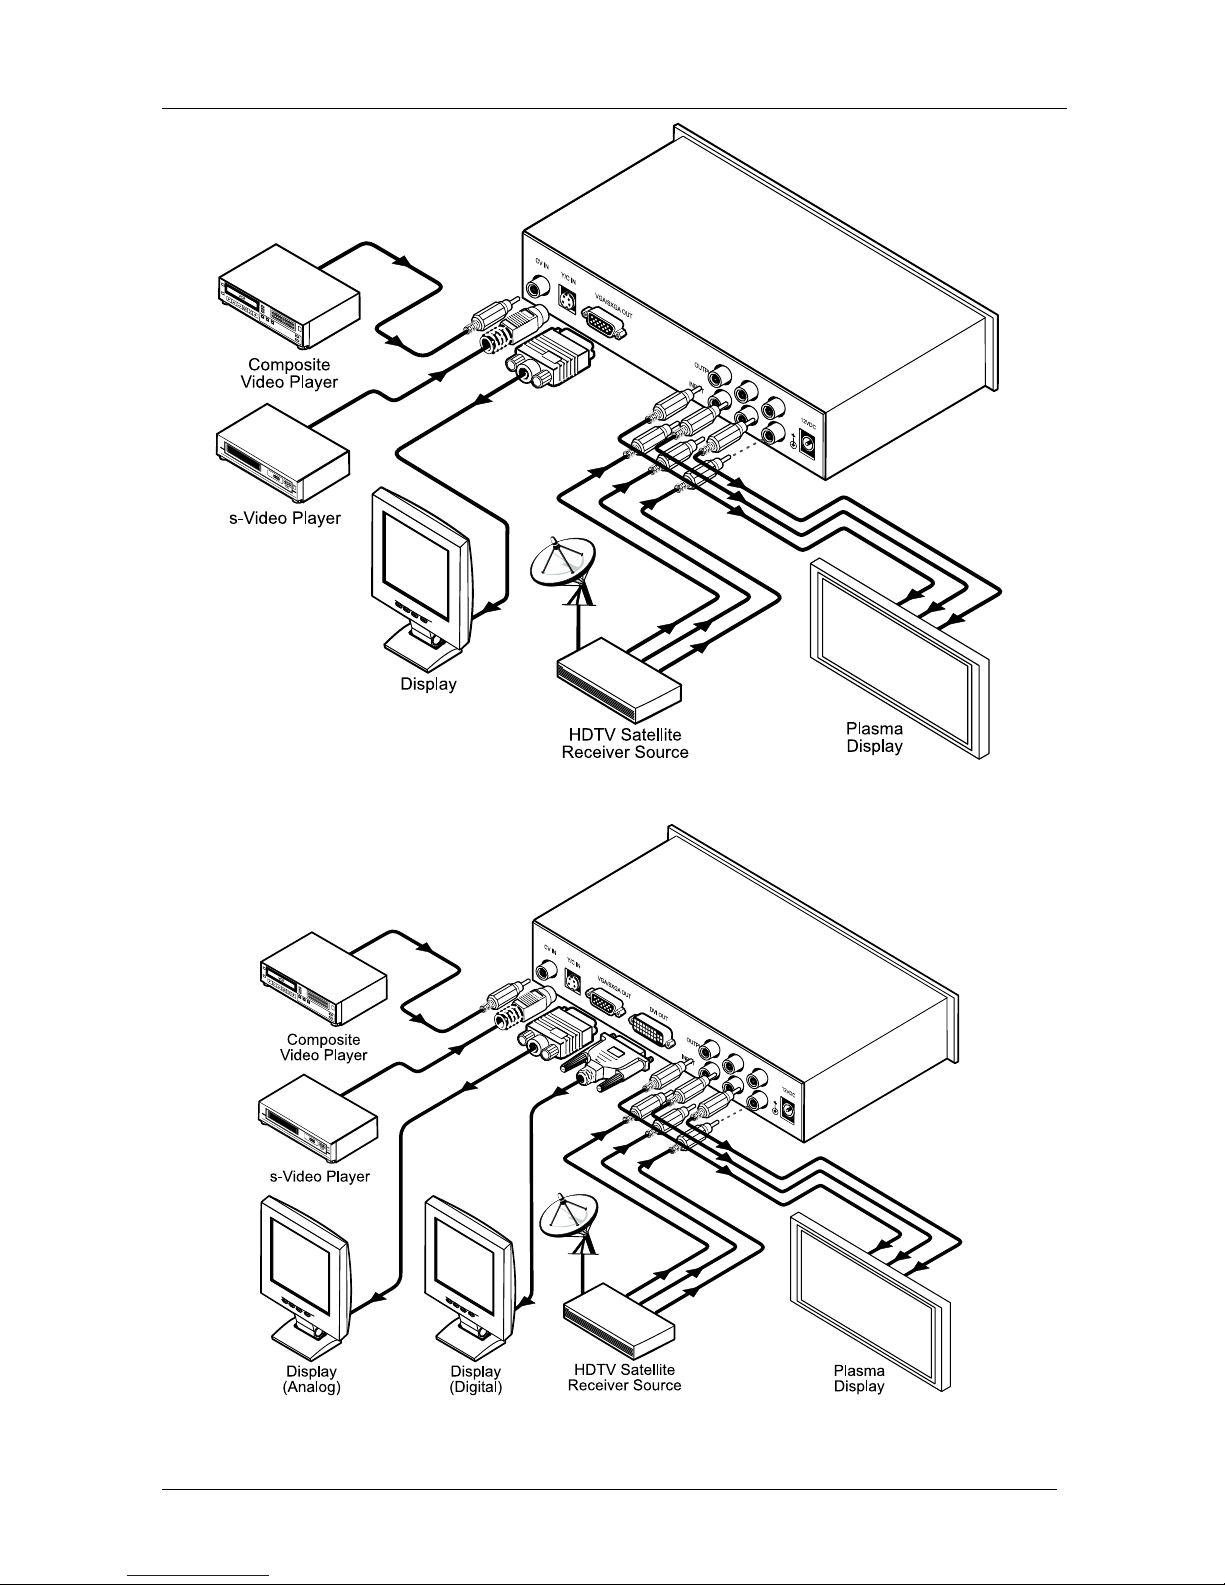
4 Your VP-715 / VP-716 Scaler
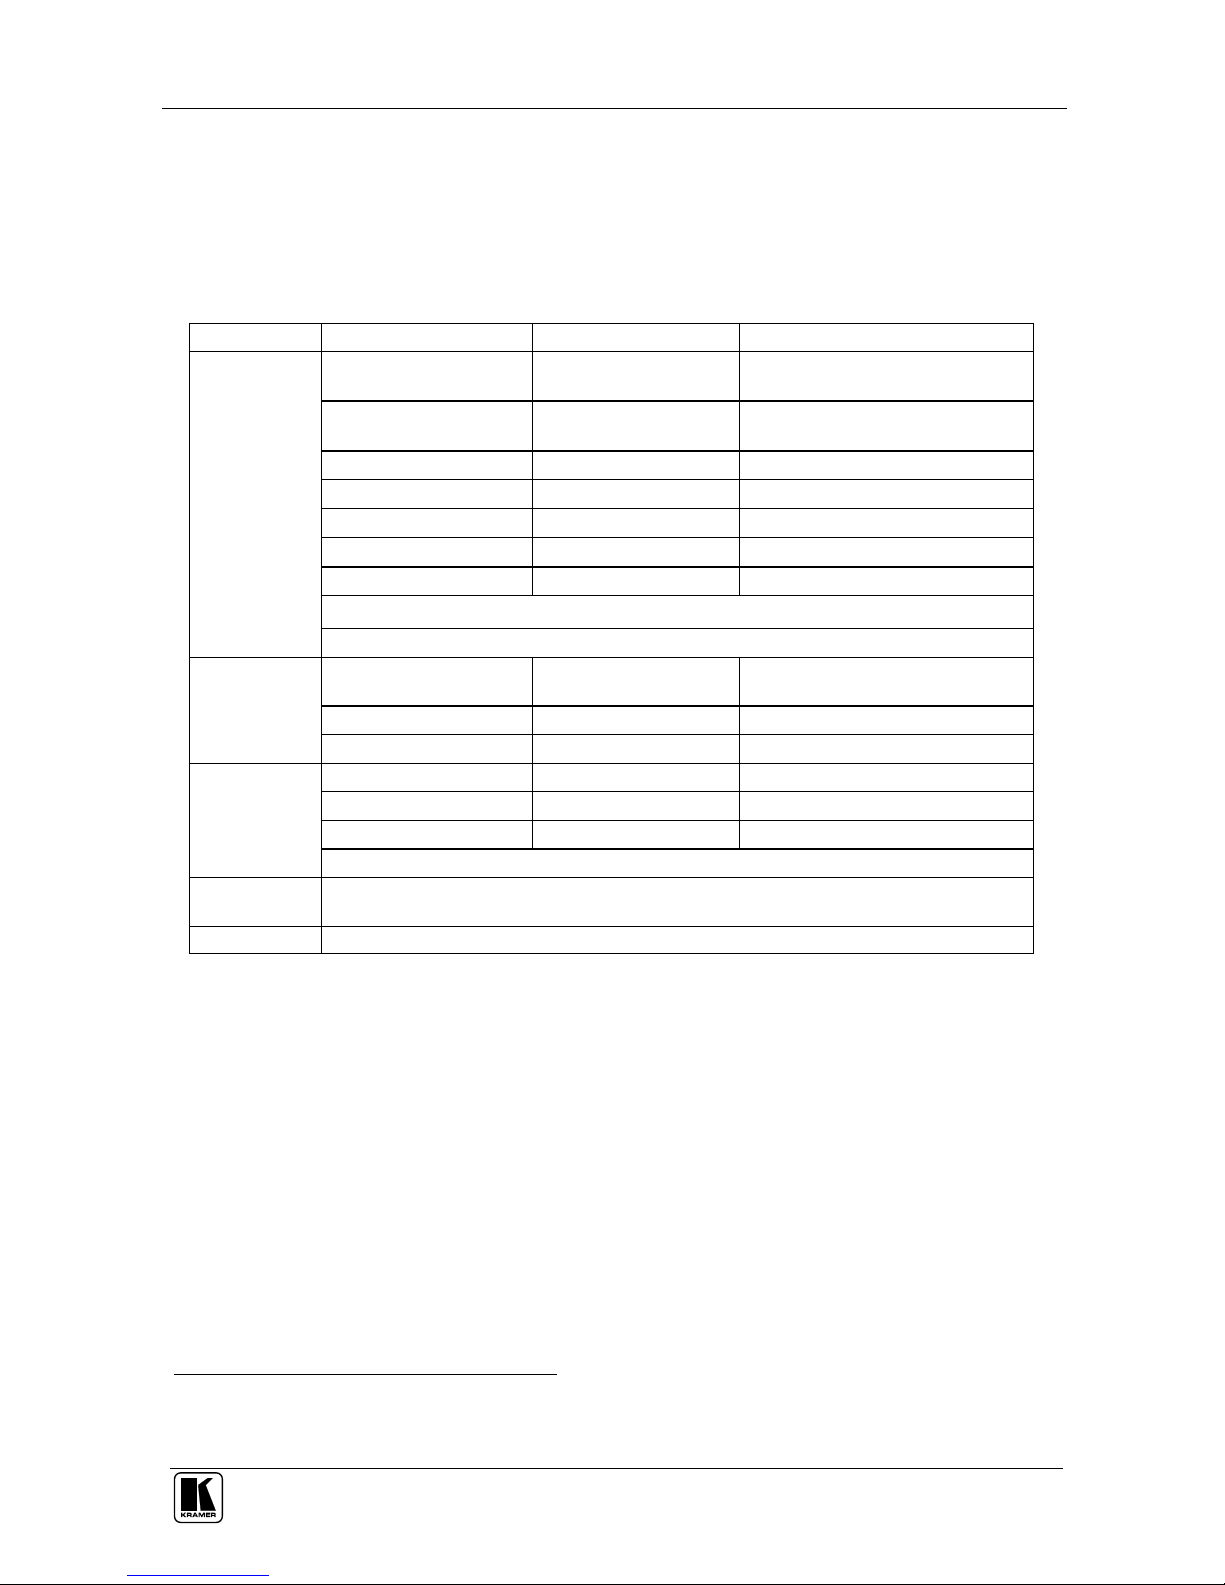
Figure 1 and Figure 2 illustrate the VP-715 and VP-716, respectively. Table 1
defines the VP-715 and VP-716.
1 The VP-715 has an analog output only
2 High definition television (HDTV) resolutions
3 Processing amplification enables adjustment of different video signal parameters
4 Making it suitable for field operation