Kraus Kohra FUS-14003 User manual
Other Kraus Bathroom Fixture manuals

Kraus
Kraus Elavo KCR-281 User manual

Kraus
Kraus KEF-15601 User manual

Kraus
Kraus Bolden FF-104 User manual

Kraus
Kraus KGW-1700 User manual

Kraus
Kraus KWT320-33 User manual

Kraus
Kraus Bellucci KGF1-30 User manual

Kraus
Kraus Aplos KEF-15301 User manual

Kraus
Kraus KEA-177 Series User manual

Kraus
Kraus KEF-15603 User manual

Kraus
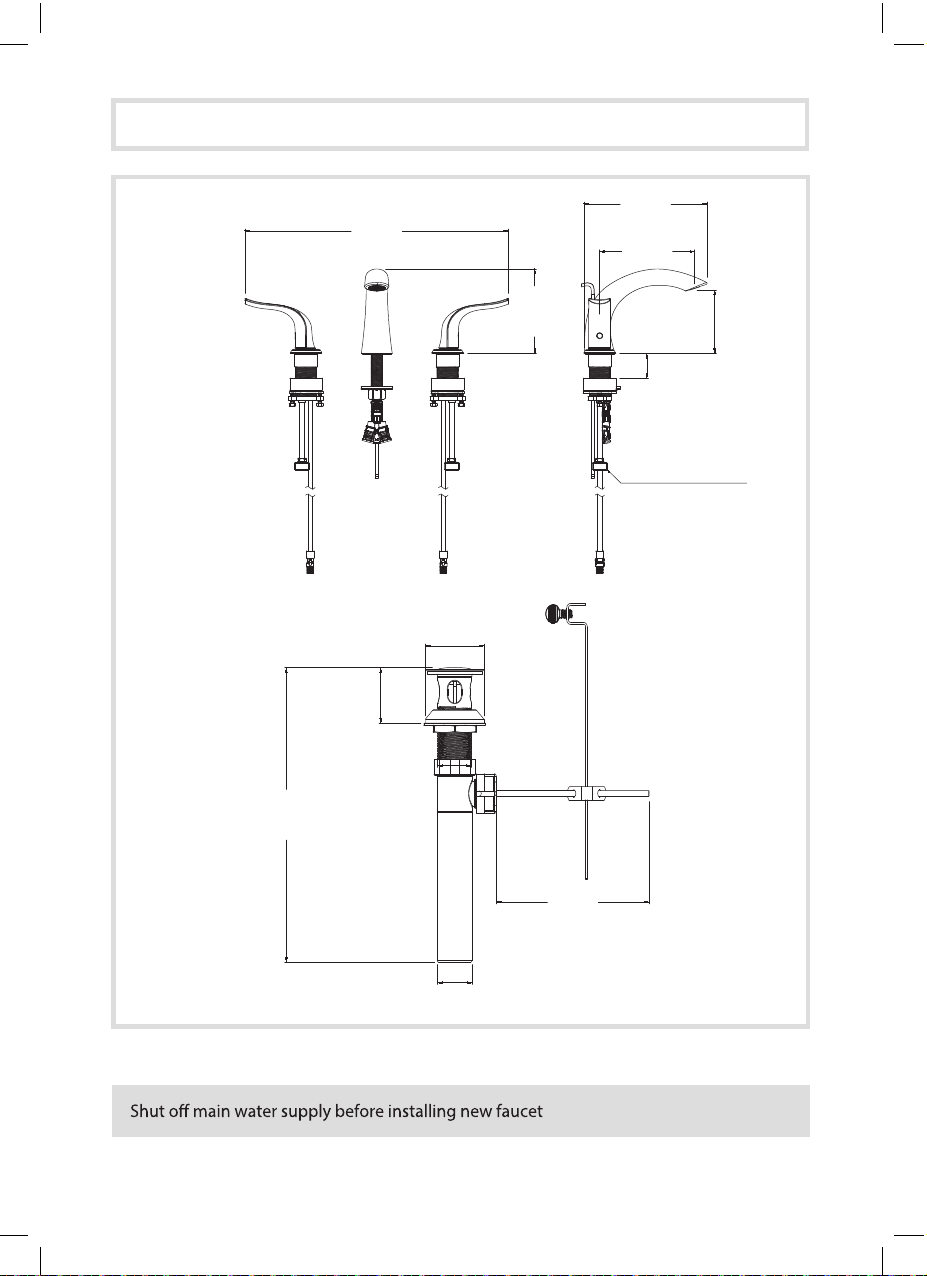
Kraus KCV-121 User manual