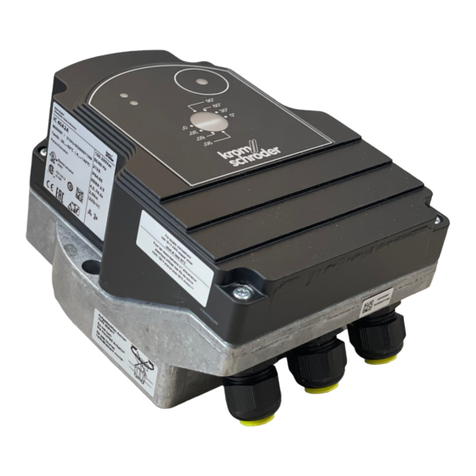
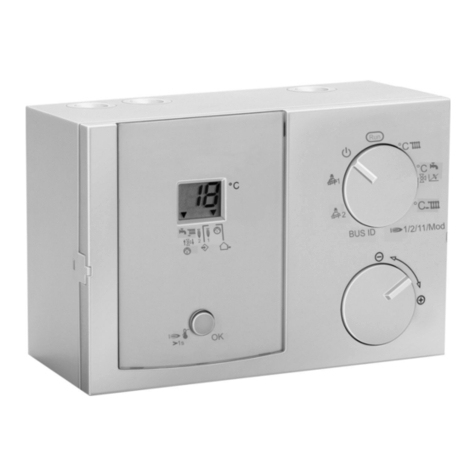
Krom Schroder E8.5064 V1 User manual

E8.5064 V1
System Manager
Operating instructions
Please observe the safety instructions and
read through this manual carefully before
commissioning the equipment.

Safety information General information
2
General infor mation
Safetyinformation
Power connection regulations
Please note the connection conditions specified by your
local electrical power supply company and the VDE
regulations.
Your heating control system may only be installed and
serviced by appropriately authorised specialists.
EIf the system is not installed properly, persons using it
are at put at risk of fatal or serious injury.
Warranty conditions
If the system is not installed, commissioned, serviced and
repaired properly, it will render the manufacturer's warranty
null and void.
Important text passages
!Important information is highlighted by an
exclamation mark.
EThis attention symbol indicates dangerous situations.
Note
!The operating manual describes the maximum
version of the controller, meaning that not all
statements are relevant for your device.
Description
Declaration of conformity
This device corresponds to the requirements
of the relevant guidelines and standards, if the
corresponding regulations and the manufacturer's
instructions are complied with.
Function
The device contains a number of functions and must be
set in accordance with use. The following functions are
mapped in the System Manager:
•Cascade modulating HS
•Control of 2 HS or 2-stage HS via relay
•Water heating, 2 mixed heating circuits, as well as 2
extra functions
•Demand-related circulation pump control
•Automatic toggle between summer and winter time
•Activation of a timer is possible

General information Contents
3
Contents
General information 2
Safety information 2
Power connection regulations 2
Warranty conditions 2
Important text passages 2
Note 2
Description 2
Declaration of conformity 2
Function 2
Contents 3
Part 1: Operation 8
Operation in normal mode 8
Operating elements 8
ÇOperating mode selection 8
Effect of the operating mode 9
Display in normal operation 10
Changing the settings 11
Operating elements 11
Operating level 12
Areas 13
General 13
Display 13
User 13
Time programs 13
Expert 13
Expert FA (only for FA via BUS) 13
Levels 13
Installation 13
Hot water 13
Heating circuit I / II 13
Solar/MF 13
Part 2: Overview of display values and settings 14
General area 14
Date/Time/Holiday 14
Service 16
Code number Entry 16
RELAY TEST 16
SENSOR TEST 17
SW NO XXX-XX 18
CASC MANUAL (only with code no.) 18
BURNER TIME and BURNER START 18
LIMITER TEST 18
SERVICE 19
RESET … 19
Display Range 20
INSTALLATION 20
T-OUTSIDE 20
EXT SETPOINT 20
T-HEADER DES (Heat requirement) 20
T-HS 1
(and T-HS 2 – 8 where cascades apply) 20
BUFFER-T/M/B 20
MOD DEPTH
(only in the case of HS via BUS connection) 20
Hot water 21

Contents General information
4
T-DHW L (storage tank lower temperature) 21
T-ROOM DES A
(current value for set room temperature) 21
T-ROOM (room temperature) 21
Solar/MF 22
Solar integration 22
T-MF(1-4) 22
User Area 23
INSTALLATION 23
GERMAN => Language 23
CONTRAST 23
DISPLAY SEL 23
SELECT PROG 23
Hot water 24
1X DHW (1x Hot water) 24
T-DHW 1-3 DES
(Hot water temperature setting) 24
BOB-VALUE (Operation Without Burner) 24
CIRCL-P-DHW (Circulation with hot water) 24
ANTILEGION
(Hot water short time heating function) 24
Heating circuit I / II 25
MODE 25
T-ROOM DES 1-3 25
T-REDUCED 25
T-ABSENCE 25
T-LIMIT DAY/T-LIMIT N (Day/Night) 26
HEATSLOPE 26
ADAPTION (Heat slope adaptation) 27
ROOM INFL (Room sensor influence) 27
T-ROOM ADJ (room sensor adaptation) 27
OPT HEAT UP (Heating optimisation) 28
MAX OPT-TIME (Maximum bring-forward) 28
OPT REDUCED (Reduction optimisation) 28
PC-ENABLE 28
RETURN 28
Timer Program Area 29
List of available time programs 29
Selecting a timer program 29
Timer/heating program adjustment 30
Expert area 33
INSTALLATION 33
CODE-NO 33
BUS-ID HS (- - - -) 33
BUS ID 1 / 2 (Heat circuit number) 33
AF SUPPLY (Outdoor sensor power supply) 33
BUS TERMIN (Bus terminating resistor) 33
EBUS SUPPLY (supply for eBUS) 34
TIME MASTER 34
MAX T-HS1/2 (Max. temperature HS) 34
MIN T-HS1/2 (min temperature HS) 34
MAX/MIN T-HEADER (only for cascades) 34
0-10 V Function 35
V-CURVE (only for 0-10V input/output) 35
CURVE 11-xx 35
T-WARM UP (Warm-up relief) 36
MIN DELIMI (minimum delimiter HS) 36

General information Contents
5
HYSTERESIS
(Dyn. switching hysteresis stage 1) 36
with HYST TIME (Hysteresis time) 36
DETECTED HSS (number of heat generators) 37
CAP/STAGE (boiler output for each stage) 37
NEW CONFIG (new BUS configuration) 38
MIN MOD CASC (min. modulation cascade) 38
HW-BOILER
(number of stages for HW operation) 38
CONTROL DEV (header control variance) 38
DES OUTPUT (required system output [in %]) 38
SWITCH VALUE (-99 – +99) 38
BLOCK TIME (currently remaining value) 38
RESET TIME (resetting time for I-Controller) 39
MODULAT MAX 39
MODULAT MIN 39
MIN MOD HS 39
MODULAT DHW (only for HW-boiler) 40
SEQUENCE 1 (boiler sequence 1) 40
SEQUENCE 2 (boiler sequence 2) 40
SEQU CHANGE (sequence change mode) 40
SEQ SW TIME(time to sequence change) 41
BLOCK-TIME (delay time for next stage) 41
HYST BURNER2 (for solid fuel / 2. burner) 41
HS COOL-FCT (cooling function for boiler) 41
with T-HS COOL
(starting temperature for cooling) 41
Switching pattern for 2-stage burners 42
HS 1 TYPE (primary heat generator type) 43
HS1 BUS (connection for HS) 43
HS 2 TYPE
(secondary heat generator type HS => A7) 43
STORAGE HS2 (heat accumulator for HS2) 43
BUFFER (heater buffer storage type) 44
Screed program 45
SCREED (activation of screed drying process) 45
Hot water 46
DHW RELIEF (Charge pump blocking) 46
PARALLEL DHW (Pump parallel running) 46
T-HS DHW (increase during HW operation) 47
HYST DHW (hot water hysteresis) 47
DHW FOLLOWUP (pump run-down time) 47
THERM INPUT (storage tank with thermostat) 47
WALL HUNG (for modulating HS) 47
LOAD THROUGH (only with F12 = T-DHW-
LOWER) 47
Heating circuit I / II 48
HC FUNCTION
(heating circuit function selection) 48
PUMP MODE (pump operating mode) 49
MIXER OPEN (open mixer dynamic) 49
MIXER CLOSE (close mixer dynamic) 50
MAX T-FLOW (max. flow temperature) 50
MIN T-FLOW (min. flow temperature) 50
T-FROST PROT (frost protection temperature) 50
T-OUT DELAY (outside temperature delay) 50
SLOPE OFFSET (heating slope distance) 51
B-HEAT SINK (circuit enable) 51
Contents General information
6
Auxiliary relay functions 52
FUNC RELAY 1 (function selection relay MF1) 52
T-MF1 SETP
(switching temperature relay MF1) 52
MF 1 HYST (hysteresis relay MF1) 52
F15 FUNCTION (sensor function F15) 55
Part 3: General function description 56
Heat circuit control 56
Weather-dependent control 56
Room sensor influence 56
Hot water generation 56
OwB => operation without burner 56
Frost protection function 56
eBUS burner controls 57
EEPROM check 57
Circulation pump control 58
Switched according to heating requirement 58
Switched according to heating limits 58
Delayed pump switch-off 58
Pump blocking protection 58
Mixer motor blocking protection 58
Part 4:Appendix 59
Remote controls 59
Operation-control module Merlin BM, BM 8,
Lago FB 59
Remote control FBR2 59
DCF receiver 60
PC 60
Telephone switch 60
System bus 61
The heating system 61
Error messages 62
Troubleshooting 63
Technical data 64

General information Contents
7

Operation in normal mode Part 1: Operation
8
Part 1: Operation
Part 1: Operation
For initial start-up or the "level Installation"
please read the installation manual.
Operation in normal mode
(operating flap closed)
Operating elements
ÇChange the set operating mode
ÇOperating mode selection
Turn the knob to select the operating mode required. The
operating mode selected is indicated by a symbol at the
bottom of the display. It takes effect when the setting is not
changed for 5 s.
The following operating modes are available for selection:
iStandby / OFF
(Heating OFF and hot water preparation OFF,
only frost protection mode)
F1 Automatic mode 1
(Heating according to timer program 1; HW according to
HW program)
F2 Automatic mode 2
(Heating according to timer program 2; HW according to
HW program)
hDay mode
(24 h heating with comfort temperature 1; HW according to
HW program)
CNight mode
(24 h heating with reduced temperature; HW according to
program)
FSummer mode
(Heating OFF, HW according to HW program)

Part 1: Operation Operation in normal mode
9
WService (automatic reset after 15 min)
Boiler regulated at Boiler temperature = max. boiler
temperature= see page 34 ; when the boiler temperature
has reached 65°C, the consumers are regulated to their
flow temperature to dissipate heat (cooling function).
!The cooling function must be explicitly enabled in
the consumer circuits by means of a set value.
Effect of the operating mode
The operating mode set here affects the boiler regulation
and the integrated heating circuits of the controller.
Each heating circuit can be assigned a separate operating
mode from the one set by means of the "operating mode"
parameter in the user level of the corresponding heating
circuit.
When the "i= Standby/OFF", and "F= Summer mode"
operating modes are set, they have a reducing effect on
system controllers with respect to all heating circuits and
consumer circuits in the entire system.
!For mixer controllers the reduction of operating
mode is only effective for internal heating circuits.

Operation in normal mode Part 1: Operation
10
Display in normal operation
18 6
12
24
F
2
A
B
EFH
I
G
D
C
D
!Due to the tolerances of sensors, deviations of
+/- 2K (2°C) are normal between various
temperature displays. Temperatures which change
rapidly can have higher deviations for short periods
due to the different time-related behaviour of various
sensors.
! The display of the current heating program applies
to the device's first heating circuit.
In case of having two heating circuits the display can
be set to the 2nd circuit
Explanations
A Current time
B Freely selectable display
(refer to "DISPLAY SEL" parameter)
C DCF reception OK
(only if receiver is connected via eBUS)
D Bus icon (if this icon does not appear, check data
line to connected CAN controllers
=> check eBUS via DISPLAY level)
E Display of the active heating program for the first
heating circuit
(here: 6:00 to 08:00 hrs and 16:00 to 22:00 hrs)
F Status display: Hinternal burner 1 relay ON;
Dheating mode; Fhot water preparation
G Mode selector switch, the display applies to all
internal heating circuits for which a separate
operating mode has been selected via the "MODE"
set value (here: F2=> Heating according to timer
program 2).
H Display of current temperature of HS 1 or header
temperature in the case cascades
I Display of numbers of active heat generators
(only applies to cascades)
! With HS1 BUS = 5 is indicated firmly here 0

Part 1: Operation Changing the settings
11
Changing the settings
The operating flap must be opened first in order to change
or request set values.
=> Controller switches to Operation mode
a Display indicating the current level
b Holes to unlock the controller fixation.
Insert a thin screwdriver deep into the holes and
then lift up the controller.
Operating elements
ÇA => Shaft encoder
Search for value/level or adjust value
ÄB => Programming key
•Select a value level
•Select a value level to change
•Save a new value
C => Change display
LED ON => The value in the display can be changed by
actuating the shaft encoder (A).
x
F
D => Manual-Automatic switch.
In Manual mode, all the pumps and first burner stage are
switched on. The mixers are not changed / accessed
(“DISPLAY EMERGENCY OPERATION”).
Limitation (switch-of with 5K hysteresis):
•Burner => MAX T-MODULE (expert)
•Heating circuit pumps => MAX T-FLOW (expert)
•Cylinder charging pump => T-DHW I (user)
ECaution, overheating, e.g. with floor or wall heating! =>
Set mixer by hand!
E => PC connection via optical adapter

Changing the settings Part 1: Operation
12
Operating level
SERVICE
General
DATE/TIME/HOLIDAY
ÇTurn anticlockwise Ê
Open
operating
flap ÇTurn clockwise Ì
INSTALLATION
HOT WATER
HEAT CIRCUIT I
HEAT CIRCUIT II
Display
SOLAR/MF
INSTALLATION
HOT WATER
HEAT CIRCUIT I
HEAT CIRCUIT II
User
SOLAR/MF
CIRCL TIME
HOTW-PROG
HTG-PROG ID1
Time programs
etc...
INSTALLATION
HOT WATER
HEAT CIRCUIT I
HEAT CIRCUIT II
Expert
SOLAR/MF
Expert FA INSTALLATION
Operation is divided into different areas:
General - Display - User - Time programs – Expert -
Expert FA.
Opening the hinged control panel cover automatically
takes you to the display and indicator area.
•The current area "DISPLAY" appears in the display for
a short time (1 clock circuit).
•After the clock circuit the display switches to the
current operating level "INSTALLATION".
•This is displayed for a short time (1 clock circuit) when
you switch to a new area.
ÇSelect the level in which the value to be adjusted or
displayed can be found using the rotary knob.
ÄPress Prog button! =>
Open / select level
ÇSearch for value using rotary knob
ÄPress Prog button! => Select value
LED lights up => adjustment can now be made
ÇModify value using rotary knob
ÄPress Prog button! => Store value - LED goes off
When the operating flap is first opened after voltage is
applied, the level SETUP is displayed once only. Once
the values grouped here have been set the controller
is operable.

Part 1: Operation Changing the settings
13
Areas
General
Value selection summary
Service => for service engineers
Date/Time/Holiday => for users
Display
System value display (e.g. sensor values and setpoints).
No adjustments can be made. Operating errors are
therefore excluded in this area.
User
Summary of settings that can be made by the operator.
Time programs
Summary of time programs for heating circuits, the hot
water circuit and extra functions where applicable
Expert
Summary of values for which expert knowledge is required
to make settings (installation technician).
EValues in the expert level are protected by a code no.
(damage/malfunction possible).
Expert FA (only for FA via BUS)
Summary of values transmitted by the automatic firing
device.
Levels
The settings in the different areas are sorted into operating
levels
•INSTALLATION
•HOT WATER
•HEATING CIRCUIT I
•HEATING CIRCUIT II
•SOLAR/MF
Installation
All display values and settings that relate to the heat
generator or the entire system and cannot be assigned to
a consumer circuit.
Hot water
All display values and settings that affect central hot water
preparation and circulation.
Heating circuit I / II
All indicator and set values that relate to the corresponding
consumer circuit (also, for example, as decentral hot-water
circuit).
Solar/MF
All indicator and set values that relate to solar energy
recovery and settings for the multifunction relay.
!An overview of all settings can be found on the
following pages.

General area Part 2: Overview of display values and settings
14
~Hinged cover OPEN Îsearch for level to the left with Ç,
open with Ä
Part 2: Overview of display values and settings
General area
(Select main level using Çand open with Ä)
Date/Time/Holiday
This area contains a series of different values in order to
provide rapid access.
(Select values/value group using Çand open with Ä)
Date/time => Value group
(General -> Date/Time/Holiday level)
All the values in this group are set in sequence =>
adjust using Ç=> continue with Ä
TIME
(Minutes)
Current minutes blink and can be
adjusted
TIME
(Hours)
Current hours blink and can be
adjusted (seconds are set to "00"
when stored)
YEAR Adjust current year
MONTH Adjust current month
DAY Adjust current day (date)
! If a heating system controller has been set to be the
TIME MASTER (time setting for all controllers, see
EXPERT/INSTALLATION) or a DCF (Radio time
receiver) has been installed in the system, the time
is blanked out on all the other controllers in the
system.
! There may be a time difference of up to 2 minutes
per month (correct time if necessary). If a DCF
receiver is connected the correct time is always
displayed.
The current weekday is calculated automatically. Checking
can take place using the selectable additional display in
the standard display => set to "Day"
It is possible to change from summer to winter time by
entering the date.

Part 2: Overview of display values and settings General area
15
!Please do not enter the day of travel as the start
date, but the first day of the holiday (no more
heating from this day).
!Please do not enter the day of travel as the end
date, but the last day on which there is to be no
heating. When you arrive home the house should be
warm and there should be hot water.
!Stop holiday function => e.g. for early return by
pressing the program switch.
!Not with Time Master or DCF
!The default setting is valid for Central European time
zones. A modification is only required if the date for
the time change is changed by political decree.
!The earliest date on which the change will occur
must be set. The controller performs the time
change on the Sunday following this date at 2.00 am
or 3.00 am.
!If no time change is required, please set
MONTH STOP to the same value as MONTH
START and DAY STOP to the same value as
DAY START.
Holiday => Value group
(General -> Date/Time/Holiday level)
All the values in this level are set in sequence => adjust
using Ç=> continue with Ä
YEAR START Set current holiday start year
MONTH START Set current holiday start month
DAY START Set current holiday start day
YEAR STOP Set current holiday end year
MONTH STOP Set current holiday end month
DAY STOP Set current holiday end day
Summer time => Value group
(General -> Date/Time/Holiday level)
All the values in this level are set in sequence => adjust
using Ç=> continue with Ä
MONTH START Set month for start of summer time
DAY START Set earliest day for start of summer
time
MONTH STOP Set month for start of winter time
DAY STOP Set earliest day for start of winter time

General area Part 2: Overview of display values and settings
16
~Hinged cover OPEN Îsearch for level to the left with Ç,
open with Ä
Service
This area contains values for the customer service
engineers in order to provide rapid access.
(Select operating level using Çand open with Ä)
Relay test => Value group (code no. required)
(General -> Service level)
Select relay using Ç=> relay switches
00 No relay
01 A1: Pump, heating circuit 1
02 A2: Pump, heating circuit 2
03 A3: Hot water charging pump
04 A4: Mixer OPEN, heating circuit 2
05 A5: Mixer CLOSED, heating circuit 2
06 A6: HS 1 ON
07 A7: HS2 ON [2-stage:HS 1+2 (after 10s) ON]
08 A8: Mixer OPEN heating circuit 1 / Multifunction 1
09 A9: Mixer CLOSED heating circuit 1 / Multifunction 2
10 A10: Multifunction 3
11 A11: Collector pump / Multifunction 4
A code number must be entered for this function.
ÄSelect Relay Test => "Code number" level
Code number Entry
ÄStart code number entry => [LED]
ÇSelect 1st digit
ÄConfirm entry
ÇSelect 2nd digit
ÄConfirm entry
ÇSelect 3rd digit
ÄConfirm entry
ÇSelect 4th digit
ÄConfirm entry
=> "Relay Test"
RELAY TEST
ÄStart relay test
ÇSelect relay => Relay switches
ÇSelect next relay or use
Äto stop relay test

Part 2: Overview of display values and settings General area
17
SENSOR TEST
Sensor test => Value group
(General -> Service level)
Select sensor using Ç=> value is displayed
F1 Buffer storage temperature Lower
F2 Buffer storage temperature middle or
room temperature heating circuit 1
F3 Upper buffer storage temperature
F5 Flow temperature, heating circuit 2
F6 Upper hot water temperature
F8 Heat generator /header temperature
F9 Outside temperature
F11 Flow temperature heating circuit 1
or temperature multifunction 1
F12 Hot water temperature lower or temperature
multifunction 2
F13 Solid fuel boiler temperature or collector 2
or temperature multifunction 3
F14 Collector 1 temperature or
temperature 4
F15;
Light;
0-10V I
Room temperature heating circuit 2 or
measured value of the light sensor or
voltage value 0-10V input
Start sensor test with Ä, use Çto select sensor =>
temperature is displayed; Use Äto stop sensor test

General area Part 2: Overview of display values and settings
18
Other entries
(General -> Service level)
Select value using Ç=> value is displayed
SW NO XXX-XX Software number with index
CASC MANUAL
(1-8; only with code
no.)
Starting different burner stages of
the cascade
BURNER TIME (1-8) ÄBurner time for all stages
BURNER START (1-8) ÄBurner start for all stages
LIMITER TEST (1-8) Safety temperature limiter test
with heat generator temperature
display
Start with Ä(hold down)!
SERVICE
(only with code no.)
Input of date or operating hours
for service messages
RESET USER 00 Load user parameter factory
settings (except language)
RESET EXPERT 00
(only with code no.)
Load expert parameter factory
settings (except sensors)
RESET T-PRG 00 Load time program factory
settings
RETURN Exit level using Ä
SW NO XXX-XX
Display software number with index (please specify if you
experience problems / have questions about the controller)
CASC MANUAL (only with code no.)
(only for cascades and only in that operating mode
“Service“ => see operating mode selection)
With Äopen level and select burner stage using Ç.
After the heat generator Ä has been selected the output
for this heat generator can be set.
With respect to multi-stage heat generators, the second
stage can be activated by means of presetting an output
value > 50%.
After closing the service functions the entries are reset
automatically .
BURNER TIME and BURNER START
Ä=> Display of current value ÄReturn
Hold down Äuntil indicator "RESET" goes out => Reset
display
LIMITER TEST
Use Äto open level and select heat generator with Ç.
=> Display heat generator temperature.
ÄHold down prog. button until LIMITER activates
Burner I ON
all pumps OFF
all mixers CLOSE
The temperature can be observed in the display.

Part 2: Overview of display values and settings General area
19
SERVICE
Input of values for the yearly service message or operating
hours.
Delete active maintenance display:
Open control panel cover, press prog. button ÄÄ, set
repeat value to "00" using Çand confirm with Ä.
Delete programmed annual message:
In the General/Service level, set value for
SERVICE=>DAY or
SERVICE => OPERATNG HOURS to hyphens.
RESET …
The three value groups can be reset to the factory setting
using the Reset function.
Select function using Ä, set to "01" using Çand confirm
with Ä.

Display Range Part 2: Overview of display values and settings
20
Display Range
!Display only - no adjustment possible. Display only
appears if the sensor is connected and the value is
present in the system, otherwise "----" or no display.
INSTALLATION
(HS => heat generator) use Çto select parameters
T-OUTSIDE Outside temperature
EXT SETPOINT External set value specification (0-
10V)
T-HEADER DES HS / Header set value (cascade)
T-HEADER HS / Header temperature (cascade)
T-HS Level Ä=> Temperature and Status
of the HS (HS 1 – HS 8)
T-SOLID FUEL For HS2 = Solid fuel boiler (A7)
T-RETURN 1 Return flow temperature of HS 1
T-RETURN 2 Return flow temperature of HS 2
T-BUFFER T Buffer storage tank temperature
removal
T-BUFFER M Buffer storage tank temperature
charging zone HS
T-BUFFER B Buffer storage tank solar zone
T-STORAGE 3 Temperature of storage tank 3 (e.g.
solar pool-heating)
MOD DEPTH 1-8 Modulation degree of HS (BUS)
RETURN Exit level using Ä
T-OUTSIDE
The measured outside temperature is smoothed for control
purposes. The smoothed value is displayed here.
EXT SETPOINT
The 0-10V input can be used to preset an accumulative set
value for the control system (see V-CURVE p. 35).
T-HEADER DES (Heat requirement)
Corresponds to the maximum required temperature of the
consumer circuits from the heating system (incl. hot water
preparation). The mixer circuits request the temperature +
heating curve distance (expert value)
T-HS 1 (and T-HS 2 – 8 where cascades apply)
Measured current temperature of the corresponding heat
generator. Additionally it is indicated whether the heat
generator is switched on ( H), in the case of two-stage
heat generators the status of the second stage is also
displayed ( II H).
BUFFER-T/M/B
(only if buffer storage is installed)
Buffer storage tank temperatures in the discharge area,
the charging area and the infeed of alternative energy.
MOD DEPTH (only in the case of HS via BUS
connection)
Only if a modulating heat generator is connected via BUS
and transmits this value.
Table of contents
Other Krom Schroder Controllers manuals

Krom Schroder
Krom Schroder IC 40 User manual

Krom Schroder
Krom Schroder GDJ 15 User manual

Krom Schroder
Krom Schroder VGBF 15R User manual

Krom Schroder
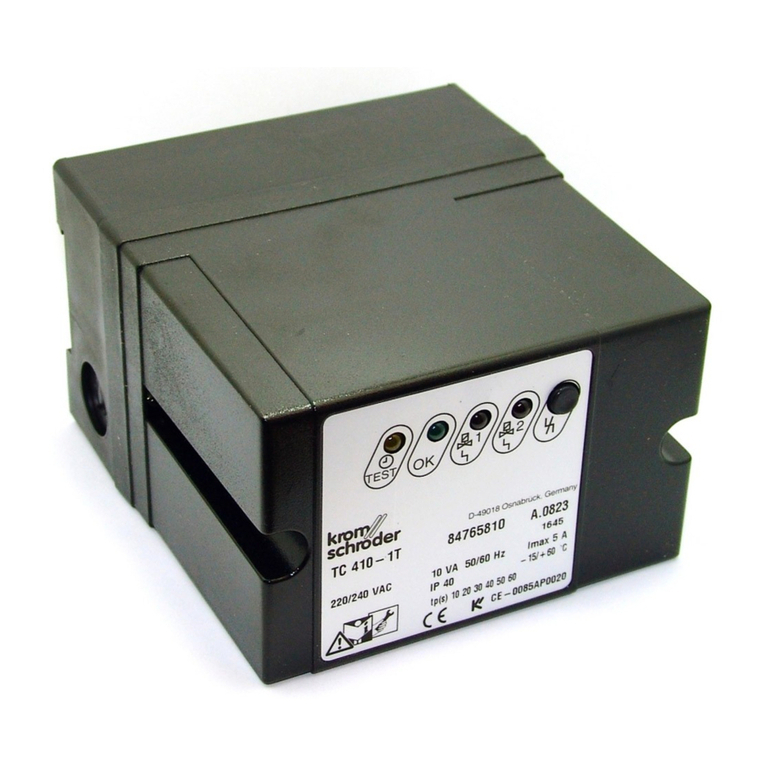
Krom Schroder TC 410 User manual

Krom Schroder
Krom Schroder Lago Basic 0201 R V1 User manual

Krom Schroder
Krom Schroder IC 50 Series User manual

Krom Schroder
Krom Schroder VAD User manual

Krom Schroder
Krom Schroder IC 20 User manual

Krom Schroder
Krom Schroder IC 20 User manual

Krom Schroder
Krom Schroder IC 40 User manual