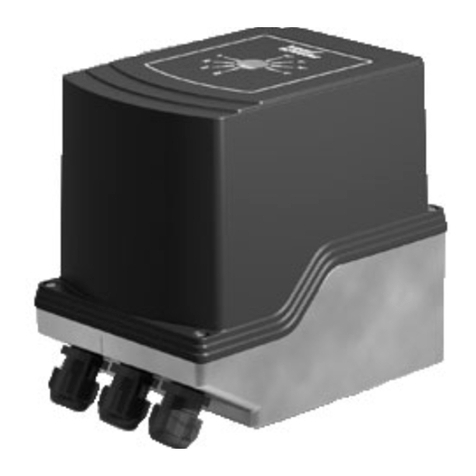
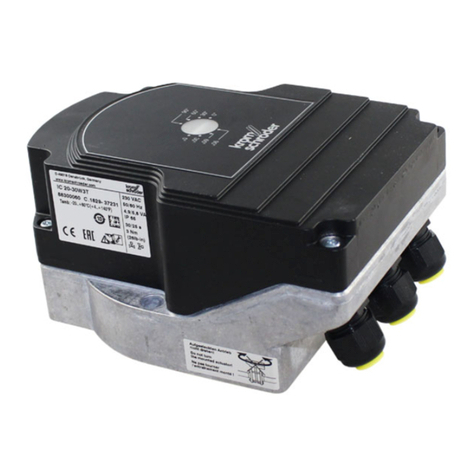
Krom Schroder IC 40 User manual

DK S N P GR
➔www.docuthek.com
D GB F NL I E
TR CZ PL RUS H
© 2017 Elster GmbH · Edition 07.18
Cert. version 07.18
Safety
Please read and keep in a safe place
Please read through these instructions
carefully before installing or operating. Following the
installation, pass the instructions on to the opera-
tor. This unit must be installed and commissioned
in accordance with the regulations and standards
in force. These instructions can also be found at
www.docuthek.com.
Explanation of symbols
• , 1 , , ... = Action
▷= Instruction
Liability
We will not be held liable for damage resulting from
non-observance of the instructions and non-com-
pliant use.
Safety instructions
Information that is relevant for safety is indicated in
the instructions as follows:
DANGER
Indicates potentially fatal situations.
WARNING
Indicates possible danger to life and limb.
CAUTION
Indicates possible material damage.
All interventions may only be carried out by qualified
gas technicians. Electrical interventions may only be
carried out by qualified electricians.
Conversion, spare parts
All technical changes are prohibited. Only use OEM
spare parts..
Changes to edition 09.16
The following chapters have been changed:
– Fully revised version
Contents
Operating instructions
D
GB
F
NL
I
E
GB-1
05147
Translation from the German
Actuator IC 40
Actuator IC 40..........................1
Contents ..............................1
Safety.................................1
Checking the usage .....................
Intended use ...........................2
Type code .............................2
Part designations ........................2
Type label..............................2
Combination of actuator with butterfly valve....2
Combination of actuator with linear flow control. 2
Installation ............................
Wiring ................................
Connection diagram......................3
Feedback..............................4
Establishing a connection to a PC .........4
Commissioning.........................5
LED display ............................5
Calibrating the zero position using BCSoft .....5
Accessories ...........................5
Opto-adapter PCO 200 ...................5
Opto-adapter PCO 300 ...................5
BCSoft................................5
Adapter set for butterfly valve DKL, DKG ......6
“Single application” attachment set...........6
Maintenance ...........................6
Assistance in the event of warnings and
faults .................................6
Technical data .........................9
Logistics ..............................9
Certification ..........................10
Contact ..............................10
Safety
Contents

GB-2
D
GB
F
NL
I
E
Checking the usage
Intended use
Actuator IC 40
It is designed for all applications that require precise,
controlled rotary movement between 0° and 90°.
The combination of actuator IC40 and control ele-
ment is designed to adjust volumes of gas and air
on various appliances and flue gas lines. IC40 is
adjusted and commissioned using the BCSoft V4.x
programming software.
This function is only guaranteed when used within the
specified limits– see page9 (Technical data). Any
other use is considered as non-compliant.
Type code
Code Description
IC 40 Actuator
SEmergency closing function
AMains voltage: 100 – 230 V AC, 50/60 Hz
Torque:
2.5 Nm
3 Nm
A
D
4 – 20 mA analogue input
Digital input
R101) 1 kΩfeedback potentiometer
1)
Optional
Part designations
23
1
4
1Housing cover
Position indicator
Red and blue LEDs
4Optical interface
Type label
Mains voltage, electrical power rating, enclosure,
ambient temperature, torque and installation posi-
tion– see type label.
D-49018 Osnabrück, Germany
www.kromschroeder.com
IC
P:
U:
Combination of actuator with butterfly valve
Type IC 40 + butterfly valve BV..
IBG IC 40 + BVG (for gas)
IBGF IC 40 + BVGF (for gas, clearance-free
valve)
IBA IC 40 + BVA (for air)
IBAF IC 40 + BVAF (for air, clearance-free valve)
IBH IC 40 + BVH (for hot air and flue gas)
IBHS IC 40S + BVHS (for hot air and flue gas,
with emergency closing function)
CAUTION
The emergency closing function should be used
only for the intended function. If the emergency
closing function is used for controlled shut-down
or for intermittent switching of the burner, this will
reduce the service life of the butterfly valve and
actuator. Such applications do not correspond to
the intended use.
Combination of actuator with linear flow
control
Type IC 40 + linear flow control
IFC 1 IC 40 + linear flow control VFC, size1
IFC IC 40 + linear flow control VFC, size3
Installation
CAUTION
Please observe the following to ensure that the
actuator is not damaged:
– Do not store or install the unit in the open air.
–The device must not be installed in a public
place. It must be accessible to authorized
personnel only. Unauthorized personnel could
make changes which could cause the system
to become unsafe or dangerous.
– Dropping the device can cause permanent dam-
age. In this event, replace the entire device and
associated modules before use.
▷Installation in the vertical or horizontal position,
not upside down.
▷
For the assembly of actuator and butterfly
valve, and for installation in the pipework, see
www.docuthek.com →Elster Thermal Solutions→
Products→03Valves and butterfly valves→
Butterfly valves BV.. operating instructions or
Linear flow controls IFC, VFC operating instruc-
tions.
▷
Do not insulate the actuator with thermal insu-
lation.

GB-3
D
GB
F
NL
I
E
Wiring
WARNING
Electric shocks can be fatal!
–Before working on electrically live components,
ensure they are disconnected from the power
supply.
–It must be possible to isolate the actuator from
the power supply. Provide a double pole switch.
▷Install supply and signal lines separately.
▷
Conductors which have not been connected
(spare conductors) must be insulated at their
ends.
▷Cables should be installed well away from high-
voltage lines of other devices.
▷Observe EMC Directive for installation of signal
lines.
▷
If the power supply is susceptible to frequent
voltage peaks, we recommend that an electric
filter be used.
▷
Use temperature-resistant supply cables (≥ 90°C
and min. 1 – 1.5 mm² or AWG 14 – 18).
▷Use cables with wire end ferrules.
▷Cable cross-section: max. 2.5mm².
▷
For information on assignment of the inputs
and outputs, see www.docuthek.com →Elster
Thermal Solutions→Products→03Valves and
butterfly valves→ Actuators IC... → Technical
Information IC40.
1 Disconnect the system from the electrical power
supply.
Shut off the gas supply.
▷
Before opening the unit, the fitter should ground
himself.
3 4 5
6 Wire as shown on the connection diagram.
▷Do not connect power supply and digital inputs
to different phases of a three-phase current sys-
tem.
Connection diagram
N L1 L1 N L1 N
100–230 V AC
50/60 Hz
COM NC NO COM NC NO
100–230 V AC
24 V DC
max. 230 V AC
max. 2 A
Power DI 1 DI 2 RO 1 RO 2 IN Analog
4–20 mA
Potentiometer
max. 0,25 W
7 Assign inputs according to application.
▷The load impedance of the 4 – 20 mA input can
be modified using the switch on the main circuit
board.
ON
1 50 Ω
ON
1
250 Ω
50 Ω
250 Ω
▷Digital input DI 1/DI 2: in the case of 24VDC,
check the polarity.
▷
Analogue input IN Analog: 4 – 20 mA, check
the polarity.
▷
For further information on the inputs, see
page9 (Technical data).
8 Assign outputs according to application.
▷Digital outputs RO 1 and RO 2: signalling con-
tacts designed as relay change-over contacts.
▷For further information on the outputs, contact
current and relay contacts, see page9 (Tech-
nical data).

GB-4
D
GB
F
NL
I
E
Feedback
▷
A feedback potentiometer offers the option of
monitoring the current position of the actuator.
▷
The potentiometer is an optional feature. It is
installed at the factory and cannot be retrofitted.
▷The potentiometer must be utilized as a voltage
divider. The change in position of the potentiom-
eter wiper (which corresponds to the actuator
position) can be measured as a changing voltage
between U-andUM.
U+
UM
U-
22
21
20
Potentiometer
Wiper
(e.g. 1 V DC)
(ground)
▷
Other circuit layouts produce measurement
results that are inaccurate and do not remain
stable over a long period of time or are non-
reproducible. They also reduce the service life
of the feedback potentiometer.
▷The available range (resolution) depends on the
parameterization of the setting range.
▷
The potentiometer is only suitable for connection
of SELV and PELV.
▷Max. power = 0.25W, max. voltage= 15V.
▷
Follow the reverse procedure when reassembling.
▷
Carefully align the optical waveguides on the
circuit board with the marking on the housing
cover (circle).
9 10 11
▷Re-tighten the cover screws in order to ensure
that the housing cover is grounded.
▷
A PC or notebook, the BCSoft V4.x program-
ming software and an opto-adapter PCO200 or
PCO300 are required for further commissioning,
see page5 (Accessories).
▷The opto-adapter establishes a connection be-
tween the PC and the actuator.
BCSoft
▷The current software and operating instructions
can be downloaded from www.docuthek.com,
see page5 (Accessories). To do so, registra-
tion in the DOCUTHEK is required.
▷
BCSoft V4.x allows you to select the type of con-
trol, the operating mode, running times, opening
angles and intermediate positions.
▷
Various operating modes, which may be modified,
are stored in the actuator.
▷
The actuator can also be controlled “by hand”
using BCSoft.
▷
Service technicians can call up statistical data
using BCSoft.
▷
Once set, all the parameters can be saved on the
PC and copied from there into other actuators.
▷
For detailed information on control, Manual
mode and statistics, see www.docuthek.com →
Elster Thermal Solutions →Products →
03Valves and butterfly valves → Actuators IC...
→ Technical Information IC40.
Establishing a connection to a PC
▷Up-to-date antivirus software must be installed
on the PC used for parameterization.
There are two ways of establishing a connection to
a PC:
▷Opto-adapter PCO 00: cable connection via
USB interface.
▷Opto-adapter PCO 00: wireless connection
using Bluetooth.
▷
Follow the instructions provided in the enclosed
operating instructions of the corresponding opto-
adapter for installation of the driver and connec-
tion establishment.
▷Operating instructions PCO 200 and PCO 300
(D,GB), see www.docuthek.com→Elster Ther-
mal Solutions→Products→03Valves and but-
terfly valves→Actuators IC20, IC40, IC50→
PCO...
• Place the sensor in the centre of the marking
(circle) provided for this purpose.
▷The film on the marking must be clean and un-
damaged.
▷
When connecting to BCSoft, a connection to
the IC 40 is established from the PC/notebook.
▷
If a connection fails to be established, the proce-
dure can be repeated by pressing function key F3.
▷The opto-adapter is to be removed again follow-
ing successful parameterization.

GB-5
D
GB
F
NL
I
E
Commissioning
LED display
Blue LED Red LED Operating state
Moderately
flashing2) Off Zero position
check
Slow flashing3) Slow flashing3) Calibration
Lit Off Device in
Standby mode
Moderately
flashing2) Off Device in
motion
Fast flashing1) Off Manual mode
Fast flashing1) Off Moving in
Manual mode
Lit
Flashing
depending on
fault message
Fault
Flashing alternately for 2 s1) Parameters
accepted
1)
Fast flashing: 5 x per second.
2)
Moderately
flashing: 3 x per second.
3)
Slow flashing: 1 x per
second.
Calibrating the zero position using BCSoft
1 After automatic identification via BCSoft, select
the IC 40 in the “Devices” window by double-
clicking on it. The individual program options are
displayed.
Select the “Commissioning..” program option.
Select the butterfly valve fitted in the “Actuator
mounted on” menu item.
BVH, BVHS
4 Select “Start calibration”.
▷
The slow flashing blue and red LEDs indicate
that the actuator is moving.
▷The setting process for the valve’s zero/closed
position takes place automatically.
▷
When the blue LED is lit continuously, calibration
is completed.
BVG, BVGF, BVA, VFC ...
4 Select “Start calibration”.
▷
The control element moves to the zero/closed
position.
• Move the actuator manually using the “OPEN”
and “CLOSE” buttons.
▷The current position can be entered as the zero/
closed position by clicking on “Accept zero po-
sition”.
▷
When the blue LED is lit continuously, calibration
is completed.
BVH, BVHS, BVG, BVGF, BVA, BVAF, VFC...
5 After the calibration process has been com-
pleted, check the selected operating mode or
select a new operating mode for the application.
▷
The setting up of the parameters and assignment
of the inputs and outputs must be co-ordinated.
CAUTION
The selected operating mode is responsible for the
setting properties of the device!
Accessories
Opto-adapter PCO 00
Cable connection via USB interface.
BCSoft CD-ROM included
Order No.: 74960625
Opto-adapter PCO 00
Wireless connection using Bluetooth.
®
BCSoft CD-ROM included
Order No.: 74960617
BCSoft
For BCSoft software and operating instructions, see
www.docuthek.com→Elster Thermal Solutions→
Products→03Valves and butterfly valves→Actua-
tors IC20, IC40, IC50→BCSoft V4.x.
▷
In order to be able to download the software,
registration in the DOCUTHEK is required.
M0 plastic cable gland with pressure
equalization element
To avoid the formation of condensation, a cable gland
with pressure equalization element can be used in-
stead of the standard cable gland. The cable gland
is designed to ventilate the device, without allowing
water to enter.
Order No.: 74924686

GB-6
D
GB
F
NL
I
E
Adapter set for butterfly valve DKL, DKG
M 6
Ø 130
Ø 90
40
53,5
10
8
0,4 kg
Order No.: 74921672
“Single application” attachment set
This attachment set is required if the actuator is
mounted onto control elements other than DKL,
DKG, BV.. orVFC.
Ø 8
Ø 17
Ø 130
Ø 90
ø 4H12
Ø 5,5
0,4 kg
7
16
25
20
Order No.: 74921671
Maintenance
Actuators IC 40 suffer little wear and require little ser-
vicing. We recommend a function check once a year.
If the “Service note” option has been activated in
BCSoft, a warning signal is issued as standard once
one or several of the set limit values has/have been
reached and exceeded. The warning limits are preset
as follows and can be adapted if necessary:
3 million cycles (0 – 90 – 0°/0 – 100 – 0%),
3 million relay switching operations,
5 million changes of direction.
If a service note is active, it can only be acknowl-
edged via BCSoft. In doing so, the current date will
be entered as the acknowledgement date in the
device history.
Assistance in the event of warnings
and faults
• Read the warning, error and fault messages in
the BCSoft diagnostic system.
WARNING
To avoid harm to persons and damage to the unit,
please observe the following:
– Electric shocks can be fatal! Before working on
electrically live components, ensure they are
disconnected from the power supply.
– Never remove the circuit board!
– Unauthorized repairs or incorrect electrical con-
nections may cause the control element to open
resulting in defects.
? Warning and fault
! Cause
• Remedy
There are three ways of resetting/
acknowledging warnings and faults:
– Reset using BCSoft
– Reset by disconnecting the mains voltage and
switching it on again
– Reset by pressing the Reset button in the device
(Attention: in the case of electrically live parts, this
may only be carried out by authorized personnel)
RESET
? Red LED lights up and blue LED flashes?
(fault/device error)
! Flashes once: internal fault.
• Carry out reset →the actuator is recalibrated.
• If it is not possible to remedy the fault, send the
actuator to the manufacturer.
! Flashes twice: zero position check, reference
switch does not close.
• Carry out reset →the actuator is recalibrated.
• If it is not possible to remedy the fault, send the
actuator to the manufacturer.
! Flashes 3 times: zero position check, reference
switch does not open.
• Carry out reset →the actuator is recalibrated.
• If it is not possible to remedy the fault, send the
actuator to the manufacturer.

GB-7
D
GB
F
NL
I
E
! Flashes 6 times: saving error for adjustable pa-
rameters.
• Carry out reset.
• If it is not possible to remedy the fault, send the
actuator to the manufacturer.
! Flashes 7 times: saving error: factory default
parameters.
• Carry out reset.
• If it is not possible to remedy the fault, send the
actuator to the manufacturer.
! Flashes 8 times: saving error: user calibration.
• Carry out reset.
• If it is not possible to remedy the fault, send the
actuator to the manufacturer.
! Flashes 9 times: low voltage.
• Check actuator mains voltage supply.
• If it is not possible to remedy the fault, send the
actuator to the manufacturer.
? Blue LED lights up in accordance with op-
erating state, red LED flashes? (warning)
! Flashes once: internal temperature > 90°C.
Ambient temperature too high.
• Reduce ambient/medium temperature.
! Flashes twice: drift > 5%. Control element me-
chanically offset or moving against its mechanical
stop.
• Check control element opens and closes without
restrictions.
• Carry out reset →the actuator is recalibrated.
! Flashes 3 times: drift > 10%. Control element
mechanically offset or moving against its me-
chanical stop.
• Check control element opens and closes without
restrictions.
• Carry out reset →the actuator is recalibrated.
• Adjust the closed position.
• Carry out reset →the actuator is recalibrated.
! Flashes 4 times/5 times: control element blocked,
large mechanical offset, internal error, actuator
offset.
• Check control element opens and closes without
restrictions.
• Carry out reset →the actuator is recalibrated.
! Flashes 6 times: analogue input AI < 4 mA.
• Check analogue input signal.
! Flashes 7 times: service note: maximum number
of OPEN/CLOSE cycles exceeded.
• Carry out reset using BCSoft.
! Flashes 8 times: service note: maximum number
of changes in direction of rotation exceeded.
• Carry out reset using BCSoft.
! Flashes 9 times: service note: relay output RO1
or RO2 switched too often.
• Carry out reset using BCSoft.
? The drive shaft does not move?
! No permanent voltage supply to the unit.
• Check supply voltage.
! No signal at the unit.
• Check signal.
! Signal at incorrect input.
• Check correct assignment: DI1/DI2.
! Signal voltage incorrect.
• Check signal voltage, see page9 (Technical
data).
! Selected operating mode does not correspond
with signal specifications.
• Adjust the unit or signals.
? Blue LED does not light – but the control
element opens?
! LED defective.
• Remove the unit and return it to the manufacturer
for inspection.
? No LED lights – unit is not functioning?
! No voltage supply to the unit.
• Check supply voltage.
! Unit defective.
• Remove the unit and return it to the manufacturer.
? Red and blue LEDs flash?
! Calibration of the closed position is active.
• Wait for the calibration process to finish.
• If the calibration process is not completed suc-
cessfully, cancel it and check control element
opens and closes without restrictions
? No reaction despite input signal?
! The selected operating mode is not reading this
input– incorrectly parameterized.
• Set the parameters for the operating mode/input
in BCSoft to suit your requirements.
? No output signal?
! Minimum and maximum current values not ob-
served.
• Check/adjust the current value.
! The function is not activated in the software.
• Set the parameters in the software to suit your
requirements.
! Change-over relay terminals incorrectly assigned.
• Check electrical wiring.
? The drive shaft does not move as required?
! The selected operating mode reads the inputs
differently to expectations.
• Set the parameters for the operating mode in
BCSoft to suit your requirements.
GB-8
D
GB
F
NL
I
E
? The drive shaft moves constantly?
! Current signal fluctuates.
• Check control loop, if possible attenuate it.
• Increase the hysteresis and filtering in BCSoft.
! 3-point step signal commands too many changes
of direction.
! Check/adjust the 3-point step controller.
? No communication possible between PC
and IC40?
! Incorrect interface used on the PC.
• Set the interface to the correct configuration us-
ing BCSoft– see page5 (Commissioning).
! Opto-adapter not positioned correctly.
• Position the magnetic head of the opto-adapter
in the circle provided.
! Optical waveguide bent.
• Carefully align the optical waveguides on the
circuit board with the marking on the housing
cover (circle).
! Housing cover not correctly secured.
• Close the housing and tighten all the screws.
! Film on the marking on cover (circle) dirty or dam
-
aged.
• Clean the film; if it is damaged, replace the cover.
! Opto-adapter defective.
• Check the adapter using the BCSoft test function.
• Replace the opto-adapter.
? The parameters cannot be set in the soft-
ware?
! No writing access granted.
• Enter passcode for writing access (see BCSoft
operating instructions).
? Unit does not react to signal change– the
blue LED flashes quickly?
! The unit is in Manual mode.
• Deactivate Manual mode in BCSoft or disconnect
device from the mains.
? The motor and drive shaft of the actuator
no longer function as required?
! The gear is defective.
• Remove the unit and return it to the manufacturer.
! The selected nominal valve size is too big and
has reduced the service life of the mechanical
components due to excessive stress.
• Check the system design.
• Adjust the valve size and/or actuator.
! Gear load is too great.
• Check the torque – see page 9 (Technical
data).
? Feedback potentiometer indicates incorrect
values?
! Connections on the terminal strip mixed up.
• Check the contact assignment on the terminal
strip.
! Incorrect potentiometer utilization.
• Utilize the potentiometer as a voltage divider.
! The windings in the potentiometer are defective.
• Remove the unit and return it to the manufacturer
for inspection.
? Software problem and/or problem with set-
tings?
! Software version obsolete.
• The current software and operating instructions
can be downloaded from www.docuthek.com,
see page5 (Accessories).
? Is it not possible for the fault to be eliminated
with the measures described above?
• Remove the unit and return it to the manufacturer
for inspection.

GB-9
D
GB
F
NL
I
E
Technical data
Purpose of control: operating control, electric
actuator.
Mains voltage: 100–230VAC, ±10%, 50/60Hz,
the actuator automatically adjusts to the respec-
tive mains voltage.
Power consumption: 10.5 W/21 VA at 230 V AC,
9 W/16.5 VA at 120 V AC.
Switch-on peak current: max. 10 A for max. 5 ms.
Screw terminals using the elevator principles for
cables up to 4 mm2(single core cables) and for
cables up to 2.5 mm2with wire end ferrules.
Angle of rotation: 0 – 90°, setting accuracy
<0.05°.
Holding torque = torque as long as mains voltage
is applied.
Independently mounted control.
Pollution degree: 3 (outside of enclosure)/2 (within
enclosure).
Rated impulse voltage: 4000 V.
Impedance protected motor.
2 digital inputs:
24 V DC or 100 – 230 V AC each.
Current requirement of digital inputs:
24 V DC: approx. 5 mA eff,
230 V AC: approx. 3 mA eff.
1 analogue input (optional):
4 – 20 mA (load impedance switchable from 50Ω
to 250Ω).
Potentiometer (optional): 1 kΩ ± 20%,
linearity tolerance: ± 2%, max. capacity: 0.25W,
conductive plastic element.
Tap wiper at high resistance, see page4
(Feedback).
2 digital outputs:
Signalling contacts designed as relay change-
over contacts. Contact current of digital outputs:
min.5mA (resistive) and max. 2A (resistive).
Enclosure:
IC 40: IP 64, in conjunction with BVH: IP 65,
IC 40: Nema 2, in conjunction with BVG, BVA or
BVH: Nema 3.
Safety class: I.
Duty cycle: 100%.
Type of action to EN 60730: type 1C.
Software class A.
Overvoltage category III.
Electrical connection:
Line entrance: 3 x M20 plastic cable glands.
Ambient temperature:
-20 to +60°C, no condensation permitted.
Storage temperature: -20 to +40°C.
Max. installation altitude: 2000 m AMSL.
Type Running time [s/90°] Torque [Nm]
50 Hz/60 Hz 50 Hz 60 Hz
IC 40 4.5 – 76.5 2.5 2.5
IC40S 4.5 – 76.5 3 3
On the IC40, the running time and torque are
independent of the mains frequency. The running
time can be freely programmed between the limits
of 4.5 and 76.5s.
Specifications on the typical designed lifetime:
The following specifications on the designed
lifetime of the actuator relate to typical applications
with butterfly valves BVA, BVH and VCG.
Mechanical switching cycles (0° – 90° – 0°/0% –
100% – 0%):
IC 40 with VFC: 5 million cycles
IC 40 with BVA/BVG: 5 million cycles
IC 40 with BVAF/BVGF: 5 million cycles
IC 40 with BVH/BVHx: 3 million cycles
Typical number of operating cycles of the digital
outputs RO1 and RO2:
Switching current Switching cycles
5 mA 4,000,000
2 A 250,000
Logistics
Transport
Protect the unit from external forces (blows, shocks,
vibration). On receipt of the product, check that the
delivery is complete, see page 2 (Part designa-
tions). Report any transport damage immediately.
Storage
Store the product in a dry and clean place.
Storage temperature: see page9 (Technical data).
Packaging
The packaging material is to be disposed of in ac-
cordance with local regulations.
Disposal
Components are to be disposed of separately in
accordance with local regulations.

GB-10
D
GB
F
NL
I
E
Contact
If you have any technical questions, please contact
your local branch office/agent. The addresses are
available on the Internet or from ElsterGmbH.
We reserve the right to make technical modifications
in the interests of progress.
Elster GmbH
Strotheweg 1, D-49504 Lotte (Büren)
Tel. +49 541 1214-0
Fax +49 541 1214-370
[email protected], www.kromschroeder.com
Contact
Certification
Declaration of conformity
We, the manufacturer, hereby declare that the prod-
uct IC40 complies with the requirements of the fol-
lowing Directives and Standards:
Directives:
– 2014/35/EU
– 2014/30/EU
Standards:
– EN 60730-2-14
Elster GmbH
Scan of the Declaration of conformity (D,GB)– see
www.docuthek.com
Eurasian Customs Union
The product IC40 meets the technical specifications
of the Eurasian Customs Union.
ANSI/CSA approved
Canadian Standards Association – ANSI/UL 429
and CSA C22.2
Directive on the restriction of the use of
hazardous substances (RoHS) in China
Scan of the Disclosure Table China RoHS2 – see
certificates at www.docuthek.com
UL listed
Underwriters Laboratories – UL 60730-1 “Automatic
Electrical Controls for Household and Similar Use”,
UL 60730-2-14 “Automatic Electrical Controls for
Household and Similar Use; Part 2: Particular Re-
quirements for Electric Actuators”, File No. E4436.
Other manuals for IC 40
1
Table of contents
Other Krom Schroder Controllers manuals

Krom Schroder
Krom Schroder IC 20 User manual

Krom Schroder
Krom Schroder IC 50 User manual

Krom Schroder
Krom Schroder IC 50 Series User manual

Krom Schroder
Krom Schroder IC 20 User manual

Krom Schroder
Krom Schroder IC 20 User manual

Krom Schroder
Krom Schroder E8.5064 V1 User manual

Krom Schroder
Krom Schroder GIK Series Manual

Krom Schroder
Krom Schroder IC 40 User manual

Krom Schroder
Krom Schroder VGBF 15R User manual

Krom Schroder
Krom Schroder GDJ 15 User manual