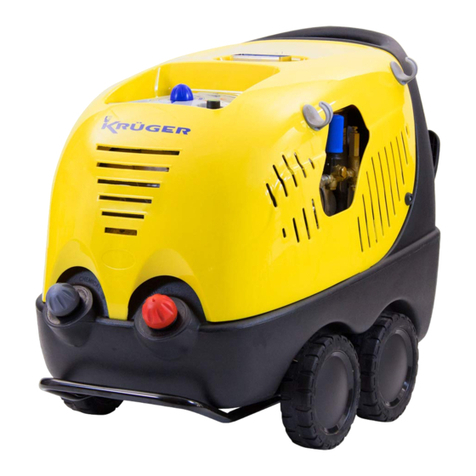
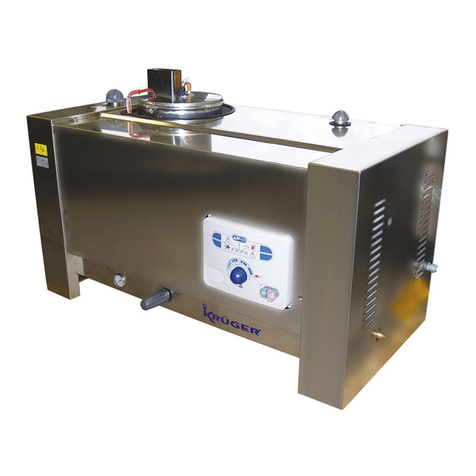
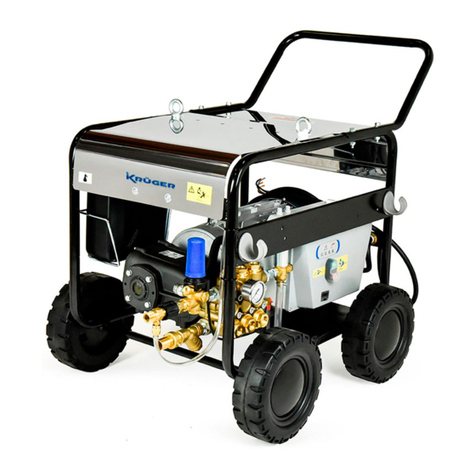
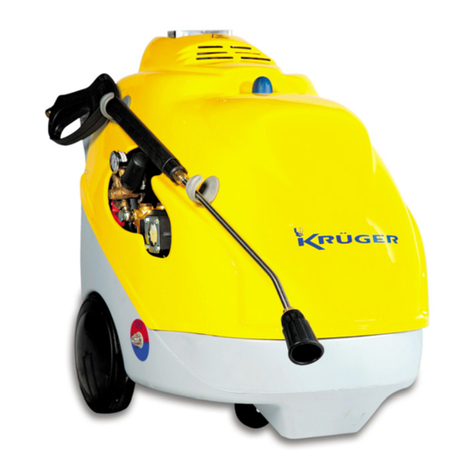
Kruger modular 140 User manual

Modular 140
Modular 160
GB I
F
D
E
P NLS NSF
ISTRUZIONI PER L’USO
OPERATING INSTRUCTION
INSTRUCTIONS D’UTILISATION
BEDIENUNGSANLEITUNG
INSTRUCCIONES PARA EL USO
HANDLEIDING
INSTRUÇÕES DE UTILIZAÇÃO
BRUKSANVISNING
INSTRUKTIONSBOK
KÄYTTÖOHJEET
IDROPULITRICE A FREDDO AD ALTA PRESSIONE
HIGH PRESSURE COLD WATER POWERWASHER
NETTOYEUR A EAU FROIDE A HAUTE PRESSION
HOCHDRUCK-KALTWASSER-REINIGUNGSGERÄT
HIDROLIMPIADORA EN FRÍO DE ALTA PRESIÓN
GEBRUIKSAANWIJZING
MÁQUINA DE LAVAR A FRIO DE ALTA PRESSÃO
VANNRENSER MED KALDT VANN OG HŘYT TRYKK
AGGREGAT FÖR KALL HÖGTRYCKSTVÄTT
KORKEAPAINEKYLMÄVESIPESURI

Fig. 1
- PRINCIPALI COMPONENTI - MAIN COMPONENTS - PRINCIPAUX COMPOSANTS - HAUPTBAUTEILE
- PRINCIPALES COMPONENTES - PRINCIPAIS COMPONENTES - VOORNAAMSTE ONDERDELEN
- HOVEDKOMPONENTER - MASKINENS HUVUDSAKLIGA KOMPONENTER
- KONSTRUKTIV HOVEDBESTANDDEL
- TÄRKEIMMÄT RAKENTEELLISET KOMPONENTIT

3
Fig. 2
Fig. 4
Fig.3
Fig. 5
Fig. 6Fig. 7

4
Fig. 9
Fig. 11
Fig. 10
Fig. 13
Fig. 12
Fig. 8
A
B

5
Fig. 15
Fig. 18
Fig. 16
Fig. 14
Fig. 19
Fig. 17
A
B

6
Modular 140 Modular 160
Pressione di servizio
-Working pressure
-Pression de service
-Arbeitdruck
-Presión de trabajo
-Werkdruk
-Pressão de trabalho
-Arbeidstrykk
-Arbetstryck
-Toimintapaine
120 bar 150 bar
-Pressione massima ammessa
-Max.permissible pressure
-Presión máx. adm.
-Max.Zulässiger Druck
-Pression maximale admissible
-Pressão máx. admissível
-Max.toelaatbare druk
-Tillañtet max-tryck
-Maks tillatt trykk
-Sallittu maksimipaine
130 bar 160 bar
-Portata d’acqua massima
-Water throughput Maximum
-Débit d’eau maximal
-Wasserdurchsatz) maximal
-Caudal de agua máx.
-Passagem de água no máx.
-Waterdoorzet maximaal
-Vattenflöde max.
-Vanngjennoms trømming maks.
-Vesimäärä maksimi
410 lt/h 600 lt/h
-Tensione
-Voltage
-Tension
-Spannung
-Tensión
-Tensão
-Spanning
-Spänning
-Spenning
-Jännite 230/240* V 230/240* V
-Frequenza
-Frequency
-Fréquence
-Frequenz
-Frecuencia
-Frequência
-Frequentie
-Frekvens
-Frekvens
-Taajuus 50/60* Hz 50/60* Hz
-Potenza
-Power consumption
-Puissance
-Leistung
-Potencia
-Potência
-Vermogen
-Effekt
-Effekt
-Teho 2,1kw 3 kw
-Tipo di protezione
-Type of protection
-Type de protection
-Schutzart
-Tipo de protección
-Tipo de protecção
-Beveiligingstype
-Skyddsform
-Kapslingklasse
-Suojaustyyppi IP X5 IP X5
-Lunghezza
-Length
-Longueur
-Länge
-Longitud
-Comprimento
-Lengte
-Längsd
-Lengde
-Pituus ~270 mm ~270 mm
-Larghezza
-Width
-Largeur
-Breite
-Ancho
-Largura
-Breedte
-Bredd
-Bredde
-Leveys ~300 mm ~300 mm

7
Modular 140 Modular 160
-Altezza
-Height
-Hauteur
-Höhe
-Altura
-Altura
-Hoogte
-Höjd
-Høyde
-Korkeus
~780 mm ~780 mm
Peso
Weight
Poids
Gewicht
Peso
Peso
Gewicht
-Vikt
-Vekt
-Paino
14 kg 14 kg
-Temperatura max. di alimentazione:
Funzionamento con acqua in pressione
-Max.water feed temperature im:
Pressurized operation
-Température d’eau d’alimentation maxi:
Lors d’une aliment. en eau sous pression
-Max.Wasserzulauf-temperatur im:
Druckwasserbetrieb
-Temp. máx. del agua de alimentación:
Red de agua a presión
-Temp. máx.de alimentação de água :
No serviço de água pressurizada
-Max.temperatuur toegevoerd water :
Bij aansluiting op waterleidingnet
-Max.vattentilloppstemperatur :
Vid tryckvattendrift
-Maks.vanntilførselstemperatur:
Ved trykkvannsdrift
-Syöttöveden maksimilämpötila :
Toiminta painevedellä
40 C° 40 C°
-Livelo di potenza acustica garantito
-Guaranteed sound power level
-Niveau de puissance sonore garantie
-Garantierter Geräuschpegel
-Nivel de potencia sonora garantizado
-Nível de Intensidade de Som Garantido
-Gegarandeerd geluidsvermogen
-Garanterad Ijudnivå på moto
-Garantert Iydkraftnivå
-Taattu luotettava tehontaso 88
dB (A)
94
dB (A)
-Reazione massima del getto
-Maximum kickback force
-Force de recul maximale
-Maximale Rückstoßkraft
-Fuerza sw retroceso máx.
-Força de recuo máxima
-Maximale terugslagkracht
-Max. rekyl
-Maksimal tilbakeslagskraftl
-Ruiskun maksimireaktio 15 N 15 N
-Vibrazioni
-Vibration
-Vibrations
-Schwingung
-Vibraciónes
-Vibrações
-Trillingen
-Vibrationer
-Vibrasjoner
-Tärinä 2,5 m/s22,5 m/s2
∗Secondo la versione nazionale
∗Depending on national version concerned
∗ Suivant la version du pays d’utilisation
∗Je nach Länderausführung
∗Depende del modelo que se entrega en el respectivo país
∗Consoante a execução do país
∗Afhankelijk van landspecifieke uitvoering
∗Avhengig av land
∗Beroende på marknad
∗Kansallisten versioiden mukaan

8
Leggere attentamente le
istruzioni per l’uso prima di
mettere in funzione l’appa-
recchiatura per la prima vol-
ta. Attenersi alle avvertenze
di sicurezza.
INDICE
1Principali componenti costruttivi pag. 8
2Avvertenze generali per la vostra
sicurezza pag. 8
3Montaggio supporto a muro pag. 10
4Collegamento del tubo di
alimentazione dell’acqua pag. 10
5Collegamento del tubo ad
alta pressione pag. 10
6Allacciamento elettrico
dell’apparecchio pag. 10
7Accensione dell’apparecchiatura pag. 10
8Spegnimento dell’apparecchiatura pag. 11
9Accessori pag. 11
10Manutenzione e riparazioni pag. 11
11 Anomalie funzionali e rimedi pag. 12
1 PRINCIPALI COMPONENTI COSTRUT-
TIVI (Fig. 1)
La ringraziamo per la fiducia accordataci con l’acquisto della nostra apparecchiatura. Siamo certi che avrà modo di apprezzare
nel tempo e con soddisfazione la qualità del nostro prodotto. La preghiamo di leggere attentamente questo manuale predisposto
appositamente per informarla circa l’ uso corretto della macchina, in conformità ai requisiti essenziali di sicurezza.
1) Pistola
2) Lancia variabile
3) Adattatore
4) Filtro
5) Attacco rapido alimentazione acqua
6) Avvolgitubo
7) Dispositivo di sicurezza pistola
8) Corpo macchina
9) Spina di alimentazione
10) Interruttore generale
11) Lancia schiuma
12) Attacco alta pressione
13) Tappo
14) Dima
15) Staffa
16) Viti per muro
17) Viti per muro
18) Supporto porta accessori
19) Maniglia avvolgitubo
20) Viti
21) Rondella
22) Vite
23) Lancia turbo (optional)
2 AVVERTENZE GENERALI PER LA
VOSTRA SICUREZZA
L’alta pressione d’acqua prodotta
e l’allacciamento alla corrente
elettrica sono fonti di pericoli par-
ticolarmente gravi.
Non utilizzare l’apparecchio in
prossimità di persone, se queste non
indossano indumenti protettivi.
I getti ad alta pressione possono essere
pericolosi se usati impropriamente. Il
getto non deve mai essere diretto ver-
so persone, apparecchiature elettriche
sotto tensione, compreso l’apparecchio
stesso. Non dirigere verso se stessi o
altri per pulire indumenti o calzature
L’apparecchiatura dovrà essere usata soltanto da persone
istruite sul suo utilizzo ed espressamente incaricate di usarla.
Rendere disponibile il libretto d’uso ad ogni utente.
Non sottoporre l’apparecchiatura a modifiche che po-
trebbero pregiudicare la Vostra sicurezza personale.
Prima di collegare l’apparecchiatura alla presa di
corrente, controllare che i dati elettrici corrispondano a
quelli della rete di alimentazione riportati sulla targhetta
di identificazione.
Usando prolunghe di cavo elettrico, verificare le sezioni
minime dei singoli cavi (ved.”Allacciamento elettrico
dell’apparecchiatura”).
Utilizzare le prolunghe di cavo elettrico, facendo at-
tenzione a mantenere invariata la classe di protezione
dell’apparecchiatura.
Le prolunghe devono avere la spina e la presa di tipo
a tenuta stagna. L’utilizzo di prolunghe non adeguate
può provocare pericolo
Un tecnico qualificato Vi potrà dare le necessarie
informazioni sulle classi di protezione.
L’impianto elettrico, a cui è collegato l’apparecchio,
dovrà essere realizzato in conformità alle leggi vigenti
nel paese di installazione.
Si raccomanda la presenza di un interruttore magne-
totermico differenziale, con sensibilità pari a 30 mA, a
monte delle prese di alimentazione o nell’impianto.
Mettere l’apparecchiatura in esercizio solo se tutti i
componenti sono privi di difetti.

9
Controllare innanzitutto il cavo di allacciamento alla
rete elettrica, il tubo ad alta pressione, il dispositivo di
spruzzatura e il cofano.
Non calpestare il tubo ad alta pressione; non tirarlo,
piegarlo o torcerlo.
Non spostare l’apparecchiatura tirandola per il tubo
ad alta pressione.
Non lavorare mai con un tubo ad alta pressione difet-
toso, ma sostituirlo subito con un ricambio originale.
Il tubo ad alta pressione deve essere omologato per
la sovrappressione di esercizio ammessa per l’appa-
recchiatura.
La sovrappressione funzionale e la temperatura mas-
sima ammesse, nonché la data di fabbricazione sono
stampate sul rivestimento del tubo ad alta pressione.
Usare solo detergenti debolmente alcalini (Ph 9,1 solu-
zione 1%) biodegradabili oltre il 90%.
In merito all’allacciamento dell’acqua, attenersi alle
disposizioni dei singoli paesi.
Il costruttore non può essere ritenuto responsabile per
eventuali danni a persone, animali o cose, derivanti da
usi impropri, erronei ed irragionevoli, comunque non
conformi alle indicazioni sopra menzionate.
L’idropulitrice non deve essere utilizzata da bambini
o da personale non addestrato.
Utilizzare esclusivamente tubi flessibili, accessori e
raccordi raccomandati dal costruttore. Non utilizzare
l’apparecchio se presenta danni al cavo di alimenta-
zione o alle parti quali tubi e raccordi.
Utilizzare esclusivamente ricambi originali forniti dal
costruttore o da lui approvati.
ABBIGLIAMENTO ED EQUIPAGGIAMENTO
Calzare scarpe di sicurezza
munite di suole antisdruc-
ciolo.
Portare occhiali protettivi o
visiera e l’abbigliamento di
sicurezza.
Si raccomanda l’uso della tuta da lavoro per ridurre il
pericolo di lesioni in caso di contatto involontario con
il getto ad alta pressione.
Campi di applicazione
La pulitrice ad alta pressione si presta per pulire veicoli,
macchine, contenitori, facciate, stalle e per eliminare
la ruggine senza produrre polvere e scintille.
Durante la pulitura fare attenzione a non disperdere
nell’ambiente sostanze pericolose derivanti dall’oggetto
da pulire (per es. amianto, olio).
Osservare rigorosamente le disposizioni relative allo
smaltimento dei rifiuti. Non trattare le superfici di cemen-
to- amianto con il getto a pressione o di vapore.
MESSA IN FUNZIONE, COMPORTAMENTO
DURANTE IL LAVORO
Non far funzionare l’apparecchia-
tura in ambienti chiusi.
Il grilletto della pistola a spruzzo deve funzionare in
modo morbido e ritornare da se nella posizione iniziale
dopo essere stato rilasciato.
Controllare le condizioni funzionali dell’apparecchia-
tura prima di ogni inizio lavoro.
Sono particolarmente importanti il cavo elettrico di rete
e la spina, il tubo ad alta pressione con dispositivo di
spruzzatura ed i dispositivi di sicurezza.
Tenere lontani i bambini e gli animali domestici quando
l’apparecchiatura è in funzione.
Non pulire mai con getto
d’acqua l’apparecchiatura
o altri apparecchi elettrici.
Pericolo di corto circuito!
Controllare che nella zona di ventilazione motore la
circolazione d’aria sia sufficiente.
Non coprire l’apparecchiatura, in modo da assicurare
una sufficiente ventilazione del motore.
Sistemare la pulitrice ad alta pressione il più distante
possibile dall’oggetto da pulire.
Non danneggiare il cavo di allacciamento alla rete
calpestandolo, schiacciandolo, tirandolo, ecc. Non
staccare la spina dalla prese tirandola per il cavo di
allacciamento.
Toccare la spina ed il cavo di allacciamento alla rete
elettrica solo con le mani asciutte.
Tenere il dispositivo di spruzzatura con ambedue le
mani per poter assorbire bene la forza di reazione e la
coppia supplementare che si forma nel caso di disposi-
tivo di spruzzatura con la lancia angolata. Assumere
sempre una posizione stabile e sicura.
Prima di sottoporre l’ap-
parecchiatura a qualsiasi
intervento: staccare la spina
dalla presa di corrente.
Oltre allo sporco si potrebbero staccare pericolose fibre
di amianto, nocive per i polmoni. Il pericolo esiste partico-
larmente dopo l’essiccazione della superficie trattata con
getto o con vapore. Non pulire componenti delicati di
gomma, tessuto e simili con il getto a spillo.
Nella pulitura con il getto piatto ad alta pressione,
tenere l’ugello ad una distanza minima di 15 cm.
10
7 ACCENSIONE DELL’APPARECCHIATURA
Far funzionare l’apparecchiatura solo cor-
rettamente installato a muro e solo dopo
aver collegato il tubo dell’alimentazione
d’acqua e aperto il rubinetto.
- Ruotare l’interruttore, posto sul fronte dell’apparec-
chiatura, su ON (Fig. 13).
- Orientare la pistola a getto sull’oggetto da
pulire - mai sulle persone!
- Premere sulla sicura (Fig. 14 - pos.1) - la pistola
viene sbloccata .
- Orientare verso il basso la lancia.
- Premere a fondo il grilletto (Fig. 14 - pos. 2).
- Svolgere il tubo ad alta pressione dal kit avvolgitu-
bo.
- Avvitare il tubo ad alta pressione sulla pistola
(fig.11).
Montaggio del dispositivo di spruzzatura
detergente
- Infilare l’adattatore nella pistola, ruotarlo di 90° ed,
estraendolo, innestarlo a scatto (fig. 12A).
- Infilare la lancia ed avvitare la ghiera dell’adattatore
(fig. 12B).
Effettuare l’allacciamento dalla rete idrica
al raccordo con un tubo pulito, verificando
che la pressione minima sia di 1,5 bar e
massima di 6 bar, con una portata minima
di 7 l/min.
- Togliere il tappo entrata acqua (fig. 8).
- Collegare il tubo (Ø min.1/2”) di alimentazione
acqua alla rete idrica (Fig. 9).
- Calzare l’innesto a scatto (Fig.10 - pos.1) sul
raccordo (2);
4 COLLEGAMENTO DEL TUBO DI ALIMEN-
TAZIONE DELL’ ACQUA
6 ALLACCIAMENTO ELETTRICO DELL’AP-
PARECCHIATURA
La tensione di rete e quella d’esercizio devono coincidere
(vedi targhetta d’identificazione).
Infilare la spina in una presa di corrente installata
conformemente alle prescrizioni.
Usando prolunghe, verificare le sezioni minime dei
singoli cavi.
Posare le prolunghe in modo da conservare la classe
di protezione dell’apparecchiatura.:
Tensione V Lunghezza Sezione
cavo m mm2
230 fino a 20 1,5
230 da 20 a 50 2,5
-Posizionare la dima (14) sulla parete sulla quale si
desidera fissare l’apparecchiatura. È consigliabile
un’altezza non inferiore ad 1,6 metri.
Evidenziare la posizione dei fori da praticare
facendo attenzione alla corretta orizzontalità. (fig.
2).
- Avvitare la staffa (15) con le quattro viti (16) fornite
in dotazione. (fig. 3).
- Posizionare la macchina sulla staffa fissata ed indi-
care la posizione di altri due fori da praticare nella
parte inferiore della macchina (Fig.4).
- Eseguiti i fori posizionare la macchina assemblata
e fissarla definitivamente (17 - fig.15 e 20 - 21
- fig.4).
ATTENZIONE! Fissare l’apparecchiatura
ad una parete in grado di supportare un
peso di circa 30Kg.
- Inserire la staffa porta accessori (18) e fissarla con
le apposite viti (22 - fig.6)
- Inserire la maniglia (19) per avvolgitubo e fissar-
la con la vite autofilettante fornita in dotazione
(fig.7)
3 MONTAGGIO SUPPORTO A MURO 5 COLLEGAMENTO DEL TUBO AD ALTA
PRESSIONE

11
9 ACCESSORI
Lancia variabile
La lancia variabile (2-Fig.1) può essere regolata in
modo continuo, ruotando la bussola di registro nera,
da getto a spillo (Fig. 15) a getto piatto o viceversa.
Inoltre ruotando la ghiera grigia è possibile passare da
bassa pressione ad alta pressione (Fig. 16).
Lancia turbo (23-Fig.1- optional)
La lancia turbo non prevede nessuna regolazione.
Lancia schiuma per l’utilizzo di detergenti
I detergenti non devono seccare
sull’oggetto da pulire.
- Smontare il tubo spruzzatore svitando la ghiera
dell’adattatore (fig. 17A).
- Rimuovere l’adattatore spingendolo verso la pistola,
ruotarlo di 90° ed estrarlo (fig. 17B)
- Riempire il contenitore della lancia schiuma con
detergente idoneo (vedi paragrafo “Avvertenze
generali per la vostra sicurezza” presente su questo
libretto - Fig.18).
- Applicare la lancia schiuma alla pistola (Fig.19)
- Terminato l‘utilizzo della lancia schiuma posizionar-
la nell’apposito vano presente sul porta accessori
(18 - Fig.1)
8SPEGNIMENTO DELL’APPARECCHIATURA
- Ruotare l’interruttore su OFF (Fig. 13).
- Chiudere il rubinetto dell’acqua
- Azionare la pistola fin quando l’acqua non gocciola
dalla lancia (ora l’apparecchiatura è senza pressio-
ne)
- Rilasciare il grilletto.
- Premere la sicura della pistola (Fig. 14). La pistola
viene bloccata, impedendo così l’inserimento invo-
lontario.
- Staccare la spina dalla presa di corrente
- Staccare il tubo di alimentazione acqua dall’appa-
recchiatura e dalla conduttura dell’acqua.
10 MANUTENZIONE E RIPARAZIONI
Prima di sottoporre l’apparecchiatu-
ra a qualsiasi intervento: staccare la
spina dalla presa di corrente.
Eseguire solo i lavori di manutenzione descritti nelle
Istruzioni per l’uso. Per tutti gli altri interventi rivolgersi
al Servizio di Assistenza Tecnica. Usare soltanto parti
di ricambio originali.
Se il cavo di alimentazione dovesse danneggiarsi, deve
essere sostituito da un cavo o da un assieme di cavi
speciali disponibili presso il costruttore o il suo servizio
di assistenza. Le spine ed i giunti dei cavi di allaccia-
mento alla rete elettrica devono essere protetti contro
gli spruzzi d’acqua.
CONSERVAZIONE
Deporre l’apparecchiatura in un locale asciutto protetto
dal gelo.
Se la protezione dal gelo non è garantita: aspirare
nella pompa un anticongelante a base di glicole, come
per gli autoveicoli:
- Immergere il tubo dell’acqua nel recipiente conte-
nente l’anticongelante.
- Immergere nello stesso recipiente la pistola senza
lancia.
- Accendere l’apparecchiatura con la pistola aper-
ta.
- Azionare la pistola fin quando non esce un getto
uniforme.
- Conservare il rimanente anticongelante in un reci-
piente chiuso.
Trattamento dei rifiuti delle apparecchiature
elettriche ed elettroniche.
Smaltire il prodotto seguendo le norme vigenti
relative allo smaltimento differenziato presso
centri di raccolta dedicati.
Non trattare come semplice rifiuto urbano.
Per qualsiasi informazione necessaria contattare il co-
struttore all’indirizzo indicato nel libretto istruzioni.
Il prodotto risponde ai requisiti richiesti dalle nuove
direttive introdotte a tutela dell’ambiente e che deve
essere smaltito in modo appropriato al termine del
suo ciclo di vita.

12
Prima di ogni intervento sulla macchina staccare la spina della corrente, chiudere il rubinetto dell’acqua e fare
funzionare la pistola fino a scaricare la pressione.
11 ANOMALIE FUNZIONALI E RIMEDI
Anomalia Causa Rimedio
Oscillazione o caduta di pressione Mancanza di acqua Aprire il rubinetto dell’acqua
Filtro acqua intasato Pulire il filtro acqua sul tubo alimenta-
zione pompa
Motore ronza all’avviamento, senza
partire Tensione di rete troppo bassa Controllare il collegamento elettrico
Pistola non azionata Accendendo la macchina, azionare
la pistola
Sezione della prolunga troppo
piccola Usare una prolunga di sezione suf-
ficiente; v. “Allacciamento elettrico
dell’apparecchiatura”
Il motore non parte all’inserimento Tensione di alimentazione errata Controllare la spina, il cavo e
l’interruttore
Protezione rete non inserita Inserire la protezione rete
Il motore si ferma Salvamotore disinserito per surri-
scaldamento del motore.
Controllare se la tensione di
alimentazione e quella dell’appa-
recchiatura coincidono, attendere
3 minuti, accendere nuovamente
l’apparecchiatura.
Non esce il detergente Iniettore intasato Pulire l’ugello della lancia per spruz-
zatura detergente
Forma del getto irregolare, non
nitida Ugello ad alta pressione nella
lancia sporco Pulire l’ugello ad alta pressione
Bussola di registro della forma del
getto non regolata correttamente Regolare la bussola di registro

13
The high pressure of the water
generated and connection to the
electricity supply constitute parti-
cularly serious danger risks.
Carefully read the user
instructions before starting
the machine for the first
time. Follow the safety
warnings.
Do not use the device in the vici-
nity of persons, unless they are
wearing the necessary protective
garments.
High pressure jets may be dangerous
if used incorrectly, the jet must never
be directed on persons, live electrical
appliances, including the appliance
itself. Never use the jet to clean your
own garments or footwear.
1 MAIN COMPONENTS (Fig. 1)
We wish to thank you for choosing our machine. We are confident that the high quality of our machine will meet with your
satisfaction and appreciation and that your pressure washer will give you long-lasting service. Before starting to use your
machine, make sure to read with care this manual, which has been purposely drawn up to provide you with all the necessary
information for proper use of the machine, in compliance with basic safety requirements.
2 SAFETY PRECAUTIONS
The appliance must be used solely by personnel trained
in its use and specifically authorized to use it.
The user manual must be made available to all users.
Do not subject the machines to any modifications which
may jeopardize personal safety.
Using extensions, check the minimum section of the
individual cables (see paragraph entitled “Connection
to the mains appliances”).
Install the extensions in such a way as not to alter the
protection class of the appliance.
In the event of the use of extensions, the plug and socket
must be of waterproof type.
The use of unsuitable extension leads may constitute a
danger risk. Your electrician can give you the neces-
sary information on the protection classification.
The electrical system to which the appliance is con-
nected must be realized in compliance with the laws of
the country of installation. The presence of a differential
magnetothermal switch is necessary with a sensitivity
of equivalent to 30 mA, above the power socket or the
system. Only put the appliance into operation provi-
ding that all components are free of defects.
Firstly check the mains attachment wire, the high pres-
sure pipe, the spraying device and the body.
Do not tread on the high pressure pipe; do not pull,
bend or twist it. Do not shift the appliance by pulling
it by the high pressure pipe. Never operate with
a defective high pressure pipe, but always replace
with original spare. The high pressure pipe must be
homologated for the permitted working overpressure
of the appliance.
INDEX
1Main constructive components pag.13
2General safety advice pag.13
3Wall mounting pag.15
4Connection of water supply pipe pag.15
5High pressure pipe connection pag.15
6Electrical connection of appliance pag.15
7Appliance switch on pag.15
8Appliance switch off pag.16
9Accessories pag.16
10 Maintenance and repairs pag.16
11 Trouble shooting guide pag.17
1) Trigger
2) Variable-nozzle jet
3) Adaptor
4) Filter
5) Water supply rapid attachment
6) Hose drum
7) Spray gun safety device
8) Machine body
9) Power plug
10) Main switch
11) Foam nozzle
12) High pressure attachment
13) Cover
14) Template
15) Staff
16) Wall screws
18) Support for accessory holder
19) Tube cover handle
20) Screws
21) Washer
22) Screw
23) Turbo nozzle (optional)

14
CLOTHING AND EQUIPMENT
Always wear anti-slip sole
footwear.
Wear protective goggles or
visor and safety wear.
It is advisable to wear work overalls in order to reduce
the risk of injury in the event of accidental contact with
a high pressure jet.
FIELDS OF APPLICATION
The high pressure water cleaner has been developed
for washing vehicles, machines, containers, façades,
stables and for removing rust without generating dust
or sparks.
During cleaning, ensure that no dangerous substances
of the object to be cleaned are dispersed into the envi-
ronment (such as asbestos, oil for example).
Carefully follow disposal instructions.
Do not treat concrete-asbestos surfaces with high
pressure jets. As it may cause the detachment of
dangerous asbestos fibres as well as dirt, detrimental
to the lungs.
The risk exists particularly after the drying of a surface
treated with a water jet or steam.
Do not clean delicate components made of rubber,
fabric or similar materials with a multi-directional jet.
When cleaning with a high pressure, flat jet, keep the
nozzle at a minimum distance of 15 cm.
.
STARTING UP, OPERATIONAL ADVICE
The trigger of the spray gun must
function smoothly and return to
initial position, after release.
Check the functional conditions of the appliance before
the start of each operation.
The mains cable and the plug, the high pressure pipe
with spraying device and the safety devices are par-
ticularly important.
Keep children and animals clear when the appliance
is operating.
Do not ever wash the ap-
pliance or other electrical
appliances with a water jet.
Short circuit danger !
Check that there is sufficient air circulation in the motor
ventilation zone.
Do not cover the appliance, ensure that there is suffi-
cient motor ventilation.
Position the high pressure cleaner as far away as
possible from the object to be sprayed.
Do not damage the mains attachment cable by treading
on it, squashing or pulling it, etc.Do not detach the
plug from the socket by pulling the connection wire,
but pull out the plug.
Make sure hands are dry before touching the plug and
the connection cable.
Hold the spraying device with both hands in order to
properly absorb the reaction force and the additional
torque in the case of spraying device with an inclined
spraying pipe. Always assume a safe and secure
position.
The functional overpressure and maximum temperature
admitted, as well as the date of construction are printed
on the high pressure pipe covering.
Use only slightly alkaline detergents (Ph 9.1, 1% solu-
tion), that are over 90% biodegradable.
As concerns water connection, refer to the regulations
of the individual countries.
The constructor will not accept liability for any damage
to people, animals or things as the result of improper,
incorrect or unreasonable use, or use which does not
comply with the above indications.
The water cleaner must not be used by children or
untrained persons.
Use only flexible hosing, accessories and fittings recom-
mended by the manufacturer. Do not use the appliance
in the event of any damage to the power cable or other
parts such as piping and fitting.
IMPORTANT : Use only original Spare Parts
Before undertaking any
work on the appliance
always detachthe plug from
the power socket.

15
7 APPLIANCE ACTIVATION
Use the machine only after installing it on a
wall and after connecting the water feeding
tube and turning on the faucet.
Connect a clean water supply pipe to the
water mains, checking to ensure that the
minimum pressure is of 1.5 bar and maxi-
mum is of 6 bar, with a minimum flow rate
of 7 l per min.
- Remove the cap for water to enter (fig. 8).
- Connect the water supply pipe (min. diam ½”) to
the water mains (fig.9)
- Fit the click-on attachment (Fig. 10 - pos.1) onto
the fitting (2);
5 HIGH PRESSURE PIPE CONNECTION
- Unwind the high pressure tube from the tube cove-
ring kit.
- Twist the high pressure tube on the gun ( fig. 11).
Assembly of the detergent spraying device
(Fig. 6)
- Insert the adaptor in the gun, rotate by 90º and,
extracting it, engage the trigger mechanism (fig.
12A).
- Insert the nozzle and tighten the locknut of the
adaptor (fig. 12B).
4 CONNECTION OF THE WATER SUPPLY
PIPE
- Turn the switch, located on the front of the machine
to ON (Fig. 13).
- Position the spray gun on the object to be
cleaned - never on people !
- Press the safety device (Fig. 14 - pos. 1) - the gun
is released
- Direct the nozzle downwards
- Fully press down the trigger (Fig. 14 - pos.2)
6 ELECTRICAL CONNECTION OF THE
APPLIANCE
The mains voltage must match the operating voltage.
(See identification plate)
- Insert the plug into a power socket installed in
compliance with regulations.
Check the minimum section of the individual cables
using extensions.
Position the extensions so as to maintain the protection
class of the equipment.
Voltage Cable Cross-section
V length m mm2
230 up to 2 1,5
230 20 to 5 2,5
3 WALL MOUNTING
- Position the template (14) on the desired wall to
mount the equipment. Mounting it at a height of no
less than 1,6 meters (approx. 63 inches) is advised.
Check the position of the holes to be made, making
sure that they are correctly aligned (fig.2).
- Tighten the shaft (15) with the four screws (16)
provided. (fig. 3).
- Position the machine on the fixed staff and register
the position of the other two holes to be made by
the lower part of the machine (Fig. 4).
- Once the holes are made, position the assembled
machine and attach it permanently (17 -fig.15 and
20 – 21 – fig.4).
WARNING! Attach the machine on a wall
that can sustain the weight of approximately
30 Kg. (66 Lbs.)
- Insert the staff to the accessory door (18) and attach
with the appropriate screws (22 – fig. 6)
- Insert the handle (19) for the tube cover and attach
with the self tapping screw furnished (fig.7)

16
10 MAINTENANCE , REPAIRS AND
STORAGE
Before undertaking any
work on the appliance
always detachthe plug from
the power socket
Undertake only the maintenance operations described
in the user instructions.
Contact the Technical Assistance service for all other
interventions.
Use only original spares.
Should the power cable be damaged, it must be repla-
ced by a cable or a set of special cables available from
the manufacturer or its assistance service.
The pins and joints of the connection cables of the electri-
cal system must be protected against accidental water
sprays.
STORAGE
Store the appliance in premises protected against
freezing conditions.
If freeze protection is not guaranteed, suction a glycol
based anti-freeze into the pump, as for cars
- Immerse the water pipe into the container of anti-
freeze
- Immerse the gun without the sprayer nozzle into the
same container
- Insert the appliance with open gun
- Activate the gun until an even jet is obtained.
Store the rest of the anti-freeze in a closed container.
9 ACCESSORIES
8 SWITCHING OFF THE MACHINE
- Turn the switch to OFF (Fig. 13).
- Turn off water supply tap.
- Actuate spray gun until water drips from the nozzle
(machine is now de-pressurized).
- Release trigger.
- Press safety latch on spray gun. (Fig.14). The spray
gun is locked and cannot be actuated accidental-
ly.
- Unplug machine from socket outlet.
- Disconnect water supply hose from machine and
water supply mains.
The detergents must not be al-
lowed to dry on the object to be
cleaned.
-- Take apart the spraying tube by unscrewing the
locknut of the adaptor (fig. 17A).
- Remove the adaptor by pushing it towards the gun,
rotate by 90º and extract it. (fig. 17B)
- Fill the container of the foam nozzle with suitable
detergent (see paragraph “General safety recom-
mendations” in this booklet) (Fig.18).
- Attach the foaming nozzle on the gun (Fig. 19)
- After using the foaming nozzle insert it in the ap-
propriate slot on the accessory holder (18 - Fig.
1)
Variable nozzle
The nozzle (2- Fig.1) can be adjusted continuously
by turning the black bushing: from a pinhole jet to
flat jet (Fig.15). Furthermore, you can also change
the pressure from low pressure to high pressure by
turning the grey collar (Fig. 16).
Turbo nozzle (23 - Fig.1 - optional)
The turbo nozzle, is ideal for maximizing cleaning,
cannot be adjusted.
ADDITION OF DETERGENT
Treatment of waste from electric/electronic
equipment
Dispose of the product in accordance with cur-
rent regulations concerning differentiated waste
disposal in dedicated waste disposal areas. Do
not treat as simple urban waste.
For any information please contact the manufacturer
at the address specified in the user manual.
The product complies with the requirements of the new
directives introduced for the environmental safeguard
and must be disposed of appropriately at the end of
its life cycle.

17
Before starting any work the machine, unplug the power cable, turn off the water supply and actuate the spray
gun until the pressure has been relieved completely.
11 TROUBLESHOOTING
Fault Cause Remedy
Pressure fluctuates or drops Lack of water Turn on water supply
Water filter clogged Clean the water filter on the pump
supply tube.
Motor hums when switched on, but
does not start Mains voltage too low Check electrical connection
Spray gun not actuted On switching on the machine,
engage the gun
Cross-section of extension lead too
small
Use correctly dimensioned exten-
sion lead, see “Connect machine to
power supply”
Motor will not start when switched
on Power supply not OK Check plug, cable and switch
Mains fuse tripped Resert mains fuse
Motor stops Motor protection switch tripped
due to motor overheating
Check that power supply matches
appliance voltage, wait 3 minutes,
then switch machine on again
The detergent fails to come out Clogged injector Clean the detergent spray nozzle
element
Jet is ineffective, ragged unsteady Clean the nozzle of the foam
launch Clean the high pressure nozzle.
Selector sleeve for type of jet
wrongly set Adjust selector sleeve

18
Lire attentivement les instruc-
tions d’utilisation avant de
mettre l’appareil en marche
pour la première fois. Respecter
les consignes de sécurité.
La haute pression d’eau produite et
le branchement électrique peuvent
être particulièrement dangereux.
Ne pas utiliser l’appareil à pro-
ximité de personnes si celles-ci
ne portent pas de vêtements de
protection.
Les jets à haute pression peuvent être
dangereux s’ils sont improprement
utilisés. Le jet ne doit jamais être diri-
gé vers des personnes, des appareils
électriques sous tension, y compris l’appareil
même. Ne pas diriger vers soi ni vers quicon-
que, dans le but de nettoyer les vêtements ou
les chaussures.
INDEX
1Principaux composants
de construction pag. 18
2Montage support mural pag. 18
3Instructions generales de securite pag. 20
4Branchement du tube
d’alimentation d’eau pag. 20
5Branchement du tube
a haute pression pag. 20
6Branchement electrique
de l’appareil pag. 20
7Mise en route de l’appareil pag. 20
8Arrêt de l’appareil pag. 21
9Accessoires pag. 21
10 Entretien et reparations pag. 21
11 Anomalies de fonctionnement
et remedes pag. 22
1 PRINCIPAUX COMPOSANTS DE CON-
STRUCTION (Fig. 1)
Nous vous remercions pour la confiance que vous nous accordez en achetant notre appareil. Nous sommes certains que vous
apprécierez la qualité de notre produit dans le temps. Nous vous prions de lire attentivement ce manuel rédigé spécifiquement
pour vous informer sur l’utilisation correcte de la machine, en conformité avec les exigences de sécurité
2 INSTRUCTIONS GENERALES DE SE-
CURITE
L’appareil devra être utilisé uniquement par des
personnes dûment informées sur son utilisation et
expressément chargées de l’utiliser.
Placer le livret d’instructions à disposition de tout
utilisateur.
Ne pas soumettre l’appareil à des modifications qui
pourraient nuire à la sécurité personnelle. Avant de
brancher l’appareil à la prise de courant, contrôler
que les données électriques reportées sur la plaquette
d’identification correspondent bien à celles du réseau
d’alimentation.
Si des rallonges de câble électrique sont utilisées,
vérifier les sections minimales de chaque câble (voir
“Branchement électrique de l’appareil”).
Utiliser les rallonges de câble électrique, en faisant
attention à ne pas modifier la classe de protection
de l’appareil. Dans le cas d’emploi de prolongateur,
la fiche et la prise doivent être étanches. L’utilisation
de prolongateurs non adaptés peut s’avérer dange-
reuse.
Un technicien qualifié pourra vous fournir des informa-
tions précises sur les différentes classes de protection.
Mettre l’appareil en service seulement si aucun com-
posant ne présente de défauts.
L’installation électrique, à laquelle est relié l’appareil,
doit être réalisée en conformité avec les lois en vigueur
dans le pays de l’installation. La présence d’un inter-
rupteur magnétothermique différentiel d’une sensibilité
de 30 mA, en amont des prises d’alimentation ou dans
l’installation, est recommandée.
Mettre l’appareil en marche seulement si aucun com-
posant ne présente de défauts.
1) Pistolet
2) Lance réglable
3) Adattatore
4) Filtre
5) Raccord rapide de l’alimentation d’eau
6) Dévidoir à tuyaux
7) Dispositif de sécurité du pistolet
8) Corpo macchina
9) Prise d’alimentation
10) Interrupteur général
11) lance-mousse
12) Attache haute pression
13) Bouchon
14) Dime
15) Bride
16) Vis pour mur
18) Support porte-accessoires
19) Poignée enrouleur tube
20) Vis
21) Rondelle
22) Vis
23) Lance turbo (optional)

19
Avant toute intervention sur
l’appareil, débrancher la
prise de courant.
MISE EN ROUTE, COMPORTEMENT LORS DU
TRAVAIL
Ne pas faire fonctionner l’appareil
dans des locaux fermés.
La gâchette des pistolets à aspersion doit être douce et
retourner d’elle-même dans sa position initiale après
avoir été relâchée.
Contrôler les conditions de fonctionnement de l’appa-
reil avant toute opération.
Le câble électrique du réseau et la prise, le tube à haute
pression équipé du dispositif d’aspersion et les disposi-
tifs de sécurité sont particulièrement importants.
Tenir les enfants et les animaux domestiques éloignés
de l’appareil lors de son fonctionnement.
Ne jamais nettoyer au jet
d’eau l’appareil lui-même ou
d’autres appareils électriques.
Danger de court-circuit !
Contrôler que, dans la zone de ventilation du moteur,
la circulation d’air soit suffisante.
Ne pas couvrir l’appareil, de manière à assurer une
ventilation suffisante du moteur.
Positionner le nettoyeur à haute pression à la plus
grande distance possible de l’objet à nettoyer.
Ne pas endommager le câble de branchement au
réseau en le piétinant, en l’écrasant, en le tirant, etc.
Ne pas débrancher la prise en tirant sur le câble de
branchement.
Ne toucher la prise et le câble de branchement au
réseau électrique qu’avec les mains sèches.
Tenir le dispositif d’aspersion à deux mains afin de
pouvoir bien absorber la force de réaction et le cou-
ple supplémentaire qui se forme lorsque le dispositif
d’aspersion et la lance forment un angle.
Prendre toujours une position fiable et stable.
Contrôler, avant tout, le câble de branchement au
réseau électrique, le tube à haute pression, le dispositif
d’aspersion et le capot.
Ne pas piétiner le tube à haute pression ; ne pas le
tirer, le plier ou le tordre.
Ne pas déplacer l’appareil en le tirant par le tube à
haute pression.
Ne jamais travailler avec un tube à haute pression
défectueux, mais le remplacer immédiatement avec une
pièce de rechange d’origine. Le tube à haute pression
doit être homologué pour la surpression de service
admise par l’appareil.
La surpression de fonction et la température maximale
admises, ainsi que la date de fabrication sont impri-
mées sur le revêtement du tube à haute pression.
Utiliser uniquement des détergents faiblement alcalins (ph
9,1 solution à 1%) et biodégradables à plus de 90%.
Pour ce qui concerne le branchement d’eau, s’en tenir
aux dispositions de chaque pays.
Le constructeur ne peut pas être tenu pour responsable
des éventuels dommages aux personnes, animaux ou
choses, dus à des utilisations impropres, erronées ou
inconsidérées et, dans tous les cas, non conformes aux
indications mentionnées ci-dessus.
La lance de lavage ne doit pas être utilisée par des
enfants ou par un personnel non formé.
Utiliser exclusivement des tubes flexibles, des accessoi-
res et des raccords préconisés par le constructeur. Ne
pas utiliser l’appareil si le câble d’alimentation ou des
composants, tels les tubes ou les raccords, présentent
des détériorations.
NOTA BENE: Utiliser exclusivement des pièces de
rechange d’origine
HABILLEMENT ET EQUIPEMENT
Chausser des chaussures de
sécurité munies de semelles
antidérapantes.
Porter des lunettes de pro-
tection ou une visière, et des
vêtements de protection.
L’utilisation d’un bleu de travail est recommandée
afin de réduire le danger de lésions en cas de contact
involontaire avec le jet à haute pression.
DOMAINES D’APPLICATION
Le nettoyeur à haute pression est destiné au nettoyage
de véhicules, de machines, de conteneurs, de façades,
d’étables, d’écuries et à l’élimination de la rouille sans
produire de poussière ou d’étincelles.
Lors du nettoyage, faire attention à ne pas disperser dans
l’environnement des substances dangereuses provenant
de l’objet à nettoyer (par exemple: amiante, huile).
Observer scrupuleusement les dispositions relatives à
l’évacuation des déchets.
Ne pas traiter les surfaces d’amiante-ciment avec le
jet sous pression ou le jet de vapeur. Avec la saleté, il
pourrait se détacher de dangereuses fibres d’amiante,
toxiques pour les poumons. Le danger existe particu-
lièrement après le séchage de la surface traitée avec
le jet ou à la vapeur.
Ne pas nettoyer de composants délicats en caoutchouc,
en tissu et similaires avec le jet à pointeau.
Lors du nettoyage au jet plat à haute pression, tenir le
gicleur à une distance minimale de 15 cm.

20
7 MISE EN ROUTE DE L’APPAREIL
Faire fonctionner l’appareillage uniquement
si installé correctement sur mur et seulement
après avoir raccordé le tube de l’alimenta-
tion d’eau et ouvert le robinet.
Brancher le réseau hydrique au raccord à
l’aide d’un tuyau propre en contrôlant si
la pression minimum est bien de 1,5 bar
et celle maximum de 6 bar, avec un débit
minimum de 7 l./min.
- Enlever le bouchon entrée eau (fig. 8).
- Brancher le tube (Ø min.1/2”) d’alimentation d’eau
au réseau (Fig.9).
- Placer l’encliquetage (Fig. 10 -pos.1) sur le
raccord (2);
5 BRANCHEMENT DU TUBE A HAUTE
PRESSION
- Tourner le tube à haute pression avec le kit enrou-
leur.
- Visser le tube à haute pression sur le pistolet
(fig.11).
Montage du dispositif d’aspersion du
détergent
- Enfiler l’adaptateur dans le pistolet, le faire tourner
de 90° et, en l’extrayant, l’enclencher (fig. 12A).
- Enfiler la lance et visser la bague de l’adaptateur
(fig. 12B).
4 BRANCHEMENT DU TUBE D’ALIMEN-
TATION D’EAU
- Tourner l’interrupteur, placé sur la partie avant de
l’appareillage, sur ON (Fig. 13).
-Orienter le pistolet à jet sur l’objet à
nettoyer – jamais en direction des per-
sonnes!
- Appuyer sur le cran d’arrêt (Fig.14-pos.1) - le
pistolet est débloqué.
- Orienter la lance vers le bas.
- Appuyer à fond sur la gâchette (Fig.14-pos.2).
6 BRANCHEMENT ELECTRIQUE DE L’AP-
PAREIL
La tension du réseau et celle de service doivent
coïncider (voir plaquette d’identification placée sur
l’appareil).
Insérer la prise dans une prise de courant installée
conformément aux prescriptions.
Si des rallonges sont utilisées, vérifier les sections
minimales de chaque câble.
Placer les rallonges de façon à conserver la classe de
protection de l’appareil :
Tension Longueur Section
V câble m mm²
230 jusqu’à 20 1,5
230 de 20 à 50 2,5
3 MONTAGE SUPPORT MURAL
- Positionner la dîme (14) sur la paroi sur laquelle on
veut fixer l’appareillage. Une hauteur non inférieure
à 1,6 mètres est conseillée.
Marquer la position des trous à pratiquer en faisant
attention à la correcte horizontalité. (fig. 2).
- Visser la bride (15) avec les quatre vis (16) fournies
en dotation. (fig. 3).
- Positionner la machine sur la bride fixée et indiquer
la position d’autres deux trous à pratiquer dans la
partie inférieure de la machine (Fig.4).
- Une fois exécuté les trous positionner la machine
assemblée et la fixer définitivement (17 - fig.15 et
20 - 21 - fig.4).
ATTENTION! Fixer l’appareillage à une
paroi en mesure de supporter un poids
d’environ 30Kg.
- Insérer la bride porte-accessoires (18) et la fixer
avec les vis prévues à cet effet (22 - fig.6)
- Insérer la poignée (19) pour enrouleur tube et la
fixer avec la vis auto-taraudeuse fournie en dotation
(fig.7)
This manual suits for next models
1
Table of contents
Languages:
Other Kruger Pressure Washer manuals

Kruger
Kruger KH20015CSP User manual

Kruger
Kruger KH522 User manual

Kruger
Kruger KHL1108C User manual

Kruger
Kruger KH120CI User manual

Kruger
Kruger KH12011CI User manual

Kruger
Kruger KKH20015CP User manual

Kruger
Kruger FTX13011PRO User manual

Kruger
Kruger K101EX User manual

Kruger
Kruger KH2020F User manual

Kruger
Kruger KH1510F User manual