Sealey PW1850 User manual

130BAR PRESSURE WASHER WITH TSS &
ROTABLAST® NOZZLE 230V
MODEL NO: PW1850
Thank you for purchasing a Sealey product. Manufactured to a high standard, this product will, if used according to these
instructions, and properly maintained, give you years of trouble free performance.
IMPORTANT: PLEASE READ THESE INSTRUCTIONS CAREFULLY. NOTE THE SAFE OPERATIONAL REQUIREMENTS, WARNINGS & CAUTIONS. USE
THE PRODUCT CORRECTLY AND WITH CARE FOR THE PURPOSE FOR WHICH IT IS INTENDED. FAILURE TO DO SO MAY CAUSE DAMAGE AND/OR
PERSONAL INJURY AND WILL INVALIDATE THE WARRANTY. KEEP THESE INSTRUCTIONS SAFE FOR FUTURE USE.
1. SAFETY
1.1. ELECTRICAL SAFETY
WARNING! It is the user’s responsibility to check the following:
Check all electrical equipment and appliances to ensure that they are safe before using. Inspect power supply leads, plugs and
all electrical connections for wear and damage. Sealey recommend that an RCD (Residual Current Device) is used with all electrical
products. You may obtain an RCD by contacting your local Sealey Stockist.
If the product is used in the course of business duties, it must be maintained in a safe condition and routinely PAT (Portable
Appliance Test) tested.
Electrical safety information, it is important that the following information is read and understood.
1.1.1. Ensure that the insulation on all cables and on the appliance is safe before connecting it to the power supply.
1.1.2. Regularly inspect power supply cables and plugs for wear or damage and check all connections to ensure that they are secure.
1.1.3. Important: Ensure that the voltage rating on the appliance suits the power supply to be used and that the plug is tted with the
correct fuse - see fuse rating in these instructions.
8DO NOT pull or carry the appliance by the power cable.
8DO NOT pull the plug from the socket by the cable. Remove the plug from the socket by maintaining a rm grip on the plug.
8DO NOT use worn or damaged cables, plugs or connectors. Ensure that any faulty item is repaired or replaced immediately by a
qualied electrician.
1.1.4. This product is tted with a BS1363/A 13 Amp 3 pin plug.
If the cable or plug is damaged during use, switch the electricity supply and remove from use.
Replace a damaged plug with a BS1363/A 13 Amp 3 pin plug. If in doubt contact a qualied electrician.
Class II products are wired with live (brown) and neutral (blue) only, and are marked with the
Class II symbol;
A) Connect the BROWN live wire to the live terminal ‘L’.
B) Connect the BLUE neutral wire to the neutral terminal ‘N’.
C) After wiring, check that there are no bare wires and ensure that all wires have been correctly
connected.
Ensure that the cable outer sheath extends inside the cable restraint and that the restraint is tight.
8DO NOT connect either wire to the earth terminal.
Sealey recommend that repairs are carried out by a qualied electrician.
1.2. GENERAL SAFETY
WARNING! Water and electricity are dangerous partners. Be extremely cautious and ALWAYS be aware that this device uses an
electric motor. Always plug into a RCD (See electrical safety above). Unplug from mains before changing accessories or servicing.
9The appliance can be used for washing surfaces outdoors, whenever pressurised water is required to remove dirt.
9 With special optional accessories, it can be used for foaming, and for washing with a rotary brush for application to the gun.
9This appliance’s performance and user friendliness make it suitable for NON PROFESSIONAL use.
9This appliance is for outdoor use only.
9Ensure you comply with all local water supply regulations. Power washers may only be connected to mains water supply if a check
valve is installed in the supply hose, or at the tap outlet.
9 The supply hose must be reinforced, and have an internal diameter of 1/2”. The water supply must be at least equal to the cleaner
capacity. The water temperature must NOT exceed 122°F (50°C). The water supply pressure must NOT exceed 6 bar (90psi).
9Always be aware of the hazards that may occur during use. Study all applications and limitations of the washer before use.
9 Use where air can freely circulate around the washer to avoid the machine overheating.
8DO NOT obstruct ventilation grilles during operation.
9Position the washer as near to the water supply as possible.
WARNING: Always disconnect the electricity and water supplies on completion of every job.
WARNING! DO NOT use the washer if any part of the unit, gun, nozzle, detergent tank, hose or cables is damaged. Replace or
repair using genuine parts only. Unauthorised parts may be dangerous and will invalidate your warranty. Always check connections
are correctly secured and not cracked or damaged in any way before using the machine.
WARNING: This appliance has been designed for use with the detergent provided or the detergent specied by the manufacturer,
such as a neutral shampoo based on biodegradable anionic surface active detergents. The use of other detergents or chemicals
may put the appliance’s safety at risk.
WARNING! Ensure all persons and animals keep at a minimum distance of 15 m from the washer when in use. All persons within
15 m shall wear appropriate P.P.E.
Recommended fuse rating
13 Amp
PW1850 Issue 2 (2) 10/02/21
Original Language Version
© Jack Sealey Limited
Refer to
instructions
Wear eye
protection
Wear protective
gloves
Wear ear
protection
Wear safety
footwear
Wear protective
clothing
DO NOT
drink water
from pressure
washer
DO NOT direct jet
against yourself,
other persons,
animals, electrical
equipment or the
machine itself

9 Wear adequate protective clothing, goggles and anti-slip rubber soled footwear.
8DO NOT touch the plug and the appliance with wet hands or when barefoot.
8DO NOT direct the nozzle toward mechanical parts containing lubricant grease, as the grease will dissolve and spread
over the surrounding ground. Vehicle tyres/tyre valves may only be cleaned from a minimum distance of 30 cm, otherwise the
vehicle tyre/ tyre valve could be damaged by the high-pressure jet. The rst indication of this is a discolouration of the tyre.
Damaged vehicle tyres/tyre valves can be deadly dangerous.
WARNING: High pressure jets can be dangerous if subject to misuse. The jet must not be directed at persons, animal, live
electrical equipment or the machine itself.
WARNING! The high pressure jet will cause loose particles to be propelled at high speed, which may cause serious injury.
WARNING: High pressure hoses, ttings and couplings are important for the safety of the machine. Use only hoses, ttings and
couplings recommended by the manufacturer. (it is extremely important to protect these components against damage by avoiding
their improper use and protecting them against bending, knocks and scratches).
9The appliance can be used for washing surfaces outdoors, whenever pressurised water is required to remove dirt.
9This appliance’s performance and user friendliness make it suitable for NON PROFESSIONAL use.
WARNING: This appliance is equipped with T.S.– Total Stop : these appliances should not be left in standby for more than
5 minutes.
WARNING! DO NOT operate the machine without a water supply. Dry running can seriously damage the unit.
9 Switch the appliance o completely (master switch on (0) OFF) whenever it is left unattended.
9Every machine is tested in its operating conditions, so it is normal for a few drops of water to be left inside it.
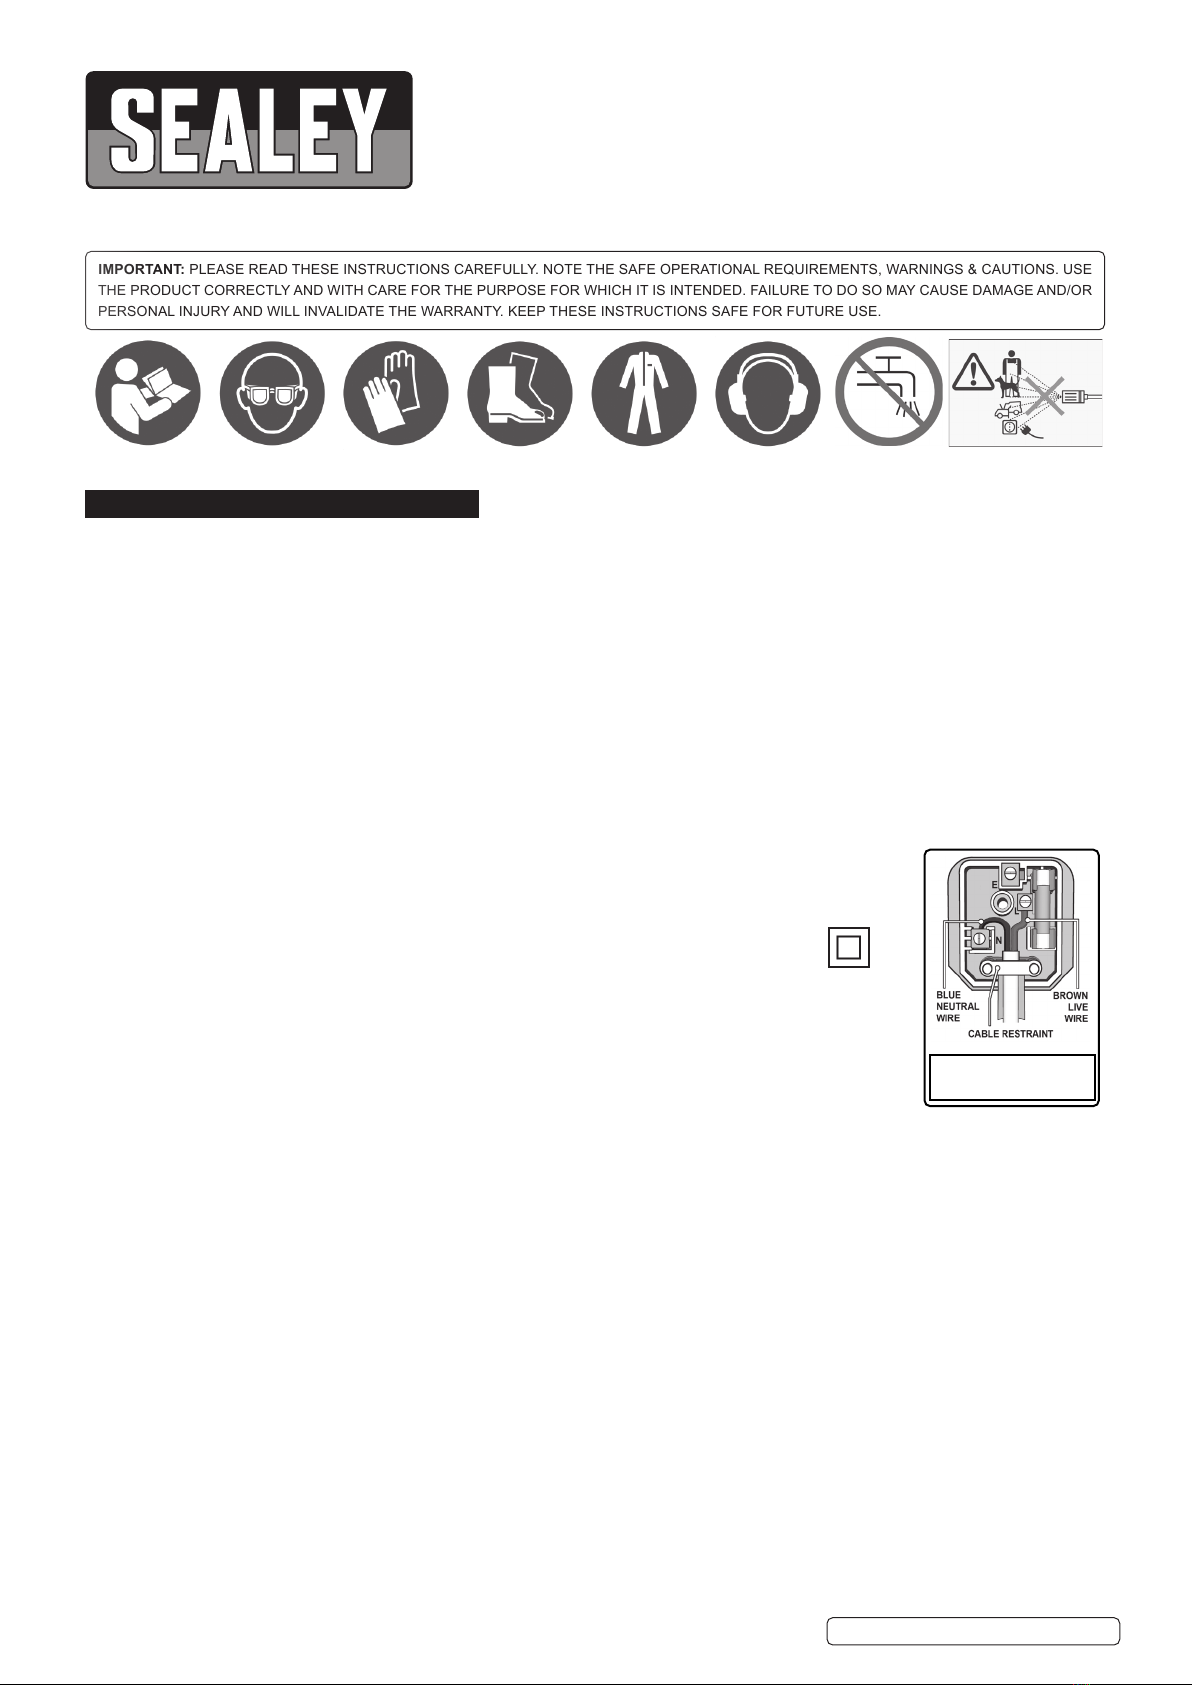
9Take care not damage the electric cable. If the supply cord is damaged, it must be replaced by the manufacturer, its service agent
or similarly qualied persons in order to avoid a hazard
8DO NOT move the unit by pulling the hoses or electrical cables. Use the handle.
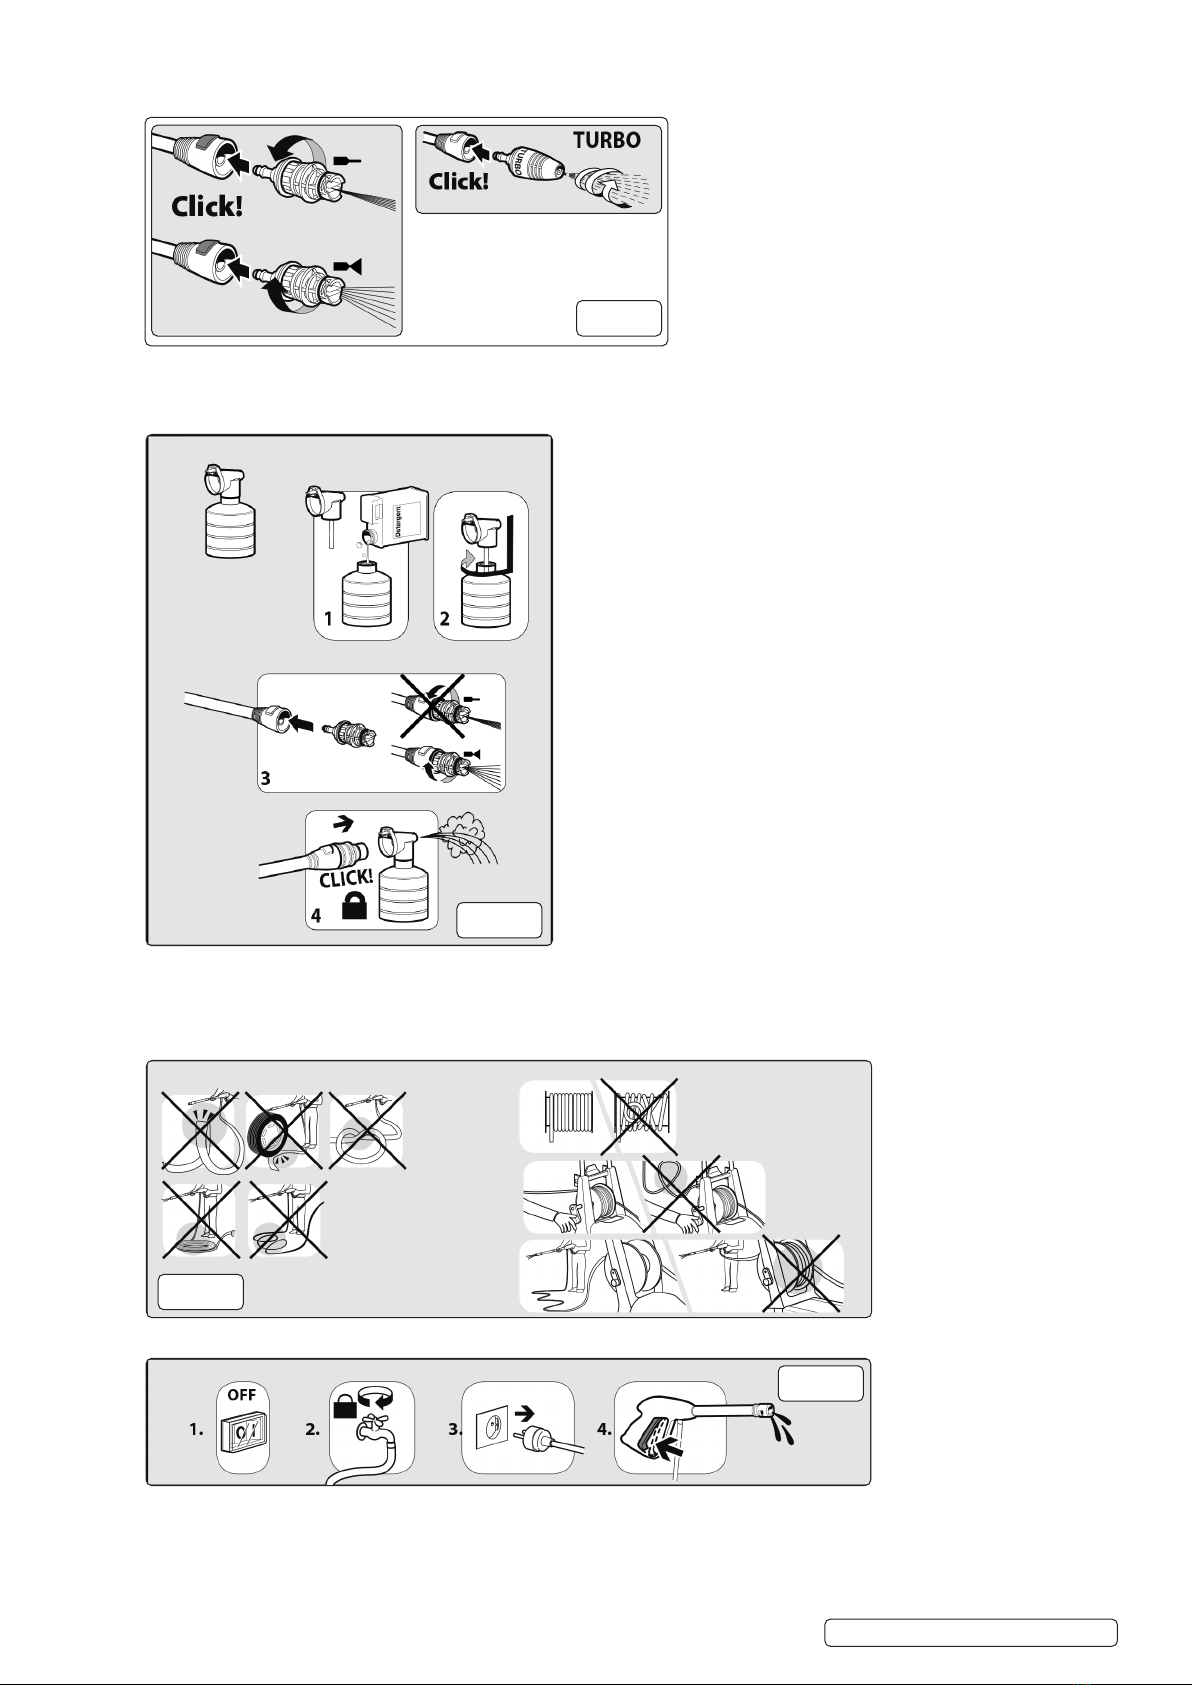
9 Appliance with uid under pressure. Keep a rm hold on the gun and be prepared to take the kickback pressure. Only use the high
pressure nozzle provided with the appliance.
9Children should be supervised to ensure that they DO NOT play with the appliance.
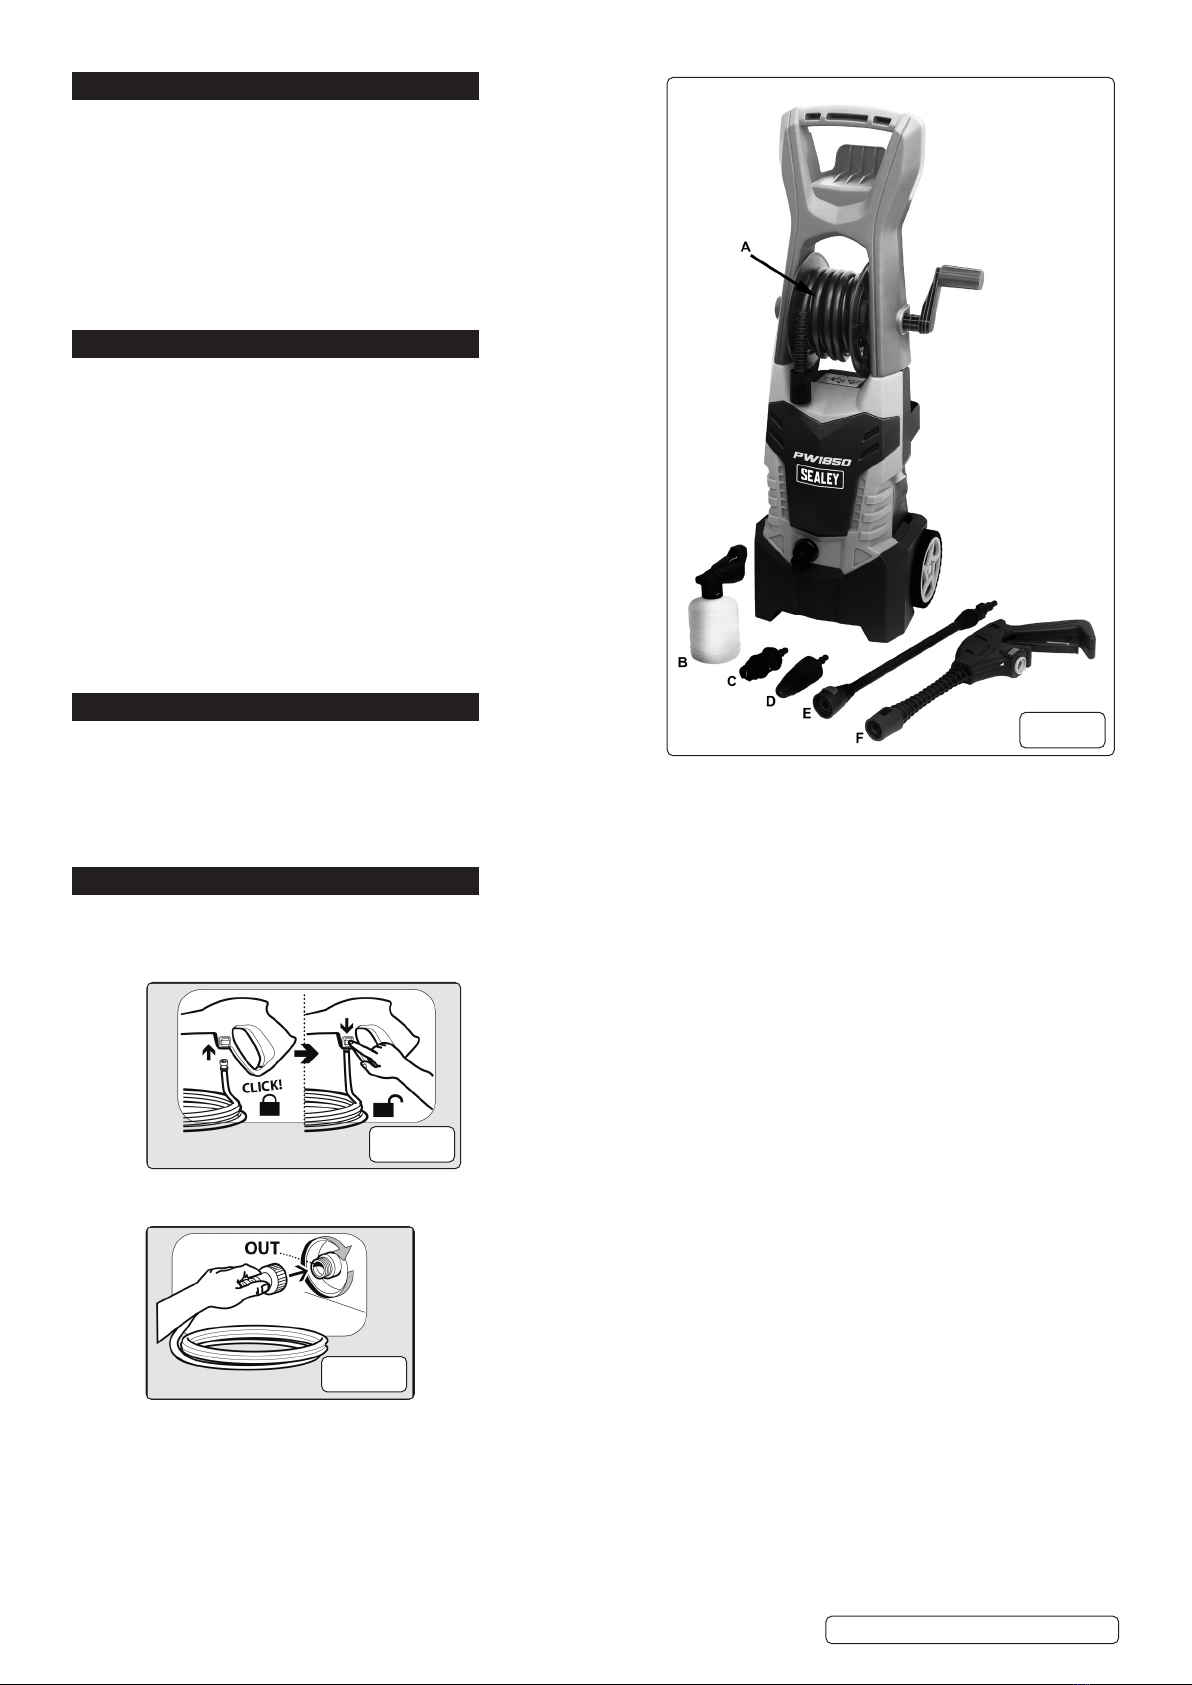
8DO NOT start the high-pressure cleaner without rst completely unwinding the high-pressure hose.
WARNING: When winding and unwinding the pipe take care not to cause the high-pressure cleaner to overturn.
9 Before unwinding or winding the hose, switch the machine o and release the pressure in the hose itself (switching o).
8DO NOT use the washer with ammable or toxic liquids or any other product. Use only recommended detergent. Unapproved
detergents may corrode the machine cover and accessories.
8DO NOT spray ammable liquids risk of explosion.
8DO NOT direct the jet against yourself or others in order to clean clothes or footwear.
WARNING: Water that has owed through backow preventer’s is considered to be non potable.
WARNING! The pressure washer must only be used with clean water. Unltered water or corrosive chemicals must not be used as
these will damage the cleaner.
WARNING: Improper extension cables can be dangerous. If an extension cord is used, it must be suitable for outdoor use, and
the connection must be kept dry and clear of the ground. It is recommended that this be done using a cable reel that holds the plug
at least 60 mm from the ground.
9If an extension cord is used, the plug and socket must be of watertight construction.
9 If, during operation, power failure occurs turn the electricity and water o for safety reasons.
WARNING: During the use of high pressure cleaners, aerosols may form. Inhalation of aerosols can be dangerous to health.
WARNING: Depending on the application, shielded nozzles can be used for high pressure cleaning, which will drastically reduce
the emission of hydrated aerosols. However, not all applications allow the use of such a device. If the armoured nozzles are not
applicable for aerosol protection, a respiratory mask of class FFP 2 or equivalent may be necessary, depending on the cleaning
environment.
WARNING: the gun is tted with a safety catch.
9 Whenever use of the machine is interrupted it is important to operate the safety catch to prevent accidental activation of the jet.
9Safety features: gun equipped with safety locking device, appliance equipped with (Class I) overload cut out, pump equipped with
by-pass valve or shutdown device.
9The safety button on the gun is not there to lock the lever during operation, but to prevent its accidental operation.
9Ensure the nozzle is aimed correctly at the work surface before switching on the machine.
9 Before activating the trigger, grip the gun rmly to counteract the recoil from the high pressure water jet.
WARNING! Avoid sudden bursts of water as these will cause water pressure to drop and put extreme pressure on hoses and
connectors.
WARNING: The appliance is equipped with a motor protection device: in case of device intervention, wait some minutes or, in
alternative, disconnect and re-connect the product to the electric system. In case this problem repeats again or if the product does
not start again, take the product to the nearest After Sales Service Point
WARNING: The machine must be always kept on horizontal bases, in a safe and stable way.
WARNING! Use washer on a at, levelled surface, in an upright position. Failure to do so will invalidate your warranty.
8NEVER lay the washer down during use.
8DO NOT adjust any internal control valves, as they have been factory set.
8DO NOT connect other appliances to the machine inlet or outlet.
8DO NOT use hoses and ttings other than those designed for use with this machine.
8DO NOT touch plug with wet hands. To avoid the risk of electrocution keep all connections dry and o the ground.
8DO NOT use washer if you are tired or under the inuence of alcohol, drugs or intoxicating medication.
8DO NOT allow children or untrained persons to operate the washer.
WARNING! Discharge residual pressure before disconnecting the washer hose. Pressure left in unit may cause injury.
9After use, disconnect washer from electrical mains and water supply and store in a safe, dry, childproof area.
9Protect from freezing conditions during winter.
9Always use the appliance at the lowest pressure setting when cleaning in the vicinity of wheels and tyres.
NOTE: This appliance is not intended for use by persons (including children) with reduced physical, sensory or mental capabilities or
lack of experience and knowledge, unless they have been given supervision or instruction concerning the use of the appliance by
a person responsible for their safety. Children should be supervised to ensure that they DO NOT play with the appliance.
Original Language Version
© Jack Sealey Limited PW1850 Issue 2 (2) 10/02/21

2. INTRODUCTION
Powerful unit designed for frequent domestic and light trade use. Ideal for a
range of applications including cleaning vehicles, patios, decking, motorbikes
and barbecues. Fitted with a powerful 1900W motor with 420 litre water ow per
hour and a maximum pressure output of 130bar. Features Automatic Total Stop
System (TSS) which switches the motor on and o when the trigger is operated,
prolonging motor life. Includes accessory storage to ensure unit stays clutter-free
and fully mobile. Supplied with 4m hose, foam lance and bottle, variable spray
nozzle and Rotablast® Turbo nozzle which helps develop the same eective
cleaning power (ECP) as a 180bar/2600psi pressure washer. Supplied with power
cable tted with 3-pin plug.
3. SPECIFICATION
MODEL NO:............................................................ PW1850
Electrical Plug Type: ................................................3-Pin BS
Hose Length:..................................................................... 4m
Maximum Pressure: ..................................... 130bar(1885psi)
Maximum Water Flow:................................................420L/hr
Motor Power:...............................................................1900W
Noise Rating: .................................................................92dB
Nozzles: ...........Variable Spray and Rotablast® Turbo Nozzle
Rated Pressure: ........................................... 100bar(1450psi)
Rotablast Nozzle®: .......................................................... Yes
Supply:................................................................. 230V - 13A
Total Stop System: ........................................................... Yes
Vibration/Uncertainty:....................................... 3.30m/s²/0.47
Water Flow Rate: .......................................................420L/hr
4. CONTENTS
A). 4m hose ....................................................................... 1x
B). Bottle ............................................................................ 1x
C). Variable spray nozzle ................................................... 1x
D). Rotablast®Turbo nozzle ............................................... 1x
E). Foam lance .................................................................. 1x
F). Pressure Washer Gun .................................................. 1x
5. OPERATION
5.1. PUT INTO SERVICE / STARTING UP
5.1.1. Connect the high pressure hose to the pressure washer gun. See g. 2.
5.1.2. Push the high pressure hose into the pressure washer gun.
NOTE: Make sure the connection nipple is aligned correctly.
5.1.3. Check the secure connection by pulling on the high pressure hose. See g. 3.
g.1
g.2
g.3
Original Language Version
© Jack Sealey Limited PW1850 Issue 2 (2) 10/02/21

5.1.4. Insert the high pressure hose tightly into the quick coupling on the appliance. See g. 4.
5.1.5. Screw the coupling element to the water connection on the appliance.
5.1.6. Attach the water supply hose to the coupling on the water connection.
NOTE: The supply hose is not included.
5.1.7. Connect the water supply hose to the water supply.
5.1.8. Completely open the water tap.
5.1.9. Insert the mains plug into the socket.
5.1.10. Turn on the appliance “I/ON”. See g 4.5
5.1.11. Unlock the lever on the pressure washer gun. See g.5
5.1.12. Pull on the lever of the pressure washer gun; the device will switch on.
5.1.13. Switch the appliance on for a (max. of 1 minute) and wait until the water exits at the hand spray gun without bubbles.
5.1.14. Release the lever on the pressure washer gun.
NOTE: Release the lever of the pressure washer gun; the device will switch o again.
5.1.15. High pressure remains in the system.
5.1.16. Lock the lever on the pressure washer gun. See g. 6.
5.2. HIGH PRESSURE LANCE
5.2.1. Push the spray lance into the pressure washer gun and fasten it by turning it through 90°. See g. 7
5.2.2. Unlock the lever on the pressure washer gun.
5.2.3. Pull on the lever of the pressure washer gun; the device will switch on. See g. 8
g.4
g.5
g.6
g.7
g.8
Original Language Version
© Jack Sealey Limited PW1850 Issue 2 (2) 10/02/21

WARNING: Appliance with uid under pressure. Keep a rm hold on the gun and be prepared to take the kickback pressure.
5.3. ATTACHING THE NOZZLES See g.9
5.3.1. Both nozzles attach by pushing them into the end of the lance. You will hear a click, and will only be able to release them using the
button, when they are properly seated.
5.4. DETERGENT SUCTION
5.4.1. Fill detergent bottle to line using neat detergent. See g.10.1.
5.4.2. Attach the variable spray nozzle to the lance (g.10.3) and then, attach bottle to pressure washer gun (g.10.4).
5.5. HIGH PRESSURE HOSE
5.5.1. Use the pressure washer only if the hose is completely uncoiled and extended. See g.11
5.6. SWITCHING OFF See g. 12
5.6.1. Switch o the machine (g.12.1).
5.6.2. Turn o the water supply (g.12.2).
5.6.3. Unplug from the electrical socket (g.12.3).
5.6.4. Squeeze trigger to release any pressure left in the gun and hose (g.12.4).
g.9
g.10
g.11
g.12
Original Language Version
© Jack Sealey Limited PW1850 Issue 2 (2) 10/02/21

5.7. T.S. TOTAL STOP
NOTE: Total Stop, which stops the machine during the bypass phase. To start the pressure washer, it is therefore necessary to set the switch
to the on position (I)“ON”; after that press the pistol trigger: the Total Stop will start the machine and will stop it automatically when
the trigger is released. It is advisable to put on the safety of the pistol trigger whenever the machine is stopped, in order to avoid
unintentional starting.
5.7.1. Any automatic start of the machine without pressing the gun trigger is attributable to air bubbles in the water or other similar
phenomena which DO NOT imply the existence of any defects in the machine.
5.7.2. DO NOT leave the appliance unattended during standby for more than 5 minutes. Contrarily, for the safety of the appliance it is
necessary to re-turn the switch into the (0) OFF position.
5.7.3. Please check that the coupling of the high pressure hose with the appliance and the gun supplied as standard equipment made
correctly, that is to say without any water leak.
6. MAINTENANCE
6.1. There are no user serviceable parts in this unit.
WARNING: the machine shall be disconnected from its power source, by removing the plug from the socket-outlet, during cleaning or
maintenance
WARNING: DO NOT spray the appliance with water and DO NOT use detergents or aggressive solvents. Machine could be
damaged.
6.2. Clean the exterior part of the machine with a dry cloth.
7. STORAGE
7.1. CLEAN AND DRY BEFORE STORING. SEE FIG. 13
7.1.1. Move the machine only by grasping the carrying handle and using the wheels.
7.1.2. Before storing clean the lter (g.13.1), dry the hose (g.13.2), and clean the nozzle (g.13.3).
7.1.3. Store the appliance and the accessories in a frost safe room (g.13.4).
8. TROUBLESHOOTING
8.1. APPLIANCE DOES NOT WORK
8.1.1. Check whether the voltage shown on the rating plate corresponds to that of the power source.
8.1.2. Check the connector cable for damage.
8.2. APPLIANCE DOES NOT REACH OPERATIONAL PRESSURE
8.2.1. Vent the appliance: allow the pump to operate without the high-pressure hose until water appears at the high-pressure outlet without
any more bubbles. Then reattach the high-pressure hose.
8.2.2. Clean the strainer in the water connection (g.13.1).
8.2.3. Let the hose dry out (g.13.2).
8.2.4. Check the inlet water ow rate .
8.2.5. Check all inlet pipes to the pump for leaks or blockage.
8.3. STRONG PRESSURE FLUCTUATIONS
8.3.1. Clean the high-pressure nozzle. Remove dirt from the nozzle hole with a needle and then rinse out with water from the front.
8.4. PUMP LEAKS
8.4.1. 10 drops per minute are permissible. In the case of more serious leakage, you should contact the authorized customer service.
8.5. REPLACEMENT PARTS
8.5.1. Use only original spare parts or spare parts suggested by the manufacturer.
g.13
Sealey Group, Kempson Way, Suffolk Business Park, Bury St Edmunds, Suffolk. IP32 7AR
01284 757500 01284 703534 sales@sealey.co.uk www.sealey.co.uk
ENVIRONMENT PROTECTION
Recycle unwanted materials instead of disposing of them as waste. All tools, accessories and packaging should be sorted, taken to
a recycling centre and disposed of in a manner which is compatible with the environment. When the product becomes completely
unserviceable and requires disposal, drain any fluids (if applicable) into approved containers and dispose of the product and fluids
according to local regulations.
WEEE REGULATIONS
Dispose of this product at the end of its working life in compliance with the EU Directive on Waste Electrical and Electronic Equipment
(WEEE). When the product is no longer required, it must be disposed of in an environmentally protective way. Contact your local solid
waste authority for recycling information.
Note: It is our policy to continually improve products and as such we reserve the right to alter data, specifications and component parts without prior
notice.
Important: No Liability is accepted for incorrect use of this product.
Warranty: Guarantee is 12 months from purchase date, proof of which is required for any claim.
Original Language Version
© Jack Sealey Limited PW1850 Issue 2 (2) 10/02/21
Other manuals for PW1850
1
Table of contents
Other Sealey Pressure Washer manuals

Sealey
Sealey PCM1300.V2 User manual

Sealey
Sealey PCM2500.V2 User manual

Sealey
Sealey PW1712 User manual

Sealey
Sealey PC2150 User manual

Sealey
Sealey PCM2500SP User manual

Sealey
Sealey PC2100 User manual

Sealey
Sealey PC2950.V3 User manual

Sealey
Sealey PC2901 User manual

Sealey
Sealey PWDM3600 User manual

Sealey
Sealey PCM2500SP.V2 User manual

Sealey
Sealey PW2512 User manual

Sealey
Sealey PW1860 User manual

Sealey
Sealey PW2000PA User manual

Sealey
Sealey PW1850 User manual

Sealey
Sealey PW1601 User manual

Sealey
Sealey PW2012R User manual

Sealey
Sealey PC3451 User manual

Sealey
Sealey PC3150 User manual

Sealey
Sealey PCM1500.V2 User manual

Sealey
Sealey PC2351 User manual