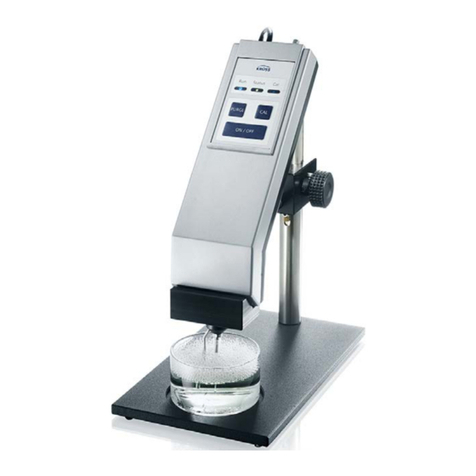
kruss K11 MK3 User manual

Tensiometer K11 MK3
User Manual
V3.05
© KRÜSS GmbH, Hamburg 2000-2010


Contents page 1
Contents
1General information ....................................................................................... 7
1.1 General safety instructions.................................................................................................7
1.2 Intended use ......................................................................................................................8
1.3 Procedure if repairs should be necessary .......................................................................... 8
1.4 Technical support............................................................................................................. 10
2Introduction.................................................................................................. 11
3Setup and starting up................................................................................... 12
3.1 Transport.......................................................................................................................... 12
3.2 Location and ambient conditions...................................................................................... 12
3.3 Levelling the instrument ................................................................................................... 13
3.4 Connectors and connections............................................................................................ 14
3.4.1 Power supply..............................................................................................................14
3.4.2 Connecting the K11 Control Panel .............................................................................14
3.4.3 Computer connection (optional) ................................................................................. 15
3.4.4 Connecting an external thermostat (optional).............................................................15
3.5 Assembling a thermostat jacket (optional) ....................................................................... 16
3.5.1 Assembling an external temperature measuring probe (optional) .............................. 18
3.5.2 Inert gas connector (optional).....................................................................................18
3.5.3 Installation of the protocol printer (optional) ............................................................... 19
4Operating the instrument ............................................................................. 20
4.1 Switching the instrument on and off ................................................................................. 20
4.1.1 Mains switch...............................................................................................................20
4.1.2 On/Off key on the Control Pad (switch on / standby) ................................................. 20
4.1.3 Resetting the instrument ............................................................................................ 21
4.1.4 Warming-up time........................................................................................................21
4.2 Error message behaviour................................................................................................. 21
4.3 The control panel (overview)............................................................................................ 22
4.4 The display....................................................................................................................... 22
4.5 Moving the sample stage ................................................................................................. 23
4.5.1 Safety Instructions......................................................................................................23
4.5.2 Moving the sample platform using the rotary knob.....................................................24
4.5.3 Saving and activating standard sample platform positions......................................... 24

page 2 Contents
4.6 The keypad ...................................................................................................................... 25
4.6.1 Measuring method selection (plate, ring, density) ...................................................... 27
4.6.2 Starting and stopping measurements......................................................................... 27
4.6.3 Entering measuring parameters ................................................................................. 28
4.6.4 Changing the basic settings (setup) ...........................................................................29
4.6.5 Illumination ................................................................................................................. 30
4.6.6 Stirrer ......................................................................................................................... 30
4.7 Suspending the measuring probes ..................................................................................31
5Cleaning procedures.................................................................................... 32
5.1 Cleaning the sample vessel ............................................................................................. 32
5.1.1 Step 1: Cleaning with water........................................................................................ 32
5.1.2 Step 2: Check cleanliness..........................................................................................32
5.1.3 Step 3 (if necessary): Scarfing ................................................................................... 33
5.1.4 Step 4 (if necessary): Cleaning with oxidising acid ....................................................33
5.2 Cleaning the ring and plate ..............................................................................................33
5.3 Cleaning the measuring probe for determining the density..............................................34
6Preparing a measurement ........................................................................... 35
6.1 Safety information ............................................................................................................ 35
6.1.1 Working with highly flammable liquids........................................................................ 35
6.1.2 Measurements at high temperatures.......................................................................... 35
6.2 Setting up and filling the sample vessel ...........................................................................36
6.3 General course of a measurement...................................................................................37
6.4 Data transfer and storage (optional) ................................................................................37
6.5 Check list before starting a measurement........................................................................ 38
7Measurements with the plate or rod method ............................................... 39
7.1 Main menu “Plate Method”...............................................................................................39
7.1.1 Measuring mode ........................................................................................................ 39
7.1.2 Reading limit ..............................................................................................................40
7.1.3 Interval .......................................................................................................................40
7.1.4 Wetted length ............................................................................................................. 40
7.2 Parameters for the plate method in Setup........................................................................41
7.2.1 Immersing speed (mm/min)........................................................................................ 41
7.2.2 Detection speed (mm/min) ......................................................................................... 42
7.2.3 Immersion depth (mm) ............................................................................................... 42

Contents page 3
7.3 Measuring surface tension by the plate method...............................................................43
7.4 Measuring interfacial tension by the plate method ...........................................................44
8Ring method measurements........................................................................ 47
8.1 Measuring parameters in the main menu of the ring method...........................................47
8.1.1 Measuring mode ........................................................................................................ 47
8.1.2 Correction................................................................................................................... 48
8.1.3 Reading limit ..............................................................................................................50
8.1.4 Heavy density............................................................................................................. 50
8.1.5 Light density ...............................................................................................................50
8.1.6 Relaxation / switching to the ring tear-off mode .........................................................50
8.1.7 Ring type....................................................................................................................51
8.2 Parameters for the ring method in Setup .........................................................................52
8.2.1 Measuring speed........................................................................................................ 52
8.2.2 Detection speed ......................................................................................................... 52
8.2.3 Immersion depth ........................................................................................................53
8.2.4 Immersion speed (mm/min)........................................................................................ 53
8.3 Measuring surface tension by the ring method ................................................................54
8.4 Measuring interfacial tension by the ring method............................................................. 56
8.4.1 Interfacial tension pull.................................................................................................56
8.4.2 Interfacial tension push .............................................................................................. 59
9Density measurement.................................................................................. 62
9.1 Parameters for the density measurement in Setup ..........................................................62
9.1.1 Detection speed (mm/min) ......................................................................................... 62
9.1.2 Immersion speed (mm/min)........................................................................................ 63
9.2 Measuring the density...................................................................................................... 63
9.3 Entering the density of a different probe .......................................................................... 66
10 Basic settings (setup menu and special functions) .................................... 67
10.1 First page of the setup menu ........................................................................................... 68
10.1.1 measuring speed........................................................................................................ 68
10.1.2 Immersion speed........................................................................................................ 68
10.1.3 Detection speed ......................................................................................................... 69
10.1.4 Acceleration due to gravity......................................................................................... 69
10.2 Second page of the setup menu ......................................................................................70
10.2.1 Immersion depth ........................................................................................................70

page 4 Contents
10.2.2 Sensitivity................................................................................................................... 70
10.2.3 Min. standard deviation .............................................................................................. 71
10.2.4 Number of values for SD............................................................................................71
10.3 Third page of the setup menu .......................................................................................... 72
10.3.1 Stirrer speed...............................................................................................................72
10.3.2 Oscillating period........................................................................................................72
10.3.3 Temperature sensor...................................................................................................72
10.3.4 Language / Sprache................................................................................................... 73
10.4 Fourth page of the setup menu ........................................................................................ 74
10.5 Fifth page of Setup menu................................................................................................. 75
10.5.1 Password ................................................................................................................... 75
10.5.2 Set defaults ................................................................................................................75
11 Special functions ........................................................................................ 76
11.1 Tare (0) ............................................................................................................................ 76
11.2 Key beep on/off (2) .......................................................................................................... 76
11.3 LabDesk output / Standard output (3) ..............................................................................77
11.4 Print setup (4) .................................................................................................................. 77
11.5 Protection (5) ................................................................................................................... 77
12 Data transfer to external media (optional).................................................. 78
12.1 Printing out on a protocol printer ......................................................................................78
12.2 PC transfer to LabDesk....................................................................................................79
12.2.1 Installation.................................................................................................................. 79
12.2.2 Preparations............................................................................................................... 83
12.2.3 The toolbar ................................................................................................................. 84
12.2.4 data transfer ............................................................................................................... 85
12.2.5 Data export................................................................................................................. 86
12.2.6 Options and settings................................................................................................... 86
13 Maintenance............................................................................................... 90
13.1 Checking the shape of the probes ................................................................................... 90
13.1.1 The ring...................................................................................................................... 90
13.1.2 The plate ....................................................................................................................91
13.2 Cleaning the surface of the K11....................................................................................... 91
13.3 Adjusting the K11............................................................................................................. 92
13.4 Downloading current firmware ......................................................................................... 93

Contents page 5
14 Thermostatting the gas phase with the TJ20 (optional) ............................. 96
15 Measuring principles .................................................................................. 99
15.1 Surface and interfacial tension......................................................................................... 99
15.1.1 The ring method according to Du Noüy...................................................................... 99
15.1.2 The plate method according to Wilhelmy .................................................................101
15.1.3 Ring and plate methods in comparison .................................................................... 102
15.2 Density measurement .................................................................................................... 103
Appendix........................................................................................................ 104
IRanges of validity for the ring correction methods .................................... 104
II Settings for compatibility with the Tensiometer K10.................................. 105
III Error messages ......................................................................................... 106
IV Computer requirements for LabDesk ........................................................ 108
VTechnical data ........................................................................................... 109
VI Warranty and caveat emptor ..................................................................... 109
VII Copyright and right to make alterations ................................................... 110
VIIIIndex ........................................................................................................ 111


General information page 7
1General information
1.1 General safety instructions
As well as this general safety information, please follow the safety instructions in
the remainder of the manual text.
The K11 is intended for use in a laboratory or pilot plant station. The general safety
rules for working in a laboratory environment apply to work carried out with the K11.
The K11 may only be used by trained personnel.
When carrying out measurements with substances which are poisonous,
hazardous to health, irritant and/or easily inflammable, the safety regulations and, if
available, information in the appropriate safety data sheets must be taken into
account when handling such substances.
Do not use the K11 in explosion-proof areas.
The controls of the K11 and a connected computer must not be operated when
wearing protective gloves, which have already been used for handling hazardous
materials.
Do not use the K11 if the unit is obviously damaged.
Disconnect the K11 from the power supply immediately if there is any damage to
the electronics, if liquids are spilled over the K11 or if there is an escape of
tempering medium.
The K11 has a motorised sample platform. Keep your hands away from the area of
movement while the platform is in motion. Make sure that no one is working within
the area of movement while the sample platform is moving. Do not place any
objects on the platform.
Measurements at temperatures above 40°C must always be carried out with the
measuring chamber closed. Samples must be exchanged using appropriate tools
and heat protection gloves. Conversions are to be carried out only when the system
is cooled down.

page 8 General information
1.2 Intended use
•K11 is intended only for measurements of the surface tension of liquids, the
interfacial tensions between two liquids and measurements of the density of a
liquid.
•The intended use includes the exclusive use of accessories supplied by KRÜSS or
substitutes with an identical design if disposable accessories are being used.
•The K11 can be used at ambient temperatures between 10°C and 40°C and with
air which is free from condensate.
•Measurements above or below room temperature are only to be performed with a
KRÜSS thermostat jacket of the TJ series. Only external laboratory thermostat
units may be used for thermostatting. Applicable liquids are water (above 0°C and
below 100°C), ethylene glycol, vegetable oils or silicon oils. KRÜSS does not
provide for damages due to working outside the temperature range between -10°C
and 130°C.
•The components of the K11 are not resistant against acids, bases or organic
solvents. KRÜSS does not provide for damages due to spilling any of these
substances. The same applies to damages due to corrosive vapours.
1.3 Procedure if repairs should be necessary
Contact KRÜSS
Contact KRÜSS customer support.
*If you did not obtain the measuring instrument directly from KRÜSS but from a
dealer, please contact your dealer first. He may be able to rectify the damage. If
not, contact KRÜSS customer support directly.
You will be given a repair number. Please quote this number in your covering letter
when you dispatch the unit.

General information page 9
Send us the measuring instrument or accessories
!Do not dispatch the measuring instrument or accessories without consulting
KRÜSS customer support.
*Components which are not directly affected by the damage may also have to be
sent with the unit. KRÜSS customer support will advise you on the necessary
scope of the shipment.
!Remove liquids (e.g. samples, temperature control liquid) completely from the
instrument and the accessories.
!Clean the unit or accessories before dispatch. This applies particularly if there is
contamination due to hazardous substances.
!Use the original packaging to pack the instrument or accessories. If you no longer
have the original packaging, it must be ordered from KRÜSS at the customer’s
expense.
!Pack all components separately which were packed separately when the unit was
supplied. Do not dispatch the unit in the assembled state.
!If the instrument or accessories were provided with transportation locks, refit these
before shipping.
!Use box-in-box packaging.
*Our customer support department will be pleased to advise you regarding the
proper packaging.

page 10 General information
1.4 Technical support
If problems should occur when working with the K11 or with LabDesk, please consult
the technical customer support at KRÜS GmbH. You can contact them at:
KRÜS GmbH
Technical support
Tel:(+49) 040/514401-0
Fax:(+49) 040/514401-98
E-mail: [email protected]

Introduction page 11
2Introduction
Dear KRÜSS GmbH Customer,
Thank you for purchasing the K11 from KRÜSS.
Thanks to the simple handling of the unit, you will soon be carrying out your
measurements without any problems. However, we advise you to read this
documentation carefully before starting work and to follow the appropriate information
when installing the unit. As well as the instructions for use, you will also find helpful
information and tips, for example for the optimum preparation of a measurement.
!We strongly advise you not to carry out the installation and work without consulting
this manual.
*This manual is subject to a permanent quality control. The current version of the
manual can always be acquired from the download section of our homepage
www.kruss.de
.
Possible uses of the K11
•measurements of the surface tension of a liquid with the Du Noüy ring or Wilhelmy
plate method as well as the rod method
•measurements of the interfacial tension between two liquids with the Du Noüy ring
or Wilhelmy plate method as well as the rod method
•Measurements with the Lamella-tear-off method
•determining the density of liquids
•motor-control of the sample stage with automatic surface detection
•optional: transferring results to a protocol printer or a data logger software
•optional: measurements within a temperature range between -10°C and 130°C

page 12 Setup and starting up
3Setup and starting up
3.1 Transport
!Two people are required for transporting the K11.
!Remove any sample vessels from the sample platform before transporting.
!Before transport, close the doors of the measuring chamber and safe them with
adhesive tape
Transport the K11 with the help of a trolley. Hold the unit firmly during
transportation.
To lift the K11 onto the trolley and from the trolley to the place of use: Hold from
both sides under the rear part of the base plate. Support the unit from both sides by
holding under the recessed plate below the sample chamber.
3.2 Location and ambient conditions
For operational safety and accuracy of results the K11 must be installed at an
adequate location.
When working with liquids which are volatile, toxic, irritant, hazardous to health
and/or inflammable: Locate the K11 in a position which is designed for working with
the appropriate hazardous substances.
Set up the K11 so that access to the mains connection is unrestricted and the K11
can be disconnected from the mains immediately in the event of danger.
•Set the unit up in a place where vibrations can be avoided.
•Avoid direct sunshine or direct radiation by warm artificial light on the instrument.
•Place the unit on a level, stable, and vibration-free base. Check if the base is level
using a bubble level or spirit level.
•Avoid large variations in room temperature during the measurements.

Setup and starting up page 13
•Avoid contamination of the sample liquid by atmospheric air (e.g. by exhaust from
machines).
•Avoid devices emitting hertzian waves near the instrument (e.g. cell phones, W-
LAN devices). These can affect the force sensor electronics and lead to
measurement errors.
3.3 Levelling the instrument
Level the K11 with the help of the two rear adjustable feet
and the spirit level fitted into the top of the K11.
The air bubble in the spirit level must be completely within the inner circle.

page 14 Setup and starting up
3.4 Connectors and connections
3.4.1 Power supply
Connect the mains cable to the
LINE
connector on the back of the K11.
Connect the mains plug supplied to a mains outlet (100-240 V AC).
3.4.2 Connecting the K11 Control Panel
Control Panel
: Control keypad for control of the K11.
Connect the plug of the Control Panel to the
CONTROL PANEL
connector on the
back of the K11.

Setup and starting up page 15
3.4.3 Computer connection (optional)
The K11 is connected to the computer via a serial interface.
Connect the
SERIAL PC
interface connector on the back of the K11 to a
corresponding interface on the computer.
3.4.4 Connecting an external thermostat (optional)
Connect the thermostat outlet to the Quick-Lock
THERMOSTAT IN
connector on
the back of the K11.
Connect the thermostat inlet to the Quick-Lock
THERMOSTAT OUT
connector on
the back of the K11.

page 16 Setup and starting up
3.5 Assembling a thermostat jacket (optional)
Unplug the K11 from the mains before assembly.
1. If you have ordered the optional TP0512 external temperature sensor: Attach the
temperature sensor bracket to the thermostat jacket before fitting the vessel
(Ö p. 18).
2. Remove the screw fitted to the shaft of the thermostat jacket (2.5 mm hexagon
socket wrench).
3. Plug the multi-pin plug on the bottom of the thermostat jacket into the socket on the
sample platform. Hold the thermostat jacket firmly and turn the coupling ring
anticlockwise as far as the stop.
4. Fix the shaft of the thermostat jacket to the angle bracket with the help of the
previously removed screw.

Setup and starting up page 17
4. Slide the rubber sleeve over the shaft as far as the lower edge of the vessel.
5. Connect the two Quick-Lock closures of the hoses coming from the thermostat
jacket to the two sockets in the sample chamber.

page 18 Setup and starting up
3.5.1 Assembling an external temperature measuring probe (optional)
1. Turn the thermostat jacket over. Attach the bracket for the temperature sensor to
the underside of the thermostat jacket with the help of the two screws supplied.
2. Fit the thermostat jacket as described in Chapter 10.3.3.
3. Lift the flap of the temperature sensor connector in the measuring chamber.
Connect the sensor plug to the sensor connector.
*To read out the temperature of the external sensor when taking measurements:
Select the option
external
under
Temperature sensor
in the
Setup
menu.
3.5.2 Inert gas connector (optional)
An inert gas atmosphere can be applied to the measurement chamber.
Use only inert gases such as nitrogen or argon. Do not use gases which are
harmful, poisonous, inflammable or corrosive.
Connect the inert gas feed to the
GAS
connector on the back of the K11.
Table of contents
Other kruss Measuring Instrument manuals

kruss
kruss BP50 User manual

kruss
kruss Mobile Surface Analyzer User manual

kruss
kruss M5000 User manual

kruss
kruss DR101-60 User manual

kruss
kruss DSA100 User manual

kruss
kruss P3000 User manual

kruss
kruss M5000 User manual

kruss
kruss M3000 User manual

kruss
kruss DS7000 Series User manual

kruss
kruss DR301-95 User manual