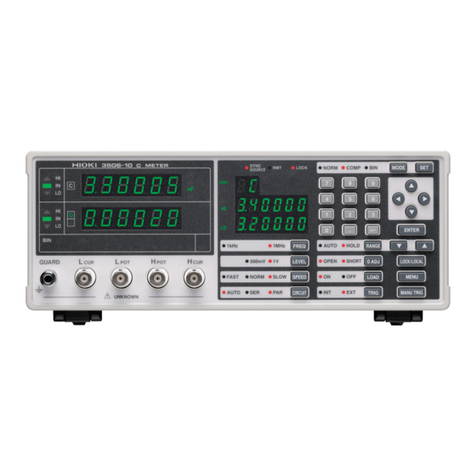
Hioki RM3545 User manual

RESISTANCE METER
RM3545, RM3544
Basic accuracy :
0.006%
No. of display digits: Max. 6.5
Max.resolution : 0.01μΩ (LP) 0.01mΩ
Basic accuracy :
0.02%
No. of display digits: Max. 4.5
Max.resolution : 1μΩ
Featuring super-high accuracy and multi-channel capabilities
(20 channels with 4-terminal measurement)
RESISTANCE METER RM3545
RESISTANCE METER RM3544
High-accuracy bench-top meter ideal for production lines

2
Choose from two models based on your application
RESISTANCE METER RM3545 RESISTANCE METER RM3544
0.00μΩ to 1200MΩ Measurement types (4-terminal direct current) 0.000 mΩ to 3.5 MΩ
3
Temperature measurement, Temperature correction (TC),
comparator, judgment sound setting, auto hold
3
3Low power resistance measurement (LP) N/A
3Temperature rise (Temperature conversion (ΔT) N/A
3Offset voltage compensation (OVC) N/A
3D/A output N/A
3RM3545-02 : Max. 20ch Multiplexer N/A
RM3545
Super-high accuracy
and multi-channel capabilities
for advanced development
and production applications
RM3544
High-accuracy bench-top meter
for both manual operation
and integration with automatic lines
Max. measurable current : 1A
Max. resolution : 0.01μΩBasic accuracy : 0.006%
Resistance measurement
Max. measurable current : 1mA Max. Open-circuit voltage : 20mV
Low power resistance measurement
Max. resolution : 0.01mΩBasic accuracy : 0.2%
Max. measurable current : 300mA
Max. resolution : 1μΩBasic accuracy : 0.02%
Applications
Motors, solenoids, choke coils, transformers,
wire harnesses
RM3544RM3545
Contacts, wire harnesses,
relay contacts, switches
RM3544RM3545
Fuses, resistors, heaters,
wires, welds
RM3544RM3545
Conductive rubber, paint
RM3544RM3545
Compact fuses, airbag inator,
compact magnetic
components (EMC lters, ferrite beads)
RM3545
Multi-contact resistance
measurement (motor and
transformer windings)
RM3545-02
Small-signal contacts
RM3545
General specications

3
SM7120
3.5MΩ
1μΩ
0.1μΩ 3.5MΩ
0.01μΩ 1.2kΩ
0.1μΩ 120MΩ
0.01μΩ 1200MΩ
50Ω 2 x 10¹⁹Ω
RM3545
RM3544
RM3548
RM3543
RM3542
A Full Line-up of HIOKI Resistance Meters
to Suit Your Measurement Range
Scanning measurement using the Multiplexer Unit Z3003 is conve-
nient in applications that require multi-contact measurement, for ex-
ample when testing network resistors, steering switches, or 3-phase
motor windings. Simply insert a Z3003 unit into one of the slots on the
back of the RM3545-02 to enable scanning measurement of up to 20
locations* with 4-terminal measurement.
(*When using two Z3003 units, up to 42 locations can be measured with 2-terminal
measurement.)
Multiplexer unit Z3003
(Option)
Pictured: Back of the RM3545-02 with
two Z3003 units (optional feature)
installed
Insert up to two Z3003 units into the
slots on the back of the instrument.
Multi-point measurement with the Multiplexer Unit Z3003
(20 locations with 4- terminal measurement)
RM3545-02
RM3544RM3545
Probes suited to manual measurement on production lines
CLIP TYPE LEAD L2101
(Bundled accessory)
4 -TERMINAL LEAD
L2104
PIN TYPE LEAD
L2102
PIN TYPE LEAD
L2103
Application 1.
Measuring a 3-phase motor winding
Resolver
detection
Resolver
cos
Stator
coil
Resolver
sin
B7
B7
A7
A7
B6
B6
A6
A6
CH7
CH6
B2
B2
A2
A2
B3
B3
A3
A3
B5
B5
A5
A5
CH5
CH1
CH3
CH2
Application 3.
Testing a relay
B1
B1
A1
A1
CH1
B2
B2
A2
A2
CH2
Application 4.
Testing battery terminal welds
B1
B1
A1
A1
B2
B2
A2
A2
CH1
CH2
Application 2.
Testing a connector or wiring harness
B1
B1
A1
A1
B2
B2
A2
A2
B3
B3
A3
A3
CH1
CH2
CH3

4
Simplifying high-accuracy resistance measurement
Convenient wide range options
The RM3545 can perform resistance measurement with a 6.5-digit,
1,200,000-count display at a maximum resolution of 0.01 μΩ. It delivers
more than enough capabilities to be used in applications requiring high-
resolution resistance measurement, for example in testing inverter motor
windings.
High-resistance materials such as conductive sheets and conductive rub-
ber are often used in electronic components. The RM3545 can measure
resistance values of up to 1,200 MΩ. It also delivers maximum accuracy of
0.006%, enabling researchers to test state-of-the-art current sensing resis-
tors.
Overview of the RM3545
Measure from 0.00
μ
Ωto 1200.0MΩ
0.0
1μΩmax. resolution, 0.006% basic accuracy
Max.measurable current of
1A
Overview of the RM3544
Measure from 0.000mΩto 3.5000MΩ
1μΩmax. resolution, 0.02% basic accuracy
Max.measurable current of 300m
A
As inverter-equipped power supply equipment uses increasingly high cur-
rents and frequencies, increasingly low-resistance and low-loss inductors
are being incorporated in their circuitry, prompting a need for the ability to
measure lower resistance levels with a high level of stability. With a resolu-
tion of 1 μΩ, the RM3544/RM3544-01 satisfythese needs.
Electronic components make extensive use of high-resistance substrates
such as conductive sheets and rubber, and the RM3544/RM3544-01 deliver
the ability to measure up to 3.5 MΩ.
Moreover, the instruments’ maximum accuracy of 0.02% allows them to be
used in testing current detectors with a precision of 0.1%.
Guaranteed accuracy with no warm up
or zero-adjustment
For the RM3545/RM3544, accuracy is guaranteed*immediately after
startup, without any warm up or zero-adjustment.
*When performing measurement with the RM3545 in a temperature and humidity environ-
ment that satisfies the guaranteed accuracy conditions, an even higher level of accuracy
(full accuracy) is guaranteed.
Thermal EMF occurs at connections between different metals. This force
can affect measurement and, if large enough, introduce a measurement er-
ror. The RM3545’s offset voltage correction (OVC) function reduces the
effects of thermal EMF to enable more precise measurement.
Offset Voltage Compensation (OVC)
High-durability probes
HIOKI offers a line of probes designed
to accommodate the full range of mea-
surement targets. Flex resistance has
been dramatically improved (based on
HIOKI comparisons).
Leads (overall view)
Example lead tip proles
RM3544RM3545
RM3544RM3545
RM3544RM3545
RM3544RM3545
RM3545
RM3544RM3545
Temperature correction
Gene r a lly, the resistance of copper wiring changes with temperature by 0.4%
per degree Celsius. The RM3544/RM3545 provide a temperature correction
function to convert the observed resistance value Rt at the current tempera-
ture tto the resistance value Rt0at the reference temperature t0.
*Requires the Temperature Sensor Z2001 or a thermometer capable of
generating analog voltage output (an infrared thermometer or similar
instrument).
Correction
Rt
Rt0
Resistance
value
t0tTemperature
Types of temperature
input
RM3544:
Temperature Sensor
(Z2001)
RM3545:
Temperature Sensor
(Z20 01),Analog voltage
input (from an infrared thermometer, etc.)
Reference temperature
setting range
-10.0 to 99.9
°C
Temperature coefficient
setting range
RM3544:
-9,999 to 9,999 ppm/
°C
RM3545:
-99,999 to 99,999 ppm/
°C
Standard features of the high-accuracy Resistance Meter RM3545 and RM3544
Measurement resistance range [Ω] Integrate into automated
inspection systems
Manual testing
on production lines

5
Super-high-accuracy, multi-channel resistance meter
for use in advanced development and production applications
RM3545
The RM3545 can perform measurement at a resolution of 10 μΩ at 1 mA
(using the 1,000 mΩ range). With an open-terminal voltage of 20 mV or
less, the instrument is ideally suited for measuring the contact resistance
of chip inductors and signal contacts.
Low-power (LP) resistance measurement
The RM3545 converts resistance measured values into DC voltage
for output. This capability is convenient when continuously recording
changes in resistance, for example as detected by a sensor, with a logger
or other piece of equipment.
D/A output
High/low current selection by range
Select the optimal measurement current by switching between high and
low settings according to the characteristics of the sample.
Temperature input (temperature sensor terminal)
Input temperature data for use in temperature correction using either the
Temperature Sensor Z2001 or a DC voltage (0 to 2 V). Connect a ther-
mometer that can generate DC voltage output, for example an infrared
thermometer, to perform temperature correction.
Temperature conversion function:
Useful in temperature-rise testing
Temperature increase (Δt) is obtained and displayed by converting resis-
tance measurements and ambient temperature.
Extensive contact check functionality
The RM3545 can detect erroneous
measurements caused by improp-
er contact, reducing the risk that
improperly judged or unchecked
parts will be shipped by mistake.
Contact check functionality is also
provided for 4-terminal measure-
ment.
High contact resistance indi-
cates an error.
Time
R
RM3545
Logger
Auto-scanning and step scanning
When using the Multiplexer Unit Z3003 to perform scanning measure-
ment, you can select either step scanning or auto scanning depending on
the test conditions.
Auto scanning is convenient when you require only an overall judgment
result at the completion of scanning, while step scanning is convenient
when you wish to generate judgments in real time using the instrument’s
EXT I/O interface..
Measurement targets that are susceptible to the effects of temperature, for
example thermistors and temperature transducers, can be compared with
a reference element to generate a judgment.
Comparator judgments based on
measurement results
The ability to freely combine A terminal pin(s) with B terminal pin(s) for
each channel makes it possible to perform measurement using wiring that
has been optimized for a variety of measurement targets.
Flexible pin assignments
Multiplexer settings can be configured using the keys on the instrument,
communications commands, or a computer application (sample PC appli-
cation). The sample application can be downloaded from Hioki’s website
(http://www.hioki.com).
Congurationusingacomputer
The multiplexer’s total judgment result (T_PASS, T_FAIL, T_ERR) can
be acquired from EXT I/O. Similarly, step scan judgment results can be
acquired for each step.
Acquiring Total judgment results from EXT I/O
RM3545
Key Features of the RM3545
TRIG signal input
CH1 measurement
CHn measurement
Overall judgment
output
Operation when auto
scanning is selected
Operation when step
scanning is selected
Overall judgment
output
TRIG signal input
CH1 measurement
CH1 judgment output
TRIG signal input
CH1 measurement
CH1 judgment output
Multiplexer function (RM3545-02 only)
RM3545-02

6
Easy-to-use RESISTANCE METER
suits both manual operation and integration with automatic lines
RM3544
High-intuitive advanced functionality
RM3544RM3545
RM3544
12
3 4
Guard terminals
Minimize the effects of external noise on measurements.
* GUARD terminal is the shield potential.
This terminal is not for guarding network resistance measurements.
1
Simple control over basic settings
Range and measurement speed can be controlled directly.
2
LED COMPARATOR ATTACHMENT (Option)
The LED Comparator Attachment
indicates judgment results with
green and red LEDs, eliminating
the need to look at the instrument’s
screen and increasing work ef-
ciency. Since the lamps do not light
up when the measurement leads are
open, the attachment can also be
used to verify the connection status.
Red light
HI/LO state
Green light
IN state
3
High-volume, user-selectable judgment tones
The RM3544 indicates results with a high-volume judgment tone of 85 dB
or greater to ensure it is audible near noisy machinery.
Both the RM3545 and RM3544 feature user-selectable judgment tones so
workers don’t confuse judgment results on lines where multiple resistance
meters are being used.
4
Functionality for saving and loading panels
The RM3545 (RM3544) can save and load up to 30* (10) sets of range,
comparator, and other settings. Naming each set of panel data lets you
make setup changes among production lots and lines smoothly and ef-
fo r tl ess ly.
*When using the multiplexer terminals, up to 8.
5
Material-and temperature-independent
temperature correction function
The temperature correction function can be used to convert resistance
values that vary with the ambient temperature to a reference value at a
reference temperature using the Temperature Sensor Z2001 and a user-
specied resistance temperature coefcient.
6
Comparator Function
The comparator function compares measured values to a previously
set reference value or range and then displays and outputs the judg-
ment result. The RM3545 and RM3544-01 can also output this infor-
mation using EXT I/O.
8
Scaling
The scaling function can be used to convert resistance values into physical
properties such as length.
Conversion formula : Rs = A× R+ B
7
A, B : Constants, R: Measurement value
Rs : Resistance value
5 6 7
8
Intuitive, graphical LCD
High-precision specs in a compact package
Compared to the previous model (HIOKI 3540), the RM3544/RM3544-01
take up approximately 25% less installation space.
This space-saving design frees up space in front of the instrument and
lets you build compact production lines.
Footprint of just 215 × 166 mm

7
Ability to extend measurement cable length
The new instruments feature better wiring resistance tolerances than pre-
vious models (the 3541 and 3540). Wiring resistance can now be as high
as 1.5 Ω for the RM3545 and 2 Ω for the RM3544.
Communications Monitor Function for smooth
systems development
The Communications Monitor Function displays communications data (re-
ceived commands and sent data) on the screen, providing valuable support
for programming of programmable logic controllers (PLCs).
Functionality for verifying the EXT I/O connec-
tion status and testing EXT I/O
In addition to allowing you to check EXT I/O signal input on the instrument’s
screen, this functionality allows you to turn output signals on or off as desired.
This capability simplies verication work during PLC programming.
Communications
Monitor screen
EXT I/O test
function screen
High-speed, comprehensive
productivity support
• The RM3545 and RM3544-01 deliver the speed demanded by automatic
testing equipment at a sophisticated level. The entire process from the
start of measurement to outputting of the judgment result takes as little
as 2.2 ms*1 (RM3545) and 18 ms (RM3544-01). One cycle of operation,
lasting from measurement to judgment output, completes within this
time. *1 When the measurement current is set to “High”.
• The instrument’s USB interface can also be used.
• The RM3545 and RM3544-01 support RS-232C data communications at
up to 115.2 kbps*2.
• The EXT I/O output mode can be switched between judgment mode and
BCD mode.
*2 With some computers, large error components may prevent fast transfer speeds (baud
rates) from being used. In this case, change the speed to a lower setting.
A switch on the rear panel is used to toggle the input signal polar-
ity between NPN (sink output support) and PNP (source output
support) settings depending on the PLC common polarity.
EXT I/O Input and Output Circuits
EXT I/O polarity
(Select NPN/PNP)
The handler interface (EXT I/O) is isolated from measurement circuitry, control
circuitry, and the protective ground (chassis ground), providing a high level of
noise resistance.
Handler (EXT I/O) interface
RM3544-01
Input Signals:
TRIG(IN0), KEY_LOCK, 0ADJ, PRINT(IN1), LOAD0 to LOAD3,
BCD_LOW
Output Signals:
[Judgment mode] EOM, ERR, INDEX, HI, IN, LO, OUT0 to OUT2
[BCD mode] EOM, ERR, IN, HILO, BCDm_n*, RNG_OUT0 to
RNG_OUT3 *
Indicates the nth bit of the mth digit.
RM3544
EXT I/O Signal List
RM3545
Input Signals:
TRIG(IN0), CAL, KEY_LOCK, 0ADJ, PRINT(IN1), MUX, SCN_STEP,
LOAD0 to LOAD5, BCD_LOW
Output Signals:
[Judgment mode] EOM, ERR, INDEX, HI, IN, LO, T_ERR, T_
PASS,
T_FAIL, BIN0 to BIN9, OB, OUT0 to OUT2
[BCD mode] EOM, ERR, IN, HILO, BCDm_n*, RNG_OUT0 to
RNG_OUT3 *
Indicates the nth bit of the mth digit.
RM3545
RM3544RM3545
EXT I/O Electrical Specications
Inputs:
Photocoupler isolation: Non-voltage contact inputs
(support for current sink output)
Input ON:
Residual voltage: Max. 1 V @4 mA
Input OFF:
Open
Max. 100
μA
Outputs:
Photocoupler-isolated open drain output (no-polarity)
DC30Vmax, DC50mAmax/ch
Residual voltage: Max. 1 V @50 mA, or 0.5 V @10 mA
External power output:
Output voltage
:
Sink output support: 5.0V±10%,
Source output support: -5.0V±10%
Max. output current
:
100mA
ISO_COM
10Ω
RM3545/-01/-02
RM3544-01
Output Circuit
Internally Isolated
Common
Max. 50 mA DC
Zener voltage
= 30 V
Output
RM3545/-01/-02
RM3544-01
ISO_COM
1kΩ
NPN
PNP
2kΩ
Input Circuit(when using NPN)
Input
Internally Isolated
Common
EXT I/O
MODE
SELECTOR
Easy integration into automatic testing equipment
(RM3545/-01/-02, RM3544-01)
When designing a control system using the EXT
I/O interface, be sure to read
the instruction manual and check the necessary
technical information.

8
Connecting the instrument to a computer
via RS-232C or USB
• Use a PC to control RM3545 and RM3544-01 functions as well as
acquire measurement results.
(This capability does not include turning the instrument on and off or
configuring certain interface settings.)
• Connect the instrument to a commercially available RS-232C printer to
print measured values, including judgment results.
• Measured values can be automatically output. By using the instrument’s
USB keyboard mode, measured values can be entered into applications
such as spreadsheets and text editors without the need to install a spe-
cial USB driver in the computer.
• The sample PC application provides functionality for capturing data
based on trigger signals, performing interval measurement, conducting
communication tests, and loading captured data into Microsoft® Excel
or outputting it as a CSV file. The application can be downloaded from
Hioki’s website (http://www.hioki.com).
RM3545-02 rear panel
*Multiplexer Units cannot be installed in the RM3545 or RM3545-01. The
RM3545-01 has a GP-IB connector.
EXT I/O polarity
(Select NPN/PNP)
RS-232C/
PRINTER
D/A output
terminals
USB
Multiplexer Unit Z3003
(optional equipment; shown with two units installed))
Temperature
sensor jack
Protective
fuse for
measurement
circuitry
EXT I/O
RM3545
RM3544RM3545
USB/
RS-232C
Applications screen
*The RM3544 does not include EXT I/O or communication interfaces
(RS-232C or USB). Select the RM3544-01 for these functions.
RM3544-01 rear panel
RM3544
EXT I/O
EXT I/O polarity
(Select NPN/PNP)
RS-232C/PRINTER
USB
Maintenance jack for HIOKI use only
(This jack is provided for maintenance
use. It cannot be used by the customer.)
Temperature sensor jack
Protective fuse
for measurement
circuitry
RM3544RM3545
Select the interfaces and EXT I/O capability needed for your application.
Interface and EXT I/O selection
RM3545 series comparison chart
(Base model)
-01 -02
External I/O
(comparator, BCD, BIN function) 3 3 3
Communication
interfaces
RS-232C/Printer/USB
3 3 3
GP-IB N/A 3N/A
Multiplexer* (scanner function)
N/A N/A 3
(Max. 20 channels)
*When using 4-terminal measurement with two MULTIPLEXER UNIT Z3003 (option) cards.
RM3544 series comparison chart
(Base model)
-01
External I/O
(comparator, BCD) N/A 3
Communication interfaces
RS-232C/Printer/USB
N/A 3
MULTIPLEXER UNIT Z3003 Specications
Measurement
targets
4-wire: 10 locations (when using 2 units, 20 locations)
2-wire: 21 locations (when using 2 units, 42 locations)
Measurable
range
[Measurement current]
Internal instrument: 1A DC or less
External instrument: 1A DC or less, 100 mA AC or less
[Measurement frequency]
External instrument DC, 10 Hz to 1 kHz
Contact speci-
cations
Contact type: Mechanical relay
Maximum allowable voltage:
33 V RMS and 46.7 V peak or 70 V DC *1
Maximum allowable power: 30W (DC), (Resistance load)
Contact service life:
4-wire: 50 million cycles*2 (reference value)
2-wire: 5 million cycles (reference value)
Dimensions Approx. 92W × 24.5H × 182D mm (3.62”W × 0.96”H ×
7.17”D) (without projections)
Mass Approx. 180 g (6.3 oz)
Accessories Instruction manual ×1, D-SUB 50pin connector ×1
*1 Cannot be used in combination with a withstand voltage tester. When used with a withstand
voltage tester, the Z3003’s internal relay will cause an insulation breakdown, resulting in electric
shock or equipment damage.
*2 Assuming 24-hour operation, the guideline of 50 million cycles corresponds to approximately
1.5 years on a line operating at 1 sec. per workpiece or approximately 15 years on a line operating
at 10 sec. per workpiece.
•About scanning time
The Z3003 switching time is 30 ms/ch.
The total scanning time can be calculated as follows:
(Switching time + measurement time including delay) × number of channels
For measurement time typical values, please see page 11.
•Example scanning times
Range Number of
channels
Measurement
speed Delay
Time to output judgment results
after TRIG input
(When the measurement current
is set to “High”.)
1000mΩ 10 FAST 0 ms Approx. 300ms
1000mΩ 10 FAST
Preset
Approx. 800ms
RM3545-02
Product warranty: 1 year

9
RM3545 RM3544
Measurement types
Resistance measurement: 0.000 00mΩ (10mΩ range) to
1200.0MΩ (1000MΩ range), 12 ranges
Low power resistance measurement: 0.00mΩ (1000mΩ range) to
1200.00Ω (1000Ω range), 4 ranges
Temperature measurement (thermistor): -10.0 to 99.9°C
Temperature measurement (analog input): -99.9 to 999.9°C
Resistance measurement: 0.000mΩ (30mΩ range) to
3.500 0MΩ (3MΩ range), 9 ranges
Temperature measurement (thermistor): -10.0 to 99.9°C
Measurement method
4-terminal direct current(constant current), banana plug, with guard terminal
Range switching Auto or Manual
Temperature correction
Reference temperature setting range: -10°C to 99.9°C,
Temperature coefficient setting range: -99,999 ppm/°C to 99,999 ppm/°C
Reference temperature setting range: -10°C to 99.9°C,
Temperature coefficient setting range: -9,999 ppm/°C to 9,999 ppm/°C
Zero-adjustment
By range, by step (RM3545-02 only)
Within ±50% f.s. of each range. (Zero-adjustment is not required
for 100 MΩ or greater ranges.)
Within -3% to 50% f.s. of each range. (f.s.= 30,000 dgt.)
Trigger Internal or external RM3544: Internal trigger, RM3544-01: Internal or external
Measurement speed
FAST / MED / SLOW1 / SLOW2 FAST / MED / SLOW
Delay Internal fixed value: / 0 to 9999 ms (1ms step) N/A
Functions
Temperature correction, Temperature conversion, Self-calibra-
tion, offset voltage compensation (OVC), comparator (ABS/
REF%), BIN, key-lock (OFF, menu lock, all lock), display digit
count selection function (7 digits/6 digits/5 digits), automatic
power supply frequency settings (AUTO/50Hz/60Hz), scaling,
judgment sound setting, auto hold, statistical calculations, clock,
self-test, L2105 LED Comparater Attachment output
Temperature correction, comparator (ABS/R EF%), key-
lock (OFF, menu lock, all lock), display digit count selec-
tion function (5 digits/4 digits), automatic power supply
frequency settings (AUTO/50Hz/60Hz), scaling, judgment
sound setting, auto hold, L2105 LED Comparater Attach-
ment output
Measurement fault
detection functions Contact check, over detection, current fault detection Over detection, current fault detection
Averaging OFF, 2 to 100 averaging iterations (variable in 1-iteration steps)
Panel store,
panel load
30 (Front terminals), 8 (MUX (multiplexer)) 10
Panel save parameters: save time and date, resistance measure-
ment ranges, measurement speed, comparator, BIN setting, mul-
tiplexer setting, etc.
Panel save parameters: resistance measurement ranges,
measurement speed, comparator, etc.
Multiplexer
RM3545-02:
Number of installed units: Max. 2
Measurement terminal settings : Front terminals / MUX
(multiplexer)
When using the MUX setting, the measurement leads cannot
be connected to the front measurement terminals
Support unit: Z3003
Number of channels that can be set: 42, switching time 30
ms (reference value)
N/A
D/A output
Output: resistance measured value
Output voltage: 0V DC to 1.5V DC
Output impedance: 1kΩ
Number of bits: 12bit
N/A
EXT I/O TRIG and other, BIN, BCD RM3544-01: TRIG and other, BCD
Communication
interfaces
Select from GP-IB*, RS-232C, PRINTER(RS-232C), or USB
*RM3545-01 only
RM3544-01:
Select from RS-232C, PRINTER(RS-232C), or USB
Communication
interfaces
Remote function, communications monitor function, data output
function, memory (50 data)
Remote function, communications monitor function, data
output function
RS-232C Bit rates: 115,200 / 38,400 / 19,200 / 9,600 bps
USB Class: CDC (COM mode), HID (USB keyboard mode)
Printer
(RS-232 port)
Printed data: Resistance measurement values, temperature mea-
surement values, judgment results, measurement conditions, sta-
tistical results
Printed data: Resistance measurement values, temperature
measurement values, judgment results, measurement con-
ditions
Operation: Prints at PRINT signal or PRINT key input.
Interval: ON/OFF, Interval times: 1 to 3,600 s (variable in 1 s steps), Number of print columns per row: 1 or 3
Operating temperature
and humidity
0 to 40ºC, 80% rh or less (non-condensating)
Storage temperature
and humidity
–10 to 50ºC, 80% rh or less (non-condensating)
Operating environment
Indoors, Pollution Degree 2, up to 2,000 m ASL
Power supply Rated supply voltage: 100 to 240 VAC ±10%, Rated supply frequency: 50/60 Hz
Rated power consumption
4 0 VA 15 VA
Insulation withstand
potential
1.62 kV AC for 1 min. (with 10 mA cutoff current),
between all mains supply terminals and protective ground, interfaces, and measurement terminals
Dimensions Approx. 215W × 80H × 306.5D mm (8.46”W × 3.15”H ×
12.07”D) (without projections)
Approx. 215W × 80H × 166D mm (8.46”W × 3.15”H ×
6.54”D) (without projections)
Mass RM3545, RM3545-01: Approx. 2.5 kg (88.2 oz)
RM3545-02:Approx. 3.2 kg (112.9 oz) (not including Z3003)
RM3544: Approx. 0.9 kg (31.7 oz)
RM3544-01:Approx. 1.0 kg (35.3 oz)
Accessories
Power cord ×1, CLIP TYPE LEAD L2101 ×1, temperature
sensor Z2001 ×1, male EXT I/O connector ×1, instruction manu-
al ×1, application disc ×1, USB cable (A-to-B type) ×1, spare fuse ×1
Power cord ×1, CLIP TYPE LEAD L2101 ×1, male EXT
I/O connector*×1, instruction manual ×1, application disc*
×1, USB cable (A-to-B type)*×1, spare fuse ×1
*Included with RM3544-01.
Applicable standards
Safety: EN61010, EMC: EN61326, EN61000-3-2, EN61000-3-3
RM3545/RM3544 Specications (Accuracy guaranteed for 1 year, Post-adjustment accuracy guaranteed for 1 year)
10
Conditions of guaranteed accuracy
• Temperature & humidity: 23 ˚C ±5 ˚C, 80% rh or less (non-condensating)
• From 0°C to 18°C and from 28°C to 40°C, add (temperature coefcient
±[1/10 measurement accuracy] / °C).
• Guaranteed Accuracy Period: 1 year
• RM3545 only: Warmup time of 60 min. or greater (If less than 60 min.,
double gures in the accuracy table to obtain the measurement accuracy.)
• RM3545 only: self-calibration AUTO
*When using manual self-calibration, temperature uctuations after performing calibration must be within ±2°C, and the calibration interval must be within 30 min.
Measurement accuracy
RM3544RM3545
t0: Reference temperature. [ºC]
t: Ambient temperature. [ºC]
Δ
t: Temperature. measurement
accuracy
α
t0:Temperature. coefficient at t0is
[1/ºC]
-α
t0
Δ
t
1+
α
t0×(t+
Δ
t-t0)×100 [%]
* During temperature correction, the value calculated below is added to
the rdg. error for resistance measurement accuracy:
Accuracy = ±(% rdg. + % f.s.)
LP OFF
• f.s. = calculated 1,000,000 dgt., where 0.001% f.s. = 10 dgt.
•
For 100 MΩ and greater ranges with 100 MΩ range high-precision mode off, calculate as f.s. = 10,000 dgt. and 0.01% f.s. = 1 dgt.
Range
100MΩ
range high-
precision
mode
Max.
measurement
display
*1
Reso-
lution
Accuracy %rdg. + %f.s. *2 Measurement
current *3
Additional
accuracy
without
0ADJ
%f.s.
*2
Max open-
terminal
voltage
FAST MED SLOW1 SLOW2
Switching
10mΩ
–
12.00000mΩ 10nΩ 0.060+0.050 0.060+0.020 0.060+0.020 –1A 0.020
5.5V *4
(0.060+0.015) (0.060+0.002) (0.060+0.001) ( – )
100mΩ 120.0000mΩ 100nΩ
0.060+0.010 0.060+0.010 0.060+0.010 High 1A 0.002
(0.060+0.003) (0.060+0.001) (0.060+0.001) ( – )
0.014+0.050 0.014+0.020 0.014+0.020 Low 100mA 0.020
(0.014+0.015) (0.014+0.002) (0.014+0.001) ( – )
1000mΩ 1200.000mΩ 1 μΩ
0.012+0.010 0.012+0.008 High 100mA 0.002
(0.012+0.003) (0.012+0.001) ( – )
0.008+0.050 0.008+0.020 Low 10mA 0.020
(0.008+0.015) (0.008+0.002) ( – )
10Ω 12.00000 Ω 10 μΩ
0.008+0.010 0.008+0.008 High 10mA 0.002
(0.008+0.003) (0.008+0.001) ( – )
0.008+0.050 0.008+0.020 Low 1mA 0.020
(0.008+0.015) (0.008+0.002) ( – )
100Ω 120.0000 Ω 100 μΩ
0.007+0.005 0.007+0.002 0.007+0.001 High 10mA –
(0.007+0.005) (0.007+0.001) (0.007+0.001) ( – )
0.008+0.010 0.008+0.010 Low 1mA 0.002
(0.008+0.003) (0.008+0.001) ( – )
1000Ω 1200.000 Ω 1mΩ 0.007+0.005 0.006+0.002 0.006+0.001
–
1mA –
(0.007+0.005) (0.006+0.001) (0.006+0.001) ( – )
10kΩ 12.00000kΩ 10mΩ 0.008+0.005 0.007+0.002 0.007+0.001 1mA
–20V
100kΩ 120.0000 kΩ 100mΩ 0.008+0.005 0.007+0.002 0.007+0.001 100μA
1000kΩ 1200.000 kΩ 1Ω 0.015+0.005 0.008+0.002 0.008+0.001 10μA
10MΩ 12.00000MΩ 10Ω 0.030+0.005 0.030+0.002 0.030+0.001 1μA
100MΩ
ON 120.0000MΩ 100Ω 0.200+0.005 0.200+0.002 0.200+0.001 100nA
OFF 120.00 MΩ 10kΩ 10.00MΩorless:0.50+0.02
10.01MΩormore:1.00+0.02 Max.
1μA
1000MΩ OFF 1200.0 MΩ 100kΩ 100.0MΩorless:1.00+0.02
100.1MΩormore:10.00+0.02
*1 For negative values, to -10% f.s. The maximum display range is 9,999,999 dgt. or 9 GΩ. (An over-range error will be indicated when the maximum measurement range is exceeded, even
if the maximum display range is not exceeded.)
*2 Measurement accuracy figures reflect accuracy after zero-adjustment. If not performing zero-adjustment, add the figures shown in the “Additional accuracy without 0ADJ” column.
Figures shown in parentheses on the second line indicate the additional accuracy with OVC on.
*3 Measurement current accuracy is ±5%.
*4 When using an external trigger source or performing measurement with continuous measurement set to off (other than free-run), the open-circuit voltage from 1 ms after the completion
of measurement (INDEX = ON) to the start of the next measurement (TRIG = ON) is limited to 20 mV or less.
LP ON
• f.s. = calculated 100,000 dgt., where 0.001% f.s. = 1 dgt.
Range
100MΩ
range high-
precision
mode
Max.
measurement
display
*1
Reso-
lution
Accuracy %rdg. + %f.s. *2 Measurement
current *3
Additional
accuracy
without
0ADJ
%f.s.
*2
Max open-
terminal
voltage
FAST MED SLOW1 SLOW2
Switching
1000mΩ
–
1200.00 mΩ 10 μΩ 0.200+0.010 0.200+0.010 0.200+0.005 0.200+0.003
–
1mA
–20mV *5
10Ω 12.0000 Ω 100 μΩ 0.200+0.005 0.200+0.005 0.200+0.003 0.200+0.002 500μA
100Ω 120.000 Ω 1mΩ 0.200+0.005 0.200+0.005 0.200+0.003 0.200+0.002 50μA
1000Ω 1200.00 Ω 10mΩ 0.200+0.005 0.200+0.005 0.200+0.003 0.200+0.002 5μA
*1 For negative values, to -10% f.s. The maximum display range is 9,999,999 dgt. or 9 GΩ. (An over-range error will be indicated when the maximum measurement range is exceeded, even
if the maximum display range is not exceeded.)
*2 Measurement accuracy figures reflect accuracy after zero-adjustment. LP values apply only when OVC is on.
*3 Measurement current accuracy is ±5%.
*5 When the contact check function is off (when the contact check function is on, 300 mV)
Resistance measurement accuracy
RM3545
RM3545
(
Example)
0.006 + 0.001 ....... 0.006
%
rdg. + 0.001
%
f.s.

11
Resistance D/A output accuracy (RM3545)
Output accuracy Resistance measurement accuracy ±0.2%f.s., (temperature coefcient ±0.02%f.s./°C)
Response time Measurement time + Max. 1 ms
RM3545
Z3003 additional error
Effects of leak current
Add a reading error shown on right depending on the measurement current
(when using guarding) (With humidity of less than 70% RH. If the humid-
ity is greater than or equal to 70% RH, add the following rdg. error × 5.):
1×10⁻⁹ [A]
IMEAS [A] ×100 [%rdg.]
Effect of measurement
speed
Add the f.s. error component shown on right when the integration time is
not a whole-number multiple of the power supply cycle:
Afs × 0.5 [%rdg.]
Effect of offset voltage
Add the resistance shown on right to the error when OVC is OFF:
10×10-6 [V]
IMEAS [A] [Ω]
Effect of offset resistance
fluctuations
When using a 2-wire setup, add the wiring resistance shown on right to
the error component.
0.1 Ω
Temperature coefficient
From 0°C to 18°C and 28°C to 40°C, add a temperature coefcient of ±(1/10 of additional accuracy) / °C.
IMEAS : Measurement
current
Afs : f.s. error component
for RM3545-02 with
Z3003
Additional accuracy when using the Z3003
When performing measurements using the Z3003, the following uncertainties are added to the RM3545 specications
(accuracy):
RM3545
RM3544
Accuracy = ±(% rdg. + % f.s.)
• f.s. = calculated 30,000 dgt., where 0.010% f.s. = 3 dgt.
Range Max. measurement
display*6,*7 FAST MED/SLOW Measurement
Current*8
Open-Circuit
Voltage
30mΩ 35.000mΩ 0.030+0.080 0.030+0.070 300mA
5.5Vmax.
300mΩ 350.00mΩ 0.025+0.017 0.025+0.014 300mA
3Ω 3.5000Ω 0.025+0.017 0.025+0.014 30mA
30Ω 35.000Ω 0.020+0.010 0.020+0.007 10mA
300Ω 350.00Ω 0.020+0.010 0.020+0.007 1mA
3kΩ 3.5000kΩ 0.020+0.010 0.020+0.007 1mA
30kΩ 35.000kΩ 0.020+0.010 0.020+0.007 100μA
300kΩ 350.00kΩ 0.040+0.010 0.040+0.007 5μA
3MΩ 3.5000MΩ 0.200+0.010 0.200+0.007 500nA
*6 For negative values, to -10% f.s.
*7 The maximum display range is 99,999dgt.
*8 Measurement current accuracy is ±5%.
RM3544
(
Example)
0.020 + 0.007 ....... 0.020
%
rdg. + 0.007
%
f.s.
•
Analog Input
(for RM3545)
Guaranteed accuracy range 0 to 2 V
Maximum allowable voltage 2.5V
Resolution 1mV
Display range -99.9 to 999.9 ºC
Measurement period (speed) Approx. 50 ms,
no moving average
Period of guaranteed accuracy 1 year
Accuracy ±1%rdg. ±3 mV
RM3545
Temperature measurement accuracy (RM3544/RM3545)
•Temperature Sensor Z2001 and RM3545/RM3544/RM3544-01
combined accuracy
Temperature Accuracy
-10.0 ºC to 9.9 ºC
± (0.55 + 0.009 × |t-10| )
ºC
10.0 ºC to 30.0 ºC
± 0.50
ºC
30.1 ºC to 59.9 ºC
± (0.55 + 0.012 × |t-30| )
ºC
60.0 ºC to 99.9 ºC
± (0.92 + 0.021 × |t-60| )
ºC
Standalone instrument accuracy:
±
0.2 ºC
t: Temperature measurement values [ºC]
•
Temperature Sensor Z2001
(for RM3544/RM3544-01)
Range of guaranteed accuracy -10.0 to 99.9 ºC
Display refresh rate
Approx. 2 s
Guaranteed accuracy period 1 year
RM3544RM3545
* Shortest time when using an external trigger source or with continuous mea-
surement off (other than free-run). With a delay of 10 ms, TC on, comparator
on, OVC off, and averaging off. Measurement speed varies with the selected
range and settings. For more information, please see the Instruction Manual.
Range Measurement
current
Measurement speed
FAST MED SLOW1 SLOW2
50Hz 60Hz
10 mΩ
N/A
41 61 58 141 241
100 mΩ High 41 61 58 141 241
1000 mΩ High 2.2 22 19 102 202
10 Ω High 2.2 22 19 102 202
100 Ω High 2.8 23 20 103 203
Unit: ms, Tolerance: ±10%±0.2 ms
Measurement time typical values (RM3545)
RM3545 RM3544
* With TC set to ON and the comparator set to ON
Measurement speed
FAST MED SLOW
50Hz 60Hz
21 18 101 401
Unit: ms, Tolerance: ±10%±2ms
Measurement time (RM3544)

HEADQUARTERS
81 Koizumi, Ueda, Nagano, 386-1192, Japan
TEL +81-268-28-0562 FAX +81-268-28-0568
http://www.hioki.com / E-mail: os-com@hioki.co.jp
HIOKI USA CORPORATION
TEL +1-609-409-9109 FAX +1-609-409-9108
http://www.hiokiusa.com / E-mail: hioki@hiokiusa.com
All information correct as of Feb. 1, 2017. All specications are subject to change without notice. RM3545-44E5-72B Printed in Japan
DISTRIBUTED BY
HIOKI (Shanghai) SALES & TRADING CO., LTD.
TEL +86-21-63910090 FAX +86-21-63910360
http://www.hioki.cn / E-mail: info@hioki.com.cn
HIOKI SINGAPORE PTE. LTD.
TEL +65-6634-7677 FAX +65-6634-7477
HIOKI KOREA CO., LTD.
TEL +82-2-2183-8847 FAX +82-2-2183-3360
E-mail: info-kr@hioki.co.jp
Note: Company names and Product names appearing in this catalog are trademarks or registered trademarks of various companies.
Model Congurations and Options
Caution when considering the use of probes without guard terminals
Proper operation of the RM3545 and RM3544 is not guaranteed when using test
leads (test probes) that lack guard terminals, for example test leads used with mod-
elssuchastheResistanceHiTester3541ormΩHiTester3540.Pleaseusethetest
leads indicated in the RM3545 and RM3544 accessory and option documentation.
Options
Multiplexer Unit (for RM3545-02)Test Leads
Temperature Sensor/LED Comparator Attachment
PC Communication
Note on probe length
B: Probe length
L: Overall length
MULTIPLEXER UNIT Z3003
TEMPERATURE SENSOR
Z2001
(RM3545/RM3545-01/
RM3545-02 Bundled accessory,
RM3544/RM3544-01 Option)
1.75 m (5.74 ft)
LED COMPARATOR
ATTACHMENT L2105
2 m (6.56 ft)
RS-232C CABLE 9637
for PC connection, 9pin - 9pin, cross, 1.8 m (5.91 ft)
RS-232C CABLE 9638
for PC connection, 9pin - 25pin, cross, 1.8 m (5.91 ft)
GP-IB CONNECTOR CABLE 9151-02
2 m (6.56 ft)
CLIP TYPE LEAD L2101
(Bundled accessory)
B: 83 mm (3.27 in), L: 1.5 m (4.92 ft)
4 -TERMINAL LEAD L2104
B: 118 mm (4.65 in), L: 1.5 m (4.92 ft)
(Whole image)
PIN TYPE LEAD L2102
B: 178 mm (7.01 in), L: 1.5 m (4.92 ft)
PIN TYPE LEAD L2103
B: 176 mm (6.93 in), L: 1.5 m (4.92 ft)
Large motors, large transformers
Vehicle grounding lines, conductivity of aircraft fuselages
Temperature rise tests (Motors, choke coils, transformers)
Related products
High-accuracy portable
resistance meter
measures from µΩ to MΩ
RESISTANCE METER RM3548
For more information, please visit http://www.hioki.com.
Max. measurable current : 1A
Max. resolution : 0.1μΩ
Basic accuracy : 0.02%
Measure from 0.0 µΩ (@ 1 A) to 3.5 MΩ
Easily record up to 1,000 data points in
memory simply by applying the instrument’s
probes.
Smoothly capture temperature-rise test data
using interval measurement.
Portable design is ideal for maintenance and
testing of large equipment.
Model : RESISTANCE METER RM3544
Model No. (Order Code)
(Note)
RM3544
RM3544-01 (with EXT I/O, RS-232C, USB)
Accessories: [RM3544] Power cord ×1, Clip type lead L2101 ×1, Instruction manual ×1, Spare
fuse ×1, [RM3544-01] Power cord ×1, Clip type lead L2101 ×1, Male EXT. I/O connector ×1,
Instruction manual ×1, Application disc ×1, USB cable (A-to-B type) ×1, Spare fuse ×1
Model : RESISTANCE METER RM3545
Model No. (Order Code)
(Note)
RM3545
RM3545-01 (with GP-IB interface)
RM3545-02 (support for the multiplexer unit)
Accessories: Power cord ×1, Clip type lead L2101 ×1, temperature sensor Z2001 ×1, Male EXT.
I/O connector ×1, Instruction manual ×1, Application disc ×1, USB cable (A-to-B type) ×1,
Spare fuse ×1
Other manuals for RM3545
1
This manual suits for next models
1
Table of contents
Other Hioki Measuring Instrument manuals

Hioki
Hioki SM7420 User manual

Hioki
Hioki 9625 User manual

Hioki
Hioki MR8740T Instruction manual

Hioki
Hioki Super megohm SM7110 User manual

Hioki
Hioki PW3198 User manual

Hioki
Hioki MR8880-20 User manual

Hioki
Hioki MR8847A User manual

Hioki
Hioki SP7001 User manual

Hioki
Hioki PW3198 User manual

Hioki
Hioki PW3365-20 User manual
Popular Measuring Instrument manuals by other brands

National Instruments
National Instruments NI PXIe-4138 CALIBRATION PROCEDURE

LOVATO ELECTRIC
LOVATO ELECTRIC DMED100T1MID instruction manual

VOLTCRAFT
VOLTCRAFT SL-300 instruction manual

ProMinent
ProMinent DULCOTEST DT1B operating manual

Shimpo
Shimpo DT-725 instruction manual

Leica
Leica DD Series quick guide