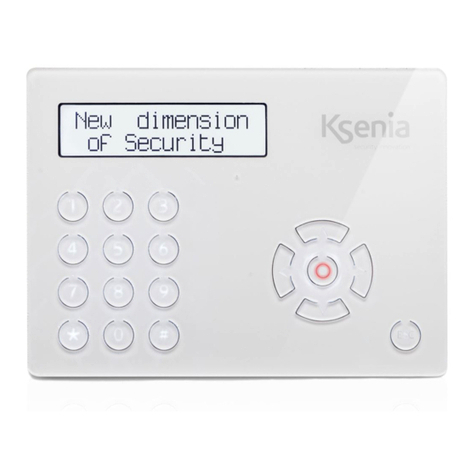
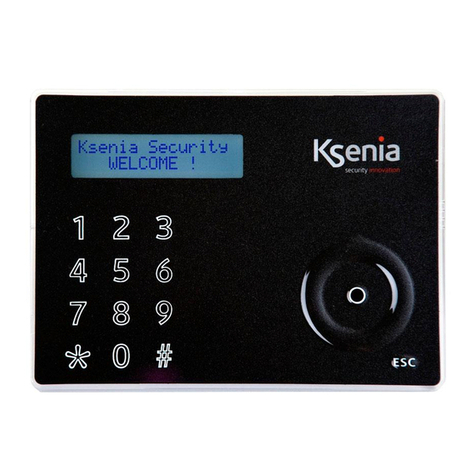
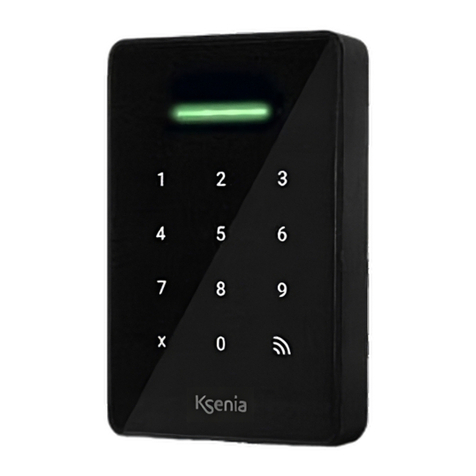
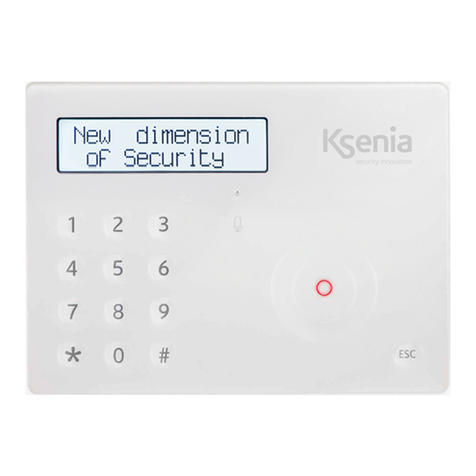
Ksenia ergo M User manual

KSI2100020.301
KSI2100020.302
KSI2100021.301
KSI2100021.302
www.kseniasecurity.com
TASTIERE LCD
MULTIFUNCTION LCD KEYPADS
CLAVIERS LCD MULTIFONCTIONS
ergo M
ergo S

2
INDICE | INDEX | TABLE DES MATIÈRES
INTRODUZIONE......................................................................................................................................................3
DATI TECNICI .........................................................................................................................................................3
FUNZIONI................................................................................................................................................................4
INSTALLAZIONE......................................................................................................................................................4
NOTE DI INSTALLAZIONE.......................................................................................................................................4
APERTURA..............................................................................................................................................................6
DISPLAY..................................................................................................................................................................7
REGOLAZIONE DEL CONTRASTO.........................................................................................................................7
DESCRIZIONE FUNZIONI TASTIERA........................................................................................................................7
CERTIFICAZIONI...................................................................................................................................................27
INTRODUCTION...................................................................................................................................................11
TECHNICAL DATA ...............................................................................................................................................11
FUNCTIONS..........................................................................................................................................................12
INSTALLATION......................................................................................................................................................12
INSTALLATION NOTES..........................................................................................................................................12
OPENING.............................................................................................................................................................14
DISPLAY................................................................................................................................................................15
CONTRAST ADJUSTMENT....................................................................................................................................15
KEYPAD FUNCTION DESCRIPTION .....................................................................................................................15
CERTIFICATION....................................................................................................................................................27
INTRODUCTION...................................................................................................................................................19
DONNEES TECHNIQUES ......................................................................................................................................19
FONCTIONNEMENT.............................................................................................................................................20
INSTALLATION......................................................................................................................................................20
NOTES INSTALLATION..........................................................................................................................................20
OUVERTURE .........................................................................................................................................................22
AFFICHAGE .........................................................................................................................................................23
REGLAGE DU CONTRASTE .................................................................................................................................23
FONCTIONS CLAVIER DESCRIPTION..................................................................................................................23
CERTIFICATIONS..................................................................................................................................................27

IT
3
INTRODUZIONE
Le nuove tastiere della serie “ergo” con ampio LCD graco si aggiungono agli organi di comando e
programmazione per le centrali Ksenia della serie lares e per il comunicatore GSM/GPRS gemino.
DATI TECNICI
13,8 Vcc
5° - 40° C
163 X119 X14,5 mm
240 g
IP 34
KSI2100021.301
ergo M ergo S
“Fast Addressing System”: nessuna necessità di pre-impostazione dell’indirizzo del dispositivo
(rilevamento automatico da parte della centrale/comunicatore)
KSI2100021.302
KSI2100020.301
KSI2100020.302
15mA standby, 100mA max
Display LCD a matrice di punti (area visibile 79 x 19 mm)
Sensore di temperatura di precisione (uso futuro)
Tasti in tecnologia Capsense
Tasti meccanici
Lettore di prossimità RFID/NFC ( distanza massima 2 cm )
Microfono ed altoparlante integrato
Funzione di ascolto ambientale
CARATTERISTICHE PRINCIPALI
Regolazione retroilluminazione e contrasto
Master di programmazione per gemino e duo UNIVERSALE
Alimentazione
Assorbimento
Temperatura di funzionamento
Dimensioni ingombro massimo
Peso
Grado di protezione
Versione bianca
Versione nera

IT
4
FUNZIONI
• Visualizzazione dello stato dell’impianto
• Visualizzazione dei parametri di funzionamento (data/ora, rete GSM attiva, livello GSM, ecc.)
• Comando del sistema (inserimenti totali o parziali, reset, attivazione dei terminali di uscita, chiamate
telefoniche, ecc.)
• Programmazione dei parametri del sistema/centrale
• Programmazione dei parametri locali (volume dell’audio, livello della luminosità e del contrasto)
• Regolazione sensibilità touch su 3 livelli : alta, media, bassa. Livello di default medio (solo per ergo S )
•Esclusione funzionalità tastiera per pulizia frontale (solo per ergo S )
• Ascolto Ambientale (solo per ergo S )
• Registrazione di messaggi Vocali
• Lettura di Tag RFID/NFC per l’inserimento e disinserimento dei sistemi antintrusione realizzati con i
dispositivi della serie lares
INSTALLAZIONE
INSTALLAZIONE (SU SCATOLA AD INCASSO O A PARETE)
Le tastiere ergo S (ergo M)possono essere installate su qualsiasi supercie piana. Inoltre hanno una
preforatura che consente di avvitarle direttamente su una scatola ad incasso DIN 503, o su scatola
ad incasso standard europeo (60 mm interasse).
1. Far passare i li attraverso il foro passacavo. ( g. 1-7 )
2. Fissare il fondo della tastiera alla scatola DIN 503 usando le viti fornite aprendo le apposite asole.
( g.1-1,3 ) .
3. Forare ed installare una vite con un tassello al muro per realizzare la funzione antistrappo
Per il ssaggio a muro usare opportuni tasselli (non forniti) attraverso le asole. ( g.1, 1-3 o 1-2 )
4. Collegare i li ai terminali sul retro della tastiera.
5. Inserire il blocco tastiera sul fondo. Essa si blocchera’ con i dentini a scatto. ( g. 2-5 )
NOTE DI INSTALLAZIONE
1. Accendendo la ergo S (ergo M)in una nuova installazione(lasciando A e B disconnessi),essa
visualizzerà sul display le seguenti informazioni:
• Prima riga: ‘Ksenia Security’
• Seconda riga: A partire dal primo carattere a sinistra apparirà la versione del FW caricato (x.x.xxx),
dal 10° carattere il display visualizza il Serial Number del dispositivo (6 caratteri numerici, l’ultimo
carattere So M indica il modello hardware installato).

IT
5
FIGURA 1 - IMMAGINE FRONTALE DEL FONDO TASTIERA
FIGURA 2 - DESCRIZIONE DELLE PARTI E DELLA MORSETTIERA
1Morsettiera di collegamento
+ A B - : Morsetti per il collegamento delle periferiche su KS-BUS.
Tutti i dispositivi devono essere collegati in parallelo, è necessario quindi collegare ciascun
morsetto ai morsetti con lo stesso nome
3Switch Antistrappo/Antiapertura
4Contatti per altoparlante fondo
Microcontrollore
A
B
4
2
3
1
5 5
2
Asole da aprire per ssaggio su scatola DIN 530
1-2 Asole da aprire per il ssagio su scatola con interasse 60 mm
Forare ed installare una vite con un tassello al muro per realizzare la funzione di antistrappo
5Rimuovere ed inserire nell’apertura laterale (8). L’apertura e’ riservata ad uso futuro.
Altoparlante
1-3
6
7Foro passacavo
5Dentini di chiusura a scatto
C010
k18121PP
8Ω
3
1
7
5
2
6
4
8
Nota: NON RIMUOVERE IL PCB E IL DISPLAY DAL SUPPORTO PLASTICO FRONTALE
8Apertura laterale
4

IT
6
A
A
FIGURA 3 - FRONTALE
1Tastierino alfanumerico con i tasti da 1 a 9, * e #
2Tasto ESC
3Tasto ENTER
Scroll che prevede anche:
4.1. Freccia a Sx
4.2. Freccia in Basso
4.3. Freccia a Dx
4.4. Freccia in Alto
4
5Display
6RFID/NFC Area
Per aprire la tastiera procedere come illustrato in gura:
Spingere i dentini a scatto ( A )
con un giravite Fare leva verso l’esterno
FIGURA 4 - APERTURA
1 2
1 2 3
4 5 6
7 8 9
*
#0 ESC
4.4
4.2
4.3
4.1
5
1
2
6
4
3
7
A
A
7Microfono
1 2 3
4 5 6
7 8 9
*
#0
ESC
4.4
4.2
4.3
4.1
5
1
2
4
3
7
ergo S ergo M

IT
7
DISPLAY
Il display permette le visualizzazioni di tutte le informazioni e dei dati gestibili tramite ergo S (ergo M).
Il display visualizza 2 righe di 16 caratteri ciascuna, ma nella tastiera e’ implementato un sistema
di scorrimento automatico che permette di visualizzare stringhe lunghe no a 32 caratteri in modo
automatico.
REGOLAZIONE DEL CONTRASTO
Usando i tasti “destra” e “sinistra” con la tastiera a riposo, compare una barra scorrevole che
regola il contrasto del display,mantenendo la pressione sul tasto “destra” o “sinistra” per più di tre
secondi la barra di contrasto modica la sua intensità. Premendo il tasto “ENTER” viene accettato il
nuovo valore, premendo invece il tasto “ESC” si esce dalla regolazione senza modicare il valore
precedente.
RFID/NFC AREA (solo per ergo-S)
La tastiera e’ provvista di un’antenna interna che permette il rilevamento di dispositivi compatibili con
lo standard RFID/NFC 13.56MHz, semplicemente avvicinandoli all’area indicata in ( g. 3-6 )
TASTIERINO
Il Tastierino serve per l’immissione di dati/caratteri in fase di congurazione, inserimento PIN
(programmatore o utente), ecc..
Sorando o effettuando una leggera pressione nell’area corrispondente al numero desiderato, è
possibile l’immissione oltre che dei numeri da 0 a 9, anche di caratteri alfanumerici (lettere e simboli)
a seconda del contesto (menù) in cui si sta agendo. Per l’immissione tramite tastierino di caratteri è
stata implementata la modalità tipica dei cellulari, cioè la pressione ripetuta del tasto che, permette
di cambiare la lettera immessa in base a quanto prestabilito (in seguito è riportata la tabella di
associazione caratteri Tasto).
Durante l’immissione di una stringa utilizzando il tastierino, l’avanzamento sulla riga del display, può
essere effettuata in due modi: digitando un “tasto” diverso da quello utilizzato in precedenza, oppure
dopo 3s di inattività dall’ultimo “tasto” digitato.
Tabella associazione caratteri tasti:
TASTO SET CARATTERI:
0 ( ) / % - _ # *
1 “ “ ‘spazio’ ? ! , . \ ‘ &
A B C a b c 2 $ @
D E F d e f 3 ; <
G H I g h i 4 = >
J K L j k l 5 [ ]
M N O m n o 6 { :
P Q R S p q r s 7
T U V t u v 8 + }
W X Y Z w x y z 9
DESCRIZIONE FUNZIONI TASTIERA
Note: L’hardware prevede un microcontrollore NFC Ready: può essere necessario l’utilizzo di una
applicazione dedicata

IT
8
TASTO ESC
Il tasto ESC serve per uscire dal menù, permettendo di tornare al livello immediatamente superiore;
quindi nel caso in cui si è all’interno di un menu ramicato, ci vorranno pressioni ripetute del tasto ESC
per uscire e tornare magari al menu principale.
Con la tastiera a riposo, la pressione prolungata del Tasto ESC per (circa 2 s.) permette di attivare la
funzione pulizia che come dice il nome stesso consente di pulire la supercie frontale disabilitando
tutte le funzioni della tastiera.
Durante lo stato di blocco della tastiera per l’attivazione della funzione pulizia, sul display di ergo S
(ergo M) verranno visualizzate le seguenti informazioni:
• Prima riga: “Blocco tastiera”
• Seconda riga: Una linea crescente di punti in avanzamento che scandiscono la durata del “Blocco
tastiera”; cioè quando la stringa di punti occupa l’ultimo carattere della riga, la funzione pulizia
termina ed ergo S (ergo M) torna nello stato di funzionamento normale.
TASTO ENTER
Il tasto ENTER permette di entrare nel menù desiderato, di andare in modica in fase di visualizzazione
dei dati di programmazione oppure di confermare l’immissione di un dato.
A tal proposito, si evidenzia il seguente comportamento:
• Durante la navigazione nel menu principale la “pressione” dell’Enter permette di entrare nel
sottomenu e di andare avanti nell’esplorazione nel caso il menu abbia più ramicazioni;
• Durante la visualizzazione dei dati di programmazione, la “pressione” dell’Enter permette di andare
in modica sul dato stesso e questo provoca:
- il lampeggio del valore impostato se esso è selezionabile con un set predenito attraverso lo Scroll;
- il lampeggio del primo carattere della stringa nel caso in cui si stia modicando una stringa;
- il lampeggio del primo numero nel caso in cui si stia modicando un valore numerico un numero
telefonico.
• Durante la fase di modica, l’ulteriore “pressione” dell’Enter conferma il dato immesso o modicato
(che quindi viene inviato a gemino o lares che li memorizzano) sul display dI ergo S (ergo M)può essere
visualizzato: il dato successivo, il menu successivo o rimanere in visualizzazione del dato stesso.
La “pressione” dell’ENTER con ergo a riposo, permette di visualizzare i dati relativi all’installatore
(Nome, Numero o indirizzo email) sempre se impostati in fase di congurazione. Nel caso in cui i dati
installatore non fossero presenti, sulla prima e seconda riga del display verranno visualizzate due
stringhe di default:
<Installatore>
<Informazioni>
Nota: per la pulizia si raccomanda l’utilizzo di un panno umido ed evitare alcol e solventi.

IT
9
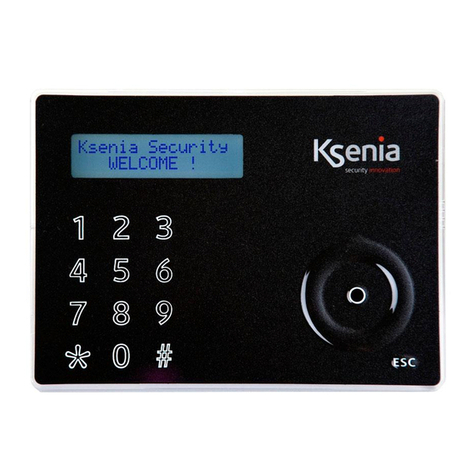
Esso in realtà non è un tasto ma la zona delimitata dalla circonferenza (presente sul lato destro di
ergo S (ergo M) in cui è presente una piccola depressione. Agendo in questa zona, in senso orario (per
andare avanti) o antiorario (per andare all’indietro) si può:
• scorrere le varie voci del menu in avanti o all’indietro;
• scegliere i dati di congurazione da immettere ( che saranno quelli previsti per il dato che si sta
modicando e non altri) quali: caratteri , numeri, valori prestabiliti ecc. (#);
Sempre in questa zona è possibile utilizzare le funzioni di:
• “Freccia in Alto” agendo in modo prolungato (circa 0,5 s.) nella zona indicata dal punto 4.4 della
gura 4; si accede alle stesse funzioni descritte per lo Scroll utilizzato in senso Orario (lo scorrere il
menu o i valori di programmazione possibili in questa modalità è più lenta in quanto va a step di
0,5 s.);
• “Freccia in Basso” agendo in modo prolungato (circa 0,5 s.) nella zona indicata dal punto 4.2 della
gura 4; si accede alle stesse funzioni descritte per lo Scroll utilizzato in senso Antiorario (lo scorrere
il menu o i valori di programmazione possibili in questa modalità è più lenta in quanto va a step di
0,5 s)
• ”Freccia a Sx” agendo in modo prolungato (circa 0,5 s.) nella zona indicata dal punto 4.1. Questa
funzione permette di scorrere una stringa all’indietro; nel caso in cui si è nella fase di modica di
un dato e si è posizionati sull’ultimo carattere numero a destra, l’utilizzo di questa funzione
permette la cancellazione in successione di uno o più caratteri/numeri del dato che si sta
modicando no ad eliminarlo completamente;
• ”Freccia a Dx” agendo in modo prolungato (circa 0,5 s.) nella zona indicata dal punto 4.3. Questa
funzione permette di scorrere una stringa in avanti, qualora essa fosse più lunga dei 16 caratteri
che il display di ergo può visualizzare. Lo scorrimento in avanti può funzionare in modo diverso a
seconda se si è in fase di navigazione nei menu o in fase di modica di un dato, infatti nel primo
caso l’avanzamento prevede uno scorrimento di 16 caratteri alla volta, mentre nel secondo caso
di un singolo carattere alla volta.
(#) Lo Scroll durante la fase di inserimento dati, permette nelle varie situazioni, di selezionare in modo
veloce i possibili valori che possono essere immessi nel dato che si è in procinto di modicare in
congurazione e in navigazione all’interno dei vari menu.
Nel caso in cui si sta inserendo o modicando una stringa, esso permette di scorrere tutta la gamma
di caratteri ruotando in senso orario/antiorario sullo Scroll o utilizzando le funzioni “Freccia in Alto”/
“Freccia in Basso” per andare in avanti o indietro.
Nel caso in cui si sta inserendo o modicando un dato che non è una stringa esso permette, di
scorrere tra i valori previsti per il dato specico.
Nella tastiera ergo M la funzione scroll non e’ disponibile, mentre sono disponibili i tasti di navigazione
(frecce).
SCROLL / TASTI FRECCIA
IT
10
Informazioni sullo smaltimento per gli utenti (Direttive RAEE)
Attenzione: Per smaltire il presente dispositivo, non utilizzare il normale bidone della spazzatura!
Le apparecchiature elettriche ed elettroniche usate devono essere gestite a parte e in conformità alla legislazione che
richiede il trattamento, il recupero e il riciclaggio adeguato dei suddetti prodotti.
In seguito alle disposizioni attuate dagli Stati membri, i privati residenti nella UE possono conferire gratuitamente le
apparecchiature elettriche ed elettroniche usate a centri di raccolta designati* o al rivenditore locale che può ritirare
gratuitamente se l’utente acquista un altro prodotto nuovo di tipologia simile.
Se le apparecchiature elettriche o elettroniche usate hanno batterie o accumulatori, l’utente dovrà smaltirli a parte
preventivamente in conformità alle disposizioni locali.
Lo smaltimento corretto del presente prodotto contribuirà a garantire che i riuti siano sottoposti al trattamento, al
recupero e al riciclaggio necessari prevenendone il potenziale impatto negativo sull’ambiente e sulla salute umana,
che potrebbe derivare da un’inadeguata gestione dei riuti.
Sono previste sanzioni molto elevate nel caso di irregolarità nel rispetto del D.Lgs 151/05.
* Per maggiori informazioni si prega di contattare l’autorità locale competente.
L’installazione di queste apparecchiature deve essere effettuata a regola d’arte, in accordo con le norme vigenti.
Queste apparecchiature sono state sviluppate secondo criteri di qualità, afdabilità e prestazioni adottati dalla Ksenia
Security.
Si raccomanda di vericare il corretto funzionamento del sistema almeno una volta al mese. Le procedure per il
collaudo dipendono dalla congurazione del sistema.
Rivolgersi all’installatore del sistema per conoscere le procedure da seguire.
Ksenia Security Srl declina ogni responsabilità nel caso in cui le apparecchiature vengano manomesse da personale
non autorizzato. Il contenuto di questo manuale può essere soggetto a modiche, senza preavviso, e non rappresenta
un impegno da parte della KSENIA SECURITY.

EN
11
INTRODUCTION
The new Keypads of “ergo” series with Wide Dot Matrix LCD Display have been added to the controls,
and programming and managing user interfaces for Ksenia lares Control Panels and for Ksenia
GSM/GPRS gemino communicators
TECHNICAL DATA
13,8 Vcc
5° - 40° C
163 X119 X14,5 mm
240 g
IP 34
KSI2100021.301
ergo M ergo S
“Fast Addressing System”: no need to pre-set the device address
(automatic recongnition from the control pannel / GSM communicator)
KSI2100021.302
KSI2100020.301
KSI2100020.302
15mA standby, 100mA max
Wide Dot matrix LCD display (viewing area 79 x 19 mm)
Accurate Temperature sensor (future use)
Keys in Capsense Technology
Mechanical Keys
RFID/NFC proximity Reader (20mm max TAGs capture area)
Integrated Microphone and Speaker
Remote listening function
MAIN FEATURES
Adjusting backlight and contrast
Master programming for gemino and duo UNIVERSAL
Power supply
Consuption
Operating temperature range
Overall Dimension
Weight
Protection degree
Black version
White version

EN
12
FUNCTIONS
•Display of system status
•Display of functioning parameters ( date/time, active GSM network, GSM level, etc)
•System commands (complete or partial arming, reset, activation of outputs terminals, phone calls,
etc.)
•Full Programming of system parameters
•Programming of local parameters (audio volume, backlight levels and LCD contrast)
• Touch sensitivity adjustment on 3 levels: high, medium, low. Average level of default (only for ergo S)
•KP functionality exclusion for front cleaning purposes (ergo S only)
•Remote Listening (ergo S only)
•Vocal messages recording
•RFID/NFC Tag reading to arm and disarm the intrusion detection systems set up with the lares
devices.
INSTALLATION
INSTALLATION ON A SWITCH BOX OR ON WALL - MOUNTED
ergo S (ergo M) can be installed on any plain surface. Furthermore, in the back ithen are 3 easy-open
holes, suitable for DIN503 and for 60mm-screw-distance boxes.
1. Push the cable through to the opening. ( g. 1-7 )
2. Fix the keypad base to the wall - box with the supplied screws through the eyelets. ( g.1-1,3 )
To wall mount the keypad, use proper plugs and scews (not supplied) through the eyelets.
( g.1, 1-3 o 1-2 )
3. Use a plug and the appsite screw to enable tamper functionality (g. 1-4 )
4. Connect the cables to the terminals on the rear of the keypad.
5. Close the keypad properly. (g. 2-5)
INSTALLATION NOTES
1. At every new installation when ergo S (ergo M)is switched on ( but not wire to bus ), the display
will show the following information:
• First line: “Ksenia Security”
• Second Line: from the rst character from the left the FW version loaded on the device (x.xx.xxx),
as from the 10° character the device serial-number (six numeric characters).
And at the 16th character Sor M depends on the model

EN
13
FIGURE 1 - FRONT VIEW OF THE KEYPAD BASE
FIGURE 2 - PARTS DESCRIPTION AND PCBA TERMINALS
1Connection Clamps
+ A B - : Connection clamps on KSI-BUS for devices. All the devices have to be connected in
parallel, it is necessary to connect each clamp with an equally named one.
Easy open hole to be opened to Built-In installation on DIN 530 box
1-2 Eyelets for 60mm-screws-distance boxes
4Place a wall mount screw to enable anti opening and removal tamper
Remove the part and used to close the side hole (8). The hole is reserved for future use.
Speaker
6
Loudspeakers contact
Anti opening / tamper switch
2Micro-controllor
3
4
5Snap ngers
C010
k18121PP
8Ω
3
1
7
5
2
6
4
8
A
B
4
2
3
1
5 5
Note: DO NOT REMOVE PCB AND DISPLAY FROM PLASTIC SUPPORT
1-3
7Cable gland
8Side hole
5

EN
14
FIGURE 3 - FRONT
1Alphanumeric keypad with 1 a 9, * and # keys
2ESC key
3ENTER key
Scroll, also including:
4.1. Left arrow
4.2. Down arrow
4.3. Right arrow
4.4. Up arrow
4
5Display
6RFID/NFC Area
To open the keypad, please proceed as follows:
Push snap ngers ( A ) using a
screw driver
Pull outward
FIGURE 4 - OPENING
1 2
A
A
A
A
1 2 3
4 5 6
7 8 9
*
#0 ESC
4.4
4.2
4.3
4.1
5
1
2
6
4
3
7
1 2 3
4 5 6
7 8 9
*
#0
ESC
4.4
4.2
4.3
4.1
5
1
2
4
3
7
7Audio mic hole
ergo S ergo M

EN
15
DISPLAY
The display shows all the information and the data ergo S (ergo M)can manage. The display can
show up to 2 lines ,16 characters each, but ergo has an automatic scroll system to show 32 characters
rows.
CONTRAST ADJUSTMENT
Acting on keys “Left” or “Right” when leypad is idle, a sliding bar used for contrast adjustement will be
enabled. The ENTER key will store the new contrast value, the ESC key will leave value unchanged.
Values will change on a 3 seconds key holding.
RFID/NFC AREA
The keypad is provided with an internal antenna that allows to detect any device that ts the RFID/
NFC 13,56MHz standard, simply by approaching it to the area shown in g. ( 3-6 )
Note: The hardware includes a NFC Ready Transceiver: You may need to use a dedicated
application. (NOT INCLUDING)
KEYPAD
It is conceived for data-entering (data/charachter) during the conguration process, PIN entering
(programmer or user) etc. By touching or exerting a slight pressure on the area corresponding to the
desired number, it allows to enter alphanumeric characters (letters and symbols) in addition to 0-9
numbers , depending on the
operating context (menu). This is possible because the keypad is provided with the tipical mobile
phone mode
technology, which allows to change the entered character depending on the settings (refer to the
following key-characters match chart).
Two ways to move forward the display line are possible while entering a text: using
another key or avoiding touching any key for 3 seconds after the last type.
Key-characters match chart:
KEY FONT:
0 ( ) / % - _ # *
1 “ “ ‘space’ ? ! , . \ ‘ &
A B C a b c 2 $ @
D E F d e f 3 ; <
G H I g h i 4 = >
J K L j k l 5 [ ]
M N O m n o 6 { :
P Q R S p q r s 7
T U V t u v 8 + }
W X Y Z w x y z 9
KEYPAD FUNCTION DESCRIPTION

EN
16
ESC KEY
The ESC key allows to exit the current menu, and go back to the previous level. This means that,
wether in a branched menu, repeated clics on the key will be needed to get back, for exanple to
main menu.
A 2 S. pressure on the ‘Esc’ key when the keyboard is not used allows the activation of the cleaning
function. As the name suggests, this function disable the keypad functionality for front-cleaning
purposes.
During the keypad block due to the activation of the cleaning function, the following information will
be displayed on the “ergo” screen:
•First line: “Keypad block”
•Second line: the time for the cleaning will be marked by an increasing dot line, moving from left to
right. When the line will be lled up the ergo S (ergo M) will be ready to accept commands again.
ENTER KEY
The Enter key allows to enter the intended menu when browsing, to start editing during conguration
phase or to conrm the input of a data during an editing session.
In this regard, the following conduct:
•When broswsing the main menu, a pressure on the Enter key allows to enter the submenu and to
keep exploring in case the menu has several branches
• When visualizing the conguration data, a push on the Enter key permits the editing of the data
itself and this involves:
- the congured object ashes if it is slectable with a predened set through the Scroll;
- the rst character of a string ashes in case the string its being edited;
- the rst number ashes when a numeric data or a phone number is being edited.
• During the editing phase, a further pressure on the ENTER key conrms the immission or modication
of the data (which will be sent to gemino or lares that will store it) and the ergo S (ergo M)display
permits to show: the following data, the subsequent menu or the data itself.
If “Enter” key is pushed when ergo is in standby mode, the display will show the installator’s data
(Name, Number or email address) if they were set during the keypad conguration. In case the
installator’s data were not available, the screen will display the two following default line:
<Installator>
<Information>
Note: to clean the device it is recommended to use a damp cloth and avoid alcohol and solvents.

EN
17
Actually, “Scroll” is not a key but the zone borded by a circle (on the right side of ergo S (ergo M)
typied by a little depression. The action on this zone clockwise (to move forward) or anticlockwise (to
move backwards) permits to:
•Slide forwards or backwards the menu entries;
• Pick the conguration data to enter (which will only be the suitable ones for the changing data)
such as: character, numbers, presetted values, etc. (#);
This area also allows to use the following functions:
•“Up arrow”. If a prolonged pressure (about 0,5 s.) is exerted on the 4.4 area of the gure 5; the
same functions described for the clockwise moved scroll are activated (obviously the slide of the
menu or the conguration
data available during this procedure is slower since it works at 0,5 seconds steps);
•“Down arrow”. If a prolonged pressure (about 0,5 s.) is exerted on the 4.2 area of the gure 5;
the same functions described for the anticlockwise moved scroll are activated (obviously the
slide of the menu or the conguration data available during this procedure is slower since it works
at 0,5 seconds steps);
• ”Left arrow”. A prolonged pressure (about 0,5 s.) exerted on the 4.1 area of the gure 5 allows to
slide backwards along a line; if settled on the last character / number to the right, this function
allows to cancel in order one or more data characters / numbers until they are completely
deleted;
• ”Right arrow”. A prolonged pressure (about 0,5 s.) exerted on the 4.3 area of the gure 5 allows
to slide backwards along a line; if it is longer than the 16 characters the ergo display can show.
The forward slide can work in different ways depending on the data we are working on:
if we are browsing a menu it will slide 16 characters at any one time, while during data editing it
will only slide character at any one time.
(#) In a data entering phase “Scroll” allows to quickly select the suitable values for the data we’re
about to edit. In case a string is being entered or edited, the “Scroll” allows to slide the whole
cheracters range by its clockwise / anticlockwise twist or by using the “Up arrow” / “Down arrow“
function to move forward or backward.
If entering or editing data other than a string the Scroll allows to slide the likely possible values for the
individual data item. In ergo M keypad scroll function is achived by use of the 4 arrows keys
SCROLL / ARROW KEYS

EN
18
Installation of these systems must be carried out strictly in accordance with the instructions described in this manual,
and in compliance with the local laws and bylaws in force. ergo series have been designed and made with the highest
standards of quality and performance adopted by Ksenia Security. Is recommended that the installed system should be
completely tested at least once a month. Test procedures depends on the system conguration. Ask to the installer for
the procedures to be followed. Ksenia Security srl shall not be responsible for damage arising from improper installation
or maintenance by unauthorized personnel. The content of this guide can change without prior notice from KSENIA
SECURITY.
Information for users: Disposal (RAEE Directive)
Warning! Do not use an ordinary dustbin to dispose of this equipment.
Used electrical and electronic equipment must be treated separately, in accordance with the relative legislation which
requires the proper treatment, recovery and recycling of used electrical and electronic equipment.
Following the implementation of directives in member states, private households within the EU may return their used
electrical and electronic equipment to designated collection facilities free of charge*. Local retailers may also accept
used products free of charge if a similar product is purchased from them.
If used electrical or electronic equipment has batteries or accumulators, these must be disposed of separately according
to local provisions.
Correct disposal of this product guarantees it undergoes the necessary treatment, recovery and recycling. This prevents
any potential negative effects on both the environment and public health which may arise through the inappropriate
handling of waste.
* Please contact your local authority for further details.

FR
19
INTRODUCTION
Les nouveaux claviers de la série “ergo” avec écran LCD large ont été ajoutés aux interfaces
de commandes existantes que sont l’ergo et le volo pour l’utilisateur. Les claviers servent à la
programmation et à la gestion des centrales lares de Ksenia et pour les communicateurs GSM/GPRS
gemino de Ksenia.
DONNEES TECHNIQUES
13,8 Vcc
5° - 40° C
163 X119 X14,5 mm
240 g
IP 34
KSI2100021.301
ergo M ergo S
“Fast Addressing System”:pas besoin de prérégler l'adresse de l'appareil
(détection automatique par la centrale lares / communicateur)
KSI2100021.302
KSI2100020.301
KSI2100020.302
15mA standby, 100mA max
LCD à matrice de points (zone visible 79 x 19 mm)
Précision capteur de température (utilisation future)
Touches de la technologie CapSense
Touches mécaniques
Lecteur de proximité RFID / NFC (distance maximale de 2 cm)
Microphone et haut-parleur intégré
Fonction d'écoute à distance
PRINCIPALES CARACTÉRISTIQUES
Réglage rétroéclairage et le contraste
Outil de programmation èt de gestion de la centrale
lares et du gemino UNIVERSEL
Alimentation
Consommation
Température de fonctionnement
Encombrement max
Poids
Degré de protection
Version blanche
Version noire

FR
20
FONCTIONNEMENT
• Afchage de l’état du système
• Afchage des paramètres de fonctionnement (date/heure, réseau GSM actif, le niveau GSM, etc.)
• Les commandes système (armement complet ou partiel, reset, activation des sorties, appels
téléphoniques, etc.)
• Programmation intégrale des paramètres du système
• Programmation des paramètres locaux (volume audio, les niveaux de rétroéclairage et contraste
de l’écran)
• régolation de la sensibilité du touch sur 3 niveaux: haute, moyenne, faible. Niveau moyen de
défaut
(seulement pour ergo S)
• Exclusion de la sensibilité des touches aux ns de nettoyage de la face avant (ergo S uniquement)
• L’écoute à distance (ergo S uniquement)
• Enregistrement des messages vocaux (ergo S uniquement)
• Lecture des badges RFID/NFC pour l’armement et le désarmement du système de détection
d’intrusion lares
INSTALLATION
INSTALLATION SUR BOÎTIER D’INTERRUPTEUR OU INSTALLATION MURALE
Le clavier ergo S (ergo M) peut être installé sur n’importe quelle surface plane. En outre, trois trous,
d’ouverture facile servent à xer l’appareil. Ils sont adaptés aux blochets DIN503 ainsi que pour les
boîtiers dont les centres des vis de xation sont distants de 60mm.
1. Poussez le câble à travers l’ouverture (Fig. 1-7).
2. Fixer la base du clavier au mur - boîte avec les vis fournies- à travers les œillets (Fig.1-1,3).
Pour le montage mural du clavier, utiliser des chevilles et vis (non fournis) et xez à travers les
œillets appropriés (Fig.1, 1-3 1-2 o).
3. Utilisez une cheville et sa vis pour permettre la fonctionnalité de l’auto protection
(anti arrachement) (g. 1-4).
4. Branchez les câbles aux borniers à l’arrière du clavier.
5. Fermez le clavier correctement. (g. 2-5).
NOTES D’INSTALLATION
1. A chaque nouvelle installation lorsque ergo S (ergo M) est branché (mais non relié encore au bus),
il afchera
les informations suivantes:
• Première ligne: ‘Ksenia Security’
• Deuxième ligne : A partir du premier caractère (en partant de la gauche) la version FW chargée
sur l’appareil (x.xx.xxx), et à partir du 10ème caractère, le numéro de série de l’appareil
(six caractères numériques). Au 16ème caractère Sou Mdépendant du modèle
Other manuals for ergo M
2
This manual suits for next models
1
Table of contents
Languages:
Other Ksenia Keypad manuals

Ksenia
Ksenia ergo A KSI2100030.301 WHITE User manual

Ksenia
Ksenia ergo-T User manual

Ksenia
Ksenia ergo-X KSI2100031.302 Use and care manual

Ksenia
Ksenia ergo M User manual

Ksenia
Ksenia ergo M Assembly instructions

Ksenia
Ksenia ergo wls KSI2100022.301 User manual

Ksenia
Ksenia ergo wls User manual

Ksenia
Ksenia ergo Operating instructions

Ksenia
Ksenia ergo wls KSI2100022.301 User manual

Ksenia
Ksenia ergo-T User manual