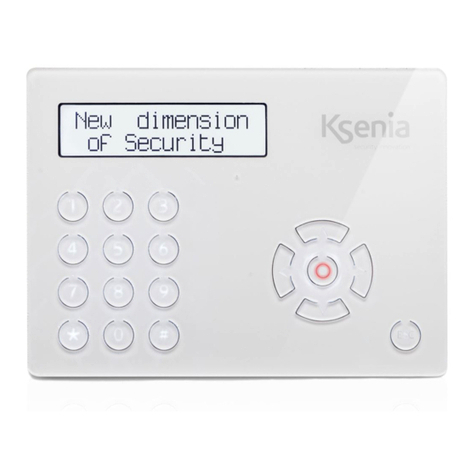
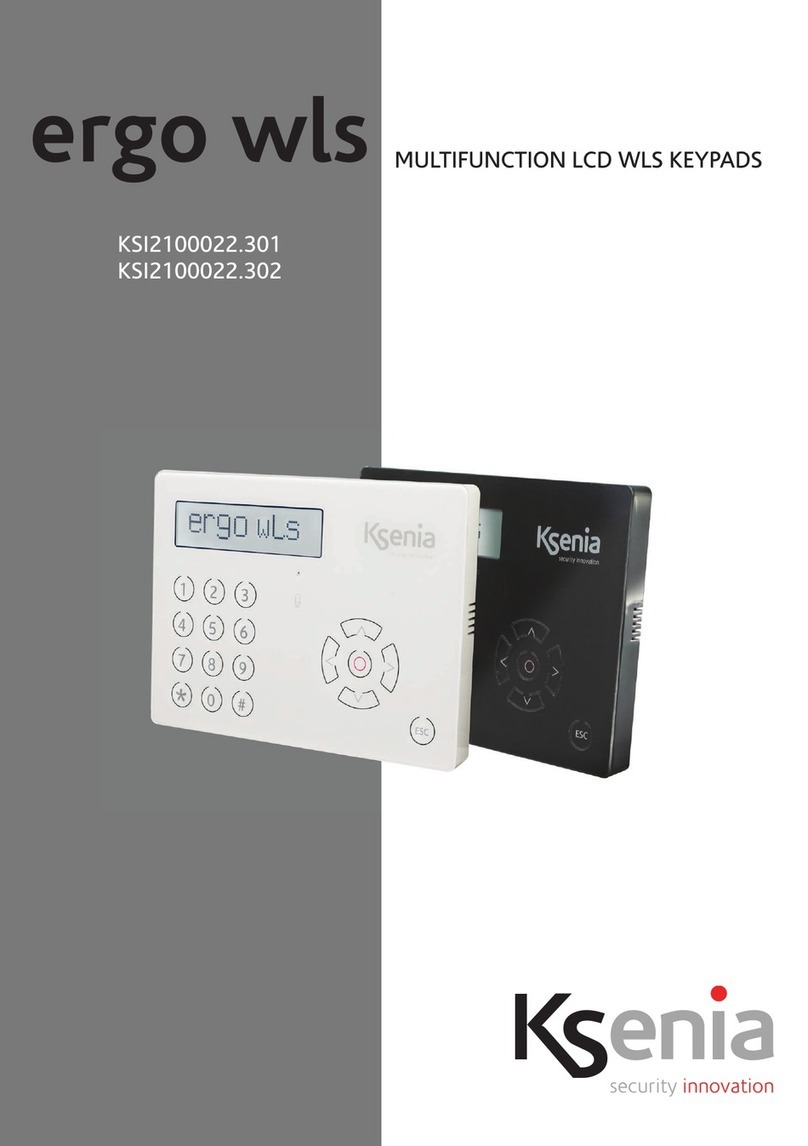
Ksenia ergo Operating instructions

KSI2100000.300
MULTIFUNCTION LCD KEYPAD
QUICK INSTALLATION AND PROGRAMMING GUIDE

EN
2
INTRODUCTION
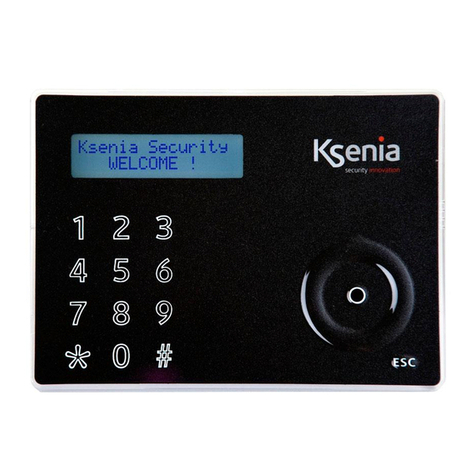
ergo is a very advanced LCD Keypad carefully developed with the objective to capture a modern,
minimalist and discreet style and an extremely slim prole ( less than ½ inch.), which allows it to be
positioned in any interior architecture thus expressing a new feeling of design, prestige and innovation.
Thanks to the “Capacitive Sensing” Technology, here you won’t see any of the ugly mechanical parts
(like as membranes, buttons, plastic cover, etc.) which are typically available in other products and
that are often the ideal dust location and the source of bad contacts. In the case of ergo the front is
completely smooth and all desired functions can be implemented by simply touching upon the surface
in the areas shown by the graphic (letters, symbols, circular-scroll mouse) in a very simple and rational
manner. All available functions, as detailed below, are really many and surprising.
It can be customized in the 4 different Ksenia institutional colors (White, Black, Red and metallized Grey),
simply by removing the transparent cover and interchanging the internal cover (Lexan) with one of
those included in the package envelope, such operation is meant to be so easy and safe that can be
done by the end-user at anytime and without risks.
Moreover, with no need of additional parts, it can be “ush-mounted” taking advantage of any std.
box Din 503, or just as it is on any wall (with no need of additional parts) or if desired even the desk-
solution can be chosen thanks to the included stylish sustainer parts.
The ergo keypad has been conceived to be linked both to Universal GSM/GPRS Communicator
geminoTM and Ksenia intrusion control panel lares, since, differently to any other similar devices, it
works also as “programming unit” , making the installer’s life much easier by avoiding the need of
having a PC with for the Communicator or the Intrusion Control Panel programming (see gure below).
As a matter of fact, all gemino’s and lares’s programming and managing functions (whether working
at stand-alone or not) can be executed directly from the ergo Keypad. Therefore ergo is in a position
to program the entire system or just to modify specic data at any time of the system life, such as,
for example, phone numbers, email addresses, SMSs, etc. (The programming cable with connectors is
available as optional).
TECHNICAL DATA
• LCD Display 16x2 (visible area 61 x 16mm)
• “Capacitive Sensing” Technology (no mechanical press-buttons)
• Circular Scroll : quick menu access
• Available in 4 different colors
• RFID/ NFC Proximity Reader
• Integrated Microphone and Speaker for recording and remote listening
• “Fast Addressing System”: no need to pre-set the device address (automatic recognition
from the Control Panel/GSM Communicator)
• Power supply: 13,8Vdc
• Consumption: 15mA standby, 400mA max
• Nr. 2 programmable terminals as inputs (e.g. for zones, contacts), or as Open Collector
outputs (500mA max.)
• 1 supply output for external devices (0,5 A max)
• Plug & Play BUS for Supply & Communication purposes
• RFID/NFC 13.56 MHz (max. distance 2 cm.)
• Operating temperature range: 5 - 40°C
• Overall Dimensions: 105 x 145 x 25 mm
• Weight: 180 gr
EN
3
FUNCTIONS
• Display of system status
• Display of functioning parameters ( date/time, active GSM network, GSM level, etc)
• System commands (complete or partial arming, reset, activation of outputs terminals, phone calls,
etc.)
• Full Programming of system parameters
• Programming of local parameters (audio volume, backlight levels)
• KP functionality exclusion for front cleaning purposes
• Remote Listening
• Vocal messages recording
• RFID/NFC Tag reading to arm and disarm the intrusion detection systems set up with the lares
devices.
OPTIONALS
KSI7500000.000 / KIT 1,5 m. cable for GSM/GPRS programming
KSI2100001.300 / Table sustainer
KSI2100002.300 / KIT ergo keypad
INSTALLATION
BUILT-IN INSTALLATION (WITH DIN 503 BOX) OR DIRECTLY ON THE WALL
INSTALLATION WITH TABLE SUSTAINER
The keypad ergo can be installed directly on a wall or put in an DIN 503 box set in the wall or leant on a
plain surface by means of the proper sustainer.
1. Push the cable through to the proper opening.
2. Fix the keypad base to the DIN 503 box with the supplied screws opening the proper eyelets. To x
the keypad base directly to a wall, use proper plugs (not supplied) through the proper eyelets.
3. Connect the cables to the terminals on the rear of the keypad.
4. Fit in the PCBA on the left side of the keypad base, keeping the display in the front and the clamps
on the back, then press the right side until a double-click is heard.
5. Insert a coloured Lexan at choice into the cover.
6. Close the cover properly.
1. Install, with a light pressure, the part 1 of the table sustainer on the back of the keypad base.
2. Fit in the part 2 of the sustainer on the part 1 by the mean of the proper hinge.
3. Push the cable through to the proper opening.
4. Connect the cables to the terminals on the rear of the keypad.
5. Fit in the PCBA on the left side of the keypad base, keeping the display in the front and the clamps
on the back, then press the right side until a double-click is heard.
6. Insert a coloured Lexan at choice into the cover.
7. Close the cover properly.
8. Use the optional cable for the programming of the communicator GSM/GPRS gemino.

EN
4
INSTALLATION NOTES
1. When ergo is switched on, the display will show the following information:
• First line: “KSENIA Security”
• Second Line: As from the rst character (from the right) the FW version loaded on the device
(x.xx.xxx), as from the 10° character the device serial-number (six numeirc characters).
This if ergo is switched on for the rst time, if not connected to KSI-BUS, or if connected to a device other
than the previous one.
2. As said, ergo has been conceived to be customized using the interchangeable Lexans provided in
the original package. In order to perform the operation (the Lexan switch) activating the “Cleaning
Function” before the front removal is suitable/advisable, and then proceed with the replacement
(for further changes to this operation please refer to gemino or lares series device manuals.
Installation of these systems must be carried out strictly in accordance with the instructions described in this manual, and in compliance
with the local laws and bylaws in force. ergo series have been designed and made with the highest standards of quality and performance
adopted by Ksenia Security. Is recommended that the installed system should be completely tested at least once a month. Test procedures
depends on the system conguration. Ask to the installer for the procedures to be followed. Ksenia Security srl shall not be responsible for
damage arising from improper installation or maintenance by unauthorized personnel. The content of this guide can change without prior
notice from KSENIA SECURITY.
Information for users: Disposal (RAEE Directive)
Warning! Do not use an ordinary dustbin to dispose of this equipment.
Used electrical and electronic equipment must be treated separately, in accordance with the relative legislation which requires the proper
treatment, recovery and recycling of used electrical and electronic equipment.
Following the implementation of directives in member states, private households within the EU may return their used electrical and electronic
equipment to designated collection facilities free of charge*. Local retailers may also accept used products free of charge if a similar
product is purchased from them.
If used electrical or electronic equipment has batteries or accumulators, these must be disposed of separately according to local provisions.
Correct disposal of this product guarantees it undergoes the necessary treatment, recovery and recycling. This prevents any potential
negative effects on both the environment and public health which may arise through the inappropriate handling of waste.
* Please contact your local authority for further details.

EN
5
FIGURE 1 - FRONT VIEW OF THE KEYPAD BASE
FIGURE 2 - TABLE SUSTAINER
3
3
1 1
6
5
2
24
4
1Eyelets to be opened to Built-In installation on DIN 530
box
1Table sustainer (part 1)
2Eyelets to direct installation on a wall
2Back of the keypad base
3Locking device to x the PCBA in the keypad base, left
side
3Table sustainer (part 2)
4Locking device to block the PCBA in the keypad base
4Hinge
5Place a xing screw (wall mounting) to take advantage
of tear tamper
6Place a xing screw (DIN 530 box mounting) to take
advantage of tear tamper
1
3
4
2
In order to maintain the conformity to the norms listed on page
21, this installation option can’t be used.
FIGURE 3 - PARTS DESCRIPTION AND PCBA TERMINALS
7
3
88
1
6
5
2
4
1Connection Clamps
+ A B - : Connection clamps on KSI-BUS for devices.
All the devices have to be connected in parallel, it
is necessary to connect each clamp with an equally
named one (clamp + is protected by a self-restoring
thermal fuse of 1.5 A)
M1 M2: Programmable clamps I/O
+P: Supply clamp for external devices (max 1,5A)
2 gemino or lares devices fast-connection cable terminal
3Anti-tear Switch
7Reserved terminal 8Loudspeakers contact
Anti-tear Switch
4
5Micro-controllor 6Microphone

EN
6
FIGURE 4 - TRANSPARENT COVER AND LEXAN
ESC
4.1
4.2
4.4
4.3
3
1
65
2
4
1Alphanumeric keypad with 1 a 9, * and # keys
2ESC key
3ENTER key
Scroll, also including:
4.1. Left arrow
4.2. Down arrow
4.3. Right arrow
4.4. Up arrow
4
5Display
6RFID/NFC Area
To open the transparent front cover, please proceed as follows:
Insert a at screwdriver in the slot Pull outward
OPEN TRANSPARENT COVER
1 2

EN
7
SUGGESTION ABOUT THE USE OF THE CAPSENSE TECHNOLOGY
The Keypad you have purchased do not utilize mechnical buttons, but the modern Capsense
Technology. If you already have other devices with capacitive Keypads, you won’t have any issues
in utilizating it and therefore do not need to continue reading this text. If instead it’s your rst time, we
inviteto follow a few small advices in order to obtain rapidly the best performances from this Technology.
Once powered, the Keypad does a self-calibration to adapt its sensitivity to the existing Humidity and
Temperature conditions.
Important note - Please wait 10 to 15 seconds before touching any buttons.
In this stage, it’s important that the keypad is positioned in its actual use conditions, for example if you
are using the desk-mount support, do not live it up-side down. Should this happen, no worries, leave
it with no touch for 10 seconds and it will go in self-calibration again in order to assure a consistent
sensitivity in the course of time.
Attention - Please avoid any contact with wet ngers!
Getting the button’s position, just touch upon with your nger tips, no pressure needed. If you believe
that the sensitivity is too low, do not increase the nger’s pressure, this doesn’t bring any benet. In this
case, it is enough to change the sensitivity setting, available in 3 different levels, by selecting it from the
keypad menù or by programming the setting taking advantage of the basis software.
At last a small test/game - Insert your PIN, surf in the menù with the circular scroll, select a menù (for
example the one which allows to insert a phone number in the phone-book and insert it by digiting on
the keypad). After few minutes only you’ll be surprised about your condence with the ergo Keypad!
DEFAULT INSTALLER’S PIN: 123456
DEFAULT USER’S PIN: 147258 (active only after the KP has benn assigned to the lares Control Panel)
KEYPAD FUNCTION DESCRIPTION
KEYPAD
It is conceived for data-entering (data/charachter) during the conguration process, PIN entering
(programmer or user) etc. By touching or exerting a slight pressure on the area corresponding to the
desired number, it allows to enter alphanumeric characters (letters and symbols) in addition to 0-9
numbers , depending on the
operating context (menu). This is possible because the keypad is provided with the tipical mobile phone
mode
technology, which allows to change the entered character depending on the settings (refer to the
following key-characters match chart).
Two ways to move forward the display line are possible while entering a text: using
another key or avoiding touching any key for 3 seconds after the last type.
Key-characters match chart:
KEY FONT:
0 ( ) / % - _ # *
1 “ “ ‘space’ ? ! , . \ ‘ &
A B C a b c 2 $ @
D E F d e f 3 ; <
G H I g h i 4 = >
J K L j k l 5 [ ]
M N O m n o 6 { :
P Q R S p q r s 7
T U V t u v 8 + }
W X Y Z w x y z 9

EN
8
ESC
The ESC key allows to exit the current menu, and go back to the previous level. This means that, wether
in a branched menu, repeated clics on the key will be needed to get back, for exanple to main menu.
A 2-second pressure on the ‘Esc’ key when the keyboard is not used allows the activation of the
cleaning function. As the name suggests, this function disable the keypad functionality for front-
cleaning purposes.
During the keypad block due to the activation of the cleaning function, the following information will
be displayed on the ergo screen:
• First line: “Keypad block”
• Second line: forewarding “.” which marks the keypad block lasting. It means that, as the “.” gets to
the last line character, the cleaning function ends and ergo recovers its regular functionally.
ENTER
DISPLAY
RFID/NFC AREA
The Enter key allows to enter the intended menu when browsing, to start editing during conguration
phase or to conrm the input of a data during an editing session.
In this regard, the following conduct:
• When broswsing the main menu, a pressure on the Enter key allows to enter the submenu and to
keep exploring in case the menu has several branches
• When visualizing the conguration data, a push on the Enter key permits the editing of the data itself
and this involves:
- the congured object ashes if it is slectable with a predened set through the Scroll;
- the rst character of a string ashes in case the string its being edited;
- the rst number ashes when a numeric data or a phone number is being edited.
• During the editing phase, a further pressure on the ENTER key conrms the immission or modication
of the data (which will be sent to gemino or lares that will store it) and the ergo display permits to show:
the following data, the subsequent menu or the data itself.
If “Enter” key is pushed when ergoTM is in standby mode, the display will show the installator’s data
(Name, Number or email address) if they were set during the keypad conguration. In case the
installator’s data were not available, the screen will display the two following default line:
<Installator>
<Information>
The Display shows all the information and the datas ergo can manage. It consist of 2 lines with 16
characters each (it is not graphic), but it can display longer strings (up to 32 characters) thanks to the
manual and automatic shift functions available on his FW. As a matter of fact, if there’s the need to
display a 32 characters string on the rst dsplay line it will be shifted to and fro 16 characters at any 3
seconds. If the 32 character string were on the second line it would be shifted through the “Right arrow”
and “Left arrow” keys. It will shift one character at any one time when in a data editing phase or 16
characters at any one time when browsing the menu.
The keypad is provided with an internal antenna that allows to detect Tags, Mobile phones or any other
devices provided with chips that work with RFID/NFC 13,56MHz standard simply by approaching it to the
area shown in gure at page 15.

EN
9
Actually, “Scroll” is not a key but the zone borded by a circle (on the right side of ergo) typied by a little
depression. The action on this zone clockwise (to move forward) or anticlockwise (to move backwards)
permits to:
• Slide forwards or backwards the menu entries;
• Pick the conguration data to enter (which will only be the suitable ones for the changing data)
such as: character, numbers, presetted values, etc. (#);
This area also allows to use the following functions:
• “Up arrow”. If a prolonged pressure (about 0,5 sec.) is exerted on the 4.4 area of the gure 5; the
same functions described for the clockwise moved scroll are activated (obviously the slide of the
menu or the conguration data available during this procedure is slower since it works at 0,5
seconds steps);
• “Down arrow”. If a prolonged pressure (about 0,5 sec.) is exerted on the 4.2 area of the gure 5; the
same functions described for the anticlockwise moved scroll are activated (obviously the slide of
the menu or the conguration data available during this procedure is slower since it works at 0,5
seconds steps);
• ”Left arrow”. A prolonged pressure (about 0,5 sec.) exerted on the 4.1 area of the gure 5 allows to
slide backwards along a line; if settled on the last character / number to the right, this function
allows to cancel in order one or more data characters / numbers until they are completely deleted;
• ”Right arrow”. A prolonged pressure (about 0,5 sec.) exerted on the 4.3 area of the gure 5 allows
to slide backwards along a line; if it is longer than the 16 characters the ergo display can show. The
forward slide can work in different ways depending on the data we are working on: if we are
browsing a menu it will slide 16 characters at any one time, while during data editing it will only slide
character at any one time.
(#) In a data entering phase “Scroll” allows to quickly select the suitable values for the data we’re
about to edit. In case a string is being entered or edited, the “Scroll” allows to slide the whole ASCII
standard cheracters range (from letter A) by its clockwise / anticlockwise twist or by using the “Up
arrow” / “Down arrow“ function to move forward or backward. The ASCII standard characters which
are eligible with this metod are:
• ” “ ‘space’ ! “ # $ % & ‘ ( ) * + , - . / ‘ 0 1 2 3 4 5 6 7 8 9 : ; < = > ? @ A B C D E F G H I J
K L M N O P R S T U V W X Y Z [ \ ] ^ _ ‘ a b c d e f g h i j k l m n o p q r s t u v w x y z {
| } ~;
If entering or editing data other than a string the Scroll allows to slide the likely possible values for the
individual data item, such as for example:
• 0 1 2 3 4 5 6 7 8 9 (when entering numbers values);
• 0 1 2 3 4 5 6 7 8 9 * # (when entering phone numbers);
• 0 1 2 3 4 5 6 7 8 9 A B C D E F (when entering hexadecimal values);
• values from 01 to 31 (if editing the day of a date);
• numbers from 01 to 12 (if editing the month of a date);
• numbers from 00 to 99 (if editing the year of a date);
• ON, OFF
• ecc.
The above said is intended to explain that the purpose of the scroll mai and anforced function is to
make data entering during conguration and menu browsing much easier.
SCROLL

1095 Budapest, Mester u. 34.
Tel.: *218-5542, 215-9771, 215-7550,
216-7017, 216-7018 Fax: 218-5542
Mobil: 30 940-1970, 30 959-0930
www.delton.hu
1141 Budapest, Fogarasi út 77.
Tel.: *220-7940, 220-7814, 220-7959,
220-8881, 364-3428 Fax: 220-7940
Mobil: 30 531-5454, 30 939-9989
Other manuals for ergo
1
This manual suits for next models
1
Table of contents
Other Ksenia Keypad manuals

Ksenia
Ksenia ergo-T User manual

Ksenia
Ksenia ergo wls KSI2100022.301 User manual

Ksenia
Ksenia ergo wls KSI2100022.301 User manual

Ksenia
Ksenia ergo M Assembly instructions

Ksenia
Ksenia ergo A KSI2100030.301 WHITE User manual

Ksenia
Ksenia ergo-T User manual

Ksenia
Ksenia KSI2100000.300 Operating instructions

Ksenia
Ksenia ergo wls User manual

Ksenia
Ksenia ergo-X KSI2100031.302 Use and care manual

Ksenia
Ksenia ergo M User manual