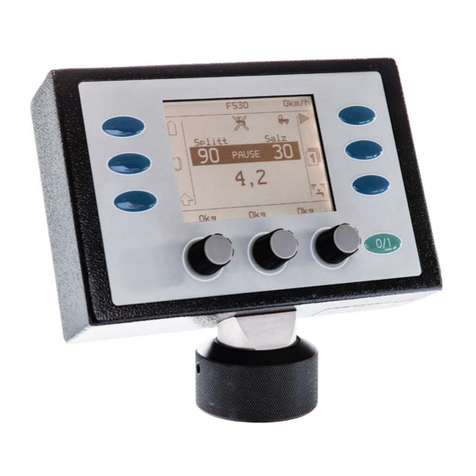
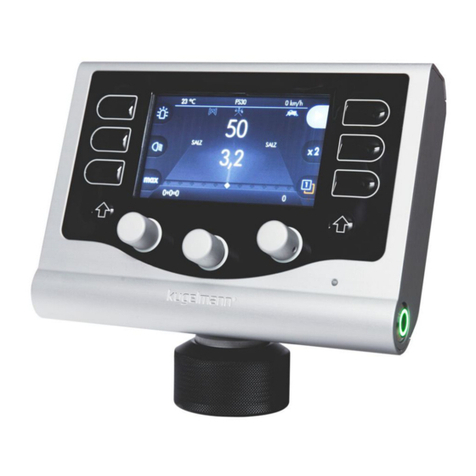
Kugelmann K-TRONIC 2 Reference guide

// BRIEF INSTRUCTIONS
Art.Nr.: 10046694 11/15/2016 | Version 1.2 | EN
Kugelmann Maschinenbau e.K.
Gewerbepark 1-5
87675 Rettenbach a.A.
GERMANY
www.kugelmann.com
+49 (0) 8860 | 9190-0
Kugelmann Maschinenbau is a family-run Allgäu business with its main emphasis and
tradition in municipal technology. With passion, we manufacture reliable and pioneering
machines - we love what we do.
ORIGINAL OPERATING INSTRUCTIONS
Control system
K-TRONIC 2

// BRIEF INSTRUCTIONS
Copyrights and trademarks 1/32
Copyrights and trademarks
© Kugelmann Maschinenbau e.K.
Gewerbepark 1-5
87675 Rettenbach a.A. (Germany)
Tel.: +49 (0) 8860 / 9190-0
Fax: +49 (0) 8860 / 9190-19
Mail: office@kugelmann.com
Web: www.kugelmann.com
All company names and designations used in this manual may also be registered trademarks
of the respective manufacturing companies and shall not be used commercially or otherwise.
Errors and omissions excepted.
All rights reserved. No part of this manual shall be reproduced or copied in any form (printing,
photocopying, storing or distribution in electronic form) without prior written consent of
Kugelmann Maschinenbau e.K.
We are constantly developing our products to offer our customers maximum convenience.
Therefore, we ask for your understanding that the manual can deviate from the product in some
regards.

// BRIEF INSTRUCTIONS
Content 2/32
1 Content
1 Content........................................................................................................2
2 User interface.............................................................................................. 3
3 Display view.................................................................................................5
4 Meaning of buttons......................................................................................7
5 Switch on / off control system......................................................................9
6 Spreading operation...................................................................................10
7 Setting of spreading width......................................................................... 11
8 Output rates...............................................................................................12
9 Switch on/off working headlights...............................................................14
10 Switch on/off rotating beacon.................................................................. 15
11 Double spreading density......................................................................... 16
12 Operator level 1 and 2..............................................................................17
13 Path-dependence and manual operation..................................................18
14 Electrical monitoring of spreading process................................................22
15 Setting of automatic spreading image.......................................................23
16 Electrical adjustment of spread pattern....................................................24
17 Switch on/off brine spreading.................................................................. 26
17.1 Changing the brine proportion................................................................................................ 28
18 Motor unit............................................................................................... 29
18.1 Start motor unit....................................................................................................................... 29
18.2 Switch off motor unit...............................................................................................................30

// BRIEF INSTRUCTIONS
User interface 3/32
2 User interface
Pos. No. Function
10 Rotating beacon / Flasher
20 Working headlight
30 Function key 1
40 Actual value button
50 Turning knob spreading material left
60 Turning knob for setting the spreading width
70 Turning knob spreading material right
80 ON / OFF
90 Button for spreading material
100 Function key 2
110 Function key 3
120 Spreading operation / Pause
130 Display

// BRIEF INSTRUCTIONS
User interface 4/32
Pos. No. Function
10 Socket master - connecting cable
20 Serial interface RS232
30 Cable support
40 USB port 1
50 USB port 2 (not occupied)

// BRIEF INSTRUCTIONS
Display view 5/32
3 Display view
Rotating beacon ON / OFF
see Chapter 10. "Switch
on/off rotating beacon",
page 15
Working headlight ON / OFF
see Chapter 9. "Switch on/
off working headlights",
page 14
Double spreading density ON / OFF
see Chapter 11. "Double
spreading density",
page 16
SPREADING / PAUSE see Chapter 6. "Spreading
operation", page 10
Operator level LEVEL1 / LEVEL2 see Chapter 12. "Operator
level 1 and 2", page 17
Maximum spreading rate ON / OFF see Chapter "Maximum
spreading rate"
Teach in ON / OFF
Motor unit ON / OFF see Chapter 18. "Motor
unit", page 29

// BRIEF INSTRUCTIONS
Display view 6/32
Electrical monitoring of spreading
process ON / OFF
see Chapter 14. "Electrical
monitoring of spreading
process", page 22
Brine spreading ON / OFF
see Chapter 17. "Switch
on/off brine spreading",
page 26
Spreader works path-dependent /
manually
see Chapter 13. "Path-
dependence and manual
operation", page 18
Electrical adjustment of spread
pattern
see Chapter 16. "Electrical
adjustment of spread
pattern", page 24
Outside temperature display
Percentage of pre-wetted salt
during brine spreading [%]
see Chapter 17.1 "Changing
the brine proportion",
page 28
Driving speed
Output counter left chamber see Chapter "Output
counter"
Output counter brine reservoir see Chapter "Output
counter"
Output counter right chamber see Chapter "Output
counter"
Spreading material and spreading
rate [g/m²] left chamber
see Chapter 8. "Output
rates", page 12
Spreading material and spreading
rate [g/m²] right chamber
see Chapter 8. "Output
rates", page 12
Spreading width [m]
see Chapter 7. "Setting
of spreading width",
page 11

// BRIEF INSTRUCTIONS
Meaning of buttons 7/32
4 Meaning of buttons
Button Meaning
Function key 1
•Confirm and continue to next menu mask
Spreading / Pause button
•Previous menu mask
Turning knob left/middle/right:
•Turning respective turning knob to continue to the next/previous
menu option.
•Turning respective turning knob to confirm the respective menu
option.
•Pressing and turning the turning knob to skip whole numbers for
settings
•Turning the turning knob to skip in steps of 0.01 for settings
Rotating beacon / Flasher button
•Exit menu
Turning knob left/right
•Start / Confirm
Function key 3
•Switching on respective option
Function key 3
•Switching off respective option
Function key 1
•Information on respective menu option
Function key 2
•Settings
Working headlight button
•Save

// BRIEF INSTRUCTIONS
Meaning of buttons 8/32
Rotating beacon / Flasher button
•Reset output counter right chamber
Working headlight button
•Reset output counter brine
Function key 1
•Reset output counter left chamber

// BRIEF INSTRUCTIONS
Switch on / off control system 9/32
5 Switch on / off control system
Switch on control system:
1 Switch on control system
➯
Switch off control system:
1 Switch off control system

// BRIEF INSTRUCTIONS
Spreading operation 10/32
6 Spreading operation
Start spreading:
Control system and spreader are
set to “PAUSE” ➯
Push spreading / pause button
“PAUSE” changes to output rates:
right chamber (50 g/m²) + left
chamber (50 g/m²) = Total (100 g/
m²)
➯
Pause:
Push spreading / pause button
Control system and spreader are
set to “PAUSE” again ➯

// BRIEF INSTRUCTIONS
Setting of spreading width 11/32
7 Setting of spreading width
This chapter gives you information on the following:
•Chapter "Configuration of spreading width"
The spreading width is infinitely variable.
Example for basic setting (5,0 m)
Turn middle turning knob to set
spreading width (4,5 m) ➯

// BRIEF INSTRUCTIONS
Output rates 12/32
8 Output rates
The output rates for the left and right spreading chamber can be set to different
values. If different spreading materials exist in the chambers, it is possible to set any
desired mixing ratio of both spreading materials.
Example for basic setting (right
chamber = 50 g/m², left chamber
= 50 g/m²).
Turn right turning knob to change
output rate of right chamber
(Example: 57 g/m²) ➯
Turn left turning knob to change
output rate of left chamber
(Example: 58 g/m²) ➯
If the spreading button is pressed, the sum
of the output rates is shown in the middle.

// BRIEF INSTRUCTIONS
Output rates 13/32
In this example (50 g/m² + 50 g/
m² = 100 g/m²) ➯
Hinweis
Part of brine of pre-wetted salt equipment (here FS35) indicates the percentage of
brine (if switched on) based on the total output:
•Brine spreading (in this example FS35) is attributed to the percentage of salt, i.e.
the proportion of salt (50 g/m²) contains 35% of brine.
➯Example: 32.5 g/m² salt + 17.5 g/m² brine = 50 g/m² (combined)
➯Brine proportion (in this example 35 %) is only attributed to salt or refined
salt.

// BRIEF INSTRUCTIONS
Switch on/off working headlights 14/32
9 Switch on/off working headlights
Working headlights switched on
Working headlights switched off
Error
Press briefly
Working headlights on ➯
Press briefly
Working headlights off ➯

// BRIEF INSTRUCTIONS
Switch on/off rotating beacon 15/32
10 Switch on/off rotating beacon
Rotating beacon switched on
Rotating beacon switched off
Error
Press briefly
Rotating beacon on ➯
Press briefly
Rotating beacon off ➯

// BRIEF INSTRUCTIONS
Double spreading density 16/32
11 Double spreading density
The double quantity of spreading material is put out.
Simple mode, no double output
Example:
Simple mode ➯
Hold down
Double spreading density ➯
Hinweis
The double quantity of spreading material is spread as long as the button is pushed
down.

// BRIEF INSTRUCTIONS
Operator level 1 and 2 17/32
12 Operator level 1 and 2
You have the possibility to store two different data sets for the two operator levels.
Operator level 1
Operator level 2
Example:
Operator level 1 ➯
Push
Operator level 2 ➯
Hinweis
After switching on, you always start at operator level 1.

// BRIEF INSTRUCTIONS
Path-dependence and manual
operation
18/32
13 Path-dependence and manual operation
Difference path-dependence and manual operation:
Path-dependent spreading
The control system calculates the quantity of spreading material for the
spreading operation on the basis of the vehicle speed.
Manual operation
During manual operation, the control system calculates the quantity of spreading
material for the spreading operation by means of the set simulation speed (see
Chapter "Simulation speed"), regardless of the actual vehicle speed.
Change from path-dependence to manual operation:
1 Start screen
2left Press and hold down actual value button
➯
3Press manual operation button

// BRIEF INSTRUCTIONS
Path-dependence and manual
operation
19/32
➯
4left Release actual value button
➯
Other manuals for K-TRONIC 2
1
Table of contents
Other Kugelmann Control System manuals