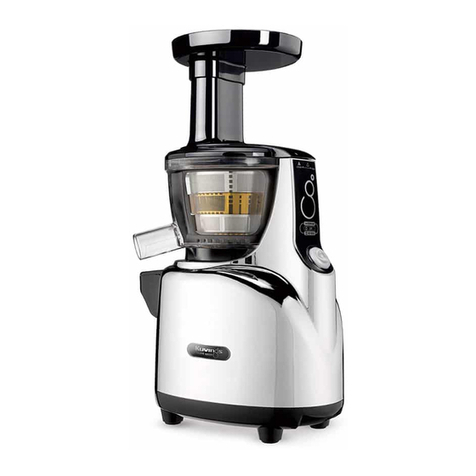
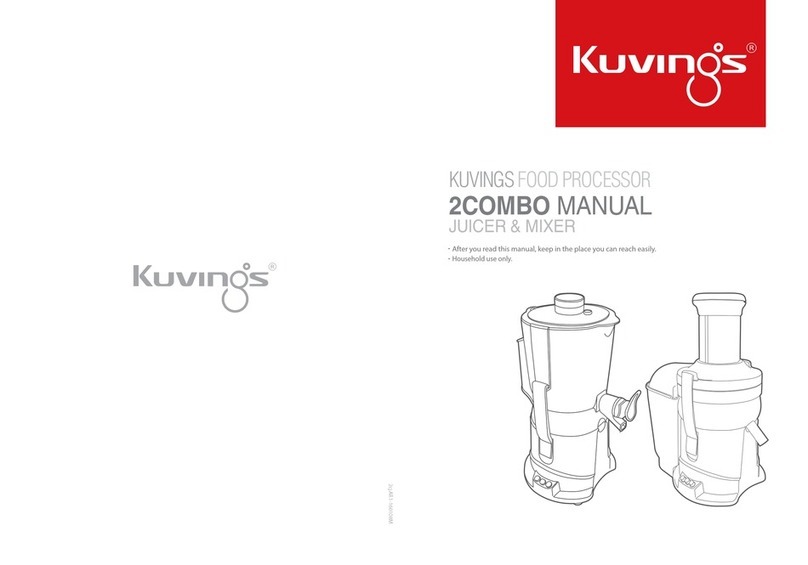
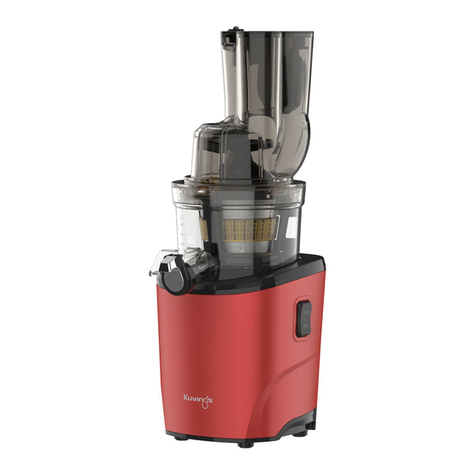
Kuvings ULD-1272CB User manual

KUVINGS
WHOLE SLOW JUICER
MANUAL
• After you read this manual,
keep where it can be easily accessed.
•
Household use only.
10AA181065A
M12
ENFR

32
CONTENTS
ㆍThis appliance is for household use only. Please carefully follow the instructions
in the manual.
(The appliance cannot be covered under the manufacturer's warranty if the product is
abnormally or commercially used.)
ㆍSave the instruction manual for future reference.
ㆍ
If the appliance is given away as a gift, please include the manual with the product.
ㆍThese instructions are also available on www.kuvings.com.
When using electrical appliances, basic safety precautions
should always be followed including the following:
Read all instructions.
To protect against risk of electrical shock do not put motor or base of
unit in water or other liquid.
Always supervise children while operating appliance.
Unplug from outlet when not in use, before putting on or taking o parts,
and before cleaning.
Avoid contact with moving parts.
If the supply cord is damaged, it must be replaced by the manufacturer,
its service agent, or similarly qualied persons in order to avoid a hazard.
The use of attachments not recommended or sold by the manufacturer
may cause re, electric shock, or injury.
Do not use outdoors.
Do not let cord hang over edge of table or counter.
Make sure juicer is assembled properly before motor is turned on. Do not
remove drum lid or parts while juicer is in operation.
Turn switch to OFF position after using juicer. Make sure the motor stops
completely before disassembling.
1.
2.
3.
4.
5.
6.
7.
8.
9.
10.
11.
Do not put your ngers or other objects into the juicer opening while it
is in operation. If food becomes lodged in opening, use food pusher or
another piece of fruit or vegetable to push it down. If this method is not
possible, turn the motor o and disassemble juicer to remove the
remaining food.
Do not use the appliance if the rotating sieve is damaged.
Make sure pulp container is in place before operating juicer.
Do not alter appliance.
Do not use the appliance for anything other than its intended purpose
as described in the manual.
The appliance should be used for limited period of time.
This appliance can be used by children age from 8 years and above and
persons with reduced physical, sensory or mental capabilities or lack of
experience and knowledge if they been given supervision of instruction
concerning use of the appliance in a safe way and understand the hazards
involved. Children shall not play with the appliance. Cleaning and user
maintenance shall not be made by children without supervision.
This appliance is not intended for use by persons(including children) with
reduced physical, sensory or mental capabilities, or lack of experience and
knowledge, unless they have been given supervision of instruction
concerning use of the appliance by a person responsible for their safety.
12.
13.
14.
15.
16.
17.
18.
19.
EN
Important Safeguards
Safety Warning
Parts
How to Assemble
How to Operate
Tips on Operation
Tips on Ingredients
Ingredients Preparation
How to Disassemble and Clean
How to Clean Silicone Parts
How to Use the CleaningTool
How to Use the Blank Strainer
How to Use the Coarse Strainer
How to Use the Smoothie Strainer
How to Use the Lid Opener
Troubleshooting Q&A
Specications
02
04
06
08
10
12
13
14
18
20
21
22
24
26
28
29
31

54
The following precaution is provided to ensure the safety of the user. Please carefully read
through the precautions and exercise a degree of care when using the appliance.
Warning : Warns risk of death of severe injuries.
Caution : Warns risk of injuries or appliance damage.
Prohibited
Follow instruction
Unplug from the outlet
Do not disassemble
Must take action
Be cautious of electric shock
SAFETY WARNING SAFETY WARNING
Do not repair, disassemble the base, or customize the appliance.
→The appliance may not operate properly causing re,
electrical shock or injury.
Do not put the parts in the dishwasher or extremely hot water.
→The parts may wear faster.
Do not use the appliance on an uneven surface.
→It may cause a malfunction if the appliance tips over.
To protect the power cord, please do not aggressively bend or put
heavy object on top of the power cord.
→It may cause short circuit or even re.
Keep away from children and store the appliance in a safe place.
→It may cause injury.
Please do not store or operate the appliance near any heating
appliance.
→The appliance may become discolored or deformed.
Do not use any hazardous chemical to clean the appliance or
ammable sprays near the appliance.
→It may change the color of the appliance or could result in a re.
For cleaning parts that come in contact with food, please follow
the instruction on pages 18-20.
Do not plug multiple power cords on a single outlet during operation.
→It may cause an explosion or re.
Do not touch the power cord with wet hands.
→It may cause electrical shock.
Use a dry towel to clean the power cord if it is dirty or wet.
→It may cause electrical shock or re.
Do not drop the appliance nor inict strong force to the appliance.
→It may damage or break the appliance.
Do not unplug by pulling on the power cord cable.
→It may damage the power cord and cause electrical shock.
Do not put your nger or other objects into the feeding tube while it
is in operation.
→It may cause injury.
Do not leave the appliance unattended. Unplug the power cord from
the outlet when not in use.
Operating the juicer without ingredients can cause damage to the
screw.
EN

76
PARTS
Align the red dots ●on each part and
assemble in the order shown. Once
assembled, turn the drum lid clockwise
to close.
STEP 1
Top-set Assembly
STEP 2
Top-set and body assembly
Place the assembled top set onto the
body. Align the down arrow ▼on the
drum lid with the OPEN mark on the
body and turn to the CLOSE position.
11. Cleaning Brush 14. Round Brush
(Optional)
12. Cleaning Tool 13. Lid Opener
17. Smoothie Strainer
(Optional)
9. Juicing Screw7. Rotation Wiper 8. Strainer
* The products illustrated in this booklet may vary slightly from the actual product. * The products illustrated in this booklet may vary slightly from the actual product.
10. Pusher
+
+
+
+
+
+
EN
1. Drum Lid
* Feeding Tube
16. Coarse Strainer
(Optional)
15. Blank Strainer
(Optional)

98
HOW TO ASSEMBLE
The drum lid will not close unless the
juicing screw is all the way in.
Note |
STEP 1
Top-set Assembly
STEP 2
Top-set and Body Assembly
Place the juicing screw into the strainer.
Turn and press down on it until it clicks into
place.
Place the drum lid on to the juicing bowl
aligning the red dot ●on the drum lid with
the red dot ● on the juicing bowl. Turn the
drum lid clockwise until the red dot ●
on the juicing bowl is lined up with close
mark .
Check Before
Operating • Wash the parts before rst use.
• Ensure that the silicone ring is assembled properly.
2
3
46
Place the pulp cup under the pulp
spout and place the juice cup under the
juice spout as shown in the illustration.
Place the assembled top set onto the
juicer body, making sure to align the
arrow ▼on the drum lid to the OPEN
mark on the base.
Turn the top set so that the arrow is aligned
with Close .
5
For easy assembly hold the drum lid
by grabbing the feeding tube and turn
clockwise as shown in the illustration.
TIP
Assemble the strainer into the rotation
wiper then place this assembly in to the
juicing bowl ensuring the red dot ● on
the strainer is aligned with the red dot ●
on the juicing bowl.
1
Note | The juicer will not operate if the down arrow
▼
on the drum lid is not completely aligned
with the CLOSE mark on the body.
Open
Close
EN

1110
HOW TO OPERATE
After preparing the ingredients, plug the power cord into a wall outlet.
Press the FORWARD button to operate.
Insert the prepared ingredients into the feeding tube, one piece at a time.
If the juicer stops due to stuck ingredients:
Switch the button to OFF position then press and
hold the REVERSE button until the ingredients
become dislodged.
Repeat REVERSE - OFF - FORWARD as needed.
FORWARD : Pulls down the food
OFF : Stops the operation
REVERSE : Pushes the food back up
▶▶▶
4
1 3
2
OFF OFFREVERSE FORWARD
Note |
Note |
Note
Tip |
Tip |
Note |
If the ingredients become jammed in the screw and the drum lid does not open, press the OFF
button. Then press and hold the REVERSE button until the ingredients become dislodged.
Repeat REVERSE - OFF - FORWARD as often as needed to dislodge food.
Use the smart cap to make mixed juice, prevent drips, or rinse
between dierent juices.
After juice and pulp have been completely extracted, switch the unit OFF.
TIP
Note
Note
Hard vegetables & high ber foods
Soft Fruits & Vegetables
| (E.g. carrots, beets, & spinach)
| (E.g. apples, oranges & tomatoes)
Insert into
the feeding
tube
Insert into
the feeding
basket
Smart Cap
·Do not touch the power cord with wet hands. It may cause electrical shock,
short-circuit, or re.
·Ensure the power cord is plugged into a power outlet.
·Forward: Pulls down and slowly masticates the ingredients.
·Reverse: Pushes the ingredients back up to dislodge them.
·REVERSE: Pushes the ingredients back up to dislodge them.
The REVERSE button only works while holding down the switch.
·Switch OFF ensuring that the juicer comes to a complete stop. Then press REVERSE.
Hold the REVERSE button for 2-3 seconds and release. Repeat as needed. Let the
juicer stop completely before using the REVERSE button to prevent malfunction.
·If the juicer does not work after these steps, disassemble and clean the parts before
operating the juicer again.
·Prepare ingredients for optimal extraction.
·If large quantity of ingredients are put into the feeding tube, it can cause the juicer to stop.
Insert the ingredients one piece at a time.
·Remove hard seeds, pits, and thick rinds in fruits. When juicing frozen fruits,
thaw slightly before juicing.
·Tough and brous ingredients:
Cut to 1/2-1 inches wide and 2 inches long.
·Fibrous leafy vegetables (celery, kale, collard greens, etc.):
Cut the stems into 2 inches long and bundle up the leafy part as you
insert them into the juicer.
·Soft ingredients: Cut ingredients into 1-4 pieces. Insert the prepared
ingredients into the feeding basket and push down the ingredient
with the basket lid to extract.
·Juicing with the smart cap closed creates various mixed juice creations with dierent fruits
and vegetables, milk, banana, beans and other ingredients.
·After juicing, close the smart cap to stop juice from dripping, especially when disassembling
the juicing bowl o of the base.
·When making dierent juices, quickly rinse any leftover avors by running a glass of water
in the juicer with the smart cap closed.
·Leave the smart cap open when juicing ingredients that tend to create foam during extraction.
(e.g. apples, celery)
·Pay close attention when operating with the smart cap closed. Juice may overow if the juice
collected in the juicing bowl exceeds its capacity.
Open the smart cap and empty the juicing bowl when it becomes full.
·If the remaining ingredients in the juicing bowl have not been extracted completely, the drum
lid may not open easily. (After each extraction, run the juicer for additional 30 seconds to let
the juicer extract the remaining pulp.)
If the drum lid gets stuck, press the REVERSE - OFF - FORWARD button in the order, switching
back and forth 2~3 times to dislodge. Then place your hands on top of the drum lid and rmly
press down as you simultaneously turn the drum lid counter clockwise to open.
※Depending on the ingredients, pour water down the feeding tube to rinse out the interior
of the juicing bowl and then try to take o the drum lid.
EN
1312
TIPS ON OPERATION TIPS ON INGREDIENTS
Peach, nectarines, apricot, plum, mango, etc.
Remove hard seeds from the ingredients
before juicing.
Hard seeds
Pineapple, melon, mango, orange, etc.
Peel the skins from the ingredients before juicing.
Hard or
inedible
skins
Frozen berries, fruit, etc.
Thaw frozen fruits slightly before juicing.
Do not juice ice.
Large frozen
fruits or ice
Sesame seed, butter, margarine, etc.
Do not extract ingredients containing vegetable
or animal oil. This can reduce performance and
even damage the juicer.
Vegetable/
animal oil
Coconut, sugarcane, whole grains, etc.
Do not extract ingredients with no water
content.
Others
The Slow Juicer is an innovative product that uses a patented slow-
speed masticating technology to efficiently extract the juice from
ingredients. The juicer is designed to obtain the best result from
ingredients with firm composition and with high water content.
For best result, each ingredient should be prepared and extracted
depending on its characteristics and properties.
Experience the best quality juice by understanding each ingredient’s characteristics
and knowing the optimal way of handling the ingredients.
DO NOT
put the following ingredients into the juicer:
Juicer damage due to owner negligence or from not following the instructions in the owner’s manual
will void the warranty service.
1.Operating the juicer without ingredients can cause damage to the juicing screw.
2.Do not continuously operate the juicer for more than 30 minutes.
This can damage the motor from overheating.
After continuous use, let the juicer rest for 30 minutes to cool down before starting another
session.
3.Do not put hand, utensil, tong, or other objects into the feeding tube other than the
provided pusher.
4.During operation, do not put spoon, spatula or other objects into the juice spout of
the juicing bowl.
If other object is put into the juice spout during operation, such materials can get stuck and
damage the juicer parts.
5.Do not juice dried whole grains, fruits with hard seeds or pits, or ice.
These may damage the juicer parts (e.g. juicing bowl, juicing screw, and strainer).
· Beans, grains, or nuts can be used if soaked overnight or boiled.
· Fruits with pits and hard seeds (e.g. nectarines, peaches, mangoes and cherries) must be pitted
before juicing.
· When using frozen fruits with small seeds such as grapes, completely thaw before inserting
them into the juicer.
· Use of ice in the juicer will decrease the product durability over time.
6.Do not use ingredients containing excessive amounts of vegetable oil or animal fat.
Do not use the juicer to extract vegetable oil from ingredients.
If vegetable/animal oil gets on the juicing screw, it may reduce performance and even damage
the part.
7.Do not reinsert the extracted pulp into the juicer. This can cause the juicer to stop or
cause the drum lid not to open.
8.After juicing ingredients with seeds like grapes, thoroughly clean all the crevices on
the bottom of the juicing screw.
EN
1514
INGREDIENTS PREPARATION
Before
Operating:
Juice Yield:
Soft fruits and vegetables
(e.g. oranges, tomatoes):
- Peel the skin o oranges, and for tomatoes and
apples, take out the stem.
- If the ingredients are larger than the feeding
tube, cut the ingredients into pieces that will fit into
the feeding tube.
- Fruits with hard seeds must be pitted before extraction.
Cut to 1-4 pieces then slowly insert the ingredients
down the feeding tube.
1~4 pieces
Insert into the feeding basket
(Basket lid open)
If the lid does not open due to excessive amount of small seeds left in the juicing bowl, continuously
run the juicer for 30 second to extract any leftover seeds. If the lid is still stuck, repeat REVERSE - OFF-
FORWARD until the ingredients become dislodged. Place both hands on the drum lid and rmly press
down while simultaneously turning the drum lid to open
.
(depending on the ingredient, pour some
water down the feeding tube for quick rinsing to help dislodging).
Slowly insert ingredients with small seeds to prevent the seeds from clogging the strainer.
| (E.g. apples, oranges & tomatoes)
Ingredients with small seeds
(e.g. raspberry, pomegranate, grape):
TIP |
Insert into the feeding basket
(Basket lid open)
Insert ingredients slowly
to minimize the amount
of leftover seeds in the
strainer.
For best result, juice with
ingredients with higher
amount of uid(e.g. apple,
pear)
PREPARATION TIPS:
·Cut 1-4 pieces.
EXTRACTION TIPS:
·Slowly insert the ingredients one piece at a time.
·Use the pusher to push the ingredients down the feeding tube. (The pusher also helps prevent juice
from spraying out of the feeding tube when extracting ingredients with high water content)
·Leave the smart cap open when juicing ingredients that create excessive foam during extraction.
(Foam can accumulate if operated with the smart cap closed. )
·It is recommended that the extracted juice be consumed within 48 hours after extracting. Depending
on the density of the ingredients the extracted juice can gradually show layers over time.
·If there is an excessive amount of foam, use a mesh strainer to separate it from the juice.
·Before Operating: If the juicer is jammed or if the drum lid does not open,
press the REVERSE button and hold until it becomes dislodged.
Repeat REVERSE-OFF-FORWARD as needed.
·Continue operating the juicer until all the ingredients in the juicing bowl are
extracted. The drum lid may not open easily if there is a lot of pulp remaining
in the juicer.
·Every ingredient yields dierent amounts of juice.
·For the optimal extraction and maximum juice yield, cut the ingredients
following the guidelines given in this section.
·Insert ingredients slowly monitoring how the ingredients are extracted.
The juice yield may vary depending on the juicing speed.
PREPARATION TIPS:
·When juicing frozen ingredients(e.g. raspberry, strawberry), make sure they are thawed.
·Thoroughly wash all ingredients. Remove stems (e.g. grapes, apples) before juicing.
·For pomegranates, discard the skin and ber and juice only the seeds.
EXTRACTION TIPS:
·Put a small portion at a time for the best result.
·Thaw frozen ingredients like pomegranate and raspberry then insert about 1 tablespoon (5g) at a time.
·Frozen ingredients usually lose signicant amount of uid from thawing. When juicing, mix milk, nut
milk, yogurt, water, coconut water, or other liquid to balance the uid lost.
EN

1716
2 inches
Fibrous ingredients like celery and kale should be cut into small lengths before juicing
Fibrous and/or tough leafy ingredients
(e.g. celery, kale, pineapple):
When juicing leafy
ingredients like celery and
kale, feed the juicer in small
amounts. For best result,
disassemble and wash
the top-set before juicing
again.
If leafy ingredients
wrap around the
juicing screw, open
the lid and remove
the bers before
juicing again.
It’s best to juice with
ingredients with higher
amount of uid, like
apples or carrots.
Caution |
Insert into the feeding tube
(Basket lid close)
How to Use
the Smart
Cap:
Adjusting
the amount
of pulp in
the juice:
Hard fruits and vegetables
(e.g. carrots, potato and beets):
Hard fruits and
vegetables may
put excess strain
cause it to stall if
not cut down to
size.
TIP: Soak in cold
water prior to
juicing and cut
to appropriate
sizes.
To increase
the juice yield,
juice fruits and
vegetables
with high water
content.
2-6 inches
1 inch
1 inch
Insert into the feeding tube
(Basket lid close)
INGREDIENTS PREPARATION
· The bers from tough ingredients like celery can wrap around the juicing screw and aect
juicer’s performance. Cut the stems that are thick and tough to 2 inches long or less.
· Foam can build up from juicing brous ingredients. Use strainer to remove the foam before
serving.
· For ingredients like pineapple, slice o the rind of the pineapple and cut around the brous
core. Cut the esh of the pineapple to smaller pieces.
· When juicing large portion of ingredients, wash the top-set before continue juicing.
PREPARATION TIPS:
· Soak the leafy greens in cold water for about 30 min prior to juicing for the best result.
· Separate each stem. Cut the outer stems that are thick and tough to 2 inches long or less.
EXTRACTION TIPS:
· One at a time, slowly insert the prepared ingredients.
· Insert more ingredients after the previously inserted ingredients have been completely extracted.
①
Roll leaves into a spiral for easier insertion into the juicer.
②
Insert the leafy part of the ingredients rst then alternate between leafy parts and stems.
③
For ingredients like wheatgrass, grab a handful and insert in a bundle.
PREPARATION TIPS:
· Slice the ingredients 1 inch thick or cut 1 inch wide and 2-6 inches long.
· Soak ingredients like carrots in cold water for about 30 min prior to juicing for the best result.
EXTRACTION TIPS:
· Slowly insert the ingredients one at a time.
· Pace the juicing speed ensuring each ingredient is thoroughly extracted.
· To maximize the juice yield, juice with ingredients with high water content.
· Juicing with the smart cap closed allows mixed juice creations with dierent
fruits, vegetables and liquids.
· After juicing, close the smart cap to block excess juice from dripping,
especially when disassembling the juicing bowl o the body.
· When making dierent juices, rinse away any leftover avors by
running a glass of water in the juicer with the smart cap closed.
· TIP: Leave the smart cap open when juicing ingredients that create excessive
foam during extraction (e.g. apples, celery).
· Pay close attention when operating the juicer with the smart cap closed.
Juice may overow if the juice collected in the juicing bowl exceeds its
capacity marked on the juicing bowl. Open the smart cap and empty the
juicing bowl when it becomes full.
· Depending on the ingredient, you may get extra pulp in the juice when
juicing continuously.
· To reduce the amount of pulp, disassemble the top-set and wash frequently.
EN

1918
HOW TO DISASSEMBLE AND CLEAN
Tip |
Clean the body with a soft damp towel
and dry.
Note |
Tip |
Note |
Under running water, clean the outside
of the juicing screw with a dish scrub. Use
the tip of the cleaning brush to push out
any residue in the crevices on the bottom
of the juicing screw.
With the smart cap closed, ll the juicing
bowl with water and turn on the juicer.
Let it run for about 30 seconds. Open
the smart cap and let the water run
out of the juicing bowl.
Turn the drum lid counter clockwise to
open.
Note |
Note |
Switch OFF and unplug the power cord
from the wall outlet.
1
1 6
7
2
Turn the top-set counter clockwise and
lift o the body.
3
1
2
Quick Rinsing
Note |
TIP |
Remove the juicing screw, strainer and
rotation wiper unit from the juicing bowl.
Clean with provided brush.
Place the juicing bowl under running
water.
4
5
* The products illustrated in this booklet may vary slightly from the actual product.
Extract all the remaining pulp in the
juicing bowl before stopping the juicer.
For easier clean up, operate the juicer for
an additional 30 seconds after the juice is
extracted.
If the lid is stuck, press the REVERSE – OFF
– FORWARD button in this order, switching
back and forth 2 to 3 times to dislodge. Then
place both hands on the drum lid and rmly
press down while simultaneously turning
the drum lid to open.
*
Fill the juicing bowl with water and run
the juicer before opening the drum lid. It
may help to open the drum lid when stuck.
·
·
·
When moving the appliance, do not lift
by grabbing the feeding tube. Always lift
the appliance by grabbing the body or
handle.
Immediately clean the juicer after each
use. If remaining residue in the juicer dries
up, it can make disassembling and clean-
up dicult. The excess build up can cause
poor performance in future uses.
For easier disassembly, place the top-
set in the sink and run the water through
from the top of the top-set.
Thoroughly dry the bottom of the juicing
screw.
The round brush can clean the juice
spout of the juicing bowl.
After juicing ingredients with seeds, make
sure to thoroughly clean the bottom
crevice of the juicing screw. (If this area
isn’t properly cleaned, it can cause the
part to be damaged.)
Thoroughly clean the juicing screw
ensuring that the it is clean without any
residue.
Completely dry before using.
If the towel is dripping wet, make sure
to squeeze out the excess liquid before
using it on the juicer.
It is not necessary to completely clean
the juicer in between juices during a
single juicing session.
When nished with juicing session
always disassemble and clean
thoroughly between juicing sessions to
prevent residue buildup.
EN

2120
HOW TO USE THE CLEANING TOOL
Hold the cleaning tool with one hand and insert
the strainer until you hear it click into place.
HOW TO CLEAN SILICONE PARTS
Silicone Brush
Pull out the silicone brush from
the rotation wiper to clean.
After cleaning, insert into the slot
with the tail pointing down as
shown in the illustration.
Silicone Ring
Remove the silicone ring from
strainer to clean.
After cleaning, push in the silicone
ring.
Smart Cap
Remove from the juice spout
to clean.
After cleaning, attach the smart
cap to the smart cap silicone on
the juice spout.
Clean the rotation wiper under running water.
Thoroughly dry after cleaning. Before assembling the top-set, ensure that the silicone ring is
rmly inserted.
If the silicone ring is not rmly inserted, juice may leak from the bottom of the juicing bowl.
Tip |
Note |
The cleaning tool makes clean-up quick and easy.
Completely dry after cleaning.
Tip |
1
After cleaning, remove the strainer from the
cleaning tool. Dry before storing.
4
Under running water, rotate the cleaning tool
and the strainer in opposite directions to clean.
2
Thoroughly rinse the inside and outside of
the strainer under running water.
3
* The products illustrated in this booklet may vary slightly from the actual product.
Cleaning inside of the bowl
If needed, unscrew the cover on the bottom and clean
inside. After cleaning, make sure that protrusion part of
gear is placed on the outer part so it ts (connects) with the
juicing bowl. Sequence of assembly is in reverse order of
disassembly.
EN

2322
HOW TO USE THE BLANK STRAINER
* Dissemble is opposite of Assemble.
Insert the blank strainer into the juicing bowl
while aligning the red dots ●of the blank strainer
and the juicing bowl.
Insert the juicing screw into the blank strainer
with a twisting motion.
Place the lid onto the juicing bowl by aligning the
red dots ●of the lid and the juicing bowl. Then,
rotate the lid clockwise until the lid is secured.
The blank strainer is used to process frozen fruits into sorbets, ice creams, and other frozen treats. Before
use, make sure the silicone ring is correctly in place.
Drum Lid
Juicing Screw
Blank Strainer
Juicing Bowl
To assemble the top set, place the juicing screw
and the blank strainer in the juicing bowl and
close the lid.
①
②
③
When using the blank strainer,
always leave the Smart Cap open.
Place the assembled top set onto the base.
Align the arrow ▼from the lid with the
OPEN sign from the base and rotate the
topset clockwise until the arrow ▼from
the lid is in CLOSE position.
Base
TopSet
HOW TO CLEAN THE SILICONE RING
The blank strainer is used only with frozen ingredients to make sorbets, ice creams, etc.
Depending on the dierent ingredients, allow the frozen items to thaw for 5 to 20 minutes
before use. Slowly process a smaller amount per batch.
CAUTION
※ Do not use ice or process ingredients containing vegetable or animal oil.
It may cause a malfunction.
※
Remove hard seeds from the ingredients and peel the skins from the ingredients
before juicing.
1
1
1
2
Carefully place the silicone ring
by aligning grooves and wedges.
TIP |
The silicone ring is removable for cleaning.
After cleaning, place the silicone ring on
as shown in the picture.
EN
ICE

2524
HOW TO USE THE COARSE STRAINER
* Dissemble is opposite of Assemble.
Insert the rotation wiper and the coarse strainer
into the juicing bowl while aligning the red dot ●
of the coarse strainer and the juicing bowl.
Insert the juicing screw into the coarse strainer
with a twisting motion.
Place the lid on to the juicing bowl aligning the
red dot ●of the drum lid and the juicing bowl.
then twist the drum lid clockwise until II sign
aligns with the red dot ●on the juicing bowl.
The coarse strainer is used for optimal juicing of hard fruits, vegetables, greens, and beans/nuts for
making milks.
Make sure to insert the coarse strainer into the rotation wiper before use.
To assemble the top set, place the juicing screw
and the coarse strainer in the juicing bowl and
close lid.
①
②
③
Place the assembled top set onto the base.
Align the arrow ▼from the lid with the
OPEN sign from the base and rotate the
topset clockwise until the arrow ▼from
the lid is in CLOSE position.
Base
TopSet
CAUTION
1
1
1
2
• When using ‘‘COARSE STRAINER’ make sure to remove any hard seeds or pits
from ingredients.
• Remove skin or rind that is tough, hard and/or leathery.
• When juicing frozen ingredients, make sure they are completely thawed,
do not use ice.
• Do not try to juice ingredients containing vegetable or animal oil.
This can reduce performance and even damage the juicer.
• Do not put the following ingredients into the juicer; coconut, kudzu,
sugarcane, whole gains etc.
Drum Lid
Juicing Screw
Rotation Wiper
Juicing Bowl
Coarse
Strainer
When using the coarse strainer,
always leave the Smart Cap open.
EN

2726
HOW TO USE THE SMOOTHIE STRAINER
* Dissemble is opposite of Assemble.
Align the arrow ▼from the lid with the
OPEN sign from the base and rotate the
topset clockwise until the arrow ▼from
the lid is in CLOSE position.
CAUTION
Place the assembled top set onto the base.
When making smoothie, add milk or other types of liquid between ingredients.
Check the consistency of the smoothie by looking through the juicing bowl, and add more liquid as needed.
(The required period to thaw the ingredients will depend on how long the ingredients were
in the freezer and the temperature it was kept in.)
When using frozen ingredients, make sure to thaw your frozen ingredients for about 5 to
20 minutes before use.
※ Please do not insert ingredients like ice, meat, oil or fat based ingredients.
These ingredients may damage the components.
※ Please remove hard or thick seeds, pits, or peel before use.
Align the arrow ▼from the lid with the
OPEN sign from the base and rotate the
topset clockwise until the arrow ▼from
the lid is in CLOSE position.
CAUTION
Insert the rotation wiper and the smoothie strainer
into the juicing bowl while aligning the red dots ●of
the smoothie strainer and the juicing bowl.
Insert the juicing screw into the smoothie strainer
with a twisting motion.
Place the lid onto the juicing bowl by aligning the red
dots ●of the lid and the juicing bowl. Then, rotate
the lid clockwise until the lid is secured.
To assemble the top set, place the juicing screw and
the smoothie strainer in the juicing bowl and close
the lid.
①
②
③
When using the smoothie strainer, make sure the
smart cap is closed to make the better smoothies.
ICE
Drum Lid
Juicing Screw
Smoothie
Strainer
Rotation Wiper
Juicing Bowl
1
1
1
2
Base
TopSet
HOW TO CLEAN THE SILICONE COVER
Carefully place the silicone cover
by aligning grooves and wedges.
TIP |
The silicone cover is removable for cleaning.
After cleaning, place the silicone cover in
regular sequence on as shown in the picture.
①
②
EN

2928
HOW TO USE LID OPENER
Use the lid opener if the lid doesn't open gently after juicing.
Grab the feeding tube and turn the lid opener counterclockwise.
1
2
Be sure that the top set is on the main body, then use lid opener.
Connect the hooks as shown in the illustration.
1
1
1
CAUTIONCAUTION
TROUBLESHOOTING Q&A
When there is no power:
·Check if the power cord is properly plugged in.
·Check if the drum lid and the juicing bowl are
properly assembled.
·Check if the top-set and the body are properly
assembled.
·Juicer will not operate if parts are not properly
assembled and if the arrows do not align.
Low juice yield:
·Dierent ingredients produce varying amounts
of uid that will yield dierent amounts of juice.
·If the ingredients are not fresh, they may
contain reduced amount of uid, which will
yield less juice. Soak ingredients in cold water
for about 30 min prior to juicing for the best
results.
·If the ingredient itself has low water content,
it may help to soak it in water before juicing.
·If juicing ingredients with small seeds, after a
few servings, it may reduce the juice yield.
For best result, disassemble and wash the top-
set in between juicing.
·If there is seed residue on the bottom of the
strainer, this can aect juicer performance and
the overall juice yield.
Too much pulp in juice:
·To reduce the ne pulp, clean the top-set
frequently and extract the pulp.
·Use a mesh strainer and put the juice through
it to collect the unwanted pulp.
·Cutting down brous foods into smaller pieces
and juicing them at a slower pace can reduce
pulp buildup inside the juicer.
·If the strainer and the screw are damaged
and aecting the juicer’s performance, it is
recommended the parts be replaced.
*The lifetime of each part may vary depending
on length and method of use and ingredients
extracted.
The drum lid will not close:
·Make sure the juicing screw is pushed all the
way in to the strainer in order for the drum lid
to close properly.
·If the juicing screw is not properly in position,
the drum lid may not close.
Odd noise from the juicer:
·Check if the parts are assembled correctly.
Try reassembling the parts and listen for the
odd noise.
·Do not run the juicer without any ingredients.
·Operating the juicer without ingredients can
cause damage to the screw.
·If the juicer is operated without ingredients or
liquid, the noise level can increase and also can
lead to damage.
·The friction noise from the juicing screw and
the strainer will disappear when ingredients
are inserted into the juicer.
·If the noise occurs when ingredients are
inserted into the juicer, check the size of the
ingredients. Do not insert any hard ingredients
that are more than 1 inch thick.
·The noise can occur if the juicer is operated on
an uneven or slanted surface. Place the juicer
on a horizontally at surface when operating.
The extracted pulp is very moist:
·During the very beginning of extraction,
the pulp can be more moist.
·There may be pulp buildup inside the juicer.
Clean the parts to remove excess pulp or pieces
of food that may be clogged.
During operation, the juicing bowl shakes.
·The juicing screw and the strainer are set up to
crush and squeeze the ingredients. It is normal
for the juicing screw and the strainer to vibrate.
·If the ingredient contains strong ber,
the vibration from the top-set may be stronger.
EN

3130
SPECIFICATIONS
Voltage
Power Consumption
Maximum Use
Weight
Dimension
Manufacturer
Type
Origin
Product
Model
Juicer
AC220-240V, 50/60Hz
240W
Less than 30 min
NUC Electronics Co., Ltd.
Low speed compression
Made in Korea
ULD-1272CB
7.1kg
201 x 239 x 490 (mm)
During juicing, the motor stopped:
·Check the power cord and make sure it is
plugged in correctly.
·Check that all the parts are correctly assembled.
·If too many ingredients are inserted at one time,
this can cause the juicer to stop.
·When the juicer stops because there are too
many ingredients inserted in it, press the
REVERSE - OFF - FORWARD button in this order,
switching back and forth 2 to 3 times.
·The reverse setting will push the ingredients up,
and the forward setting will pull the ingredients
down.
·After using more than 30 minutes continuously,
the overload protection feature may stop the
juicer. Let the juicer cool for 30 minutes to 1
hours before juicing again.
·If there are hard seeds within the ingredients,
remove them before juicing. Hard seeds can
damage the juicer.
Layers of separation in the juice:
·
Depending on the density of the ingredients, the
extracted juice may show layers of dierent juices.
It is dierent from separation due to oxidation
caused by juicing with a high-speed juicer.
The drum lid is stuck:
·After juicing, let the juicer operate for another
30 seconds to extract the remaining pulp.
·
If there is too much pulp in the top-set, this can cause
the drum lid to not open. In this situation, press
the REVERSE-OFF-FORWARD button in the order,
switching back and forth 2 to 3 times. Then place both
hands on the drum lid and firmly press down while
simultaneously turning the drum lid to open.
·Pour water down the feeding tube to rinse out
the insides and then try opening the drum lid.
Juice dripping down the body:
·
If the silicone ring on the bottom of
the juicing bowl is not plugged in correctly,
the juice may seep out on to the juicer body.
Before assembling the parts, check and make sure
the silicone ring is plugged in correctly.
Is it possible to juice ingredients with
tough ber?
·Ingredients like celery or ginger contain long
bers that may wrap around the juicing screw
and aect the juicer’s performance. When
juicing brous ingredients, cut them down
to smaller pieces and alternate with other
ingredients. Clean the top set regularly if
juicing larger amounts of brous produce.
Plastic parts are discolored:
·After juicing, if the juicer is not cleaned right
away, the remaining pulp inside the top-set
can dry up which can make disassembling and
cleaning hard. This can also aect the juicer’s
performance and color.
·Ingredients that are rich in carotenoids such
as carrots and spinach may dye plastic parts.
When the parts are dyed with carotenoids, rub
vegetable oil or lemon juice in to the dyed
areas and use mild detergent to clean.
·Vegetable oil should only be used during
clean-up for parts that are discolored. Do not
use vegetable oil on the juicing screw or the
strainer. If vegetable oil or oil from animal fat
gets on the juicing screw or the strainer, this
can aect the juicer’s performance and may
result in damaged parts.
·The silicone pieces on the top-set can be
detached to be thoroughly cleaned.
Using for dierent purposes:
·This juicer is designed for home use to juice
ingredients like fruits, vegetables, soaked nuts,
and soaked soybeans.
·Do not use the juicer for extracting oils or butters.
·Do not juice ingredients with high contents of
vegetable/ animal oil.
·If vegetable/animal oil gets on the juicing screw
or the strainer, this can aect the performance
of the juicer and could result in damaged parts.
TROUBLESHOOTING Q&A
EN

M12
• Après avoir lu ce manuel, conservez-le à
portée de main.
• La couleur du produit peut être différente.
• À usage domestique uniquement.
EXTRACTEUR BASSE
VITESSE KUVINGS
MANUEL
FR

3534
RECOMMANDATIONS IMPORTANTES
Lire toutes les instructions.
Pour éviter tout risque d’électrocution, ne pas placer le bloc moteur dans
l’eau ou dans un autre liquide.
Les enfants doivent être surveillés pour qu'ils ne jouent pas avec l'appareil.
Débranchez l’appareil de la prise de courant lorsqu’il n’est pas utilisé avant
de monter ou de démonter des pièces et avant de le nettoyer.
Évitez tout contact avec des pièces en mouvement.
Si le cordon d'alimentation est endommagé, il doit être changé par
le fabricant ou une personne qualiée.
L’utilisation d’accessoires non recommandés ou non vendus par le fabricant
peut causer un incendie, une électrocution ou des blessures.
Ne pas utiliser à l’extérieur.
Ne pas laisser pendre le câble d’alimentation de la table ou du plan de travail.
Assurez-vous toujours que le couvercle est bien fermé avant de mettre le
moteur en marche. Ne pas ouvrir le couvercle pendant que l’extracteur de
jus est en marche.
Assurez-vous d’appuyer sur le bouton OFF après chaque utilisation de votre
extracteur de jus. Assurez-vous que le moteur est complètement à l’arrêt
avant le démontage.
1.
2.
3.
4.
5.
6.
7.
8.
9.
10.
11.
pendant que le moteur est en marche. Si des aliments sont bloqués,
utilisez le poussoir ou un autre morceau de fruit pour pousser vers le
bas. Si cette méthode ne marche pas, arrêtez le moteur puis démontez
l’extracteur de jus pour retirer les aliments restants.
N’utilisez pas l’appareil si le balai de rotation est endommagé.
N’utilisez pas l’appareil si le collecteur de pulpe n'est pas en place.
Please do not alter the appliance in anyway.
N’altérez/ne modiez pas l’appareil de quelque manière que ce soit.
N’utilisez pas l’appareil à des ns autres que celles indiquées dans le
manuel.
L’appareil doit être utilisé pour une durée limitée.
Cet appareil peut être utilisé par un enfant de plus de 8 ans ou des
personnes handicapées s'ils ont été bien formés sur le mode
d'utilisation par une personne compétente. Les enfants ne doivent
pas jouer avec l'appareil. Pendant le nettoyage et l'utilisation, les
enfants doivent être sous surveillance d'adulte.
Cet appareil ne doit pas être utilisé par des enfants ou des personnes
handicapées, sans avoir reçu des instructions sur l'utilisation par une
personne responsable.
12.
13.
14.
15.
16.
17.
18.
19.
Respectez toujours les consignes de sécurité de base lorsque vous utilisez
des appareils électriques.
ㆍ
Cet appareil est exclusivement destiné à un usage domestique. Veuillez suivre
attentivement les instructions contenues dans le manuel.
(L’appareil ne peut bénécier de la garantie du fabricant s'il est utilisé d’une manière
non prévue par le fabricant ou à but commercial.)
ㆍConservez le manuel d’utilisation pour une consultation ultérieure.
ㆍSi l'appareil est transmis à quelqu'un, veuillez remettre cette notice.
ㆍ
Ces instructions se retrouve sous d'autres formats sur le site.
e.g.on a website. www.kuvings.com
CONSERVEZ CEZ INSTRUCTIONS
FR
TABLE DES MATIERES
Recommandations importantes
Avertissement de sécurité
Pièces
Assemblage
Mode d'emploi
Conseils d'utilisation
Conseils sur les ingrédients
Préparation des ingrédients
Comment démonter et nettoyer l’appareil
Nettoyer les pièces en silicone
Utilisation de la brosse rotative
Utilisation du tamios à sorbets
Utilisation du tamis à coulis
Utilisation du tamis à smoothies
Utilisation de l'ouvre couvercle
Q&R résolution de problèmes
Caracteristiques
34
36
38
40
42
44
45
46
50
52
53
54
56
58
60
61
63

3736
AVERTISSEMENTS DE SÉCURITÉ INSTRUCTIONS DE SÉCURITÉ
Les précautions suivantes sont fournies an d’assurer la sécurité de l’utilisateur. Veuillez
lire attentivement toutes les consignes et faire attention lorsque vous utilisez l’appareil.
Avertissement : Ce symbole signale le risque de mort ou de blessures graves.
Attention : Ce symbole signale le risque de blessures ou d’endommagement de l’appareil.
Interdit
Suivre les instructions
Débrancher la prise de l'appareil
Ne pas démonter
Il faut prendre une mesure
Faire attention aux chocs électriques
Ne pas réparer, désassembler la base, ou modier l’appareil.
→
L’appareil pourrait ne pas fonctionner correctement,
engendrer un incendie, un choc électrique, ou être
à l’origine d’une blessure.
Ne pas mettre les pièces dans le lave-vaisselle ou dans une eau
extrêmement chaude.
→Les pièces peuvent s’user plus vite.
Ne pas utiliser l’appareil sur une surface irrégulière.
→Cela peut engendrer un dysfonctionnement si l’appareil bascule.
Pour protéger le cordon d’alimentation électrique, veuillez ne pas le
plier brutalement ou placer d’objet lourd sur le cordon
d’alimentation électrique.
→Il peut être à l’origine d’un court-circuit ou même d’un incendie.
Tenir éloigné des enfants et conserver l’appareil dans un endroit sûr.
→Il peut être à l’origine d’une blessure.
Veuillez ne pas conserver ou utiliser l’appareil à proximité d’une
source de chaleur.
→L’appareil peut subir un changement de couleur ou
une déformation.
Ne pas utiliser de produits chimiques dangereux pour nettoyer
l’appareil, vaporiser ou pulvériser de liquides inammables à
proximité de l’appareil.
→
Ils pourraient être à l’origine d’un changement de couleur de
l’appareil ou conduire à un incendie.
Ne pas brancher plusieurs cordons d’alimentation électrique sur une
seule prise pendant le fonctionnement.
→Cela peut engendrer une explosion ou un incendie.
Ne pas toucher le cordon d’alimentation électrique avec des
mains humides.
→Cela peut engendrer un choc électrique.
Utiliser un tissu sec pour nettoyer le cordon d’alimentation s’il
est sale ou humide.
→Cela peut engendrer un choc électrique ou un incendie.
Ne pas faire tomber l’appareil ou soumettre l’appareil à une force
importante.
→Cela peut endommager ou casser l’appareil.
Ne pas débrancher en tirant directement sur le cordon
d’alimentation électrique.
→
Cela peut endommager le cordon d’alimentation électrique et
engendrer un choc électrique.
Ne pas placer son doigt ou un autre objet dans le tube d’alimentation
lorsqu’il est en fonctionnement.
→Cela peut être à l’origine d’une blessure.
Ne pas laisser l’appareil sans surveillance. Débrancher le cordon
électrique de la prise en dehors des périodes d’utilisation.
Utiliser le presse-agrume sans ingrédients peut entrainer des
dommages du cône.
FR

3938
+
+
+
+
+
+
Alignez les points rouges ●gurant de
chaque côté et assemblez dans l'ordre
indiqué. Une fois assemblé, faites tourner
le couvercle dans le sens des aiguilles
d'une montre pour fermer.
* Les produits illustrés/photographiés dans ce manuel peuvent diérer légèrement du produit réel.
ÉTAPE 1
Assemblage du bloc supérieur
ÉTAPE 2
Assemblage du bloc supérieur avec la base
Placez le couvercle sur le bol d'extraction.
Alignez la èche vers le bas ▼ qui se
trouve sur le couvercle avec la marque
OPEN (OUVRIR) sur la base et tournez
vers la position CLOSE (FERMER).
2. Bol d’extraction
3. Bac à bres 6. Bac à jus
4. Smart Cap (Capuchon)
5. Base
Détachable
* Tube d'alimentation
Panier
d'alimentation Tube
d'alimentation
PIÈCES
+
+
+
+
+
+
FR
1. Couvercle
11.
Brosse de
nettoyage
14. Brosse ronde
(Optionnelle)
12.
Brosse rotative
13.
Ouvre Couvercle
17. Tamis à smoothies
(Optionnelle)
9.
Vis de pressage
7.
Balais rotatif
8.
Filtrer
10.
Poussoir
16. Tamis à coulis
(Optionnelle)
15. Tamis à sorbets
(Optionnelle)
Table of contents
Languages:
Other Kuvings Juicer manuals

Kuvings
Kuvings JUICE EXTRACTOR User manual

Kuvings
Kuvings M12 User manual

Kuvings
Kuvings NS-721 User manual

Kuvings
Kuvings Silent juicer User manual

Kuvings
Kuvings REVO830 User manual

Kuvings
Kuvings NS-110CEM User manual

Kuvings
Kuvings NJE-3520U User manual

Kuvings
Kuvings NS-995UL User manual

Kuvings
Kuvings Witt C9600 User manual

Kuvings
Kuvings NS-995UL User manual