manuals.online logo
Brands
  1. Home
  2. •
  3. Brands
  4. •
  5. Kwikset
  6. •
  7. Lock
  8. •
  9. Kwikset SMARTKEY User manual

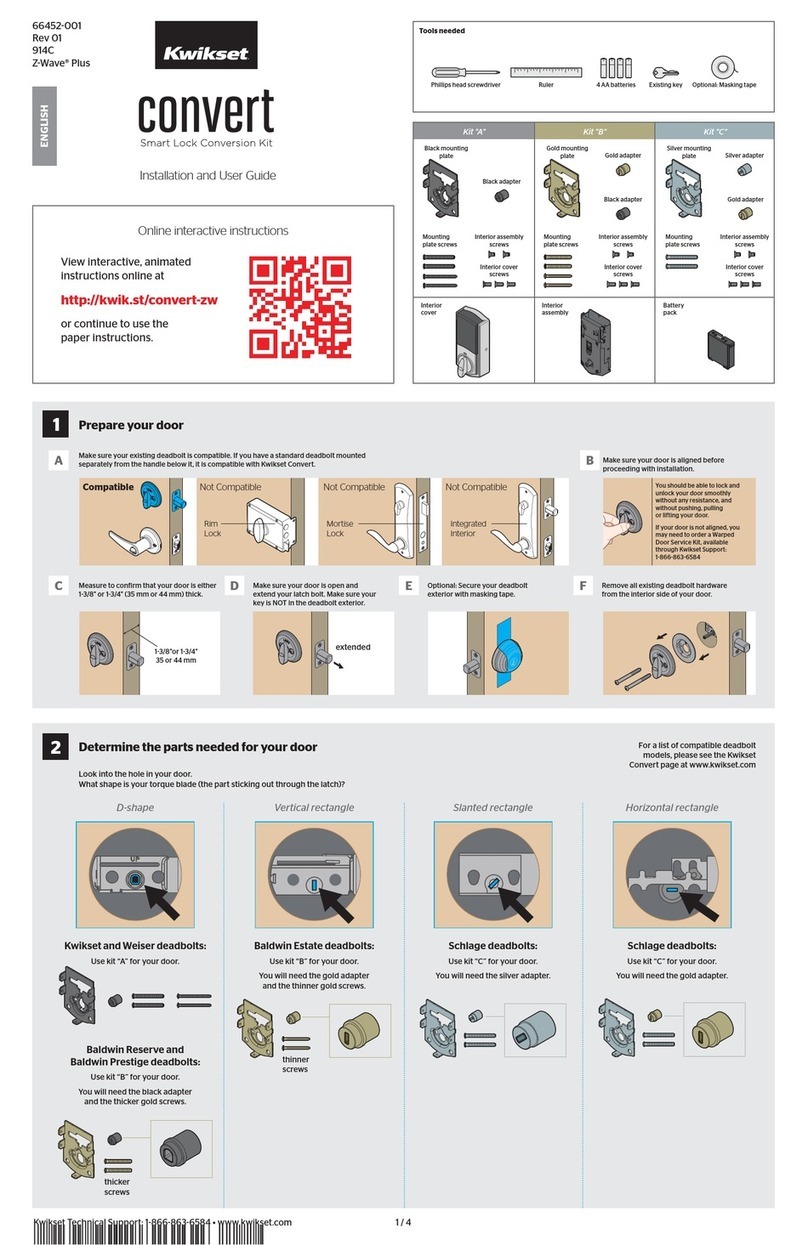
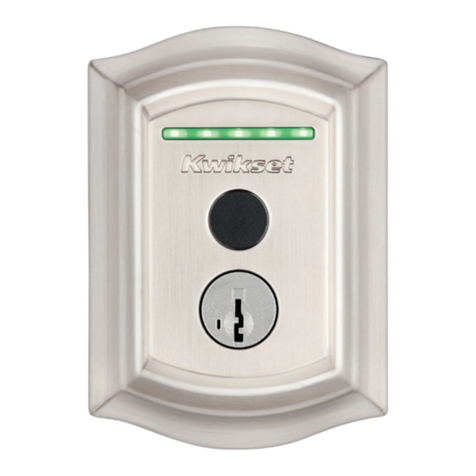
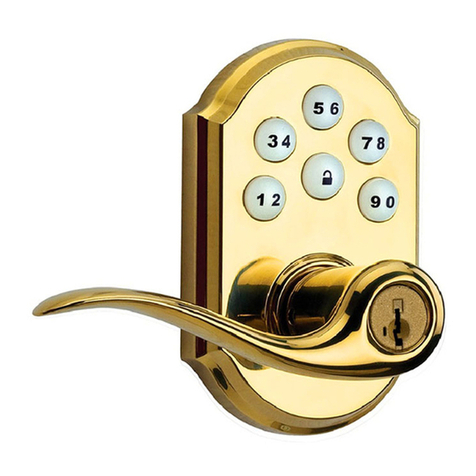
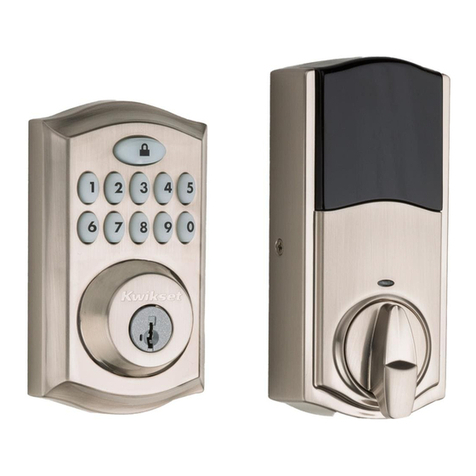
Kwikset SMARTKEY User manual

ATTENTION
CAUTION
While holding the cylinder body stationary, rotate the key
back to the home position.
Remove the key. Reinstall cylinder in product.
HALF TURN
DEMI-TOUR
MEDIA VUELTA
HALF TURN
DEMI-TOUR
MEDIA VUELTA
2
3
Avant de commencer, tournez le cadran inférieur complètement vers la
droite pour aligner la flèche du cadran supérieur avec le point de
départ du cadran intérieur.
Insert cylinder all the way into the
inner dial.
Insérez le cylindre jusqu’au fond du
cadran intérieur.
Introduzca el cilindro hasta el fondo
dentro del disco interior.
Insert the SmartKey tool into the small hole (next to the keyway) on the cylinder
face, and push wIth force until it goes all the way in, then remove the SmartKey
tool.
Insert the key you want to learn in the
plug, while being sure not to rotate the
plug.
Remove the plug from the reset cradle by
gently pulling on the key.
Sortez le cylindre du berceau de réglage
en tirant doucement sur la clé.
Before you begin, rotate lower dial to the right until it
stops, to align arrow on upper grip with start point
on inner dial.
Antes de comenzar, gire el disco inferior a la derecha hasta que se
detenga, y alinee la flecha en el fijador de ajuste con el punto de
comienzo en el disco interior.
Para evitar daño físico, mantega la cuna lejos de los niños y no meta el dedo
en el centro del disco interior. 43875 /02
Insérez l’outil SmartKey dans le petit trou (à côté du chemin de clé) situé sur la
face du cylindre et poussez-le fermement pour le faire entrer jusqu’au fond, puis
retirez l’outil SmartKey.
Inserte la herramienta SmartKey en el agujero pequeño (al lado de la
bocallave) en la cara del cilindro, y empújela con fuerza hasta que quede
insertado totalmente, luego saque la herramienta SmartKey.
Insérez la clé que vous désirez utiliser
dans le cylindre en prenant soin de ne
pas tourner le cylindre.
Inserte la llave que desee que se
reprograme en el cilindro, asegurándose
mientras tanto de no girar el cilindro.
Saque el cilindro de la cuna jalando la llave
con cuidado.
Replacez le cylindre dans le produit.
Vuelva a instalar el cilindro en el producto.
Retirez la clé.
Saque la llave.
Tout en maintenant immobile le corps du cylindre, tournez
la clé pour la faire revenir à sa position de repos.
Mientras detiene el cuerpo del cilindro en su lugar, gire la
llave de regreso a la posición inicial.
SMARTKEY RESET CRADLE
BERCEAU DE RÉGLAGE SMARTKEY
CUNA PARA RESTABLECER SMARTKEY
Rotate lower dial half turn to the left until it stops,
where the two arrows meet.
Tournez le cadran inférieur d’un demi-tour vers la
gauche jusqu’à ce qu’il s’arrête au point de rencontre
des deux flèches.
Gire el disco de abajo dándole media vuelta a la
izquierda hasta que se detenga, donde ambas
flechas se juntan.
CUIDADO
Pour éviter le risque des dommages de lacération, gardez le berceau hors de la
proximité des enfants et n'insérez pas le doigt dans le trou central de cadran.
To avoid risk of laceration injury, keep reset cradle out of the reach of children
and DO NOT insert finger in the center dial hole.
1
注意
AVISO
Enquanto mantém o corpo do cilindro no lugar, gire a
chave de volta à posição inicial.
Remova a chave. Reinstale o cilindro no produto.
注意
MEIA VOLTA
转半圈
旋轉半圈
MEIA VOLTA
转半圈
旋轉半圈
2
3
开始前, 向右旋转下转盘直至转不动为止,确保下转盘顶部小圆圈里的
竖线和上转盘的箭头对齐
重設之前,先將底盤向右旋轉到底,使上握圈的箭頭與內圈起點對齊
Introduza o cilindro até o fundo dentro
do disco interior.
将锁芯嵌入内圈,直止到底。
將鎖心垂直插入內圈,一直到底。
Insira a ferramenta SmartKey no pequeno orifício (ao lado do buraco de
fechadura) na face do cilindro, e empurre com força até que entre totalmente.
Então, retire a ferramenta SmartKey.
Insira a chave que deseja programar no
cilindro, assegurando-se, por enquanto,
de não girar o cilindro.
Retire o cilindro da base puxando a chave
com cuidado.
轻轻拖动钥匙,连锁芯一起从复位转盘上取出
。
輕輕拉動鑰匙, 把鎖心從支座中拔出來。
Antes de começar, gire o disco inferior para a esquerda até que
pare e alinhe a seta da parte superior com o ponto de início
do disco interior.
智能校锁片插入锁芯面的小孔里,(钥匙孔边),用力将其插到底, 再拔出智能校锁片。
把 SmartKey 工具插入鎖心表面的小洞中(位於鑰匙孔旁),用力插到底,然後把
SmartKey 工具拔出。
将您想要新配的钥匙插入锁孔, 同时确
保不转动锁芯。
插入您想配對的鑰匙,小心不要轉動鎖心。
将锁芯重新装入产品中。
把鎖心裝回鎖組中。
拔出钥匙。
拔出鑰匙。
握住鎖心柱身不動,把鑰匙轉到原點。
稳稳拿住锁芯, 将钥匙转回原位。
BASE PARA RESTABELECER A SMARTKEY
智能锁复位转盘 SMARTKEY
重設支座 SMARTKEY
Gire o disco inferior dando meia volta para a esquerda
até que pare, onde ambas as setas se juntam.
下转盘向左旋转半圈直至停止,这时两个箭头会交汇。
將底盤向左旋轉半圈到底,使兩個箭頭對齊。
为避免伤害, 请将复位转盘放到儿童无法拿到的地方, 而且请勿将手指伸入孔内
Para evitar ferimentos, mantenha a base fora do alcance de crianças e NÃO
insira o dedo no centro do disco interior.
1
為了避免造成撕裂傷,請將重設支座放在放在兒童拿不到的地方,
而且切勿將手指放入中央圓孔中
Copyright © 2010 Black & Decker Corporation 43875 /02

Other Kwikset Lock manuals

Kwikset Deadbolt Series User manual

Kwikset

Kwikset Deadbolt Series User manual

Kwikset PL1 User manual

Kwikset

Kwikset PL1 User manual

Kwikset SMARTCODE 916 User manual

Kwikset

Kwikset SMARTCODE 916 User manual

Kwikset 48803 / 01 BP User manual

Kwikset

Kwikset 48803 / 01 BP User manual

Kwikset Kevo User manual

Kwikset

Kwikset Kevo User manual

Kwikset SmartCode 909 User manual

Kwikset

Kwikset SmartCode 909 User manual

Kwikset SmartKey Series User manual

Kwikset

Kwikset SmartKey Series User manual

Kwikset OBSIDIAN User manual

Kwikset

Kwikset OBSIDIAN User manual

Kwikset 24896/04 User manual

Kwikset

Kwikset 24896/04 User manual

Kwikset Smartcode 914 User manual

Kwikset

Kwikset Smartcode 914 User manual

Kwikset 985 User manual

Kwikset

Kwikset 985 User manual

Kwikset HomeConnect 620 User manual

Kwikset

Kwikset HomeConnect 620 User manual

Kwikset SMARTCODE 916 User manual

Kwikset

Kwikset SMARTCODE 916 User manual

Kwikset HomeConnect 620 Instruction Manual

Kwikset

Kwikset HomeConnect 620 Instruction Manual

Kwikset Smartcode 914 User manual

Kwikset

Kwikset Smartcode 914 User manual

Kwikset SMARTCODE 915 User manual

Kwikset

Kwikset SMARTCODE 915 User manual

Kwikset Smartcode 914 Operating instructions

Kwikset

Kwikset Smartcode 914 Operating instructions

Kwikset Powerbolt2 User manual

Kwikset

Kwikset Powerbolt2 User manual

Kwikset SmartCode Series Assembly instructions

Kwikset

Kwikset SmartCode Series Assembly instructions

Kwikset Powerbolt 250 User manual

Kwikset

Kwikset Powerbolt 250 User manual

Kwikset SmartCode 913 User manual

Kwikset

Kwikset SmartCode 913 User manual

Kwikset Signature Series Austin 788AUL LH 11P User manual

Kwikset

Kwikset Signature Series Austin 788AUL LH 11P User manual

Kwikset Kevo Installation guide

Kwikset

Kwikset Kevo Installation guide

Kwikset HALO User manual

Kwikset

Kwikset HALO User manual

Popular Lock manuals by other brands

Axelent X-GUARD T10-12 Assembly guide

Axelent

Axelent X-GUARD T10-12 Assembly guide

ABB GKey quick guide

ABB

ABB GKey quick guide

Sears 139.53716 Installation

Sears

Sears 139.53716 Installation

Yale 501F installation instructions

Yale

Yale 501F installation instructions

Yakima SKS Series Installation

Yakima

Yakima SKS Series Installation

Conrad 75 42 86 operating instructions

Conrad

Conrad 75 42 86 operating instructions

iLoq D10 Series Mounting and care instructions

iLoq

iLoq D10 Series Mounting and care instructions

Lockwood ASSA ABLOY Induro installation instructions

Lockwood

Lockwood ASSA ABLOY Induro installation instructions

Securam SafeLogic C10 D-Drive operating instructions

Securam

Securam SafeLogic C10 D-Drive operating instructions

INSYS CombiLock 200 simplex manual

INSYS

INSYS CombiLock 200 simplex manual

Eon RTE-302 installation manual

Eon

Eon RTE-302 installation manual

Alarm Lock Trilogy DL4100 Series Addendum Programming instructions

Alarm Lock

Alarm Lock Trilogy DL4100 Series Addendum Programming instructions

Assa Abloy Yale SIMPLICITY Mounting instructions

Assa Abloy

Assa Abloy Yale SIMPLICITY Mounting instructions

KAS Z-WAVE DIGITAL LOCK Manual operation guide

KAS

KAS Z-WAVE DIGITAL LOCK Manual operation guide

StarTech.com LTLOCKKEY manual

StarTech.com

StarTech.com LTLOCKKEY manual

Gemini GE370 BASIC PROGRAMMING STEPS

Gemini

Gemini GE370 BASIC PROGRAMMING STEPS

SG Rotarybolt Z03 installation instructions

SG

SG Rotarybolt Z03 installation instructions

Gianni Industries EM-1200 specification

Gianni Industries

Gianni Industries EM-1200 specification

manuals.online logo
manuals.online logoBrands
  • About & Mission
  • Contact us
  • Privacy Policy
  • Terms and Conditions

Copyright 2025 Manuals.Online. All Rights Reserved.