manuals.online logo
Brands
  1. Home
  2. •
  3. Brands
  4. •
  5. Kyocera
  6. •
  7. Printer Accessories
  8. •
  9. Kyocera FS-1700 User manual

Kyocera FS-1700 User manual

1
English
Note on Paper
Before purchasing paper, test a sample on the printer installed with
the paper feeder and check that printing quality is satisfactory.
Notice
We shall have no liability or responsibility to customers or any other person or
entity with respect to any liability, loss or damage caused or alleged to be caused
directly or indirectly by equipment sold or furnished by us, including but not
limited to, any interruption of service, loss of business or anticipatory profits, or
consequential damages resulting from the use or operation of the equipment or
software.
Caution
NO LIABILITY IS ASSUMED FOR ANY DAMAGE CAUSED BY
IMPROPER INSTALLATION.
The information in this manual is subject to change without notification.
Additional pages may be inserted in future editions. The user is asked to excuse
any technical inaccuracies or typographical errors in the present edition.
o responsibility is assumed if accidents occur while the user is following the
instructions in this manual.
The contents of this manual are protected by copyright. o part of this manual
may be reproduced or copied by any means without the permission of the
copyright holder.
Regarding Tradename
PRESCRIBE is a registered trademark of Kyocera Corporation.
2
Radio interference requirement in European countries
The option bulk paper feeder PF-7E is intended for use with the printer models
FS-1700 and FS-3700 which are type tested and categorized as a Class A
computing device in accordance with the E 55022 rules.
Devices in the Class A category may cause interference to radio or television
reception particularly in a residential installation.
CAUTION This equipment has een tested and found to comply with the
limits for a Class A digital device, pursuant to Part 15 of the
FCC Rules. These limits are designed to provide reasona le
protection against harmful interference when the equipment
is operated in a commercial environment. This equipment
generates, uses, and can radiate radio frequency energy and,
if not installed and used in accordance with the instruction
manual, may cause harmful interference to radio
communications. Operation of this equipment in a
residential area is likely to cause harmful interference in
which case the user will e required to correct the
interference at his own expense.
3
English
Table of contents
Introduction ............................................................................................................ 4
Packing List .................................................................................................. 5
Setup ........................................................................................................................ 5
Choosing a Location ..................................................................................... 5
Installation .............................................................................................................. 6
Removing the Multi-purpose Tray ............................................................... 6
Installing the Base and the Printer ................................................................ 8
Installing the Bulk Paper Feeder .................................................................. 9
Operating the Optional Bulk Paper Feeder ...................................................... 11
Loading Paper ............................................................................................. 11
Loading Envelopes and Postcards .............................................................. 13
Loading Paper in the Printers Cassette ............................................................ 14
Selecting Paper Feed from the Optional Paper Feeder ................................... 14
Selection from the Printers Control Panel ................................................. 14
Setting the Paper Size ................................................................................. 15
Setting the paper size from the control panel ............................................. 15
Selection Using PRESCRIBEs CASS Command ..................................... 16
In Case of Trou le ................................................................................................ 17
Clearing Paper Misfeeding ......................................................................... 17
Troubleshooting Procedures ....................................................................... 18
Paper Selection ..................................................................................................... 19
General Guidelines ..................................................................................... 19
Paper Specifications .................................................................................... 19
Selecting the Right Paper ............................................................................ 20
Paper Storage .............................................................................................. 22
Envelopes and Postcards ............................................................................. 22
Curly Envelopes .......................................................................................... 24
Storage of Envelopes and Postcards ........................................................... 25
Specifications ........................................................................................................ 25
4
Introduction
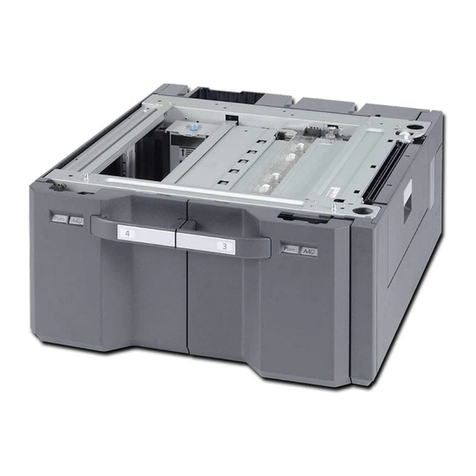
The PF-7E is a bulk paper feeder for Kyocera laser printers. By removing the
multi-purpose tray and attaching the bulk paper feeder to the option paper feeder
slot at the front of the printer, you can continuously print on up to 2,000 sheets of
paper (at paper thickness of 0.1 mm). At the same time, you can still select the
printers normal paper cassette for the alternative paper source. The bulk paper
feeder is shipped with a base that provides mounting for both the printer and the
paper feeder. You can select the source of paper supply yourself using the
switches on the printers FEE key on the control panel or by the CASS
command of the PRESCRIBE command language.
Before using the optional bulk paper feeder, please read this manual, then
carefully follow all instructions given for installing and using the optional paper
feeder. The printer illustrations used in this manual are of the FS-3700.
Printer
Paper Feeder
(PF-7E)
Base PB-20
(Option)
5
English
Packing List
Make sure that the optional bulk paper feeder package contains each of the
following items in the indicated quantities.
FPF-7E optional bulk paper feeder, 1
FInstruction manual (this booklet), 1
Setup
The PF-7E is set up by placing itself and the printer on the base (option),
removing the printers multi-purpose tray and attaching the bulk paper feeder to
the front of the printer. Power for the paper feeder is supplied directly from the
printer through connectors on the base.
CAUTION Before installing (or removing) the optional ulk paper
feeder, e sure to turn off the printers power.
Choosing a Location
The feeder will work best if it is installed in a location that is:
FLevel and well-supported: Place the base on a sturdy table or desk.
Fot exposed to sunlight or other bright light (not next to an uncurtained
window).
FWell ventilated, not too hot or cold, and not too damp or dry:
Temperature should be 10 to 32.5°C, ideally about 20°C (50 to 90°F,
ideally about 68°F). Humidity should be 20 to 80%, ideally 65%.
6
Installation
Removing the Multi-purpose Tray
Before installing the bulk paper feeder, remove the multi-purpose tray from the
front of the printer. The procedure is as follows.
Note The printers multi-purpose tray cannot e used together
with the optional ulk feeder.
1. Pull the printers paper feed unit release lever, then draw the paper feed
unit fully out of the printer.
2. Gently tilt the multi-purpose tray toward the printer until that it rests on
its side as shown in the figure.
Multi-purpose Tray
Paper Feed Unit
Release Lever
Paper Feed Unit
English
3. Remove the multi-purpose tray from the printer by lifting it straight
upward.
4. After removing the multi-purpose tray, return the paper feed unit to its
original position.
5. Remove the protective cover from the connector inside the printer.
Protective Cover
Note: When you remove the
bulk feeder, be sure to reinstall
the protective cover.
8
Installing the Base and the Printer
The printer is mounted on the upper deck of the base. See figure below.
1. Place the base onto a firm, sturdy table or desk.
Note The ta le or desk must e larger than the ase.
2. Align the positioning pins on the top of the base with the holes in the
base of the printer, then slowly and carefully lower the printer onto the
base. Make sure that the connector on the base fits squarely into the
corresponding connector in the base of the printer. See figure below.
Printer
Upper eck
Connector
Base
Positioning Pins
Lower eck for
the Feeder
9
English
Installing the Bulk Paper Feeder
Mount the bulk paper feeder onto the rail in the lower deck of the base. The rail
is movable and must be pulled out before installing the bulk paper feeder.
1. Pull the rail fully out until it stops. See figure below.
2. Grasp the feeder by the two handles in the side covers.
3. Facing the paper output slot of the feeder toward the printer, align the
(four) positioning tabs on the rail of the base with the holes in the base
of the feeder. Then slowly and carefully lower the feeder onto the base.
CAUTION Ensure that the arrow marks on the rail are correctly
aligned with the arrow marks on the front side of the feeder
efore proceeding.
Feeder
Printer
Connector
Rail
PF-7E
Rail
Arrow Marks
10
4. Slide the rail with the feeder mounted back toward the printer until the
connector on the front side of the feeder is fully connected to the
connector on the base, holding the feeder by the both hands.
CAUTION When mounting the feeder to the printer, e careful to avoid
pinching your fingers etween the two.
Notes FBefore installing the ulk paper feeder, make sure that
you have removed the protective cover from the printer.
FDo not use the adjuster kno on the top of the feeder or
the feeder plastic cover as a handle for sliding the feeder.
Make sure that the output slot of the feeder is properly aligned with the
option feeder slot on the front side of the printer.
This completes setting up the feeder with the printer. Before using the feeder,
plug the printer to power and load paper in the bulk paper feeder (explained in the
following pages).
Rail
Feeder Adjuster Knob
Option Feeder
Slot
Connector
Cover
11
English
Operating the Optional Bulk Paper Feeder
This chapter describes how to load paper in the feeder and to select the feeder as
the paper source.
CAUTION When the tray is rising or descending, please o serve the
following precautions.
FKeep your fingers out of the slot on the inner side of the
feeder.
FWhile the tray is descending, keep your hands out from
under the tray.
FDo not push down on the tray or pull it upward.
Loading Paper
Once the feeder has been installed in accordance with the instructions provided
previously; you can prepare to load paper. Before loading paper, you must adjust
the side plates inside the feeder to the actual width of the paper to be loaded.
Note The legal-size paper is not usa le with the ulk paper feeder.
For details on paper size, see Paper Specifications later in this
manual.
1. Turn printer power on. The paper feeder is turned on simultaneously.
2. Gently open the feeders tray cover. The paper tray will lower.
12
3. Make sure that the paper tray is lowered and stopped. Then, while
watching the side plates inside the feeder, rotate the paper adjuster knob
on top of the feeder clockwise. Stop rotating the knob when the side
plates have been set to their widest settings (outmost positions). See
figure below.
4. Place several sheets of the paper you are going to use with the feeder on
the center of the paper tray.
5. Adjust the side plates by rotating the adjuster knob on top of the feeder
counterclockwise so that the left and right side edges of the paper are
flush with the left and right side plates.
Then, rotate the adjuster knob half a turn clockwise. This allows an
approximately 1 mm gap between each side of the paper stack and the
side plate, which is needed to ensure the proper paper feeding. See
figure below.
Note Make sure that the paper edges are evenly aligned on the
center of the tray and the front edge of the stack fully a uts
on the feeders inside panel.
Cover
Inside Panel
Side Plates
Tray Paper
Adjuster Knob
13
English
6. Load up to 2,000 sheets of paper (four standard reams of packages of
paper with a thickness of 0.1 mm) onto the tray. Fan and flex each ream
as you load it. Load the paper with the side on which printing is done
facing upward in the feeder.
Note Dont put in more paper than the limit indicated on the
inside of the feeder. See figure elow.
7. Close the cover. The tray will rise and a sheet will feed partially into the
printer. The printer indicates Ready and the feeder is ready for
operation.
Loading Envelopes and Postcards
If you are loading postcards
in the paper feeder, load
them so that they are fed
with the top edge first. For
envelopes, make sure that
they are fed with the right or
bottom edge first.
Adjuster Knob
Load Limit
irection
of paper
feed
Postcard
Envelope
14
Loading Paper in the Printers Cassette
To gain access to the printers paper cassette for loading paper, etc., slide the bulk
paper feeder fully backward from the printer. If you are using a Legal-size
cassette in the printer, you will need to remove the bulk paper feeder from the
mounting base (rail).
Selecting Paper Feed from the Optional Paper Feeder
You can select paper feed from the optional bulk paper feeder using the FEE
key on the printers control panel. You can also select it by including
PRESCRlBEs CASS command in a file that you send to the printer from the
computer. ote that the optional bulk paper feeder replaces the printers multi-
purpose tray.
Selection from the Printers Control Panel
1. First, verify that the printers message display shows either Ready or
Add paper.
2. ext, press the FEE key to change the source of paper feed. The
source indication toggles between the following sequences:
Cassette
Bulk feeder
To select the paper feeder as the paper source, select Bulk feeder.
Notes FWhen printing on special forms such as envelopes, la els,
or thick paper, use the printers STACK key to select
paper output to the face up tray.
FIf paper is not loaded into the feeder, or the feeder is
detached from the printer (on the rail which, when
pulled, detaches the feeder from the printer), the printer
shows Add paper.
3. Make sure that the printer is ready and on-line, then begin printing.
Note When used with the ulk paper feeder, the printer may print
in the position which does not fully corresponds to the one
the application software requests.
15
English
Setting the Paper Size
The printer does not automatically detect the size of paper loaded into the bulk
feeder. You must set the paper size yourself from the printers control panel
according to the size of paper loaded into the bulk paper feeder.
Paper sizes you can select from the control panel are as follows.
Table 1. Paper size settings available through the control panel
Printer
display Paper size Printer
display Paper size
MO Monarch (3-7/8 x 7-1/2 inches) B6 JIS B6 (12.8 x 18.2 cm)
BU Business ( -1/8 x 9-1/2 inches) A5 ISO A5 (1 .8 x 21 cm)
#9 Commercial 9 (3-7/8 x 8-7/8
inches) B5 JIS B5 (18.2 x 25.6 cm)
#6 Commercial 6-3/ (3-5/8 x 6-1/2
inches) b5 International B5 (17.6 x 25 cm)
DL International DL (11 x 22 cm) A ISO A (21 cm x 29.7 cm)
C5 International C5 (16.2 x 22.9
cm) EX Executive (7-1/ x 10-1/2 inches)
A6 ISO A6 (10.5 x 1 .8 cm) LT Letter (8-1/2 x 11 inches)
Note Although LG (Legal size) appears as a paper size, the ulk
paper feeder cannot e used to feed legal size paper. To print
on legal size paper, remove the PF-7E from the printer and
re-install the multi-purpose tray.
Setting the paper size from the control panel
Set the paper size from the control panel as follows.
1. Make sure that the bulk paper feeder is properly installed and that the
Ready appears in the printers message display. Then press the MO E
key on the printers control panel.
2. Press the + or - key on the printers control panel until the message
display shows Bulk feeder size.
16
3. Press the ENTER key. A question mark (?) appears.
Bulk feeder size
? A4
4. Each time you press the + key, the message display shows another of the
paper sizes indicated in the table above. Continue pressing + until the
desired size appears, then press ENTER.
5. To finish selection and return message display to Ready, press the EXIT
key.
Selection Using PRESCRIBEs CASS Command
Feed selection can be done using the CASS command of the PRESCRIBE
command language. To switch paper feed to the option bulk paper feeder, place
the CASS command in a file or program as follows.
!R! CASS 0; EXIT;
When the printer receives the CASS command, it automatically does a form feed
operation. Therefore, the CASS command should be sent either at the beginning
of the file, or at the beginning of an intermediate page.
The PRESCRIBE FRPO R4 command changes the printers default (power-on)
paper cassette setting. To change the power-on paper source to the optional bulk
paper feeder, use the following command sequence.
!R! FRPO R4, 0; EXIT;
Note When the optional ulk paper feeder is installed, the printer
ignores the PRESCRIBE FRPO T0 command (Auto/manual
feed setting).
1
English
In Case of Trouble
Clearing Paper Misfeeding
If the printers message display shows Paper jam or Add paper (even
though the feeder has paper loaded inside), detach the paper feeder from the
printer by sliding with the rail away from the printer, holding the bulk paper
feeder by both hands as shown below.
If paper is partially fed out from the feeders output slot, pull the paper out by
hand as shown.
Note When paper is protruding from the feeders output slot,
always remove it y pulling the paper in its normal direction
of travel. Never pull paper ackwards.
If paper is not stuck at the feeders output slot, open the feeder cover and pull the
paper in the feeder.
If no paper is found jammed inside the paper feeder, slide the bulk paper feeder
away from the printer, and check if paper is jammed inside the printer.
Jammed Paper
18
After connecting the feeder back to the printer, open the printers top cover once,
then close it again and wait for the message display to show Ready.
Troubleshooting Procedures
If you frequently experience problems, please check for the conditions indicated
in the table below.
Sympton Suggested Cause Remedy
Paper will not
feed properly
into printer.
Too much paper in feeder. Open cover. Remove any quantity in
excess of the marked load limit.
Paper too slick or stack
together tightly.
Fan and flex paper to separate sheets.
Check that paper isn't too shiny or slick
causing rollers to slip. Replace with plain
paper to check feeder operation. Refer to
Paper Specifications section later in this
manual for proper paper. Clean rollers of
feeder with lint-free cloth.
Paper is damaged. Check paper stack for bent corners,
edges, etc., and replace paper.
Side plates inside the feeder
are improperly set.
Set the side plates so that a 1-mm gap is
left between each side of the paper stack
and the side plate.
Feeder does
not raise/lower
paper tray.
Feeder cover not
closed/opened.
Open/close feeder cover.
Printer not powered on. Plug printer power cord.
Feeder not properly
mounted on the base (rail).
Mount feeder aligning the arrow marks on
the feeder with the arrow marks on the
rail.
Feeder's connector not
properly connected to the
printer's connector.
Press the feeder toward the printer firmly
to ensure good contact of both
connectors.
19
English
Paper Selection
General Guidelines
The bulk feeder is designed for use with various special types of print media such
as adhesive-backed label, thick paper, envelopes, and post cards, it may not be
used to print on paper not satisfying the requirements below.
Note The manufacturer assumes no lia ility for pro lems that
occur when paper not satisfying these requirements is used
with the ulk feeder.
Selection of the right paper is important. The wrong paper can result in jams,
misfeeds, curl, poor print quality, and paper waste, and in extreme cases can
damage the paper feeder and/or the printer. The guidelines given below will
increase the productivity of your office by ensuring efficient, trouble-free printing
and reducing wear and tear on the paper feeder and the printer.
Paper Specifications
The following table summarizes the basic paper specifications.
Item Specification
Weight 60 to 200 g/m2 (16 to 53 lbs./ream)
Thickness 0.086 to 0.29 mm (3. to 11.5 mils)
Squareness of corners 90 ± 0.2°
Curl Inream flat within mm
Packaging Moisture-proof ream wrapping required
Moisture content to 6%
Direction of grain Long grain
Pulp content 80% or more
Note The ulk paper feeder accommodates a wide range of paper
weights. However, make sure that the paper weight also
conforms to the specifications set forth for the printer.
20
Selecting the Right Paper
Printer printing is a process involving light beam, electrostatic discharge, toner,
and heat. In addition, as the paper passes through the printer it undergoes
considerable sliding, bending, and twisting motions. A high quality printing paper
matching the requirements withstands all these stresses, enabling the bulk paper
feeder and the printer to turn out clean, crisp printed copy consistently.
Remember that all paper is not the same. Some of the factors to consider when
selecting paper for use with the bulk paper feeder are as follows:
Condition of the paper: Avoid using paper that is bent at the edges, curled, dirty,
torn, or contaminated with lint, clay, or paper shreds.
Use of paper in these conditions can lead to illegible printing, misfeeding, and
paper jams, and can shorten the life of the paper feeder and the printer. In
particular, avoid using paper with a surface coating or other surface treatment.
The paper should have as smooth and even a surface as possible.
Paper size: The minimum
size of paper loadable in the
paper feeder is 76 × 148 mm
(3 × 5.8 inches). The
maximum size is 216 × 305
mm (8.5 × 12 inches). The
bulk paper feeder can feed
paper of any sizes between
these sizes (shaded area in
the figure).
You can set the paper feed
size from the printers
control panel. See page 15
for details.
irection
of paper
feed
Maximum:
305mm (12")
Mini-
mum:
148mm
(5.8")
Minimum:
76mm (3")
Maximum: 216mm (8.5")

Other manuals for FS-1700

2

This manual suits for next models

2

Other Kyocera Printer Accessories manuals

Kyocera TASKalfa 650c User manual

Kyocera

Kyocera TASKalfa 650c User manual

Kyocera IB 21 User manual

Kyocera

Kyocera IB 21 User manual

Kyocera TASKalfa 650c User manual

Kyocera

Kyocera TASKalfa 650c User manual

Kyocera Mita PF-400 User manual

Kyocera

Kyocera Mita PF-400 User manual

Kyocera FS FS-C8500DN User manual

Kyocera

Kyocera FS FS-C8500DN User manual

Kyocera FS-C5016N User manual

Kyocera

Kyocera FS-C5016N User manual

Kyocera TASKalfa 3501i User manual

Kyocera

Kyocera TASKalfa 3501i User manual

Kyocera TASKalfa 650c User manual

Kyocera

Kyocera TASKalfa 650c User manual

Kyocera TASKALFA 300I How to use

Kyocera

Kyocera TASKALFA 300I How to use

Kyocera KM-C3225 User manual

Kyocera

Kyocera KM-C3225 User manual

Kyocera TASKalfa 8000i User manual

Kyocera

Kyocera TASKalfa 8000i User manual

Kyocera KM-C2520 User manual

Kyocera

Kyocera KM-C2520 User manual

Kyocera TASKalfa 400ci User manual

Kyocera

Kyocera TASKalfa 400ci User manual

Kyocera FS-C5016N Use and care manual

Kyocera

Kyocera FS-C5016N Use and care manual

Kyocera KM-C3225 User manual

Kyocera

Kyocera KM-C3225 User manual

Kyocera PF-430 User manual

Kyocera

Kyocera PF-430 User manual

Kyocera KM-4230 User manual

Kyocera

Kyocera KM-4230 User manual

Kyocera Data Security Kit (B) For Copier User manual

Kyocera

Kyocera Data Security Kit (B) For Copier User manual

Kyocera KYOCERA FS-C8100DN User manual

Kyocera

Kyocera KYOCERA FS-C8100DN User manual

Kyocera PF-100 User manual

Kyocera

Kyocera PF-100 User manual

Kyocera FS 4000DN - B/W Laser Printer User manual

Kyocera

Kyocera FS 4000DN - B/W Laser Printer User manual

Kyocera DF-420 User manual

Kyocera

Kyocera DF-420 User manual

Kyocera FS-1100 User manual

Kyocera

Kyocera FS-1100 User manual

Kyocera KM-C2520 User manual

Kyocera

Kyocera KM-C2520 User manual

Popular Printer Accessories manuals by other brands

Seiko I Infotech IP-260 user guide

Seiko I Infotech

Seiko I Infotech IP-260 user guide

Kodak A-1671 user manual

Kodak

Kodak A-1671 user manual

Utax PF 420 Service manual

Utax

Utax PF 420 Service manual

HP Color LaserJet 9500 Administrator's guide

HP

HP Color LaserJet 9500 Administrator's guide

Novexx Solutions AP 4.4 Service manual

Novexx Solutions

Novexx Solutions AP 4.4 Service manual

Matan Barak Ionizer Application note

Matan

Matan Barak Ionizer Application note

HP LaserJet Enterprise 600 installation guide

HP

HP LaserJet Enterprise 600 installation guide

Ricoh M3 Field service manual

Ricoh

Ricoh M3 Field service manual

Epson S050187 Product information sheet

Epson

Epson S050187 Product information sheet

Mir-Aus CISS FLY V.3 installation instructions

Mir-Aus

Mir-Aus CISS FLY V.3 installation instructions

Xerox C11 - DocuPrint Color Inkjet Printer installation guide

Xerox

Xerox C11 - DocuPrint Color Inkjet Printer installation guide

Roland Metaza MPX-95 Gift Kit GK-1 manual

Roland

Roland Metaza MPX-95 Gift Kit GK-1 manual

Xerox SquareFold Trimmer Module user guide

Xerox

Xerox SquareFold Trimmer Module user guide

Oki ML8810n installation instructions

Oki

Oki ML8810n installation instructions

Oki B 6100 installation guide

Oki

Oki B 6100 installation guide

Oki B930dn installation instructions

Oki

Oki B930dn installation instructions

Oki C5100n installation instructions

Oki

Oki C5100n installation instructions

Oki B4400 Series Replacement guide

Oki

Oki B4400 Series Replacement guide

manuals.online logo
manuals.online logoBrands
  • About & Mission
  • Contact us
  • Privacy Policy
  • Terms and Conditions

Copyright 2025 Manuals.Online. All Rights Reserved.