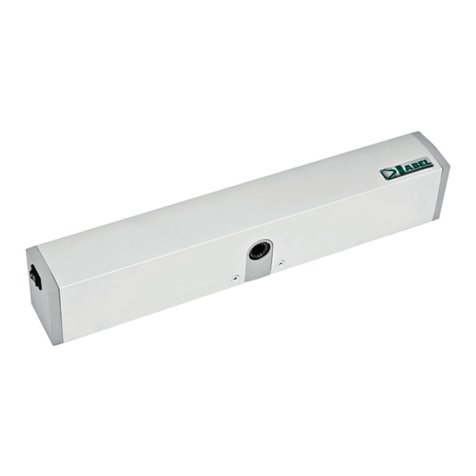
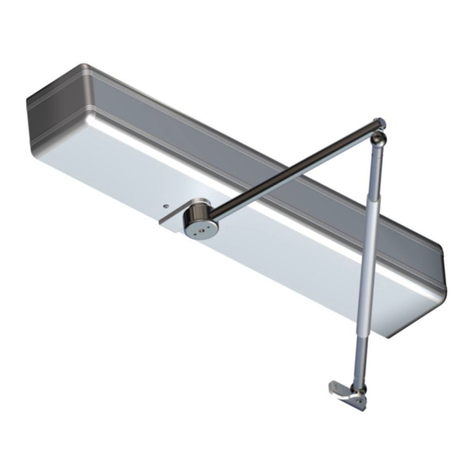
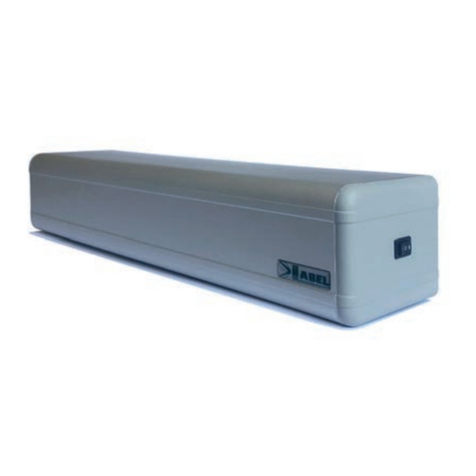
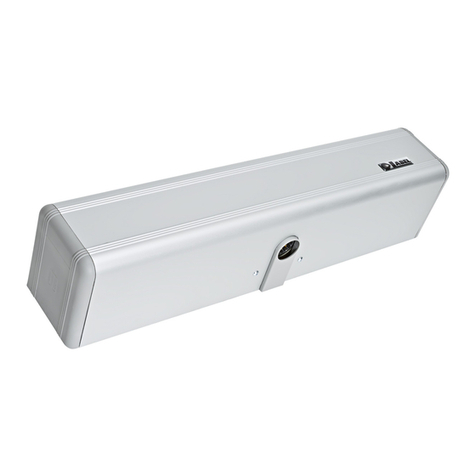
Label NEXT 75 User manual

USER MANUAL
NEXT 75_Eng_Rel.1.0_01/2019 - CD0750En-MU
TRANSLATION OF THE ORIGINAL INSTRUCTIONS
NEXT 75
Automation
for interior
swing doors
En

RECOMMENDATIONS
THIS INSTRUCTION MANUAL IS INTENDED FOR THE FINAL USER OF A LABEL AUTOMATIC SWINGING
DOOR SYSTEM; IT IS UNDERSTOOD THAT INSTALLATION AND TESTING MUST HAVE BEEN CARRIED
OUT BY SPECIALISED PERSONNEL.
GENERAL SAFETY WARNINGS
BEFORE COMMISSIONING THE AUTOMATIC DOOR, PLEASE CAREFULLY READ THIS
MANUAL
PROVISIONS
The automation has been designed to be used exclusively with pedestrian automatic swinging doors.
The manufacturer accepts no responsibility for incorrect product usage, as well as for any damages arising from changes to the system
made without its prior consent.
When operating the system, accident prevention regulations must be observed.
REMARKS
Always meet the usage and maintenance conditions provided for by LABEL.
Maintenance and repair operations must only be performed by qualied and properly trained personnel.
PROPER BEHAVIOUR
Only use the automatic door if it is in perfect technical conditions.
In case of failure or malfunction that might aect safety, immediately contact the service centre.
Inappropriate use of the system may cause serious injuries and damage.

TABLE OF CONTENTS:
1) INDICATIVE SYSTEM DESCRIPTION 4
2) TECHNICAL DATA 4
3) AUTOMATIC DOOR OPERATION 5
3.1) NORMAL DOOR OPERATION 5
3.2) DOOR OPERATION IN NIGHT LOCK MODE 5
3.3) DISABLED PEOPLE OPERATING MODE 5
4) PROGRAM SELECTORS 6
4.1) MANUAL PROGRAM SELECTOR 6
4.2) EV-MSEL MECHANICAL KEY SELECTOR 6
4.3) ET-DSEL DIGITAL PROGRAM SELECTOR 7
4.4) T-NFC DIGITAL PROGRAM SELECTOR 8
4.5) ET-DSEL SELECTOR GENERAL PROGRAMMING MENU 9
4.6) ET-DSEL SELECTOR USER PASSWORD MANAGEMENT 10
4.7) T-NFC SELECTOR USER PASSWORD MANAGEMENT 12
4.8) LANGUAGE 13
5) OPERATION IN CASE OF POWER SUPPLY FAILURE 13
6) NOTIFICATION OF ERRORS AND OPERATION PROBLEMS 14
7) MAINTENANCE 15
8) DISPOSAL 15

4
NOTE:
The grey part indicates the
monitoring area of radars and
sensors.
1) INDICATIVE SYSTEM DESCRIPTION
EXTERNAL RADAR
INTERNAL RADAR
OPENING COMMAND
PROGRAM SELECTOR
SAFETY SENSOR FOR CLOSING
SAFETY SENSOR FOR OPENING
NEXT 75 AUTOMATION
ELECTRIC LOCK
FLOOR STOP
2) TECHNICAL DATA
AUTOMATION MODEL NEXT 75
POWER SUPPLY 115/230~ , 50/60Hz
POWER 40W
AUTOMATION DIMENSIONS (L x H x D) 420 x 60 x 74 mm
FREQUENCY OF USE continua
OPERATING TEMPERATURE -15°C +50°C
ELECTRIC MOTOR Brushless 24Vdc
POWER SUPPLY OF EXTERNAL ACCESSORIES 24Vdc, 1A
STAND-BY CONSUMPTION 5W
CLASS APPLIANCE class II
MISSION SOUND PRESSURE LEVEL

5
3) AUTOMATIC DOOR OPERATION
WARNING!!
Always contact the service technician before commissioning the door, to learn how the automation works.
Switch on the power supply by means of the system switch.
The automation electronic control unit beeps shortly to indicate that the automatic door is powered.
The rst opening command starts a calibration cycle during which the door opening speed is very low until the end of the stroke, to nd
the stop point; after the delay time has elapsed, the door closes back at normal speed.
3.1) NORMAL DOOR OPERATION
• When something enters the motion sensors (internal and/or external radar) monitoring area, the door opens and stays open until the
sensors detect the presence, then once the pause delay has elapsed the door closes back.
• When the manual door opening button is pressed, the door opens and stays open until the command remains active, then once the
pause delay has elapsed it closes back.
• If the electronic control unit has been set up with the function PUSH & GO, you can open the door even with a brief manual thrust.
• If the closing safety sensor detects a presence, the door immediately reopens, and stays open as long as the sensor remains engaged.
• If the opening safety sensor detects a presence, the door stops and remains still for the entire period during which the sensor remains
engaged; it will complete the opening cycle only after the sensor is disengaged.
• If, during the opening motion, the door collides against an obstacle, it stops and closes back.
• If, during the closing motion, the door collides against an obstacle, it stops and opens back.
3.2) DOOR OPERATION IN NIGHT LOCK MODE
• The door cannot be opened through the external and internal radars.
• The door can only be opened by pressing the OPEN button, or using the Spyco radio-control, if present.
• The safety functions (sensors and behaviour in case of obstruction) are active and work as described in par. 3.1. for normal operation.
3.3) DISABLED PEOPLE OPERATING MODE
This only applies if the electronic control unit has been programmed and set to the disabled people operating mode.
• The disabled person may open the door through a special button or motion sensor.
The door stays open for a delay time long enough to allow the disabled person to cross the door.
• All the safety functions are on.

6
4) PROGRAM SELECTORS
The program selector allows the user of the door to select the operating mode.
Depending on the preference, it is possible to use the manual selector incorporated in the side panel of the automation NEXT 75, the
mechanical key selector EV-MSEL, or the digital programmer ET-DSEL or T-NFC.
Each program selector is fully described below.
4.1) MANUAL PROGRAM SELECTOR
The 3-position manual PROGRAM selector is the basic solution provided on the automation.
Position I= Automatic bidirectional program
The door automatically opens when each opening control activates.
Position 0= Manual free door
Automatic operation is disabled and the door can be opened manually.
Position II = a) Night lock program
The door can only be opened through the OPEN input or using the remote
control.
b) Open door program
The door remains stationary in complete opening position.
4.2) EV-MSEL MECHANICAL KEY SELECTOR
OPERATING MODE
Insert and turn the key of selector EV-MSEL to select the desired program.
Open door program
The door remains stationary in complete opening position.
Manual free door
Automatic operation is disabled and the door can be opened manually.
Automatic bidirectional program
The door automatically opens when each opening control activates.
Automatic unidirectional exit only program
To exclude the incoming detection on external radar input.
Night lock program
The door can only be opened through the OPEN input or using the SPYCO remote control, if any.
The key can be taken out of the selector when in any position in order to prevent undesired changes to the work program.
It can operate in two
dierent ways, depending
on the setting on the
automation electronic
control unit:

7
4.3) ET-DSEL DIGITAL PROGRAM SELECTOR
Pressing once the button select the automatic door operating mode.
Whenever the button is pressed, you switch from a work program to the next.
The operating programs which can be selected using the button are described below.
Automatic unidirectional exit only program
To exclude the incoming detection on external radar input.
Open door program
The door remains stationary in complete opening position.
Manual free door
Automatic operation is disabled and the door can be opened manually.
Automatic bidirectional program
The door automatically opens when each opening control activates.
Automatic unidirectional entry only program
To exclude the exit detection on internal radar input.
Night lock program
The door can only be opened through the OPEN input or using the remote control, if any.
Operation of other buttons located on ET-DSEL program selector panel
Partial opening, used only in a double leaf door automation
To activate the partial opening press the button once;
The symbol on the display indicates that the function is on.
In a double leaf door, only the rst leaf (Master) opens if the opening command is given by the internal or
external radar inputs.
The partial opening only operates in bi-directional, single-direction, and open door automatic programs.
In order to disable partial opening, press again button .
F2
Can have two distinct functions, depending on the setting of the automation.
a) Disables spring actuated door reclosing after a manual opening.
With F2 o, the door closes, with F2 on, the door remains stationary after a manual opening.
b) Disables step by step operation
(if enabled in the settings on the automation electronic control unit)
Push once the button F2 to disable step by step operation and enable the automatic closure of the door.
The symbol F2 lights up on the display.
To activate step by step operation, press again the button F2. The symbol F2 turns o on the display.
F1
Door opening command
Pressing the F1 button will open the door.
The F1 button can open the door even when the "NIGHT LOCK" work program is selected, if the
automation electronic control unit is set accordingly.

8
4.4) T-NFC DIGITAL PROGRAM SELECTOR
DAILY USE
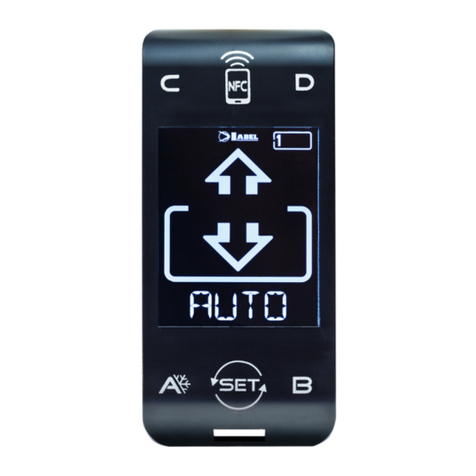
The selector T-NFC allows to select 6 dierent types of programs for everyday use:
AUTO:
The door opens and closes automatically
in both ow directions with all sensors
active.
ENTRY:
The door opens and closes automatically
only in entry direction:
the sensor connected on the Internal
Radar input is disabled.
EXIT:
The door opens and closes automatically
only in exit direction:
The sensor connected on the External
Radar input is disabled.
OPEN:
The door opens and remains open until
you change again the work program.
LOCK:
CLOSED DOOR
The door can be opened automatically
only by means of some specic inputs
(Open, RX).
Each time the door closes, the electric
lock (if present) activates.
MANUAL:
The door can be moved manually
and does not react to any input that is
activated.
Use this work program if you want to,
for instance, clean the panes, being
sure that the door cannot move if you
accidentally activate the opening sensors
or any other activation command.
To change a work program, press the SET button once to exit from the "Screen Saver" function and thus make the
selector active (the screen will increase its brightness), now press SET again several times until you position on the
desired work program.
If you have activated the program lock with the SLIDE function, to exit from the "Screen Saver" slide your nger
from left to right on the buttons A* - SET - B to activate the selector.
Warning!
If no button is pressed for approximately 20 seconds, the selector automatically switches to
"Screen Saver" mode and reduces the brightness of the display.
In addition to the work program, it is possible to select at any time a
partial opening with respect to the standard one (used in double leaf
doors to open only the main leaf).
To do this, press the button A.
The corresponding symbol appears on the display and the ow
direction icons (if active) will become thinner.
Press again button A to return to return to complete opening.
The gure below shows an example with the AUTO program.
DOOR OPENING FROM T-NFC
The button B, if pressed, generates a door opening command, closure will take place automatically as for the other sensors.
This button is able to open the door even in "LOCK" work program, if the function is active.
9
4.5) ET-DSEL SELECTOR GENERAL PROGRAMMING MENU
The user can enter the general programming menu when he wishes to select the desired language for the texts that appear on the
display, or when he wishes to enable a password to prevent any unauthorised access to the ET-DSEL digital programmer.
DIAGRAM 1
SECTION RESERVED FOR
TECHNICAL STAFF
SECTION RESERVED FOR
TECHNICAL STAFF
SECTION RESERVED FOR
TECHNICAL STAFF
“PASSWORD MANAGEMENT"
SECTION
SECTION RESERVED FOR
TECHNICAL STAFF
SELECTOR OPTIONS SECTION
NOT USED
“LANGUAGE" SECTION
The paragraphs below explain the procedure to be followed to manage the user password and to select the language.

10
4.6) ET-DSEL SELECTOR USER PASSWORD MANAGEMENT
To prevent the door work program from being modied, you can enter a password every time the ET-DSEL programmer is used.
To enable the password perform the operations listed below:
1. Press and hold the SET button for 5 seconds to access the general programming menu (see Diagram 1 at para. 4.3.1)
2. Press the F1 button ve times to switch to the Password Management sub-menu.
3. Press the Enter button to access the “Password management” section.
PASSWORD MANAGEMENT
PRIMARY PASSWORD (for the system owner-user)
It is a 5-character password used by the user to prevent unauthorized persons from having access to the ET-DSEL programmer and
change the work program.
Using a primary password is optional and must be enabled by system owner.
The default technical password is “A-A-A-A-A”.
WARNING!
When enabling the password, be very careful not to forget the access combination.
SERVICE PASSWORD (for user)
It is a 5-character password that the system owner can provide to persons authorized to use the ET-DSEL programmer.
With the service password, it is only possible to change the work program of the automatic door.
The default service password is “A-A-A-A-A”.
To change the service password, it is necessary to log in using the primary password.
Use the button to move the selection arrow downward, the F2 button to move back upward.
HOW TO CHANGE THE PRIMARY PASSWORD
• Select “PRIMARY PASSWORD”
• Press OK (F1).
• Enter the default primary password “A-A-A-A-A” by pressing 5 times the A button.
(If the primary password is not the default password, since it had already been changed before,
enter the currently used primary password).
• Enter the new primary password, selecting a combination of 5 characters from A-B-C-D.
This section displays the two passwords available to the nal user, the primary password and the
service password.
The technical password is reserved for the technical sta in charge of installation and maintenance
operations.
• You are prompted to repeat the new password, so enter again the previous combination.
• If the password entered is correct, the “PASSWORD OK” message appears on the display for
one second, then the system returns to the PASSWORD MANAGEMENT section; press the EXIT
button to return to the general programming menu
• If the password you entered does not match the previous one, the display shows PASSWORD
ERROR, the system returns to the section PASSWORD MANAGEMENT and it is necessary to
perform again the procedure.

11
• Enter the primary password
• Enter the new service password, selecting a combination of 5 characters from the letters A-B-C-D.
• You are prompted to repeat the new password, so enter again the previous combination
• Enter the primary password
• If the password entered is correct, “PASSWORD OK” is shown on the display for one second and
the system returns to the PASSWORD MANAGEMENT section.
• Press the OFF button (F1) to disable user password usage.
To return to the general programming menu, press the EXIT button twice
From this moment, access to the ET-DSEL digital programmer as program selector is free.
HOW TO CHANGE THE SERVICE PASSWORD
• Select “SERVICE PASSWORD”
• Press OK (F1).
Press the EXIT sbutton to return to general programming menu.
If the password entered does not match the previous one, the display shows PASSWORD ERROR, the system returns to the section
PASSWORD MANAGEMENT, and it is necessary to perform again the procedure.
ENABLING USER PASSWORD (primary and service password)
• Select “PASSWORD ON / OFF”
• Press OK (F1).
• Press the ON button to enable user passwords and return
to the PASSWORD MANAGEMENT menu.
To return to the display of the programming menu, press the
EXIT button twice
From this moment on, whenever the user wants to access the ET-DSEL digital programmer to change the automatic door work program,
the primary or service password must be entered.
When the user decides to enable the password, it is recommended to change the combination of both primary and
service password.
DISABLING USER PASSWORD
• From the PASSWORD MANAGEMENT section, select “PASSWORD ON / OFF”
• Press the button OK (F1)

12
4.7) T-NFC SELECTOR USER PASSWORD MANAGEMENT
The selector T-NFC allows to prevent work program change by means of a password.
This function is useful if you want to prevent unauthorized persons from setting the work program of the door.
To do this, you need to activate the user password with the following steps:
Press and hold button D for approximately 2 seconds.
The display will show the message "CODE>....."
Enter the current password (default = AAAAA) with the buttons A-B-C-D (5 digits)
You are now inside the user password area, from where you can access 3 dierent selections:
PASSWORD 1: To change the code of the primary password
PASSWORD 2: To change the code of the service password
PASSWORD ON/OFF: To enable or disable the primary and the service password.
By repeatedly pressing the button B, you can move in sequence to all 3 selections.
Warning!
The primary password (1) is the only one that enables to enter the user password area and should therefore be known only
by the owner of the store/organization where the door is installed. The service passwords (2) instead is used for employees
or third parties that can use it to change the work programs of the door, but cannot in any way change or disable both
passwords.
To change the password 1, press the button A after selecting PASSWORD 1. The display will show:
Enter the new password.
The next screen will be:
Enter again the new password.
Repeat the same sequence to change password 2.
Finally, in order to enable the password, select PASSWORD ON/OFF by means of button A, and select ON by means of button D (ON).
Once you have enabled the password, press the button SET to exit this area and return to the main screen.
To disable the user password, select PASSWORD ON/OFF by means of button A, and select OFF by means of button B (OFF).
Now, after the selector is in "Screen Saver" mode, each time you press the button SET, you will be prompted by the selector to enter the
password to access program change.

13
4.8) LANGUAGE
To select the language on the selector ET-DSEL, perform the operations listed below:
1. Press the button for 5 seconds to enter the general programming menu.
(see diagram 1 in the previous paragraph)
2. Press F1 three times to switch to the Language sub-menu.
3. Press Enter to access the “Language” section.
• Use the buttons F2 and to move the arrow in correspondence with the language
desired.
• Press the EXIT button to return to the general programming menu.
• Press the EXIT button again to return to the main view of the automatic door work
program.
5) OPERATION IN CASE OF POWER SUPPLY FAILURE
In case of power supply failure the door can be opened and closed manually.
If the door is equipped with an electric lock, use the special key to unlock it.
If the automation is equipped with a battery, depending on the programming of the electronic control unit, the door may operate as
follows:
a) The door can be opened by activating any opening command (motion radars, buttons, etc.).
b) The door automatically opens and stays open if the program selector is not set to Night Lock.
POWER LAMP DISPLAY
ON ET-DSEL PROGRAMMER ON T-NFC PROGRAMMER
Mains power supply on and battery being charged.
Mains power supply o and door operating with charged
battery.
• Mains power supply o and door operating with
battery almost exhausted.
• Mains power supply on with inecient battery.

14
6) NOTIFICATION OF ERRORS AND OPERATION PROBLEMS
PROBLEM LIKELY CAUSE SOLUTION
The door opens but it doesn't close back.
The motion radars or the closing safety
sensor detect the presence of an object or
of a person.
Check that the radars or the sensors are
not engaged.
The door doesn't complete the opening
cycle and stops along the way.
The opening safety sensor detects an
obstacle. Identify the obstacle and remove it.
The door doesn't respond to the opening
commands.
The MANUAL FREE DOOR function can
be activated. Check the setting of the program selector.
The door stops during the stroke and
inverts the running direction.
The door detects an obstacle along its
stroke. Identify the obstacle and remove it.
Friction occurs along door stroke.
Properly set the door;
for this operation please contact the service
centre.
The electronic control units beeps multiple
times and door operation is irregular.
The defect depends on the number and
length of the beeps.
Contact the service centre for the resolution
of the issue.
The display shows the symbol
The system has detected a machine
operation error.
Contact the service centre for the resolution
of the issue.
Should any malfunction occur, the Customer must contact the Support Centre and use the door manually, without powering it.

15
7) MAINTENANCE
The maintenance plan must be respected in order to ensure the service life and the safe operation of the automatic door. It is advisable
to sign a maintenance contract that provides a periodic service visit on the system on the part of specialized technicians.
If the user has the ET-DSEL or T-NFC digital program selector, he will be warned that the maintenance interval has expired when the
message "PROGRAMMED MAINTENANCE" is shown on the display.
Each maintenance operation is recorded into the maintenance register.
The nal user must limit himself to cleaning the glass surfaces, the xture proles and if necessary the motion and presence sensors,
taking care to lock the door while performing these operations.
8) DISPOSAL
At the end of its life, this system must be disposed of in accordance with national provisions.
To this purpose we recommend that you contact specialised operators.

NEXT
CERTIFIED COMPANY
QUALITY SYSTEM
UNI EN ISO 9001:2000
Made in Italy
by
S.p.A
Via Ilariuzzi, 17/A - S. Pancrazio P.se - 43126 PARMA - ITALIA
Tel. (+39) 05 21/ 67 52 - Fax (+39) 05 21/ 67 52 22
LABEL service centre
Other manuals for NEXT 75
1
Table of contents
Other Label Door Opening System manuals

Label
Label NEXT 75 User manual

Label
Label NEPTIS PLUS User manual

Label
Label Neptis SMP User manual

Label
Label Neptis SMP User manual

Label
Label NEPTIS/LE User manual

Label
Label ETERNA 90 EASY User manual

Label
Label NEXT 120s User manual

Label
Label T-NFC User manual

Label
Label ETERNA 70 User manual

Label
Label Neptis SLT-B User manual
Popular Door Opening System manuals by other brands

Assa Abloy
Assa Abloy NORTON RIXSON 1600 Series installation instructions

Woelm
Woelm HELM GT-L 80 installation instructions

GDO
GDO 72 Series owner's manual

Assa Abloy
Assa Abloy Pando Mini Go quick start guide

Easydor
Easydor PUSH Fitting and Operating Guide

Synergy Hardware
Synergy Hardware S4036 instructions