lakeair excel Service manual

RK Ventures Inc. 1509 Rapids Dr.
Racine, WI 53404
www.lakeair.com
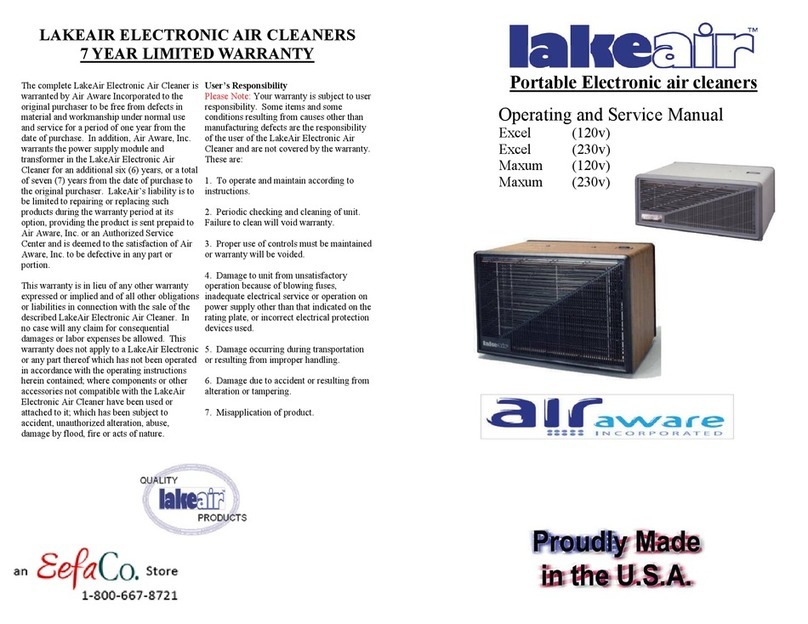
Portable electronic air cleaners
Operating and Service Manual Excel (120v)
Maxum (120v) Excel 230 (230v) Maxum 230 (230v)

qElectronic Filter (Cell) pCarbon After Filter
nCover Assembly
DESCRIPTION OF PARTS
1. COVER ASSEMBLY: The vinyl covered metal cover assembly is secured to the chas-sis by means of two screw
fasteners on top of the unit. The cover assembly includes the two grille sections.
2. CHASSIS: The chassis consists of the base of the Excel and Maxum and has several components of the unit
attached to it. The motor and fan, power supply, control switch, and all internal wiring are found in the chassis.
3. CARBON AFTERFILTER: The carbon afterfilter is standard in all Excel and Maxum units and is used as an
afterfilter to remove objectionable odors from the cleaned air.
4. ELECTRONIC FILTER (CELL): This is the workhorse of the LakeAir Air Cleaner and performs the major
function of the air cleaner byremoving the particles from the air. The cell is activated by the power supply and is
designed to removeeven the smallest particles, down to 0.01 microns in size, or 1/25,400 of 1 inch.
2
oChassis Assembly

3
EXCEL EXCEL 230 MAXUM MAXUM 230
Input Voltages: 120v 60 Hz
72 Watts
230v 50 Hz
72 Watts
120v 60 Hz
102 Watts
230v 50 Hz
102 Watts
Cleaning Capacity: Low: 70 cfm
High: 110 cfm
Low: 21 m3/min.
High: 34 m3/min.
Low: 210 cfm
High: 275 cfm
Low: 65 m3/min.
High: 85 m3/min.
Actual Size: 17” x 8” x 15: 43cm x 20cm x 38 17” x 13” x 15” 43cm x 33cm x 38cm
Actual Weight: 17lbs. 7.7 kg 24 lbs. 10.9kg
Shipping Size: 18” x 9” x 15” 48cm x 30cm x 38cm 18: x 15” X 16” 49cm x 38cm x 41cm
Shipping Weight: 22 lbs. 9.9 kg 29 lbs. 13.2 kg
SPECIFICATIONS
HOW A LakeAir UNIT WORKS
In business establishments or in y our home, millions of airborne particles are con-tinually being circulated in the air you
breathe. A LakeAir Electronic Air Cleaner removes these smoke, dust, dirt, and pollen particles with an electrostatic
process that works this way:
1. The internal circulating fan draws the dirty air into the system where it first must pass through the outer
grille.
2. The air then passes intothe ELECTRONIC CELL
where it encounters the IONIZING SECTION with its many fine ion wires.
These wires charge the airborne particles by exciting them with a high
electrical charge. As the charged particles move along to the collecting
section, they are
trapped by the collector plates much like a magnet attracts and collects metal
filings.
3. The ACTIVATED CARBON AFTER FILTER, the final filter in the
system, removes odors and freshens the air.
4. The cleaned and purified air is then returned to the room environment.

UNPACKING AND OPERATING INSTRUCTIONS
In order to operate your LakeAir Air Cleaner properly, it is necessary to remove plastic packing material from the carbon
afterfilter inside the unit. Follow the step–by–step instructions and you will soon be enjoying clean fresh air.
1. Remove the two fasteners from the top of the
cabinet using a Phillips head screwdriver.
2. Lift the cover assembly from thechassis and set
aside.
3. Remove the carbon afterfilter from behind the
cell. Take off the protective packing material and
discard.
4. Replace the carbon after filter, then the cover
assembly, making sure to include both of the fasteners. NOTE: The fasteners must be in place and secured snugly or the unit
will not operate.
Place your LakeAir Air Cleaner in a convenient area in the desired room. If you are using the air cleaner for a specific
purpose, such as smoke removal, locate the air cleaner as close as possi-ble to the source. (Such as near a smoking stand.) Care
should be taken to allow at least 4-6” of unobstructed space behind the unit so that it will exhaust freely into the room. If,
however, you position the unit so that the airflow is parallel to the nearest wall, you need not allow as much free space. For
best results the unit should be elevated by placing it on a table or stand. It can also be mounted on a wall, using our
convenient wall mount option.
Plug the line cord into a standard household outlet with 120V AC 60 Hz (230 models require 230 V AC 50 Hz). Caution
should be taken to use the unit only on the required voltage, as to do otherwise will void the warranty.
OPERATING AND MAINTE-NANCE
INSTRUCTIONS
Position the unit and plug it into the proper line voltage before
turning it on.
1. To turn unit on, locate the three-position rocker switch
on top of the unit. Depress the
button to activate the unit on the desired speed; High, Low, or
Off (center, flat position). Under normal conditions, the Low
position is adequate to keep an average size room clean. With
exces-sive amounts of dust, smoke, or other pollutants present,
the air cleaner should be operated on high.
2. To shut the unit off, simply push the button to its
center (flat) position and unplug the unit from the line
voltage.
NOTE: It should be noted thatoccasion-ally a large
particle will pass through the electronic cell and an
arcing will occur, resulting in an audible cracking
sound. This is normal and will not causeany damage
to the unit.
4

Maintenance
Your LakeAir Air Cleaner is a high quality, precision piece of equipment designed for
long years of satisfactory performance. Adhere to a regular maintenance schedule and
no problems should occur. This unit should be checked periodically for “dust load”
and cleaned if found to have a large accumulation of dust and lint. Under regular
conditions cleaning can be done once every 1 or 2 months. Under other more severe
conditions more frequent cleaning may be required. To obtain maximum efficiency
from your LakeAir Electronic Air Cleaner it must bekept clean.
In addition to the grilles and electronic cell, care should be taken to keep the rest of the
unit clean as well.
Disassembly and Cleaning
1. Turn off unit and disconnect line cord from outlet.
2. Remove fasteners from cover assembly.
3. Lift cover from chassis.
4. Remove ground screw from base of chassis connecting chassis to the electronic cell.
Lift cell from chassis, being careful not to bend any of the plates on the electronic cell.
5. The electronic cell may be cleaned in a number of ways, but the best way is to soak
it in a container of hot water into which has been dissolved a cup of dishwasher
detergent or other cleaner thatis safe for aluminum. After soaking for 10-15 minutes,
agitate the filter (cell) in the solution to release some of the
particles. Alkaline cleaners, such as our LA-99 heavy duty cleaning solution, may be
used with care. Be certain to read and follow all directions carefully to avoid damage
to the aluminum cell components caused by harsh chemical agents. LA-99 can be
obtained through your dealer or by calling LakeAir directly.
6. It may be necessary, if the cell is extremely dirty, to repeat the soaking process or to
take a small soft brush to the plates of the cell.
If this is done, care should be taken not to damage the plates or the fine ion wires
between the widely spaced plates on the ionizer section of the cells. After soaking,
rinse off all traces of the detergent with clean warm water and allow the excess to
drain off. Before replacing the cell into the chassis, make sure the cell is
completely dry.
7. The electronic cell may also bewashed in the normal cycle of a household
dishwasher, but caution should be taken to avoid damage to the closely spaced plates
of the unit.
8. Do not wash the carbon afterfilter. This filter should be brushed or cleaned with a
vacuum cleaner if any dust is present. This filter should also be replaced when there is
an indication that it is no longer absorbing odors. Normal replacement is
approximately every 4-6 months.
NOTE: TO INSURE PROPER OPERATION, FILTERS SHOULD BE
CLEANED AT REGULAR INTERVALS. FAILURE TO CLEAN ELECTRONIC
FILTER WILL VOID WARRANTY.
Reassembly
1. Place the dry electronic filter (cell) back on the chassis, making sure the wider
spaced plates (ionizer section) face the outside of the unit. Also make sure the
handle is at the top of the unit.
2. Insert the ground screw in the proper location and tighten.
3. Place the carbon afterfilter back into the unit.
4. Replace the cover assembly and secure with the fasteners.
5. Before plugging the unit in, make sure the power button is in the Off position.
Plug in the line cord and turn the unit on to the High or Low position. If arcing
occurs, turn the unit off until the electronic filter cell has been dried completely.
5
TROUBLESHOOTING YOUR LakeAir ELECTRONIC AIR CLEANER
6
Some of the common causes for malfunction ofyour air cleaner are listed below. Re-view them should you have a
problem, and perform the corrective measures listed here. If your LakeAir Electronic Air Cleaner is not restored to
proper operation, contact your Dealer, nearest AuthorizedService Center, or LakeAir.
Problem Possible Cause Possible Remedy
Air cleaner will not operate Control switch is in Off
Position
Depress power switch to High or Low
Power cord not plugged in Plug in power cord Replace fuse or
reset breaker
Blown fuse inhousehold or
breaker tripped.
Cover removed
Cover fasteners not tight
Replace cover Tighten fasteners
snugly
Small volume of air discharged from unit Clean according to InstructionsExtremely dirty electronic filter
(cell)
Plastic packing still on carbon after
filter
Remove plastic wrap
Unit not effectively cleaning the air Clean according to InstructionsElectronic filter dirty
Electronic filter is not prop-erly
installed
Check reassemble instructions
Continuous “arcing” or snap-ping noise Excessive accumulation of dirt on
the electronic filter
Clean according to Instructions
Electronic filter still damp Allow filter cell to dry Com-pletely
Bent or damaged plate on
electronic filter. (cell)
Check and straighten
Odors more pronounced than usual Discard and replace the carbon after filter
Open doors to the adjoining rooms
Service life of carbon after filter
expired
Air cleaner being used in a
confined space
If any of the problems are not solved to your satisfaction, please contact your Dealer or LakeAir

470004
40136
40137
20082 (120v)
21182 (230v)
or
20048 (120v)
495101
or
499052
497576
497612/497613
10064/10065
or
10067/10066
499086/499087
or
499088/499089
10072 (120v)
10172 (230v)
470067
10012 & 499049
499005
or
499027
40054
10011
or
10068
7
EXCEL PARTS MAXUM PARTS
Part# Description Part# Description
10068 Electronic Filter Cell 10011 Electronic Filter Cell
499027 Carbon Afterfilter 499005 Carbon Afterfilter
10066 Cover Assembly-Woodgrain 10064 Cover Assembly-Woodgrain
10067 Cover Assembly-White 10065 Cover Assembly-White
20082 Motor 120v 20048 Motor, 120v
21182 Motor, 230v 21148 Motor, 230v
499052 Fan Blade 499086
Grille, Black 499087 Grille,
Grey
495101 Fan Blade 499088
Grille, Black 499089 Grille,
Grey
PARTS COMMON TO BOTH UNITS
10012&499049 Cell Contact Bracket 40054 Ion
Connector Strap 470004 Ground Screw U-Clip
497572A Voltage Doubler
497606 Transformer 120v
497607 Transformer 230v
40136 Ion Wires w/S-Hooks and Springs (6) 40137 Ceramic
Insulators w/Screws (4/8) 470067 High Voltage Wire Jiffy Clip
Fastener 470033 Black cover Fastener
495159 White Cover Fastener
497613 Grey Rocker Switch
497612 Black Rocker Switch

User’s Responsibility
Please Note: Your warranty is subject to user responsibility.
Some items and some conditions resulting from causes other
than manufacturing defects are the responsibility of the user
of the LakeAir Electronic Air Cleaner and are not cov-ered
by the warranty. These are:
1. To operate and maintain according to instructions.
2. Periodic checking and cleaning of unit. Failure to clean will void war-ranty.
3. Proper use of controls must be main-tained or warranty will be voided.
4. Damage to unit from unsatisfactory operation because of blowing fuses,
inadequate electrical service or opera-tion on power supply other than that
indicated on the rating plate, or incorrect electrical protection devices used.
5. Damage occurring during transporta-tion or resulting from improper han-
dling.
6. Damage due to accident or resulting from alteration or tampering.
7. Misapplication of product.
The complete LakeAir Electronic Air Cleaner is warranted by
LakeAir International, Inc. to the original purchaser to be free from
defects in material and workmanship under normal use and service
for a period of one year from the date of purchase. In addition,
LakeAir International, Inc. warrants the power supply module and
transformer in the LakeAir Elec-tronic Air Cleaner for an additional
six (6) years, or a total of seven (7) years from the date of purchase
to the original purchaser. LakeAir’s liability isto be limited to
repair-ing or replacing such products during the warranty period at
its option, providing the product is sent prepaid
to LakeAir International, Inc.or an Author-ized Service Center and
is deemed to the satisfaction of LakeAir International, Inc.to be
defective in anypart or portion.
This warranty is in lieu of any other warranty expressed or implied
and of all other obliga-tions or liabilities in connection with the sale
of the described LakeAir Electronic Air Cleaner. In no case will any
claim for conse-quential damages or labor expenses be al-lowed.
This warranty does not apply to a LakeAir Electronic or any part
thereof which has not been operated in accordance with the
operating instructions herein contained;where components or other
accessories not compatible with the LakeAir Electronic Air Cleaner
have been used or attached to it; which has been subject to accident,
unauthor-ized alteration, abuse, damage byflood, fire or acts of
nature.
LakeAir ELECTRONIC AIR CLEANERS 7 YEAR LIMITED
WARRANTY
International, Inc. 1509 Rapids Drive
Racine, Wisconsin 53404
This manual suits for next models
3
Table of contents
Other lakeair Air Cleaner manuals

lakeair
lakeair Excel Z Service manual

lakeair
lakeair WM-RC2 120 Volt Service manual

lakeair
lakeair LA2000 User manual

lakeair
lakeair MAX Guard 120 Service manual

lakeair
lakeair CM2-RC2 120 Volt Service manual

lakeair
lakeair Excel (120v) Service manual

lakeair
lakeair LA-1000FM Training manual

lakeair
lakeair LA-Table M(120v) Service manual

lakeair
lakeair LAFC-RC2 Training manual

lakeair
lakeair LA2-RC2-Kitchen Service manual