manuals.online logo
Brands
  1. Home
  2. •
  3. Brands
  4. •
  5. Larson Electronics
  6. •
  7. Spotlight
  8. •
  9. Larson Electronics GL-2100-E-F Manual

Larson Electronics GL-2100-E-F Manual

Wireless Remote Control Spotlight with
Post Mount - Perko Socket
INSTRUCTION GUIDE
Part# GL-2100-E-F
Congratulations
You are now the owner of one of the finest remote control searchlights available today. Thank you for
letting Larson Electronics assist you in your lighting application needs. We're proud of our products and
the technology that we've developed to ensure our customers the most durable, versatile and powerful
searchlights in the lighting industry.
Please read these instructions before using your new Remote Control Spotlight from Larson Electronics.
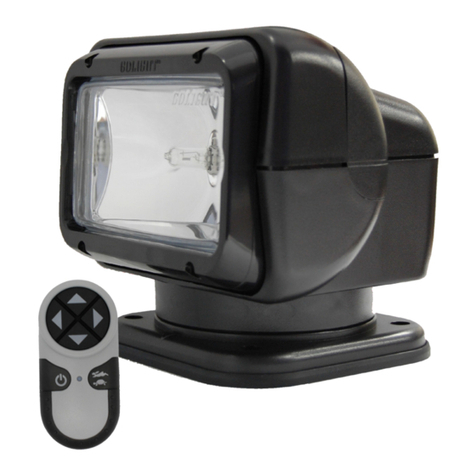
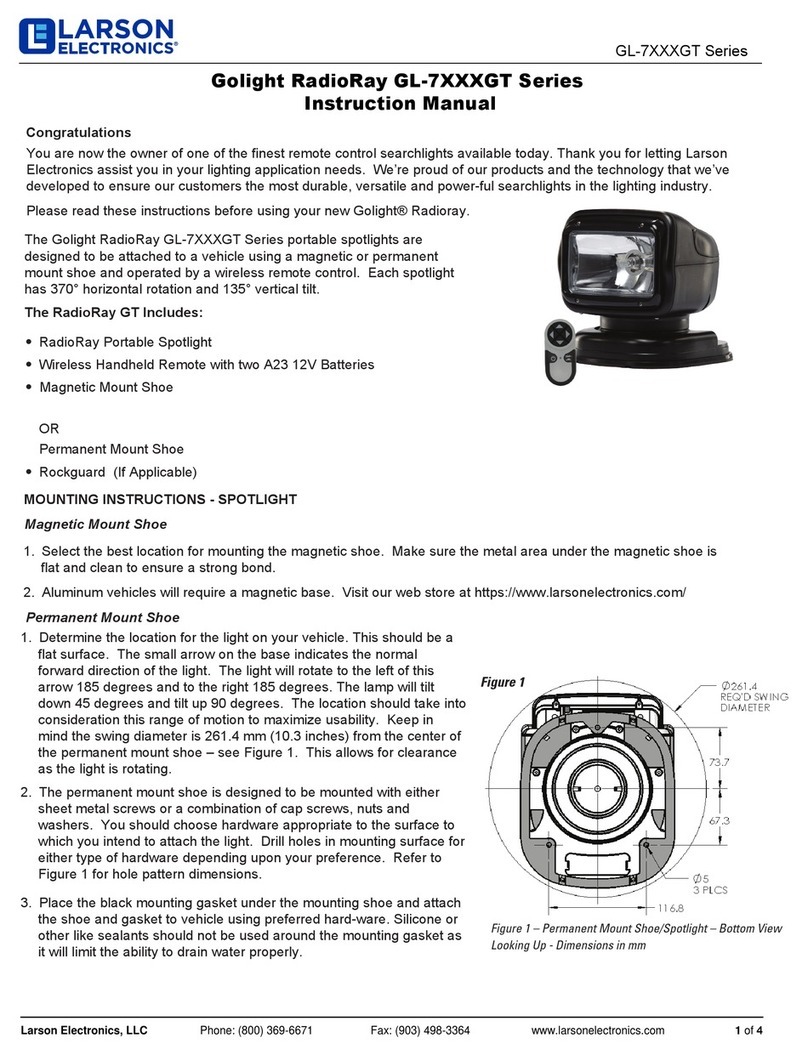
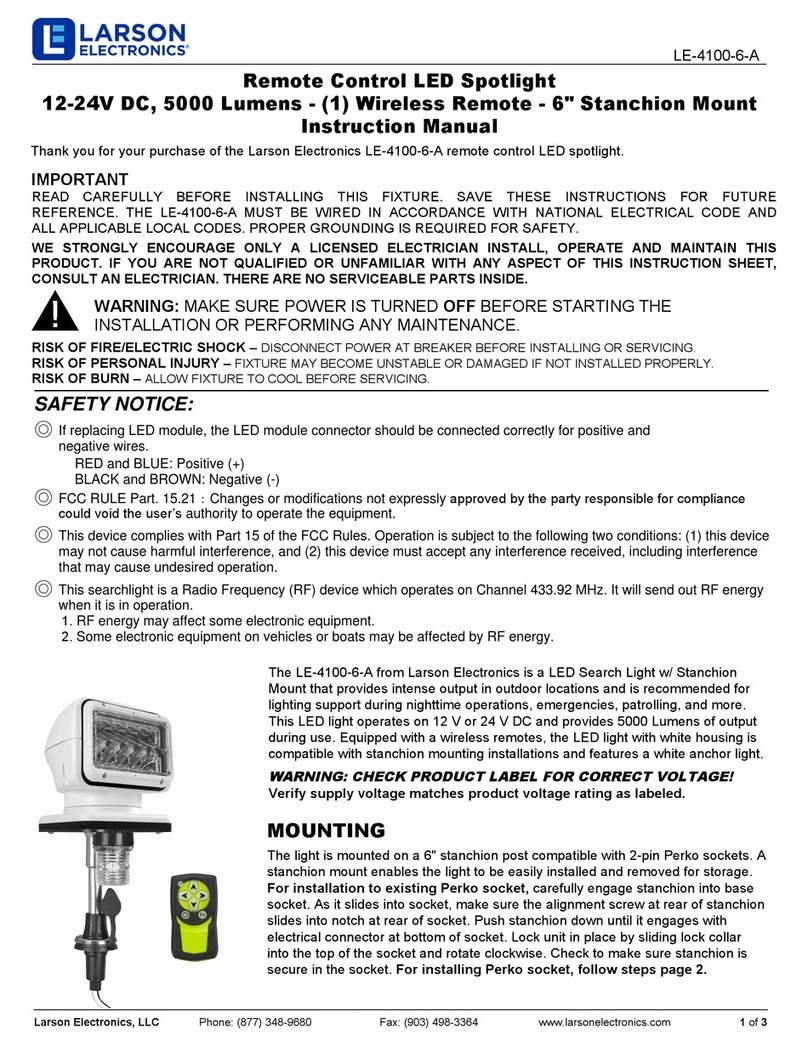
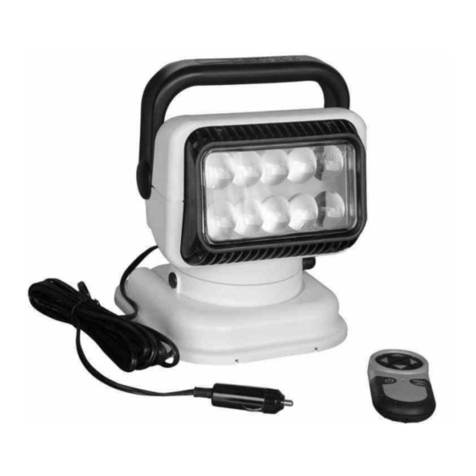
The GL-2100 65 Watt motorized spot and flood light
combo that operates with a wireless hand held
remote control and a wireless dash mount remote
control. This particular model is available in a white
finish and is mounted on a stanchion post with
red/green navigational running lights. It produces a
wide spot beam with an effective working beam of
700 feet and has a 5 million candlepower rating.
GL-2100 Hard Wired - Permanent Mount:
GL-2100 Searchlight
Wireless Remote Control
Wireless Dash Remote Control
2 A23 12V Batteries
Perko Socket/Mount
MOUNTING INSTRUCTIONS
Determine the location for the light on your vehicle or
boat. The small arrow on the base indicates the
normal forward direction of the light. The light will
rotate to the left of this arrow approximately 185 and
to the right approximately 185. The beam will angle
down about 45 and angles up to 90. The location
should take into consideration this beam movement
to ensure optimum usability.
Once the position and orientation are decided
upon—use the black rubber gasket as a footprint to
mark the mounting of base to vehicle. Drill 1/4 inch
hole though mounting surface in the middle of the
footprint for passage of the power cord. Use silicone
sealant to fill opening around power cord.
IMPORTANT: Allow 3” of cord to remain under the
light to ensure full 370 rotation.
You should choose screw or bolt fasteners
appropriate to the surface to which you intend to
attach the light. If you intend to use the four small
plastic caps provided to cover the screw heads once
installed, a #8 round head is recommended.
The black gasket should be installed on the lamp
base prior to attachment to the vehicle surface.
NOTE: The small drain hole in the edge of the
gasket should normally face opposite the forward
direction of the vehicle—opposite the arrow molded
in the front of the base. Silicone or other like
sealants should not be used around the base gasket
as it will limit the light’s ability to drain excess water
properly.
The 12 Volt DC power wire should be joined to the
leads under the lamp with appropriate automotive
wire attachments. It is critical that polarity be
observed. Connect vehicle positive (+) to spotlight
positive (+) wire. Connect vehicle ground (-) to
spotlight ground (-) wire. Power should be fused at
10 Amps and be on a dedicated circuit, or wired to an
appropriate automotive relay system.
PROGRAMMABLE REMOTE INSTRUCTIONS
The GL-2100 is controlled with a programmable
remote with 2187 different channels. This feature
allows you the freedom to change the channel
selection, and the receiver relearns the new
selection.
PROGRAMMING THE TRANSMITTER.
This light has been pre-programmed at the factory, it
is not necessary to re-program the transmitter, but is
recommended.
PROGRAMMABLE REMOTE INSTRUCTIONS
The GL-2100 Light is controlled with a programmable
remote with 2187 different channels. This feature
allows you the freedom to change the channel
selection, and the receiver re- learns the new
selection. This light has been pre-programmed at the
factory, and it is not necessary to re-program the
transmitter, unless you experience outside
interference. To program transmitter:
1.IMPORTANT Disconnect power.
2.Remove battery cover from remote control.
3.Set the 7 dip switches to a selection of your
choice. There are 3 positions on each; positive,
negative and neutral. Use a small screwdriver and
select a position for each dip switch. *Please note
that the orientation of the +/- switch positions may
vary among different models of wireless remote
controls.
4.Insert both A23 12V batteries. Be sure batteries
have adequate charge.
5.Replace battery cover.
a. Depress the on/off button and hold it down.
Red LED will light.
b. While holding the on/off button down,
reinstall the power (replace fuse or connect
vehicle battery).
c. Keep on/off button depressed for 5-6
seconds, and then release. The light should
now be programmed.
WIRELESS DASH CONTROL
If you have a wireless dash control, please note that
it is vital for this to be attached to a flat / smooth
surface with the 4 mounting screws included. The
arrow under the rubber cover should point up.
OPERATION OF GL-2100
1. Using the remote control, turn on the light by
depressing the on/off button.
2. With the 4-way arrows on the remote control,
rotate your light to the desired location.
Depending upon conditions, the wireless remote
may be used up to 80 feet from the spotlight.
3. The speed of the light rotation can be controlled
by de-pressing the tortoise/hare button one time
and by depressing it again to restore the original
speed.
4. The spotlight should not be turned on when the
snap on lens cover (rockguard) is attached. (Not
applicapble for LED)
BATTERY INSTALLATION AND REMOVAL FOR
TRANSMITTER
Remove Battery Cover: remove the Phillips head
screw securing the battery cover then remove the
cover. With the battery compartment now exposed,
insert batteries according to correct polarity.
Remove the batteries by gripping the positive end of
each battery and lifting.
Use only 12v-A23 batteries in the Golight remote
control
USAGE:
» This light is intended for off-road and utility use only
» This light may only be disassembled and repaired
by an authorized representative
MISUSE:
» This light is not approved for road or highway use
» This light is not approved for underwater use
» This light is not approved for inverted mounting
» This light is not approved for use inside a vehicle or
enclosure and power should be disconnected prior to
placing the light in such circumstance
» This light may be damaged if operated in icing
conditions
» This light may only be dismantled by an authorized
Larson Electronics representative.
» Any violation of the above referenced misuses
will be considered grounds for warranty refusal
IMPORTANT SAFETY INFORMATION
This symbol is to alert you to important operating
or servicing instructions that appear in your
instructions.
Always follow basic safety
precautions when using
this product to reduce the
risk of injury, fire or electric shock.
This light is for off road and utility use only. It
is not designed for road use as a driving light.
The GL-2100 complies with Part. 15.105 of the
FCC Rules. This equipment has been tested and
found to comply with the limits for a Class B
digital device. These limits are designed to
provide reasonable protection against harmful
interference in a residential installation. This
equipment generates, uses, and can radiate
radio frequency energy and, if not installed and
used in accordance with the instructions, may
cause harmful interference to radio
communications. However, there is no
guarantee that interference will not occur in a
particular installation. If this equipment does
cause harmful interference to radio or television
reception, which can be determined by turning
the equipment off and on, the user is encouraged
to try to correct the interference by one or more
of the following measures:
Reorient or relocate the receiving antenna.
Increase the separation between the equipment
and receiver.
Connect the equipment into an outlet on a
circuit different from that to which the
receiver is connected.
Consult the dealer or an experienced
radio/TV technician for help.
FCC RULE Part. 15.21 - Changes or
modifications made by the user not expressly
approved by Larson Electronics, LLC. for
compliance could void the user’s authority to
operate the equipment.
PARTS / ACCESSORIES
Contact manufacturer for GL-2100 parts and
accessories.
PKS-1
Larson Electronics, LLC Phone: (800) 369-6671 Fax: (903) 498-3364 www.larsonelectronics.com
1of 1
Black 2-Pin Perko Socket Mounting Base
Mounting information
Do not attempt operation until you are familiar with all warnings, precautions, and procedures outlined within this
instruction sheet. Read carefully before operating. Retain these instructions for future reference.
USER SHOULD BE TRAINED IN THE PROPER USE AND MAINTENANCE OF THIS DEVICE.
WE RECOMMEND A LICENSED ELECTRICIAN INSTALL THIS PRODUCT.
INSTALLATION
1. For proper light selection, positioning and configuration, refer to A.B.Y.C. Standard A-16*, the '72 COLREGS*,
and the U.S. Inland Rules*.
2. These bases are designed to be mounted on a horizontal surface.
3. For Bi-Color lights, draw a 6" long reference line through the center of the selected mounting location and parallel
to the centerline of the boat.
4. Cut out the mounting template. Place it on the mounting surface such that the reference line (drawn above) is
directly underneath the reference line marked on the template.
5. Drill indicated holes through the template to accommodate #8 oval head mounting screws and socket as required.
6. Attach supply connections to the light, making sure to wire in accordance with both A.B.Y.C. Standard E-9* and
the U.S. Coast Guard Safety Standards for Boat Electrical Systems (33 CFR 183)*.
For 2-contact bases, the supply leads are coded as follows:
WHITE: Positive supply lead
BLACK: Negative supply lead (Caution: Negative lead connected to case. To avoid energizing case, observe
polarity.)
Electrical connections must be made such that the forward compartment is switched in conjunction with the
other running light(s); aft compartment should be switched with Ignition (or permanently energized), as a
push switch is provided on top of the light. NOTE: All light circuits must be circuit protected. Use a 1/2 Amp
fuse (or breaker) for the courtesy light circuit and a 2 Amp fuse (or breaker) for the combination light circuit.
7. Setup for Operation: As pole engages with base, make sure alignment screw in pole slides into the notch in the
base. Push pole until it engages the electrical connector and lock by rotating the locking collar clockwise.
* The above referenced standards can be obtained from
American Boat & Yacht Council, Inc.
U.S. Coast Guard
613 Third Street, Suite 10
Washington D.C. 20593
Annapolis, MD 21403 (or your local C.G. Office)
<< PRINT ACTUAL SIZE (100% SCALE) FOR CORRECT DIMENSIONS.

Other Larson Electronics Spotlight manuals
Larson Electronics 2000-M Manual

Larson Electronics

Larson Electronics 2000-M Manual

Larson Electronics GL-3110-S-12-E Manual

Larson Electronics

Larson Electronics GL-3110-S-12-E Manual

Larson Electronics GL-9950 Manual

Larson Electronics

Larson Electronics GL-9950 Manual

Larson Electronics HL-85-LED-CPR-NC User manual

Larson Electronics

Larson Electronics HL-85-LED-CPR-NC User manual

Larson Electronics GL-3100-S-12-E Manual

Larson Electronics

Larson Electronics GL-3100-S-12-E Manual

Larson Electronics PTB-1 User manual

Larson Electronics

Larson Electronics PTB-1 User manual

Larson Electronics HUL-LED25WRE-CPR-TRP User manual

Larson Electronics

Larson Electronics HUL-LED25WRE-CPR-TRP User manual

Larson Electronics EXPRA-06R-LED User manual

Larson Electronics

Larson Electronics EXPRA-06R-LED User manual

Larson Electronics Golight Stryker GL-30064ST User manual

Larson Electronics

Larson Electronics Golight Stryker GL-30064ST User manual

Larson Electronics GL-2110-F Manual

Larson Electronics

Larson Electronics GL-2110-F Manual

Larson Electronics HL-85-LED-CPR User manual

Larson Electronics

Larson Electronics HL-85-LED-CPR User manual

Larson Electronics GL-9901 Manual

Larson Electronics

Larson Electronics GL-9901 Manual

Larson Electronics LEDWL 1227 Series Manual

Larson Electronics

Larson Electronics LEDWL 1227 Series Manual

Larson Electronics HML-5M-RC User manual

Larson Electronics

Larson Electronics HML-5M-RC User manual

Larson Electronics GL-30514-S-E Manual

Larson Electronics

Larson Electronics GL-30514-S-E Manual

Larson Electronics HL-85-3W1-IR User manual

Larson Electronics

Larson Electronics HL-85-3W1-IR User manual

Larson Electronics Golight Radioray GL-2081-M Manual

Larson Electronics

Larson Electronics Golight Radioray GL-2081-M Manual

Larson Electronics HAL-RA-48-6L-LED User manual

Larson Electronics

Larson Electronics HAL-RA-48-6L-LED User manual

Larson Electronics Golight Radioray GL-2051GT User manual

Larson Electronics

Larson Electronics Golight Radioray GL-2051GT User manual

Larson Electronics LED10W-LT User manual
Larson Electronics

Larson Electronics LED10W-LT User manual

Larson Electronics HUL-P10WR-DM-ILS-1227 User manual

Larson Electronics

Larson Electronics HUL-P10WR-DM-ILS-1227 User manual

Larson Electronics RL-14 User manual

Larson Electronics

Larson Electronics RL-14 User manual

Larson Electronics IL-LED-27R User manual

Larson Electronics

Larson Electronics IL-LED-27R User manual

Larson Electronics GL-8130-M User manual

Larson Electronics

Larson Electronics GL-8130-M User manual

Popular Spotlight manuals by other brands

Leviton LeL15 user guide

Leviton

Leviton LeL15 user guide

Occhio Piu piano LED instructions

Occhio

Occhio Piu piano LED instructions

Wetelux H-740 instruction manual

Wetelux

Wetelux H-740 instruction manual

MIIDEX LIGHTING Vision-EL 80100 Notice Instructions

MIIDEX LIGHTING

MIIDEX LIGHTING Vision-EL 80100 Notice Instructions

Titanium TT-TRK-15W-1 quick guide

Titanium

Titanium TT-TRK-15W-1 quick guide

Portfolio 17837-001 manual

Portfolio

Portfolio 17837-001 manual

Cooper Invue ClearPath Bollard installation instructions

Cooper

Cooper Invue ClearPath Bollard installation instructions

Mr. Beams MB370 installation instructions

Mr. Beams

Mr. Beams MB370 installation instructions

Chauvet Intimidator Spot LED 250 user manual

Chauvet

Chauvet Intimidator Spot LED 250 user manual

Martin Mania SCX600 user manual

Martin

Martin Mania SCX600 user manual

Cameo Q-SPOT 40i user manual

Cameo

Cameo Q-SPOT 40i user manual

Ignition 2Bright Expo 575 WW user manual

Ignition

Ignition 2Bright Expo 575 WW user manual

MasterCraft 054-4265-8 instruction manual

MasterCraft

MasterCraft 054-4265-8 instruction manual

LIVARNO home 375304 2101 Operating and safety information

LIVARNO home

LIVARNO home 375304 2101 Operating and safety information

Black & Decker 3 user manual

Black & Decker

Black & Decker 3 user manual

ACME LED-900D RGB user guide

ACME

ACME LED-900D RGB user guide

olympia electronics GR-83 quick start guide

olympia electronics

olympia electronics GR-83 quick start guide

American DJ Pinspot LED BP Specifications

American DJ

American DJ Pinspot LED BP Specifications

manuals.online logo
manuals.online logoBrands
  • About & Mission
  • Contact us
  • Privacy Policy
  • Terms and Conditions

Copyright 2025 Manuals.Online. All Rights Reserved.