manuals.online logo
Brands
  1. Home
  2. •
  3. Brands
  4. •
  5. Launch
  6. •
  7. Diagnostic Equipment
  8. •
  9. Launch X-431 HD Module User manual

Launch X-431 HD Module User manual

Vehicle
Power
Wireless
USB
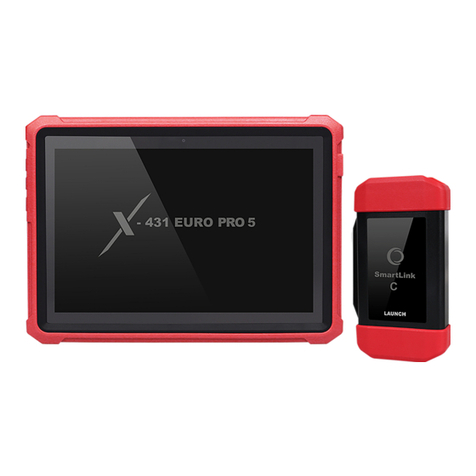
X-431 HD Module Quick Start Guide
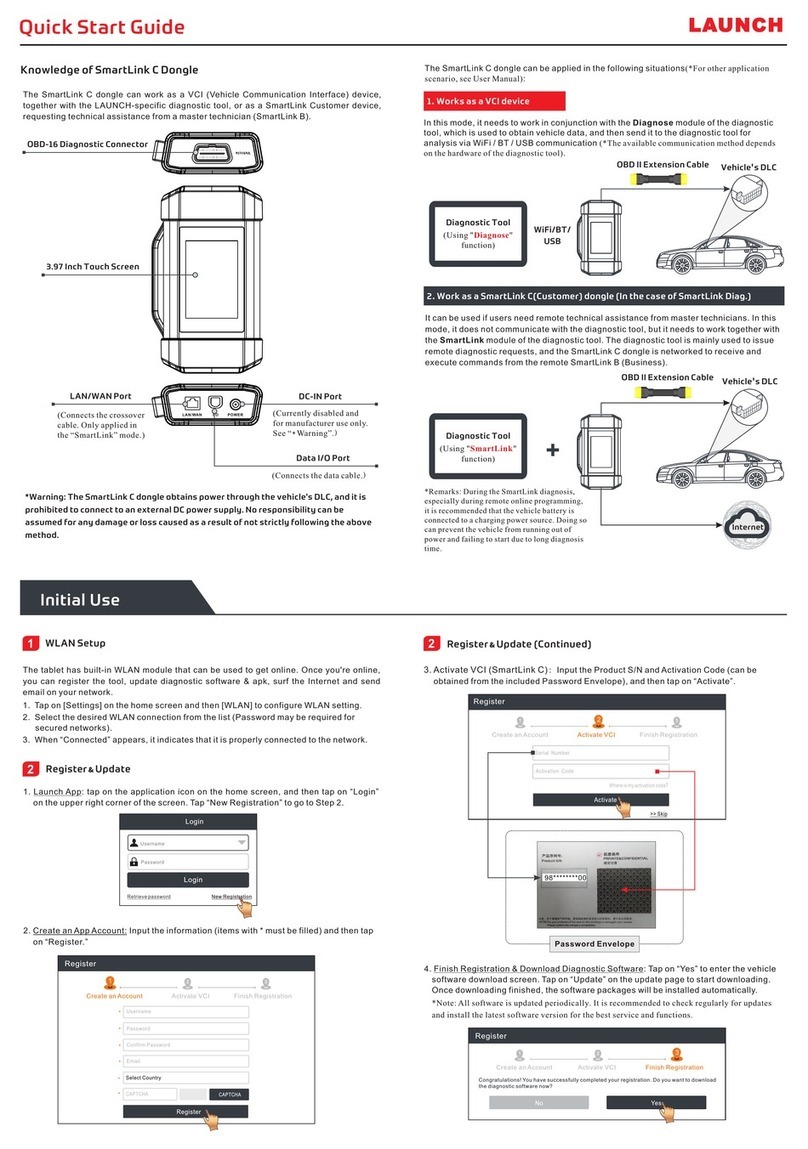
了解诊断盒
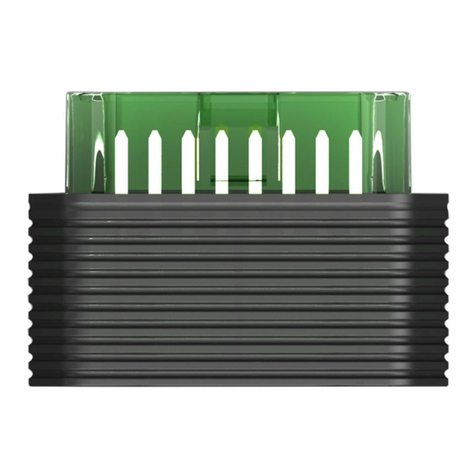
Knowledge of X-431 HD Module
Diagnostic socket
(For connecting the diagnostic cable.)
DC-IN power jack
Data transmission port
Displays the working status of the module. t is defined as
follows:
I
1. Vehicle: While the module is communicating with the
vehicle, the indicator lights up and flashes. Otherwise,
it will not illuminate.
2. Power: It illuminates solid red when the module is
powered on.
3. Wireless communication: Blue indicates the module is
working in wireless communication mode.
4. USB: It lights up when the module is connected to the
diagnostic tool via data cable.
LED Indicators
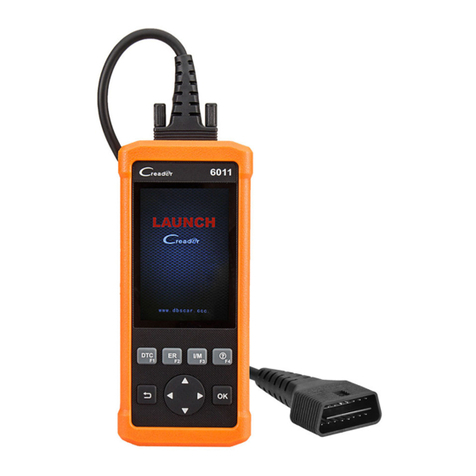
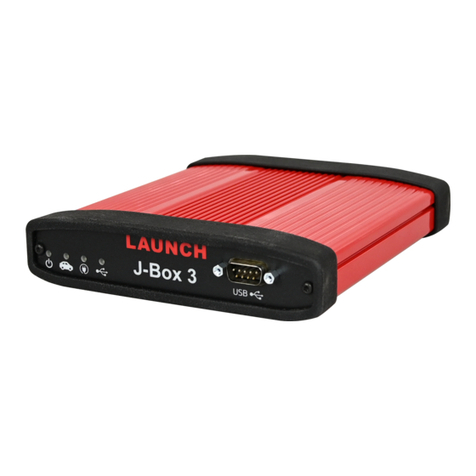
X-431 HD module works as a vehicle communication interface device, which is used read the
vehicle data and then send it to the diagnostic tool via wireless communication and data cable
connection. The LED indicators enable you to easily identify the working status of the module.
Technical parameters:
 Working voltage:9-36V
 Power consumption:≤ 2W
 Working temp.:-10℃- 55℃
 Communication via:
1) Data cable connection
2) Wireless communication
Note: When the diagnostic
cable or adaptor cable keeps
unused, please remember to
unplug it from the vehicle’s
DLC.
X-431 HD module
(For collecting vehicle live data)
Wireless communication
To vehicle’s DLC
Diagnostic cable
Working Principle
Data cable connection
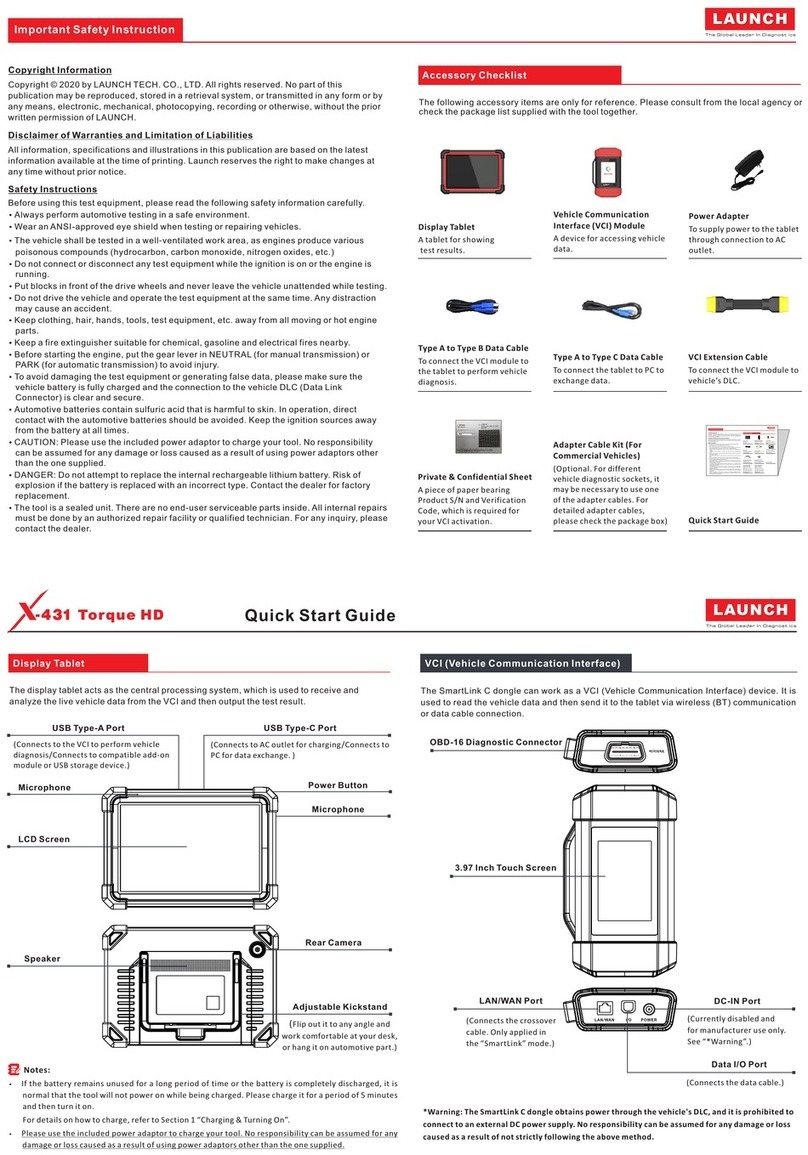
Accessory Checklist
X-431 HD module Diagnostic cable Data cables
Cigarette lighter Battery clamps cable Adaptor cable kit
(For accessing vehicle
live data)
(To connect the
module and diagnostic
tool to perform vehicle
diagnosis.)
HD (To connect the
module to the diagnostic
tool with different type of
data transmission ports.)
HD
(A piece of paper bearing
S/N and Activation Code,
which is needed for your
registration.)
Power adaptor Password envelope
(Sends the vehicle data
to diagnostic tool)
(For connecting the power adaptor
or cigarette lighter/battery clamps
cable to obtain power.
(For connecting it to the diagnostic
tool to perform vehicle diagnosis.)
(For different vehicle
diagnostic socket, it may
be necessary to use one of
the adaptor cables included
within the kit.)
(To supply power to the HD
module through connection
to vehicle’s battery.)
(To supply power to the HD
module through connection
to cigarette lighter
receptacle.)
(To supply power to the HD
module through AC outlet.)
Launch’s Android-based diagnostic tool
(such as X-431 PAD II etc.)
(For analyzing received vehicle
data and indicating the test results.)
LAUNCH
LAUNCH
LAUNCH
1. The DLC (Data Link Connector) is typically a connector
where diagnostic code readers interface with the vehicle's on-board computer.
2.
3.
5. To perform vehicle diagnosis via data cable, connect t he B-shaped terminal of the
data cable to the HD module and other end to the diagnostic tool.
Locate the vehicle’s DLC:
The
DLC location varies from vehicle to vehicle. It is generally located in driver ’s cab. If
no DLC is found, please refer to Automobile Repair Manual.
Switch the ignition on.
For vehicles equipped with OBDII management system, plug one end of the
diagnostic cable into the vehicle’s DLC, and the other end into the diagnostic
socket of the HD module, and then tighten the captive screws.
For vehicles not equipped with OBDII management system, it is necessary to use
the corresponding adaptor cable, and then follow one of the methods below to
make connection:
1
Connections
2
3
2 4
HD module Diagnostic cable
Cigarette lighter
Battery clamps cable
Adaptor cable To vehicle's DLC
To Cigarette lighter receptacle
To vehicle battery
Power adaptor To AC outlet
A
B
C
If you had a diagnostic tool of 12V passenger car configuration and intend to
experience the diagnosis of commercial vehicles, follow the steps described below to
activate the module:
Note: Please make sure that the diagnostic tool is properly connected to the Internet before
proceeding this step.
1. Launch the application, then tap -> “Profile” -> “Activate Connector”.
2. Input the Product S/N and Activation Code, which can be obtained from the
included Password Envelope, then tap “Activate” to activate it and advance to
the update center.
3. Tap “Update” to download and install it.
4. Once the module is activated, a new “Heavy-duty” tab appears on the
diagnostic main menu screen.
*Note: Once newer software is detected, a pop-up message will prompt you. In this case,
tap “Update now” to keep synchronized with the latest version.
If several VCI connectors and HD module are activated on the diagnostic tool, a
list of connectors will be displayed in the “My Connector”, which can be accessed
by tapping -> “Profile”-> “My Connector”.
 If you want to switch from a passenger car to a commercial vehicle, enter “My
Connector” -> select the HD module S/N(starting with 98649) -> tap to
navigate to the diagnostic main menu -> connect the VCI module, diagnostic tool
and vehicle -> tap “Heavy-duty” tab to select the corresponding vehicle model ->
follow the on-screen prompts to start a diagnostic session.
 To switch from a commercial vehicle to a passenger car, enter “My Connector” ->
select the VCI connector S/N -> tap to navigate to the diagnostic main menu
-> connect the VCI module, diagnostic tool and vehicle -> Use VINScan(or
manual diagnosis) to start diagnosis.
Activate X-431 HD Module & Download Software(Cont.)
Toggle Between Passenger and Commercial Vehicles
Activate X-431 HD Module & Download Software Start Diagnostics
Follow the sequence below to start a new
diagnostic session.
X-431 HD Module Quick Start Guide
Activate Connector
Serial Number
Activation Code
Activate
Tap “Diagnostic”
Tap “Heavy-duty” to
select vehicle model
Select test system
Select test function
Refer to Section 2 to
activate it
Is HD module
activated?
No
Select the module S/N
from “My Connector”
Yes
Download diagnostic
software
*Note: Pictures illustrated herein are for
reference only and this Quick Start Guide is
subject to change without written notice.
THANK YOU FOR CHOOSING LAUNCH!
If you have any questions or comments
please forward them to:
LAUNCH Tech USA Product Support
Phone: 877-528-624 xt: 4
Fax: 562-463-1590
1820 S. Milliken Ave. Ontario, CA 91761
Monday - Friday 5 am - 5 pm PST
9
Service & Repair
Phone: 877-528-624 xt: 5
Monday - Friday 8 am - 5 pm PST
Please visit our public form @
http://launch.activeboard.com
9
Other Launch Diagnostic Equipment manuals

Launch X-431 PADII User manual

Launch

Launch X-431 PADII User manual

Launch CReader 6011 User manual

Launch

Launch CReader 6011 User manual

Launch X-431 PRO3S+ User manual

Launch

Launch X-431 PRO3S+ User manual

Launch Creader 519 User manual
Launch

Launch Creader 519 User manual

Launch CRT 511S User manual

Launch

Launch CRT 511S User manual

Launch X-431 IMMO ELITE User manual

Launch

Launch X-431 IMMO ELITE User manual

Launch X431 V 11 User manual

Launch

Launch X431 V 11 User manual

Launch M-Diag Lite User manual

Launch

Launch M-Diag Lite User manual

Launch Creader Professional 123 Series User manual

Launch

Launch Creader Professional 123 Series User manual

Launch X-431 Diagun Installation guide

Launch

Launch X-431 Diagun Installation guide

Launch X-431 EURO TURBO User manual

Launch

Launch X-431 EURO TURBO User manual

Launch X-431 PAD V User manual

Launch

Launch X-431 PAD V User manual

Launch X-431 Turbo III User manual

Launch

Launch X-431 Turbo III User manual

Launch CReader V User manual

Launch

Launch CReader V User manual

Launch X-431 PADII User manual

Launch

Launch X-431 PADII User manual

Launch X-431 PADII User manual

Launch

Launch X-431 PADII User manual

Launch HD3 User manual

Launch

Launch HD3 User manual

Launch X-431 GDS User manual

Launch

Launch X-431 GDS User manual

Launch Creader 629 User manual

Launch

Launch Creader 629 User manual

Launch X-431 PADII User manual

Launch

Launch X-431 PADII User manual

Launch Creader Professional 129E User manual

Launch

Launch Creader Professional 129E User manual

Launch CRT 7 Series User manual

Launch

Launch CRT 7 Series User manual

Launch Creader Professional 123X User manual

Launch

Launch Creader Professional 123X User manual

Launch DB-15 User manual

Launch

Launch DB-15 User manual

Popular Diagnostic Equipment manuals by other brands

BGS technic 9853 manual

BGS technic

BGS technic 9853 manual

Magnaflux MD-2030 Series installation guide

Magnaflux

Magnaflux MD-2030 Series installation guide

Sealey LED038 instruction manual

Sealey

Sealey LED038 instruction manual

Hella Gutmann mega macs 56 quick start guide

Hella Gutmann

Hella Gutmann mega macs 56 quick start guide

Haldex TPMS 2.0 installation guide

Haldex

Haldex TPMS 2.0 installation guide

Vertiv BDS-40 installation instructions

Vertiv

Vertiv BDS-40 installation instructions

MSW Motor Technics MB-500 user manual

MSW Motor Technics

MSW Motor Technics MB-500 user manual

CRU WiebeTech UltraDock UDv5.5 quick start guide

CRU WiebeTech

CRU WiebeTech UltraDock UDv5.5 quick start guide

LABORIE Goby owner's manual

LABORIE

LABORIE Goby owner's manual

DIGITAL YACHT NAVDOCTOR NMEA 2000 Installation and instruction manual

DIGITAL YACHT

DIGITAL YACHT NAVDOCTOR NMEA 2000 Installation and instruction manual

Sealey VS2072.V2 instructions

Sealey

Sealey VS2072.V2 instructions

Alfano TYRECONTROL manual

Alfano

Alfano TYRECONTROL manual

Bosch TPA 200 Original instructions

Bosch

Bosch TPA 200 Original instructions

Cognivue Thrive installation guide

Cognivue

Cognivue Thrive installation guide

Autel AutoLink AL629 Quick reference guide

Autel

Autel AutoLink AL629 Quick reference guide

AU Tool CS520 user manual

AU Tool

AU Tool CS520 user manual

Pro-tec PRS 500 F Instructions for use

Pro-tec

Pro-tec PRS 500 F Instructions for use

Mindray Zonare ZS3 Service manual

Mindray

Mindray Zonare ZS3 Service manual

manuals.online logo
manuals.online logoBrands
  • About & Mission
  • Contact us
  • Privacy Policy
  • Terms and Conditions

Copyright 2025 Manuals.Online. All Rights Reserved.