Installation and Setup
BLUEPOD TECHNICAL SERVICE Tel: 1800 800 255 Email: technical@bluepod.com.au
Copyright Bluepod Coffee Co Pty Ltd Page 5 of 12
Initial Setup after installation
1. Ensure the electricity supply is OFF and the water supply is ON
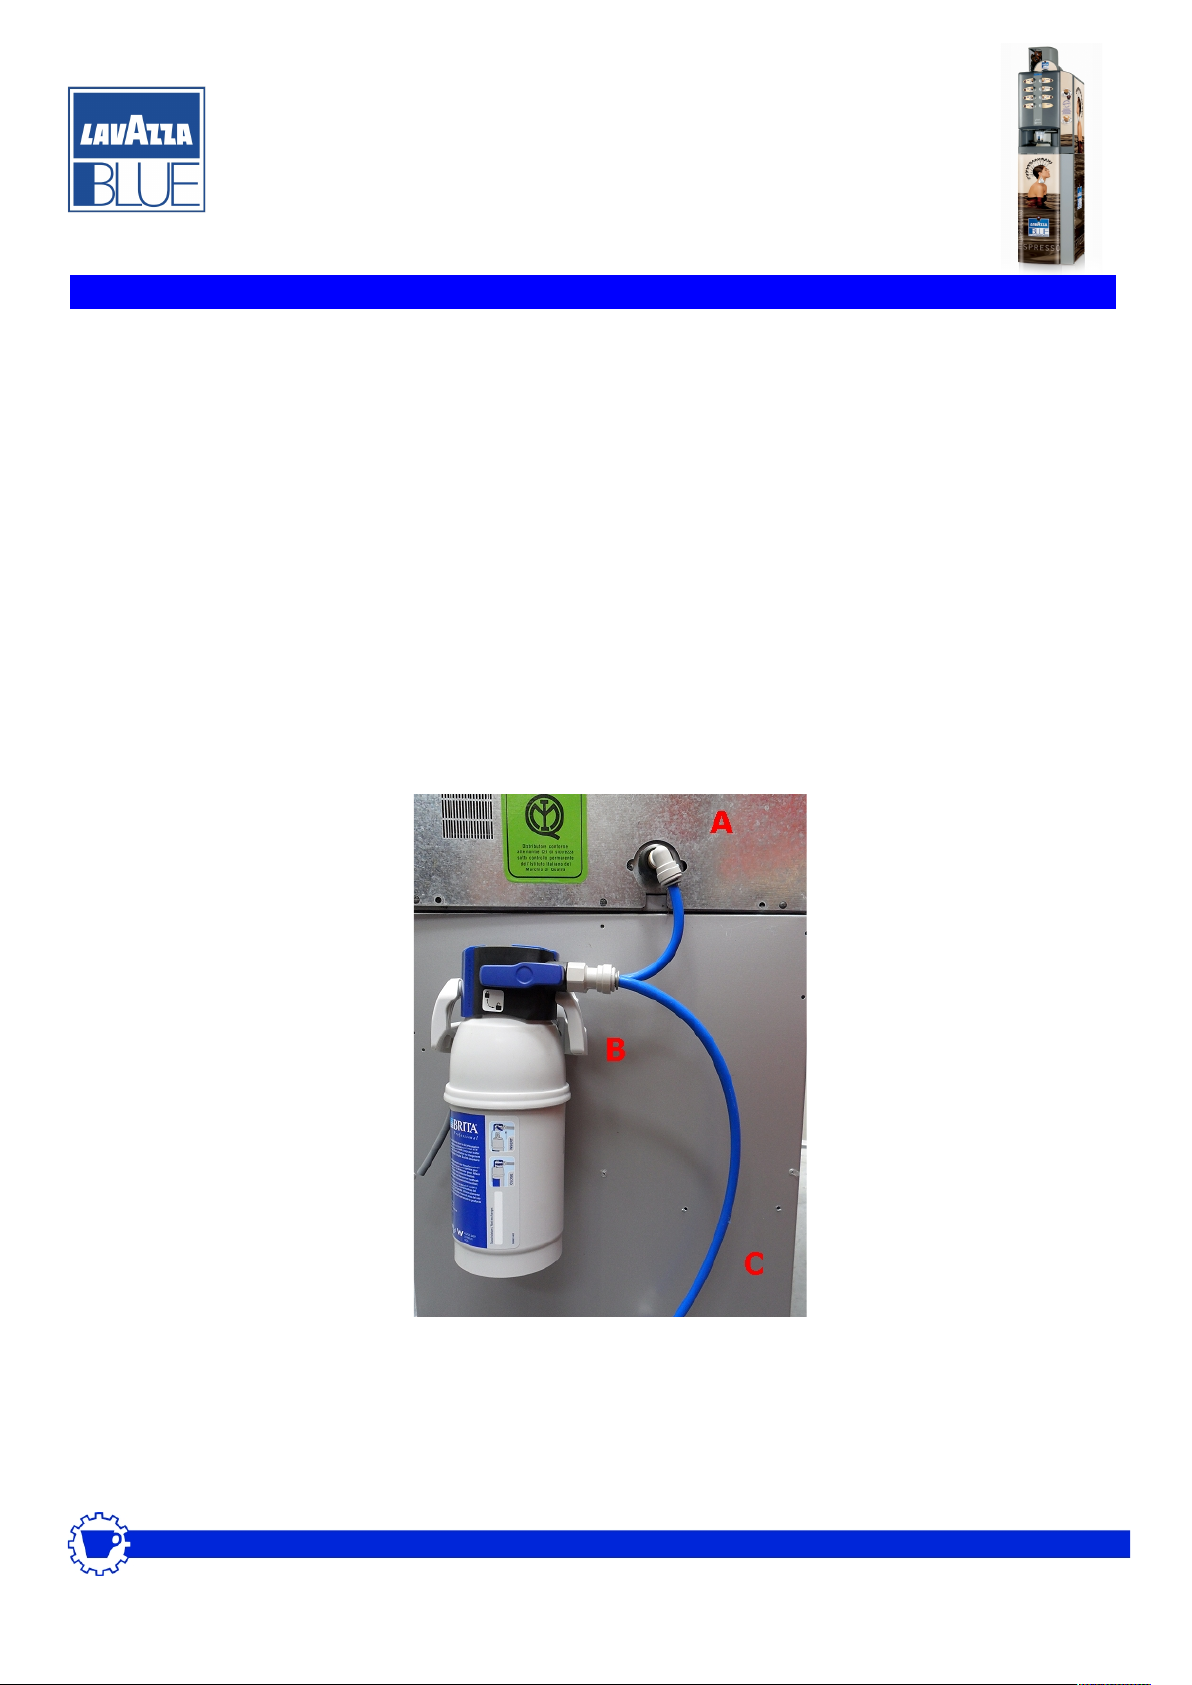
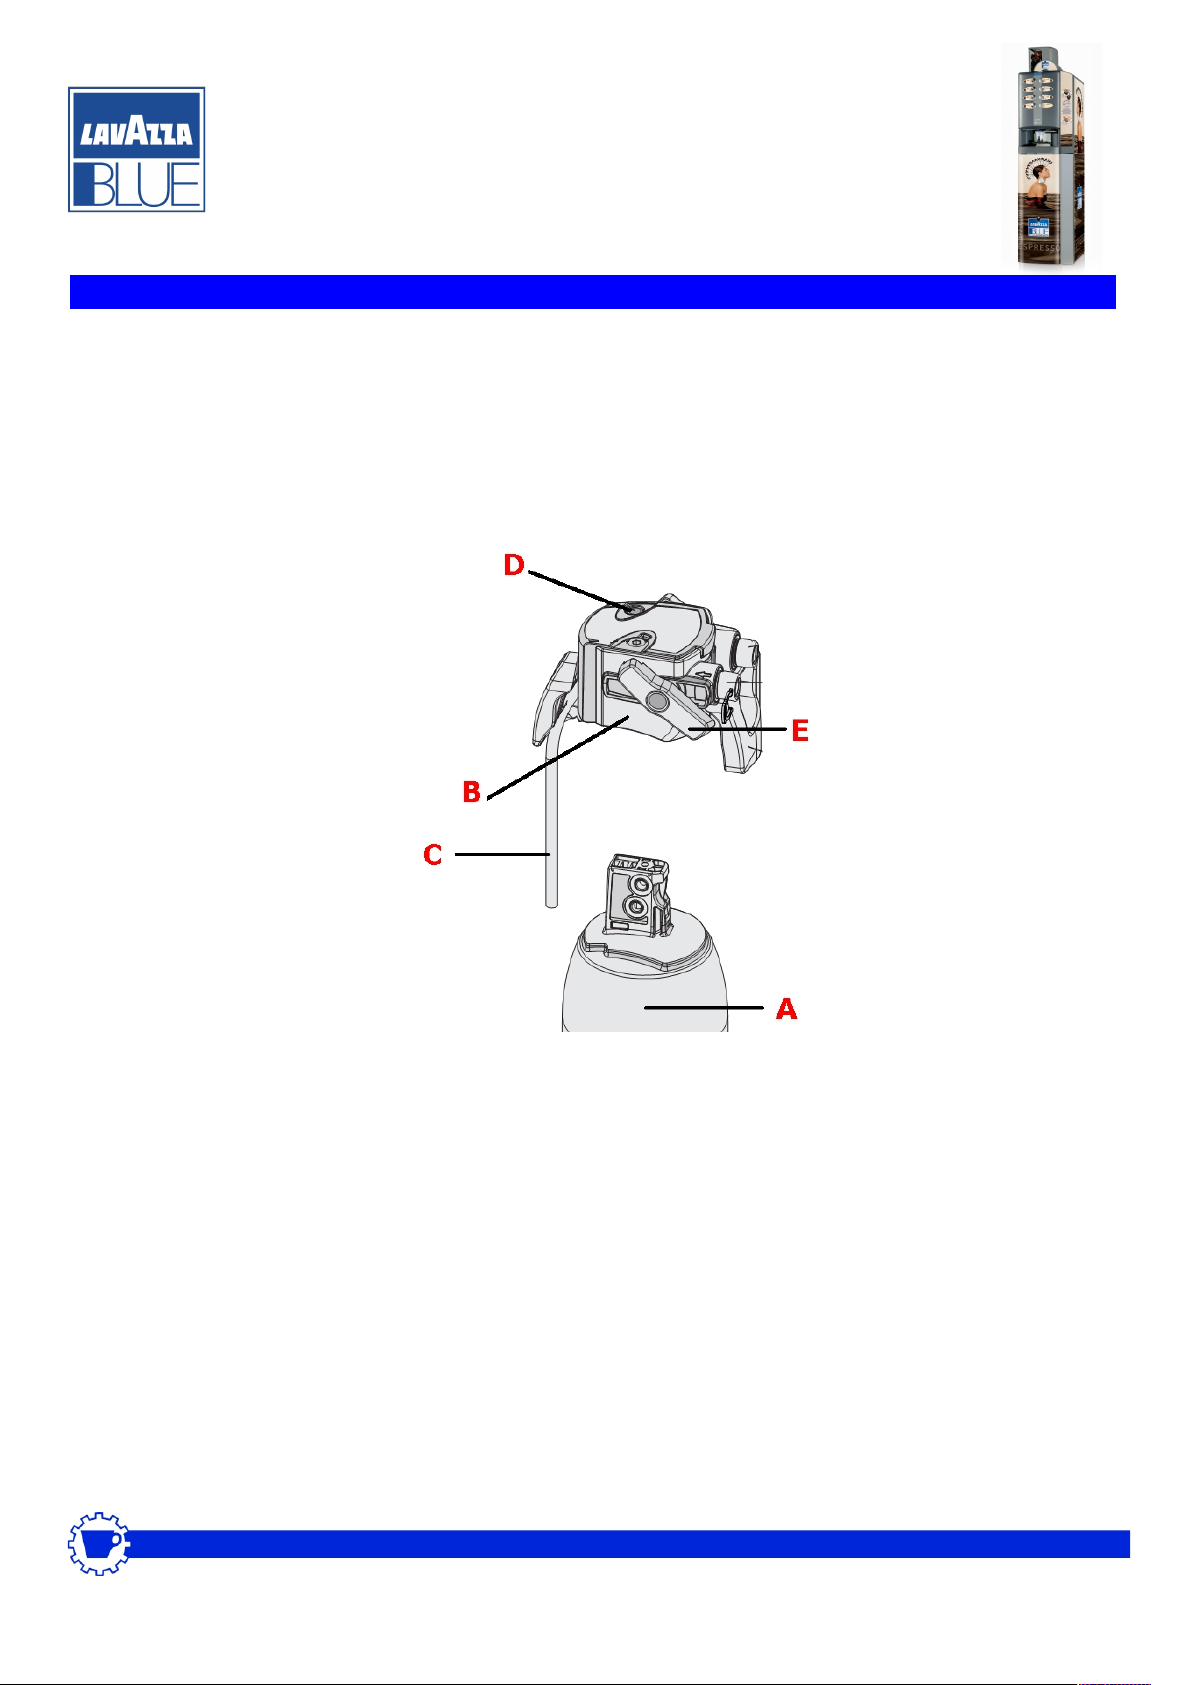
2. Machines are supplied with a Brita water filter, this must be fitted and flushed
before using the machine. Do not proceed further until this is carried out.
3. Open the top main machine door.
4. The 2 grey lids on the top of the machine can now be opened. They are used to fill
the coffee and milk/chocolate canisters. These lids cannot be opened with the door
closed.
5. The left lid is the coffee pod hopper lid. Fill the hopper with coffee pods, it takes up
to 140. Leave at least 2cm clearance from the top. DO NOT FORCE PODS IN.
The pods need space to sort within the hopper. Do not drop cardboard pieces from
the pod box into the hopper, they can jam the pod mechanism.
6. The milk and chocolate compartments on the right side of the pod hopper will take
up to a bag of product each. Fill with product. Do not overfill as the lid will not
close and the machine will not operate.
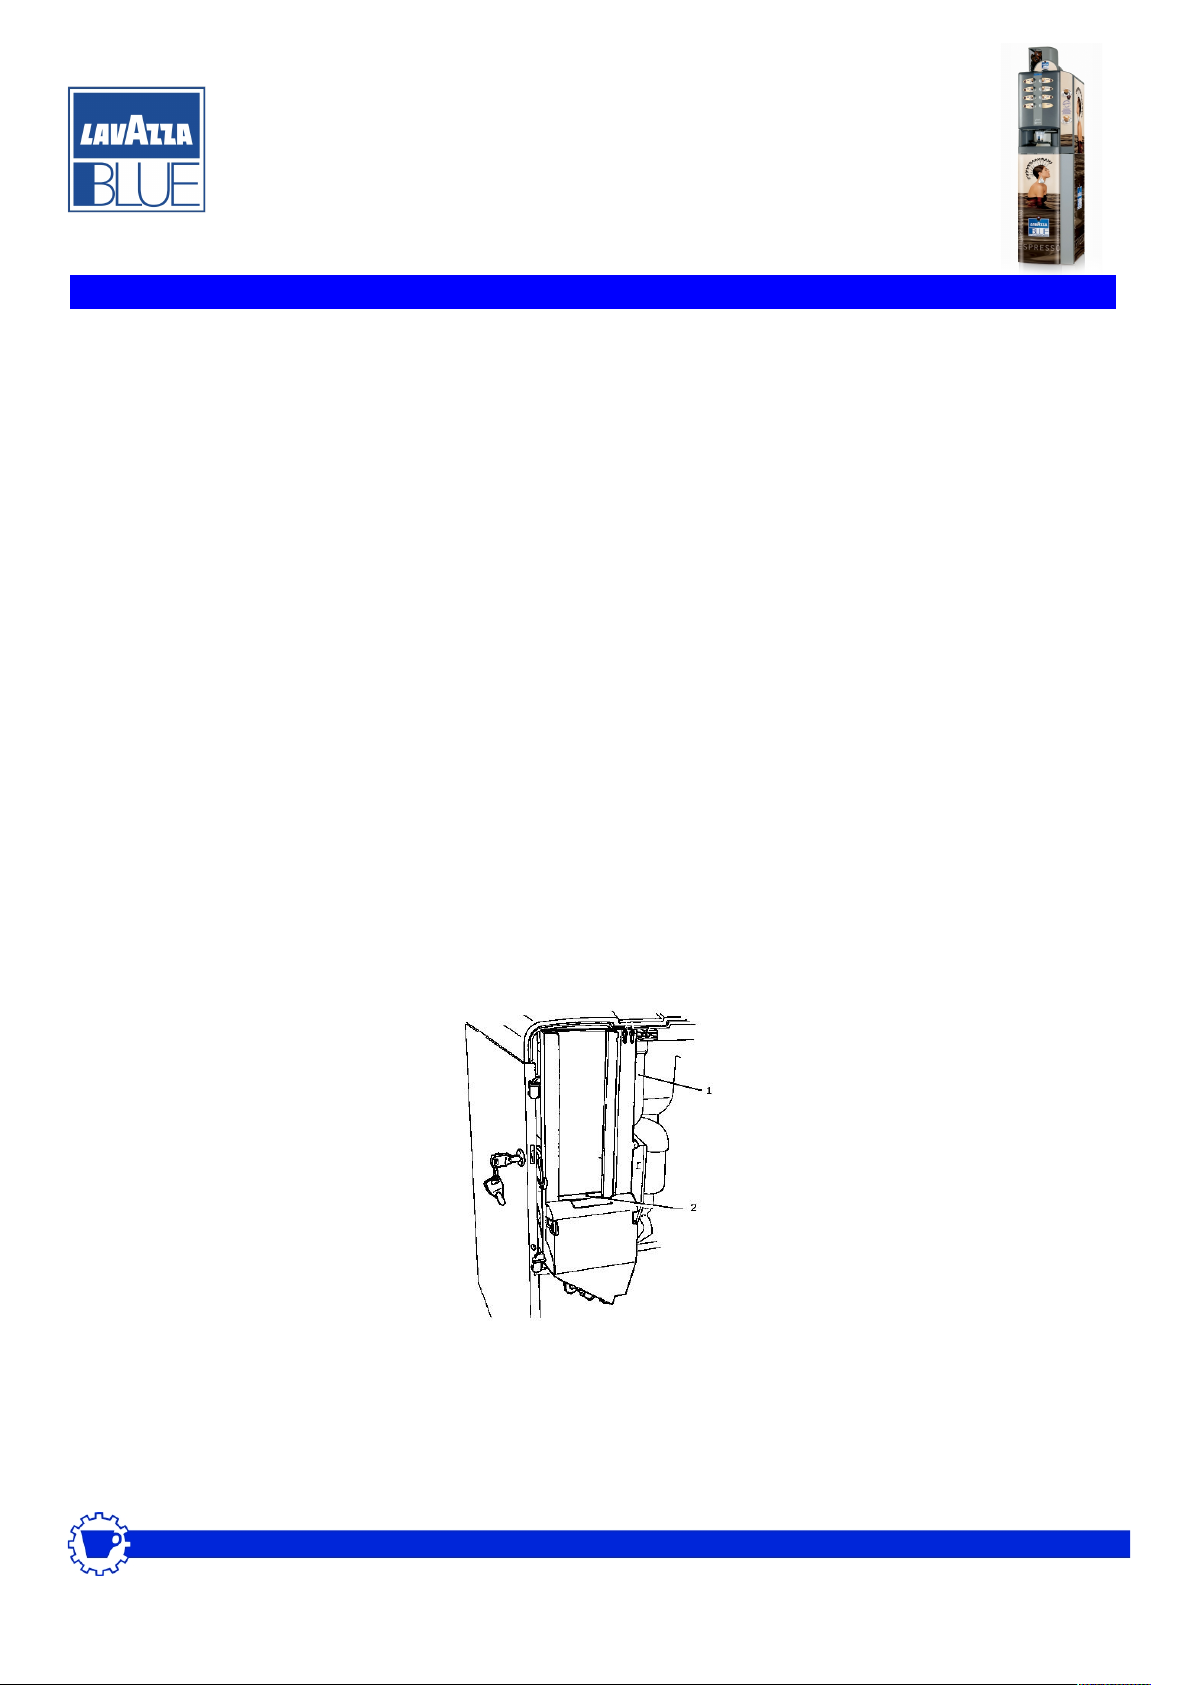
7. Rotate the sugar /stirrer mechanism outwards to access the sugar container (1)
Lift the lid and fill using normal sugar. Do not use castor sugar.