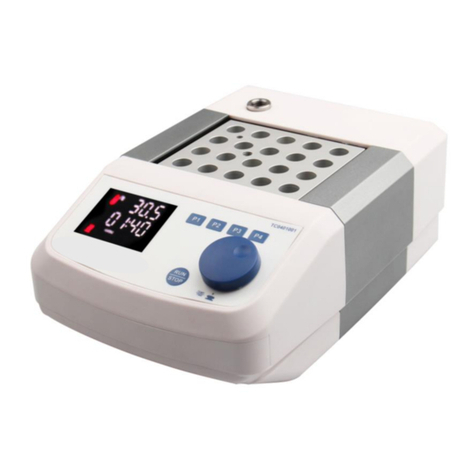
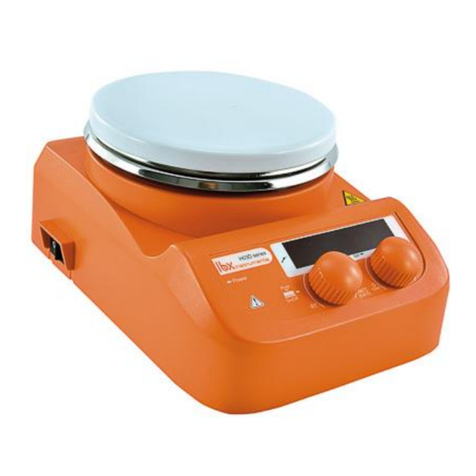
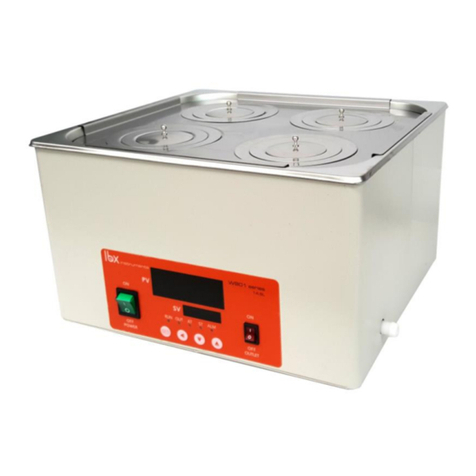
lbx HDB120 Series User manual

LBX –HDB Digital Led dry bath
Please read the User Manual carefully before use, and follow all operating and safety instructions!
user manual
english / español / français

2
User Manual
LBX - HDB Digital led dry bath
Preface
Users should read this Manual carefully, follow the instructions and procedures, and beware of all
the cautions when using this instrument.
Service
In If help is needed, you can always contact your dealer or Labbox via www.labbox.com
Please, provide the customer service representative with the following information:
Serial number (on the back side)
Description of the problem
Your contact information
Warranty
This instrument is guaranteed to be free from defects in materials and workmanship under normal
use and service, for a period of 24 months from the date of invoice. The warranty is extended only
to the original purchaser. It shall not apply to any product or parts which have been damaged on
account of improper installation, improper connections, misuse, accident or abnormal conditions of
operation.
For claim under the warranty, please contact your supplier.

3
1. Safety Precautions
Connect the device to an earthed power supply to ensure safety of the
machine and the experiment; connect the power when the machine requires
it.
The use of this instrument in inflammable, explosive, poisonous, or highly
corrosive experiments is forbidden.
Place the dry bath on a horizontal, flat, stable table leaving 100 free mm on
each side. Make sure the surface is adequate for the equipment’s weight.
This item must only be used by previously qualified staff that has read the
instructions manual and knows how to operate it.
Do not place the device near any heat source.
During its functioning, dangerous materials such as flammable or
pathological substances must be out of the device’s safety area.
While the machine is working, do not touch the working surface, in order to
avoid burns.
Read the instructions manual before using this device.
When working, wear the necessary personal protective equipment to avoid the risk of:
-Burns caused by splashing and evaporation of liquids
-Intoxication caused by release of toxic or flammable gases.

4
Set up the instrument on a spacious, stable, clean, non-slip, dry, and fireproof surface that
can support the equipment’s weight. Do not operate the instrument in explosive
atmospheres or with hazardous substances.
The temperature must be set at least 50ºC below the flash point of the substances used.
Beware of hazards due to:
-Flammable materials or media with a low boiling temperature
-Vessel overfilling
-Unsafe vessels
Process pathogenic materials only in closed vessels.
The device and accessories shall be checked before handling prior to each use. Do not use
damaged components. Safe operation is only guaranteed with the accessories included.
Accessories must be securely attached to the device and cannot come off by themselves.
Always disconnect the plug before assembling or disassembling accessories.
The instrument can only be disconnected from the main power supply by pulling the plug,
not the wire.
The voltage stated on the label must correspond to the main power supply.
Ensure that the main wire does not contact the heating base. Do not cover the device.
Keep away from high magnetic fields.
2. Instructions for use
The instrument has been designed for heating liquids in schools, laboratories, industries and
research purposes. It is not suitable for domestic use or for use in environments that can be
hazardous for either the user or the instrument.

5
3. Inspection
3.1 Unpacking
Unpack the equipment carefully and check for any damages that may have arisen during
transportation. If necessary, contact your supplier for technical support.
Note:
If there is any apparent damage on the
equipment, please do not plug it into the power
line.
3.2 Items list
The package includes the following items:
LBX HDB120 series:
Items
Quantity
Main unit
1
Power cable
1
Instructions manual
1

6
4. Control Elements
Digital led dry bath LBX HDB series:
In the HB120-S series, the control panel is set up the following way:
2
3
5, 6
4
1. Power
2. Parameter adjustment know
3. Time adjustment button
4. Temperature adjustment button
5. Timer LED
6. Heat LED
7. Temperature screen
8. Time screen
7
8
1

7
5. Trial run
Make sure the required operating voltage and the power supply’s voltage match.
Make sure the socket is earthed.
Add the substance to heat in the testing tube and place it on the work plate.
Plug in the power inlet, and turn on the “POWER” (1) switch.
Set the target temperature with the T º button (4) and adjust it with the knob (2). You shall
see the required temperature on the screen (7)
Set the time, with the timer button (3) otherwise, the machine will work continuously. The
selected time should appear on the timing screen (8)
Press the parameter setting knob (2) to start the heating function.
While the device is on, the heat led (6) will be on (yellow light) and if the timer has been set,
the timer led (5) will also be on.
On the Tº display (7) working temperature shall appear. If the timer has been set, the
adjusted time will show on the time display (8)
If the heat increases and the timer is counting down, the device is working properly.
6. Handling
Place the equipment in a plane and stable surface, leaving at least 100 mm of free space on
each side. Make sure that the surface is adequate for the weight of the equipment.
Add the substance into the testing tube and place it on the work plate.
Plug the appliance, and turn on the “Power” switch.
Wait until the device finishes the initializing process, the real temperature of the device will
appear on the screen (7).
After adjusting temperature and timer (if necessary), press the adjusting knob (2)
The heat (6) and time (5) LEDS shall stay on (yellow)
After use, the device must be turned off using the “Power” button (1) and unplugged.
Make sure the device stays unplugged while is not being used for long periods

8
Note:
Make sure that the voltage required by the
equipment matches with electrical network.
Make sure the main power cord is not in
contact with the heating surface
If the equipment is damaged, please
disconnect it from the electrical network.
6.1 Heat setting
The device is controlled by digital temperature control technology, the maximum
temperature is 120℃.
Set the target temperature with the Tº button (4) and adjust it with the knob (2) to the target
value. For saving this parameter press the knob (2).You shall see the working temperature on
the screen (7). The device will start with the heating function
6.2 Timer setting
The device can work in accordance with the timing mode or continuous operation mode.
By default, this option will remain inactive, the device will work continuously until it’s
turned off manually. In order to work with
specific periods of time, proceed as follows:
To set the timing mode, press the timer button (3), (the time display area will be
flashing)(8) and will show the last setting, by default will be “00:00”.
Rotate the parameter setting knob (2) to set the target time (min), press the
parameter setting knob to save the selected option. On the timing screen (8), the
countdown will be displayed.
During operation, motion can be stopped at any time by pressing the
speed/timer control knob. If the knob is pressed again, motion and timer countdown
will restart. When the timer reaches zero, the unit will stop automatically.
To set the continuous mode: Press the time switch button (3), the characters in time
display area will be flashing, make sure the setting time is “00:00”, press the
parameter setting knob (2) to save the changes and the timer will be disabled.
Note: The working temperature needs to be set before the timer.

9
7. Faults
• The device does not start:
Check if the power line is unplugged.
Check if the fuse is broken or loose.
• The set temperature can’t be reached:
Check if the control panel has been damaged.
The electric resistance could be damaged.
If these faults are not resolved, please contact manufacturer/supplier.
8. Maintenance and Cleaning
Proper maintenance can keep instruments working properly and lengthen its lifetime.
Do not spray cleanser into the instrument when cleaning.
Unplug the power line while cleaning.
Only use recommended cleansers:
Dyes
Isopropyl alcohol
Construction materials
Water containing tensides / Isopropyl alcohol
Cosmetics
Water containing tensides / Isopropyl alcohol
Food
Water containing tensides
Fuels
Water containing tensides
Before using other cleaning or decontamination method, the user must ensure with the
manufacturer that this method will not harm the instrument.
Wear the proper protective gloves during cleaning procedures.
The device needs to be cleaned and decontaminated before sending to repair.
Must be sent with the original packing.
Make sure the device is used on a clean and dry surface and that the ambience temperature
is steady.

10
9. Transport and storage
Keep the device on a dry and clean place with good airing and free of corrosive gases and
flammable or corrosive atmospheres.
Ensure that the device does not get wet or hit during transport.
10. Associated Standards and Regulations
Construction in accordance with the following safety standards
EN 6110-1 (Security standards for the measurement electric devices of control and laboratory use)
UL 3101-1 (Electric devices for laboratory purposes)
CAN/CSA C22.2 (1010-1)
EN61010-2-10 (heating)
Construction in accordance with the following EMC standards
EN 61326-1 (Electromagnetic compatibility)
Associated EU guidelines:
EMC guidelines: 89/336/EWG
Instrument guidelines: 73/023/EWG
Changes or modifications not expressly approved by the party responsible for
compliance could void the user's authority to operate the equipment.
Note: This equipment has been tested to comply with the limits for an electrical
device of class A with compliance with part 15 of the FCC rules. These limits are
designed to provide protection against interference when the equipment operates
in a commercial environment. This equipment generate, use and can radiate radio
frequency energy, therefore, if it is not installed and used in accordance with this
instruction manual, it may cause interference in radio communications. Using this
equipment in residential areas may cause harmful interference in this case, the
user will have to correct these interferences at his own expense.

11
12. Technical characteristics
Item
Especificación
VoltaGe [VAC]
100-240
Frequency (Hz)
50/60
Power [W]
160
Block dimension [mm]
150x95
Temperature range [ºC]
Tª Amb. +5º-120ºC
Temperature view
LED
Precision
±0.5 ºC
Security temperature [ºC]
140 ºC
Timer
Si
Time range
1 –99h59min
Operating setting
continuous / Timer
Dimensions [W x D x H mm]
175 x 290 x 85
Weight [Kg]
1.6 (without the block)
Permissible temperature
5-40 ºC
Permissible humidity
80%
Protection
DIN EN 60529
IP 21

12
Manual de usuario
LBX HDB - Termostato digital de bloque metálico
Introducción
Los usuarios deben leer este manual cuidadosamente, seguir las instrucciones y los procedimientos,
con el fin de estar informados de todas las precauciones antes de usar el equipo, así como con el
fin de obtener las máximas prestaciones y una mayor duración del equipo.
Consultas y servicio técnico
Cuando necesite ayuda, puede contactar con su distribuidor o con Labbox a través de:
www.labbox.com.
Por favor proporcione al personal de Atención al Cliente la siguiente información:
Número de serie del equipo (en el panel trasero)
Descripción del problema detectado
Sus datos de contacto
Garantía
El termostato digital modelo LBX HDB dispone de una garantía de 24 meses desde la fecha de
factura para defectos de material y fabricación en caso de un uso normal descrito en este manual.
La garantía se extiende solamente al comprador original.
Esta garantía no se aplica al equipo o a cualquier pieza dañada como consecuencia de una mala
instalación, malas conexiones, mal uso, un accidente o condiciones anormales de uso.
Para las reclamaciones bajo garantía, por favor póngase en contacto con su proveedor.

13
1. Instrucciones de seguridad
Conecte el equipo a tierra a una fuente de alimentación provista de
toma a tierra para garantizar la seguridad del instrumento y del
experimento; conectar la alimentación cuando el equipo lo requiera.
Se prohíbe el uso de este equipo en experimentos inflamables y
explosivos, tóxicos o altamente corrosivos.
Coloque el dispositivo sobre una mesa horizontal, plana y estable,
creando un espacio libre de 100 mm por lado. Asegúrese de que la
superficie sea adecuada al peso del equipo.
Este artículo debe ser utilizado por personal cualificado previamente,
que conozca el equipo y su manejo mediante el manual de uso.
No coloque el equipo en zonas próximas a fuentes de calor.
Durante su funcionamiento, el material peligroso tal como líquidos
inflamables o material patológico, deben estar fuera de esta área
Cuando el equipo está en funcionamiento, no toque la superficie
calefactora para evitar quemaduras.
Lea el manual de instrucciones antes de utilizar el equipo.
Durante el uso del equipo, usar protección de seguridad personal (EPI) evitará riesgos de
posibles daños cómo:
-Quemaduras por salpicaduras y evaporación de líquidos.
-Intoxicación por emisión de gases tóxicos o combustibles.

14
Coloque el equipo en una superficie plana, estable, limpia, antideslizante y a prueba de fuego.
No utilice el equipo en atmósferas explosivas, con materiales peligrosos o bajo el agua.
La temperatura debe ajustarse siempre al menos 50ºC por debajo de la temperatura de
inflamación de los materiales utilizados.
Cuidado con los peligros causados por:
-Materiales o medios inflamables con una temperatura de ebullición baja
-Sobrellenado de los recipientes
-Recipientes inseguros
Utilice recipientes cerrados en caso de procesamiento de material patógeno.
Compruebe el equipo y los accesorios antes de cada uso. No utilice componentes en mal estado.
El funcionamiento seguro del equipo está garantizado solamente con los accesorios
compatibles. Los accesorios deben estar firmemente sujetos al equipo y no pueden
desprenderse. Desconecte siempre la alimentación antes de instalar los accesorios.
El equipo sólo se puede desconectar de la toma de corriente tirando de la base del enchufe, no
del cable.
El voltaje indicado en el equipo debe corresponder al de la red eléctrica utilizada.
Asegúrese que el cable de alimentación principal no esté en contacto con la superficie
calefactora. No cubra el equipo.
Mantenga el equipo alejado de elevados campos magnéticos.
2. Normas de uso
Este equipo está diseñado especialmente para calentar en seco bloques metálicos para propósitos
educacionales, industriales o de investigación. Este aparato no es adecuado para uso doméstico o
en ambientes que pudieran ser peligrosos para el usuario o el equipo.

15
3. Inspección
3.1 Recepción
Desempaque cuidadosamente el instrumento y compruebe que el equipo y/o los accesorios
hayan llegado sin daños aparentes. En caso necesario póngase en contacto con el proveedor que le
suministró el equipo para solicitar ayuda técnica.
Nota:
Si el equipo está dañado, no debe conectarse a la red
eléctrica.
3.2 Lista de embalaje
El paquete incluye los siguientes artículos:
HDB120:
Contenido
Cantidad
Unidad principal
1
Cable de alimentación
1
Manual de uso
1

16
4. Elementos de control
Termostato digital de bloque metálico LBX HDB series:
En el equipo HB120-S series, el panel de control se distribuye de la siguiente manera:
2
1. “Power”
2. Mando de ajuste de parámetros
3. Botón ajuste de tiempo
4. Botón ajuste de temperatura
5. Timer LED
6. Heat LED
7. Pantalla de temperatura
8. Pantalla de tiempo
7
8
1
3
4
5 y 6

17
5. Test de funcionamiento
Asegúrese de que el voltaje requerido por el equipo coincide con el de la red eléctrica utilizada.
Asegúrese de que la toma de corriente dispone de toma de tierra.
Añada la substancia a calentar en el tubo de ensayo e introdúzcalo en la placa de trabajo.
Introduzca el recipiente con el medio en la placa de trabajo.
Conecte el cable a la red eléctrica y asegúrese de que la alimentación esté encendida; a
continuación, pulse el botón “Power” (1).
Mediante el botón de temperatura (4), ajuste la temperatura objetivo con ayuda del mando de
ajuste (2); en la pantalla de temperatura (7) podrá observar la temperatura introducida.
Mediante el botón de temporizador (3), ajuste un tiempo de trabajo. Si no, el equipo trabajará
continuadamente; en la pantalla de tiempo (8) podrá observar el período de tiempo ajustado.
Pulse el mando de ajuste (2) para que el equipo empiece a calentar.
Cuando el equipo esté en funcionamiento, la Heat LED (6) permanecerá encendida (amarillo) y, si
ha ajustado un temporizador, la Timer LED (5) también permanecerá encendida.
En la pantalla de temperatura (7), se le mostrará la temperatura actual de trabajo; si se ha
configurado un temporizador, en la pantalla de tiempo (8), se le mostrará el tiempo ajustado
anteriormente.
Si la temperatura aumenta y el temporizador resta tiempo correctamente, indican el buen
funcionamiento del equipo.
6. Manejo
Coloque el termostato digital sobre una superficie plana y estable, creando un espacio libre al
menos de 100 mm por lado. Asegúrese de que la superficie es adecuada para el peso del
equipo.
Añada el medio en el recipiente que dispondrá a calentar. Seguidamente, introduzca el
recipiente con el medio en la placa de trabajo.
Enchufe el equipo a la corriente; a continuación, encienda el equipo con el botón “Power”.
Espere a que el equipo haga su puesta a punto; al final del encendido, podrá ver en la pantalla
de temperatura (7) la temperatura real del equipo.
Para que el equipo empiece a trabajar, después de haber ajustado una temperatura y, si es
necesario, un temporizador, debe pulsar el mando de ajuste (2).
Cuando el equipo esté en funcionamiento, las luces LED de temperatura y tiempo (6) y (5),
permanecerán encendidas (amarillo).
Después de su uso, apague el equipo mediante el botón “Power” (1) y desenchúfelo de la red
eléctrica.
Recuerde que, si no va a hacer uso del equipo durante un período de tiempo prolongado, el
equipo debe permanecer desenchufado de la red eléctrica.

18
Nota:
Asegúrese de que el voltaje requerido por el
equipo coincida con el de la red eléctrica
utilizada.
Asegúrese que el cable de alimentación
principal no esté en contacto con la
superficie calefactora.
Si detecta que el equipo está
averiado/dañado, por favor, desconéctelo de
la red eléctrica.
6.1 Ajuste de la temperatura de trabajo
Este equipo usa tecnología digital para el control de temperatura. La temperatura máxima es de
120ºC; proceda de la siguiente manera para realizar un ajuste de temperatura:
Pulse el botón de ajuste de temperatura (4); en la pantalla de temperatura (7) le mostrará la
temperatura anteriormente seleccionada. Para cambiar la temperatura objetivo, ayúdese del mando
de ajuste (2); una vez alcanzada dicha temperatura, pulse el mando de ajuste (2) para guardar la
temperatura seleccionada; seguidamente, el equipo empezará a calentar.
6.2 Ajuste del temporizador
Este equipo puede trabajar en modo temporizador o continuo.
Por defecto, siempre que encienda el termostato, está opción permanecerá apagada, por lo que el
equipo permanecerá en funcionamiento hasta que sea apagado manualmente. Si desea trabajar
durante períodos de tiempo concretos, proceda de la siguiente manera:
Pulse el botón de ajuste de tiempo (3); en la pantalla de tiempo (8) le mostrará el tiempo
anteriormente ajustado. Por defecto, éste será de 00:00.
Gire el mando de ajuste (2) para seleccionar el período de tiempo en que desea trabajar (min);
una vez alcanzado dicho tiempo, pulse el mando de ajuste (2) para guardar el tiempo
seleccionado.
En la pantalla de tiempo (8), se le mostrará el tiempo restante de trabajo.
La operación se puede detener en cualquier momento pulsando el mando de
velocidad/tiempo. Si el mando se vuelve a pulsar, la operación y el temporizador se reinician.
Cuando el temporizador llega a cero, la operación se detiene.
Si desea desactivar esta opción, proceda de la siguiente manera:
Pulse el botón de ajuste de temperatura (3) y, con ayuda del mando de ajuste (2), fije el tiempo
en “00:00”; pulse el mando de ajuste (2) para guardar la acción y, el temporizador estará
desactivado.
Nota: Primero, es necesario ajustar una temperatura de trabajo y luego ajustar el temporizador para que éste
entre en funcionamiento.

19
7. Resolución de pequeñas averías
El equipo no se enciende:
-Compruebe si la línea eléctrica está desconectada
-Compruebe si el fusible está roto o suelto.
-
La temperatura no puede alcanzar la temperatura programada:
-Compruebe si el panel de control tiene daños producidos durante el transporte
-La resistencia del equipo puede estar averiada
Si no se resuelven estas pequeñas averías, póngase en contacto con el proveedor que le
suministró el equipo.
8. Mantenimiento y limpieza
Un mantenimiento adecuado permite que el equipo funciona correctamente y alarga su vida útil.
No rocíe el producto de limpieza directamente sobre el instrumento cuando se disponga a
limpiarlo.
Desconecte la alimentación principal durante la limpieza.
Utilice únicamente productos de limpieza recomendados en las siguientes situaciones:
Colorantes
Alcohol Isopropílico
Material de
construcción
Agua con tensioactivos/Alcohol
isopropílico
Productos cosméticos
Agua con tensioactivos/Alcohol
isopopílico
Productos alimenticios
Agua con tensioactivos
Combustibles
Agua con tensioactivos
Antes de usar otro método de limpieza o de descontaminación, el usuario debe verificar con el
fabricante que este método no daña el instrumento.
Utilice guantes de protección adecuados durante la limpieza del equipo.
El equipo deberá ser limpiado y desinfectado antes de ser enviado a reparar.
Utilice siempre el embalaje original.
Utilice el equipo en un lugar seco y limpio y con una temperatura ambiente estable.

20
9. Almacenamiento y Transporte
Mantener el equipo en un lugar seco y limpio, con buena ventilación y libre de gases corrosivos
y atmosferas inflamables o corrosivas.
Durante su transporte, evite que el equipo se moje y sufra golpes que puedan afectar al equipo.
10. Normativas aplicables
Fabricación acuerdo con los siguientes normas de seguridad:
EN 6110-1 (Requerimientos de seguridad para los equipos eléctricos de medida, control y uso en
laboratorios. Parte 1/ requisitos generales)
UL 3101-1 (Equipos eléctricos para uso en laboratorio; Parte 1: Requisitos generales)
CAN/CSA C22.2 (1010-1)
EN61010-2-10 (Calefacción)
Fabricación de acuerdo con la siguiente normativa CEM
EN 61326-1 (Compatibilidad electromagnética)
Directivas UE asociadas
Directiva EMC: 89/336/EWG
Directiva del instrumento: 73/023/EWG
Los cambios o modificaciones no aprobados expresamente por la parte responsable del
cumplimiento pueden anular la autoridad del usuario para operar con el equipo.
Nota: Este equipo ha sido probado para cumplir con los límites para un dispositivo eléctrico de
clase A con el cumplimiento de la parte 15 de las reglas FCC. Estos límites son diseñados para
proporcionar una protección contra las interferencias cuando el equipo opera en un ambiente
comercial. Este equipo genera, utiliza y puede irradiar energía de radio frecuencia, por lo tanto, si
no es instalado y usado concorde a éste manual de instrucciones, puede causar interferencias en las
radio comunicaciones. Usar este equipo en zonas residenciales puede causar interferencias dañinas,
en éste caso, el usuario tendrá que corregir estas interferencias por su propia cuenta.
Table of contents
Languages:
Other lbx Laboratory Equipment manuals
Popular Laboratory Equipment manuals by other brands

Delsys
Delsys Trigno Avanti Load Cell Adapter user guide

Metrohm
Metrohm 900 Touch Control Tutorial

BiOptic
BiOptic Qsep 1 Operation Quick Start

VERDER
VERDER Carbolite Gero HTMA 7/28 Installation, operation and maintenance instructions

Giatec Scientific
Giatec Scientific SURF user manual

akrometrix
akrometrix Table Top Shadow Moire user manual