lbx WB01 Series User manual

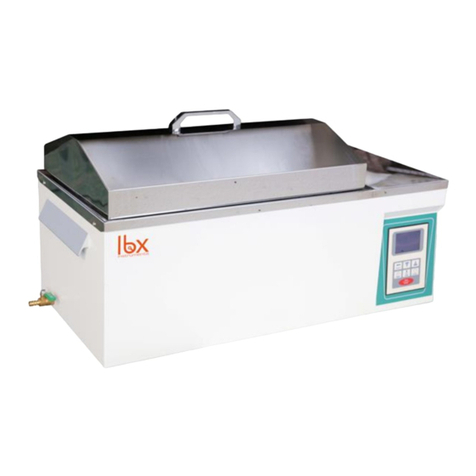
WB01 Thermostatic Water Bath
Please read the User Manual carefully before use, and follow all operating and safety instructions!
user manual
english / español / français / italiano

2
User manual
WB01 Digital thermostatic water bath
Preface
Users should read this Manual carefully, follow the instructions and procedures, and beware of all the cautions
when using this instrument.
Service
If help is needed, you can always contact your dealer or Labbox via www.labbox.com
Please, provide the customer service representative with the following information:
▪Serial number (on the back side)
▪Description of the problem
▪Your contact information
Warranty
This instrument is guaranteed to be free from defects in materials and workmanship under normal use and
service, for a period of 24 months from the date of invoice. The warranty is extended only to the original
purchaser. It shall not apply to any product or parts which have been damaged on account of improper
installation, improper connections, misuse, accident or abnormal conditions of operation.
For claim under the warranty, please contact your supplier.

3
1. Safety Instructions
Connect the device to an earthed power supply to ensure safety of the
machine and the experiment; connect the power as the machine
requires it.
The use of this instrument in inflammable, explosive, poisonous, or
highly corrosive experiments is forbidden.
Place the water bath on a horizontal, flat, stable table leaving 30
free cm on each side.
The heating mantle must only be used by previously qualified staff
that has read the instructions manual and knows how to operate it.
Do not place the heating mantle near any heat source.
During its functioning, dangerous materials such as flammable or
pathological substances must be out of the device’s safety area.
An overfilling of the vessel could cause some working parts to
overheat, which could dissolve flammable materials and start a fire.
While the machine is working, do not touch the working surface, in
order to avoid burns.
Read the instructions manual before using this device.
•When working, wear the necessary personal protective equipment to avoid the risk of:
-Burns caused by splashing and evaporation of liquids
-Intoxication caused by release of toxic or flammable gases.
•Set up the instrument on a spacious, stable, clean, non-slip, dry, and fireproof surface that can
support the weight of the equipment. Do not operate the instrument in explosive atmospheres
or with hazardous substances.
•The equipment must be used only when the resistor is covered by water; doing it otherwise will
harm the resistor.
•The temperature must be set at least 25ºC below the flash point of the substances used.
•Beware of hazards due to:
-Flammable materials or media with a low boiling temperature
-Overfilling of the vessel

4
-Unsafe vessels
•Process pathogenic materials only in closed vessels.
•Check the instrument and accessories before handling for damage prior to every use. Do not
use damaged components. Safe operation is only guaranteed with the accessories described
in the “Accessories” chapter. Accessories must be securely attached to the device and cannot
come off by themselves. Always disconnect the plug before the assembly or disassembly of
accessories.
•Use original spares only, consult your supplier for more information.
•The instrument can only be disconnected from the main power supply by pulling from the plug,
not the cable.
•The voltage stated on the label must correspond to the main power supply.
•Ensure that the mains cable does not touch the heating base. Do not cover the device.
•Keep away from high magnetic fields.
•Pay attention to the temperature setting. Never leave the equipment unattended while the
heating function is ON.
2. Using instructions
The instrument is designed for heating liquids in schools, laboratories or factories. It is not suitable for
domestic use or for use in environments that can be hazardous for either the user or the instrument.
3. Inspection
3.1 Unpacking
Unpack the equipment carefully and check for any damages that may have arisen during
transportation. If necessary, contact your supplier for technical support.
Note:
If there is any apparent damage to the
equipment, please do not plug it into the power
line.

5
3.1. Items list
The package includes the following items:
WB01 series:
4. Control Elements
4.1. Thermostatic water bath, WB01 series:
In the TWBA-001-001 series, the control panel is set up the following way:
1. “Power”: ON/OFF switch
2. Control panel
3. Power inlet
Items
Quantity
Main unit
1
Instructions manual
1
Power cable
1
Resistor covering platform
1
Lid with hole
1
Fuse
1
Reducing discs
Según Modelo
2
3
1

6
In the other models, the control panel is set up this way:
1.1 ‘Power’: ON/OFF switch
1.2 Drain switch: ‘Outlet’
1.3 Control panel
1.4 Draining pipe
1.5 Power inlet
Control Panel
The control panel is the same for all models.
2.1 SET: parameters confirmation 2.7 RUN: work indicator
2.2 ◄: shift digits 2.8 OUT: heat indicator
2.3 ▼: decrease parameter 2.9 AT: auto setting indicator
2.4 ▲: increase parameter 2.10 ST: time setting indicator
2.5 PV screen: measurement value 2.11 ALM: alarm indicator
2.6 SV screen: parameter value
1.5
1.1
1.3
1.2
1.4
2.7
2.8
2.5
2.10
2.11
2.6
2.1
2.2
2.9
2.3
2.4

7
5. Trial run
▪Place the equipment on a flat, stable surface that can support the weight of the device
leaving 30 free cm on each side.
▪Make sure the required operating voltage and the power supply’s voltage match.
▪Make sure the socket is earthed.
▪Place the resistor covering platform and fill the water barrel 2/3 of its total capacity.
▪The use of decalcified water is recommended.
▪Connect the power cable to the equipment and then to the socket. Make sure the power is ON.
▪Turn ON the equipment by pressing the ON/OFF switch.
▪The PV screen will display the real temperature of the water. If this is on, the electronic
equipment is working properly.
▪The SV screen will display the previously set temperature. Press the SET button and set a
higher temperature than the water’s real temperature. If the temperature increases, the
equipment is working properly.
Note: DO NOT use purified or demineralized water since these are great oxidants.
6. Operating
Note: before using the water bath, check the water level inside the barrel; if necessary, add more
water. Remember that runing the resistor without being completely covered may damage it.
▪Place the equipment on a flat, stable surface that can support the weight of the device
leaving 30 free cm on each side.
▪Press the green ON/OFF switch at the front part of the water bath. In the TWBA-001-001
series, the switch is on the left side.
▪Once the equipment is ON, you will hear a light sound; this indicates that the equipment is
ready to use.
▪The PV screen displays the real water temperature, while the SV screen displays the
previously set temperature.
▪After using, turn off the equipment by pressing the ON/OFF switch and unplug it. Remember
that, if the equipment is not going to be used for a long time, it must be drained. This function
is not available in the TWBA-001-001 series; therefore, you need to wait for the equipment
and the water to cool down before draining the water bath.
Note: The thermostatic bath cannot be used with deionized, demineralized or distilled water as it will
not conduct electricity properly
6.1. Set the working temperature
The max working temperature is 100ºC; set the temperature this way:
▪Press SET. The PV screen will display the command “Sy” and the SV screen will display the
temperature value to be adjusted.
▪Use the ▲and ▼buttons to set the desired temperature. Use the ◄button to shift digits.
▪Press SET to confirm the command; the resistor will start working to reach the set temperature.
The PV screen will display the real temperature while the SV screen will display the set
temperature.

8
▪In order to get a homogeneous temperature in all the water, stir regularly. Adapt the reducing
discs to the container’s size.
▪Pulse SET para aceptar el comando; la resistencia empezará a funcionar para alcanzar la
temperatura deseada; la pantalla PV le mostrará la temperatura real del agua del baño,
mientras que la pantalla SV le mostrará la temperatura seleccionada.
6.2. Timer setting
By default, every time the water bath is switched ON, this feature will be OFF. Therefore, the
equipment will keep working until it is manually switched OFF by the user with the ON/OFF
switch.
▪Press the SET button for 3 seconds. The PV screen will display the “Loc” command and the SV
screen will display, by default, the digits ”0000”.
▪Using the ▲and ▼buttons, configure the “0002” setting and press SET. The PV screen will
display the command “St” and the SV screen will display “Off”.
▪Use the ▲ and ▼buttons (and the ◄button to shift) to configure the time period in which
you want to work. The maximum time value is 9999 min.
▪Press SET to save the time value, and then wait to go back to the initial screen where the real
temperature is displayed on the PV screen and the time, on the SV screen.
When the timer option is on, the indicator RUN will stay lit (green) and the ST and OUT
indicators will flash (green); and once the time is over the RUN and OUT indicators will turn off
and the ST indicator will keep flashing.
Once you turn ON this option, it will stay ON. To turn it OFF, proceed the following way:
▪Press the SET button for 3 seconds; the PV screen will display the “Loc” command and the SV
screen will display, by default, the digits ”0000”. Then, configure the option “0002” and press
SET. To deactivate the timer, set the time to “0000”; “Off” will appear on the SV screen. Press
SET to save and wait to go back to the initial display.
Note: before programming the timer, you must adjust the temperature you want to work with.
6.3. Alarm setting
If the temperature of the water bath is 10ºC above the set temperature, an alarm will sound,
while the PV screen displays the real temperature of the water bath, the SV screen displays
the command “dHAL”, and the ALM indicator flashes (red). To make the alarm stop, turn OFF
the equipment.
To change the timer’s value, proceed the following way:
▪Press SET for 3 seconds. The PV screen will display “Loc” and the SV screen will display, by
default, the digits “0000”.
▪Use ▲and ▼to configure the “0003” option and press SET. The PV screen will display the
command “dHAL”.
▪Use ▲and ▼(and ◄to shift digits) to set the alarm’s temperature. Press SET to save and
wait to go back to the initial screen.
6.4. Draining

9
All the water baths, except TWBA-001-001 series, have a draining system, which includes a
pump and a drainpipe.
▪Before draining, male sure the ON/OFF switch is in the OFF position (O); otherwise, the
resistor could be functioning once the bath has been emptied and get damaged.
▪With the equipment plugged, press the drain switch; the drainpipe will start emptying the
water bath container.
6.5. Autosetting
The autosetting function allows you to adjust the internal parameters at a certain working
temperature. To do that:
▪Select the working temperature (follow instructions in 6.1).
▪Press ▼until the AT indicatior starts flashing (Green) –you just selected the autosetting
function.
▪The autosetting will end once the AT indicator turns off.
▪After the autosetting, the equipment will optimize its service.
6.6. “Stop” Function
The “Stop” function allows you to stop and resume the equipment throughout the execution of
a function. Through this function, you can stop and resume the equipment while heating and if
the timer is on, you can stop and resume it.
▪In the initial screen, press ▲for a few seconds. You will hear a “click” and the SV screen will
display “Stop”.
▪To resume the function, press ▲for a few seconds again until you hear a light beep that
indicates the resumption.
7. Fault Resolution
▪The equipment cannot be turned ON
-Check whether the power cable is plugged in.
-Make sure the cable is rightly connected.
▪The temperature cannot reach the set point
-Check for apparent damages that may have arisen during transportation
-The resistor and/or the electric system may be damaged.
If these faults are not resolved, contact your manufacturer/supplier.
8. Cleaning and maintencance
▪First, disconnect the equipment from the socket during cleaning and/or maintenance.
▪Proper maintenance can keep instruments working and lengthen their lifetime.
▪Do not spray cleanser onto the instrument when cleaning.
▪The equipment must be cleaned and disinfected when before shipping, and packed into its
original packaging.
▪Always use the equipment in a dry, clean space with a stable temperature.

10
9. Storage and Transportation
▪Keep the equipment in a dry, clean place with good with good ventilation and no corrosive
gases.
▪During transportation, prevent the equipment from wetting and avoid violent collision.
10. Technical Features
Model
TWBA-001-001
TWBA-002-001
TWBA-004-001
TWBA-006-001
Capacity (L)
3
6,1
14,6
22,5
Voltage (V)
230 V/50 Hz
Max temperature (ºC)
100
Power (W)
400
500
100
1500
Temperature motion
(ºC)
±0.5
Temperature range (ºC)
Tª ambiente + 5 ~100
Temperature control
sensitivity (ºC)
≤ ±1
Temperature error (ºC)
≤ ±2.5
External size (W x H x
L) (mm)
170 x 154 x 210
318 x 168 x 210
350 x 318 x 210
524 x 322 x 210
Internal size (mm)
150 x 135 x 150
300 x 150 x 150
325 x 300 x 150
500 x 300 x 150
Packaging size (mm)
240 x 230 x 280
390 x 240 x 280
420 x 390 x 280
600 x 390 x 280
Net weight (kg)
3,3
4,5
6
7,5
Gross weight (kg)
4
5
7
9
11. Working Conditions
Ambient temperature: 5 ~ 40º
Relative humidity: ≤85%
Voltage: 220-240 V; 50-60 Hz

11
Manual de usuario
WB01 Baño termostático digital
Introducción
Los usuarios deben leer este manual cuidadosamente, seguir las instrucciones y los procedimientos, con el fin de
estar informados de todas las precauciones antes de usar el equipo, así como con el fin de obtener las
máximas prestaciones y una mayor duración del equipo.
Servicio
Cuando necesite ayuda, puede contactar con su distribuidor o con Labbox a través de:
www.labbox.com.
Por favor proporcione al personal de Atención al Cliente la siguiente información:
▪Número de serie del equipo (en el panel trasero)
▪Descripción del problema detectado
▪Sus datos de contacto
Garantía
El baño termostático digital modelo WB01 dispone de una garantía de 12 meses desde la fecha de factura
para defectos de material y fabricación en caso de un uso normal descrito en este manual.
La garantía se extiende solamente al comprador original.
Esta garantía no se aplica al equipo o a cualquier pieza dañada como consecuencia de una mala instalación,
malas conexiones, mal uso, un accidente o condiciones anormales de uso.
Para las reclamaciones bajo garantía, por favor póngase en contacto con su proveedor.

12
1. Instrucciones de seguridad
Conecte el equipo a una fuente de alimentación provista de toma a
tierra para garantizar la seguridad del instrumento y del
experimento; conectar la alimentación cuando el equipo lo requiera.
Se prohíbe el uso de este equipo en experimentos inflamables y
explosivos, tóxicos o altamente corrosivos.
Coloque el baño termostático sobre una mesa horizontal, plana y
estable, creando un espacio libre de 30 cm por cada lado.
El baño termostático debe ser utilizado por personal cualificado
previamente, que conozca el equipo y su manejo mediante el manual
de uso.
No coloque el baño termostático en zonas próximas a fuentes de
calor.
Durante su funcionamiento, el material peligroso tal como líquidos
inflamables o material patológico, deben estar fuera de esta área.
Si hay un llenado excesivo del recipiente, puede provocar un
sobrecalentamiento de algunas piezas del área de trabajo.
Cuando el equipo está en funcionamiento, no toque la superficie
calefactora para evitar quemaduras.
Lea el manual de instrucciones antes de utilizar el equipo.
•Durante el uso del equipo, usar protección de seguridad personal evitará riesgos de posibles
daños como:
-Quemaduras por salpicaduras y evaporación de líquidos
-Intoxicación por emisión de gases tóxicos o combustibles volátiles.
•El equipo debe utilizarse sólo cuando la resistencia esté cubierta por agua, si no lo está,
resultará dañada
•Coloque el equipo en una superficie espaciosa, estable, limpia, antideslizante, seca y a
prueba de fuego, también adecuada para el peso del equipo.
No utilice el equipo en atmósferas explosivas, con materiales peligrosos o atmósferas
inflamables.
•La temperatura debe ajustarse al menos 25ºC por debajo de la temperatura de inflamación
de los materiales utilizados.

13
•Cuidado con los peligros causados por:
-Materiales o medios inflamables con una temperatura de ebullición baja
-El llenado excesivo del recipiente
-Recipientes inseguros
•Utilice recipientes cerrados en caso de procesamiento de material patógeno
•Compruebe el equipo y los accesorios antes de cada uso. No utilice componentes en mal
estado. El funcionamiento seguro del equipo está garantizado solamente con los accesorios
descritos en el capítulo “Lista de embalaje”. Los accesorios deben estar firmemente sujetos al
equipo y no pueden desprenderse. Desconecte siempre la alimentación antes de instalar
accesorios.
•Use recambios originales, consulte con su proveedor para más información
•El equipo sólo se puede desconectar de la toma de corriente tirando de la base del enchufe,
no del cable.
•El voltaje indicado en el equipo debe de corresponder al de la red eléctrica utilizada.
•Asegúrese que el cable de alimentación principal no esté en contacto con la superficie
calefactora. No cubra el equipo.
•Mantenga el equipo alejado de los campos magnéticos.
•Preste atención al ajuste de temperatura; nunca deje desatendido el equipo durante el
funcionamiento de y con la función de calefacción encendida.
2. Normas de uso
Este equipo está diseñado especialmente para calentar agua para propósitos educacionales,
laboratorios o industria. Este aparato no es adecuado para uso doméstico o en ambientes que
puedan resultar peligrosos para el usuario o para el equipo.
3. Inspección
3.1. Recepción
Desembale cuidadosamente el instrumento y compruebe que el equipo y /o los accesorios hayan
llegado sin daños aparentes. En caso necesario póngase en contacto con el proveedor que le
suministró el equipo para solicitar ayuda técnica.
Nota:
Si el equipo está dañado, no debe conectarse a
la red eléctrica.
3.2. Lista de embalaje

14
El paquete incluye los siguientes artículos:
Serie WB01:
Contenido
Cantidad
Unidad principal
1
Manual de usuario
1
Cable de alimentación
1
Plataforma cubre resistencias
1
Tapa con orificio
1
Fusible
1
Discos reductores
Según Modelo
4. Elementos de control
4.1 Baño termostático, modelo WB01:
En el caso del modelo TWBA-001-001 el panel de control está dispuesto de la siguiente manera:
1.1. “Power”: interruptor
encendido /apagado del equipo
1.2. Panel de mandos
1.3. Toma de corriente
1.2
1.3
1.1

15
Para los modelos restantes, el panel de control estará dispuesto de la siguiente manera:
1.1 ‘Power’: interruptor de
encendido/apagado del equipo
1.2 Interruptor de vaciado: ‘Outlet’
1.3 Panel de mandos
1.4 Manguera de desagüe
1.5 Toma de corriente
Panel de mandos
El panel de mandos es el mismo para todos los modelos
2.1 Botón SET: confirmación de parámetros 2.7 RUN: indicador de trabajo
2.2 Botón ◄: paso de un digito al siguiente 2.8 OUT: indicador de calor
2.3 Botón ▼: disminución del parámetro 2.9 AT: indicador de autoajuste
2.4 Botón ▲: aumento del parámetro 2.10 ST: Indicador de fijación de tiempo
2.5 Pantalla PV: Valor de la medida 2.11 ALM: indicador de alarma
2.6 Pantalla SV: Valor del parámetro
5. Test de funcionamiento
▪Sitúe el equipo en una superficie plana, estable y adecuada para al peso del equipo,
creando un espacio de al menos 30 cm por cada lado.
▪Asegúrese de que el voltaje requerido por el equipo coincide con el de la red eléctrica
utilizada.
▪Asegúrese de que la toma de corriente dispone de una toma de tierra.
▪Coloque la plataforma cubre resistencias y llene la cuba de agua hasta 2/3 partes de su
capacidad total.
▪Se recomienda el uso de agua descalcificada.
1.5
1.1
1.3
1.2
1.4
2.7
2.8
2.5
2.10
2.11
2.6
2.1
2.2
2.9
2.3
2.4

16
▪Conectar el cable de alimentación al equipo y luego a la toma de corriente, asegúrese que la
alimentación está encendida.
▪Encienda el equipo con el interruptor de encendido.
▪En la pantalla PV, se le mostrará la temperatura real del agua del baño, si ésta se enciende
indica un buen funcionamiento eléctrico del equipo.
▪En la pantalla SV, se le mostrará la temperatura anteriormente seleccionada, seguidamente,
pulse el botón SET y ajuste una temperatura mayor a la real del baño. Si esta aumenta,
indica el buen funcionamiento del sistema de calefacción del equipo.
Nota: NO usar agua desionizada o desmineralizada debido a que tienen un gran poder de
oxidación.
6. Manejo
Nota: antes de empezar a utilizar el baño, compruebe el nivel del agua dentro de la cuba; si es
necesario añada más agua. Recuerde que si la resistencia trabaja sin estar completamente
cubierta puede sufrir daños.
▪Sitúe el equipo sobre una superficie plana, estable y adecuada para el peso del equipo,
creando un espacio de 30 cm por cada lado.
▪Pulse el interruptor verde de encendido/apagado en la parte frontal del baño; para el
modelo TWBA-001-001, el interruptor está situado en el lateral izquierdo.
▪Al final del encendido, escuchará un ligero sonido, éste nos indica que el equipo está listo
para usarse.
▪La pantalla PV mostrará la temperatura real del agua del baño, mientras que la pantalla SV
mostrará la temperatura anteriormente seleccionada.
▪Después de su uso, apague el equipo mediante el interruptor de encendido/apagado y
desenchúfelo de la red eléctrica.
Recuerde que, si no va a hacer uso del equipo durante un período prolongado de tiempo,
vacíe la cuba de agua mediante el interruptor de vaciado y la manguera de desagüe. El
modelo TWBA-001-001, no dispone de esta acción, por lo que, espere a que el equipo y el
agua se hayan enfriado antes de vaciarlo.
Nota: El baño termostático no se puede usar con agua desionizada, desmineralizada o destilada ya que
no conducirá la electricidad adecuadamente
6.1 Ajuste de la temperatura de trabajo
La temperatura máxima de trabajo es de 100ºC; proceda de la siguiente manera para
realizar el ajuste de temperatura:
▪Pulse SET. En la pantalla PV se mostrará el comando “Sv” y en la pantalla SV el valor de la
temperatura a seleccionar.
▪Utilice los botones ▲y ▼para seleccionar el valor de temperatura deseado. Utilice el botón
◄para poder desplazarse de un dígito a otro.
▪Pulse SET para aceptar el comando; la resistencia empezará a funcionar para alcanzar la
temperatura deseada; la pantalla PV le mostrará la temperatura real del agua del baño,
mientras que la pantalla SV le mostrará la temperatura seleccionada.

17
▪Cuando la resistencia está en funcionamiento, el indicador RUN permanecerá encendido
(verde), mientras que el indicador OUT parpadeará (verde); una vez se alcance la
temperatura deseada, el indicador OUT se apagará.
▪Para conseguir una temperatura homogénea en todo el volumen de agua, remueve
regularmente el agua del baño.
Adecúe los discos reductores al tamaño del recipiente a calentar.
6.2 Ajuste del temporizador
Por defecto, siempre que se encienda el baño, está opción estará en Off, por lo que el
equipo permanecerá en funcionamiento hasta que sea apagado manualmente por el usuario
mediante el interruptor encendido/apagado. Si desea trabajar durante períodos de tiempo
concretos, proceda de la siguiente manera:
▪Mantenga pulsado el botón SET durante tres segundos. En la pantalla PV se le mostrará el
comando “Loc” y en la pantalla SV aparecerá por defecto los dígitos “0000”.
▪Mediante los botones ▲y ▼configure la opción “0002” y pulse SET; en la pantalla PV se le
mostrará el comando “St” y en la pantalla SV “Off”.
▪Configure el periodo de tiempo en el cual desea trabajar con ayuda de los botones ▲, ▼y,
para desplazarse ◄; el valor del tiempo se puede ajustar hasta un máximo de 9999 min.
▪Pulse SET para que el tiempo quede grabado y, espere a volver a la pantalla inicial dónde
se le muestra la temperatura real de trabajo en la pantalla PV y el tiempo programado en
la pantalla SV.
Cuando la opción de temporizador es activada, el indicador RUN permanecerá encendido
(verde) y los indicadores ST y OUT parpadearán (verde); una vez acabado el tiempo, los
indicadores RUN y OUT se apagarán y el indicador ST seguirá parpadeando.
Una vez active esta opción, se quedará grabada; para desactivarla, proceda de la siguiente
forma:
▪Mantenga pulsado el botón SET durante tres segundos; en la pantalla PV se le mostrará el
comando “Loc” y en la pantalla SV los dígitos “0000”, seguidamente, configure la opción
“0002” y pulse SET; para desactivar el temporizador, tiene que fijar el tiempo en “0000”; le
aparecerá Off en la pantalla SV; pulse SET para guardar la operación y espere a que
vuelva a la pantalla inicial.
Nota: antes de programar el temporizador, tiene que ajustar la temperatura con la que desea
trabajar.
6.3 Ajuste de alarma
En caso que la temperatura real del baño exceda más de 10ºC temperatura seleccionada,
sonará una alarma; al mismo tiempo la pantalla PV le mostrará la temperatura real del
baño, la pantalla Sv el comando dHAL y, el indicador ALM parpadeará en rojo. Apague el
equipo con el interruptor On/Off para que la alarma dejé de sonar.
Si quiere ajustar la alarma a otro valor, proceda de la siguiente forma:
▪Mantenga pulsado el botón SET durante tres segundos. En la pantalla PV se le mostrará el
comando “Loc” y en la pantalla SV aparecerá por defecto los dígitos “0000”.

18
▪Mediante los botones ▲y ▼configure la opción “0003” y pulse SET. En la pantalla PV se le
mostrará el comando dHAL.
▪Configure la temperatura de alarma con ayuda de los botones ▲, ▼y, para desplazarse
◄; pulse el botón SET para guardar la operación y espere a volver a la pantalla inicial.
6.4 Vaciado
Todos los baños, excepto el modelo TWBA-001-001, disponen de sistema de vaciado, que
incluye una bomba y un desagüe para su vaciado.
▪Antes de vaciar el baño, asegúrese de que el interruptor de encendido On/Off está en
posición de apagado (O); de otro modo la resistencia podría estar funcionando cuando el
equipo se vacíe y puede resultar dañada.
▪Con el equipo enchufado a la red eléctrica, pulse el interruptor de vaciado y la válvula
comenzará a vaciar la cuba de baño.
6.5 Autoajuste
La función de autoajuste permite ajustar los parámetros internos del regulador a una
determinada temperatura de trabajo. Para ello:
▪Seleccione la temperatura de trabajo según lo explicado en el apartado 6.1.
▪Mantenga pulsada la tecla ▼hasta que el indicador AT empiece a parpadear (verde); ya
ha seleccionado la función autoajuste.
▪El autoajuste habrá finalizado cuando el indicador AT se apague.
▪Tras el autoajuste el equipo optimizará el servicio.
6.6 Función “Stop”
La función “Stop” permite parar y reanudar el equipo en el transcurso de una función que se
esté realizando. Mediante esta función podrá parar y reanudar el equipo cuando se esté
calentando y si se ha programado un temporizador, podrá parar y reanudar éste mismo.
▪En la pantalla inicial, mantenga pulsado el botón ▲varios segundos, escuchará un ligero
“clic” y en la pantalla SV se mostrará la palabra “Stop”.
▪Si desea reanudar el ejercicio, vuelva a mantener pulsado el botón ▲varios segundos hasta
escuchar un ligero pitido que le indicará la reanudación.
7Resolución de pequeñas averías
▪El equipo no se enciende
-Compruebe si la línea eléctrica está desconectada
-Revise si el cableado está bien conectado
▪El equipo no puede alcanzar la temperatura programada
-Compruebe si el panel de control tiene daños visuales producidos durante el
transporte
-La resistencia del equipo y/o el sistema eléctrico pueden estar dañados
Si no se resuelven estas pequeñas averías, póngase en contacto con el proveedor que le suministró este
equipo.

19
8Mantenimiento y limpieza
▪Primero de todo, desconecte el equipo de la red eléctrica durante la limpieza y/o
mantenimiento.
▪Un mantenimiento adecuado permite que el equipo funciona prolongadamente y alargar la
vida útil del equipo.
▪No rocíe con productos de limpieza directamente sobre la superficie del instrumento cuando
se disponga a limpiarlo.
▪El equipo deberá ser limpiado y desinfectado antes de ser enviado a reparar. Utilice siempre
el embalaje original.
▪Utilice el equipo en un lugar seco y limpio y con una temperatura estable.
9Almacenamiento y Transporte
▪Mantener el equipo en un lugar seco y limpio, con buena ventilación y libre de gases
corrosivos.
▪Durante su transporte, evite que el equipo se moje y que sufra golpes.
10Características técnicas
Modelo
TWBA-001-001
TWBA-002-001
TWBA-004-001
TWBA-006-001
Capacidad (L)
3
6,1
14,6
22,5
Voltaje (V)
230 V/50 Hz
Temperatura máxima
(ºC)
100
Potencia (W)
400
500
100
1500
Temperature Motion
(ºC)
±0.5
Rango Temperatura (ºC)
Tª ambiente + 5 ~100
Sensibilidad del control
de la Tª (ºC)
≤ ±1
Error temperatura (ºC)
≤ ±2.5
Tamaño exterior (ancho
x alto x largo) (mm)
170 x 154 x 210
318 x 168 x 210
350 x 318 x 210
524 x 322 x 210
Tamaño cámara interior
(mm)
150 x 135 x 150
300 x 150 x 150
325 x 300 x 150
500 x 300 x 150
Tamaño Packaging
(mm)
240 x 230 x 280
390 x 240 x 280
420 x 390 x 280
600 x 390 x 280
Peso neto (kg)
3,3
4,5
6
7,5
Peso bruto (kg)
4
5
7
9
11Condiciones de trabajo
Temperatura ambiente: 5 ~ 40º
Humedad ambiente: ≤85%
Voltaje: 220-240 V; 50-60 Hz

20
Mode d’emploi
WB01 Bain thermostatique numérique
Préface
Les utilisateurs doivent lire ce manuel avec attention, suivre les instructions et les procédures, afin
d’être informés de toutes les précautions avant d’utiliser le matériel, ainsi que d’obtenir les prestations
maximales et une meilleure durée de vie du matériel.
Service clients
En cas de problème ou pour toute information technique, contacter le Service Clients :
Merci de préciser les informations suivantes :
▪Numéro de série (sur le panneau arrière)
▪Description du problème
▪Vos informations de contact (nom de l’entreprise, nom du contact,
téléphone, email)
Garantie
Le bain thermostatique numérique modèle WB01 est garanti pour une période de 24 mois à partir
de la date apparaissant sur la facture pour les défauts du matériel et la fabrication dans le cas
d’une utilisation normale spécifiée dans ce manuel.
Cette garantie ne s’applique uniquement qu’à l’acheteur d’origine. Elle ne s’applique pas sur les
produits ou pièces qui auraient été abimés en raison d’une installation incorrecte, de connexions
incorrectes, de mauvaise utilisation, d’accident ou de conditions anormales d’utilisation.
Pour toute réclamation durant la période de garantie, contacter votre fournisseur.
This manual suits for next models
4
Table of contents
Languages:
Other lbx Laboratory Equipment manuals