lbx H20SQC User manual

H20SQC LED Digital magnetic stirrer with heating - Glass ceramic
PleasereadtheUserManualcarefullybeforeuse,andfollowalloperatingandsafetyinstructions!
user manual
english / español / français

2
User Manual
H20SQC LED Digital magnetic stirrer with heating - Glass
ceramic
Preface
Users should read this Manual carefully, follow the instructions and procedures, and beware of all
the cautions when using this instrument.
Service
If help is needed, you can always contact your dealer or Labbox via www.labbox.com
Please, provide the customer service representative with the following information:
▪Serial number (on the back side)
▪Description of the problem
▪Your contact information
Warranty
This instrument is guaranteed to be free from defects in materials and workmanship under normal
use and service, for a period of 24 months from the date of invoice. The warranty is extended only to
the original purchaser. It shall not apply to any product or parts which have been damaged on account
of improper installation, improper connections, misuse, accident or abnormal conditions of operation.
For claim under the warranty, please contact your supplier.

3
1.
Safety Instructions
Warning!
•Read the operating instructions
carefully before use.
•Make sure only trained staff works
with the equipment.
Risk of burns!
•Caution when touching parts of the
chassis and the hotplate, which can
reach temperatures of 550°C.
•Pay attention to the residual heat
after switching off the equipment.
Protective ground contact!
•Make sure that the socket is
earthed (with protective ground
contact) before use.
▪When working wear personal protective equipment to avoid risks from:
-Splashing and evaporation of liquids
-Release of toxic or combustible gases
▪Set up the instrument on a spacious, stable, clean, non-slip, dry, and fireproof surface. Do not
operate the equipment in explosive atmospheres, with hazardous substances or under water.
▪Increase the speed gradually. Reduce the speed if:
-Stirring bar breaks due to high speed
-The equipment is not running smoothly or the container moves on the base plate.
▪Temperature must always be set at least 50 ºC below the combustion point of the media used.
▪Beware of hazards due to:
-Flammable materials or media with a low boiling temperature
-Overfilling of the container
-Unsafe container
▪Process pathogenic materials only in closed vessels.

4
▪If the stirrer bar contains PTFE, please note:
-Elemental fluorine, three fluoride and alkali metals will corrode the PTFE and Halogen
alkanes expand at room temperature.
-Molten alkali, alkaline earth metals or their solution, as well as the powder in second and
third ethnic of the Periodic Table of Elements will react with PTFE if the temperature
reaches 300 ~ 400 ºC .
▪Check the instrument and the accessories for damage prior to every use. Do not use damaged
components. A safe operation is only guaranteed with the accessories described in the
“Accessories” chapter. Accessories must be securely attached to the device and cannot come off
by themselves. Always disconnect the plug before the assembly or disassembly of accessories.
▪When the external temperature sensor is needed, the tip of the measuring sensor must be at least
5-10 mm away from the vessel bottom and wall.
▪The equipment can only be disconnected from the main power supply by pulling out the mains
plug.
▪The voltage stated on the label must correspond to the main power supply.
▪Make sure that the main power supply cable does not touch the hotplate. Do not cover the device.
▪Do not exert pressure on the ceramic glass surface or expose it to overheated media; it may cause
the surface to break.
▪The instrument may only be opened by expert authorized electronic technicians.
▪Keep away from high magnetic fields.
▪Observe the minimum distances between devices, between the device and the wall, and above the
assembly (min. 100 mm.)

5
Figure 1
2.
Proper Use
The instrument is designed for mixing and/or heating liquids in schools, laboratories, or factories.
This device is not suitable for use in residential areas or other restrictions mentioned in Chapter 1.
3.
Inspection
3.1 Unpacking
Unpack the equipment carefully and check for any damages which may have arisen during
transportation. Please contact the manufacturer/supplier for technical support.
3.2 Listing of Items
The package includes the following items:
Items
Qty
Main unit
1
Power cable
1
Stirrer bar
1
User Manual
1
Table 1
Note:
If there is any apparent damage to the
system, please do not plug it into the
power line.

6
4.
Control
4.1 Control elements
LED Heat
LED Display
LED
Temperature
Control Knob
Speed Control
Knob
Figure 2
Connection PT1000
( Hotplate model )
Socket
Figure 3

7
Figure 4
Power Switch
Items
Descriptions
Speed control knob
Stir
The stirring function and its speed are
adjusted with this knob.
To increase the value, turn the knob
clockwise. To stop the function, turn the
knob all the way counterclockwise.
Temperature control
knob Heat
The heating function and the temperature
are adjusted with this knob.
To increase the value, turn the knob
clockwise. To stop the function, turn the
knob all the way counterclockwise.
LED screen
LED screen displays the settings and the real
temperature.
Heat
LED
When the heating function is activated, the
Heat LED lights up until the set temperature is
reached.
If the temperature drops or is changed , the
LED lights up again until the set temperature
is reached.
Stir
LED
When the instrument is ON, the Stir LED
lights up.
Power Switch
Switch the instrument ON/OFF.
Table 2

8
4.2 Display
Figure 5
Display area
Display
Descriptions
When the heating function is ON, the LED screen
displays the temperature setting value for 5 seconds
Display
and then shifts to the real value.
area for
Once the heating function is switched OFF but the
the
hotplate temperature is still above 50ºC, the LED
temperatu
screen displays “Hot”; otherwise, the LED screen
re
displays “0”.
5.
Trial Run
Table 3
•Make sure the required operating voltage and power supply voltage match.
•Ensure the socket is properly earthed.
•Plug in the power cable, ensure the power is on.
•Add the medium into the vessel with an appropriate magnetic stirring bar.
•Place the vessel on the work plate.
•
Stirring
: Set the stirring speed and begin (see Chapter 7: Stirring Function).
•Observe the magnetic stirring bat as it moves.
•
Heating
: Set the target temperature and start heating.
•Observe the real temperature value on the LED screen.
•Stop the heating and stirring functions.
•Power OFF the equipment by pressing the ON/OFF switch.
If the operations above cause no abnormalities, the device is ready to operate. Otherwise, the device
may have been damaged during transportation; please contact manufacturer/supplier for technical
support.
Warning!
Forbidden to transfer/manipulate the
vessel while the instrument is working.

9
6.
Function: Heating
The device is controlled by digital temperature control technology, which has two separate safe
circuits.
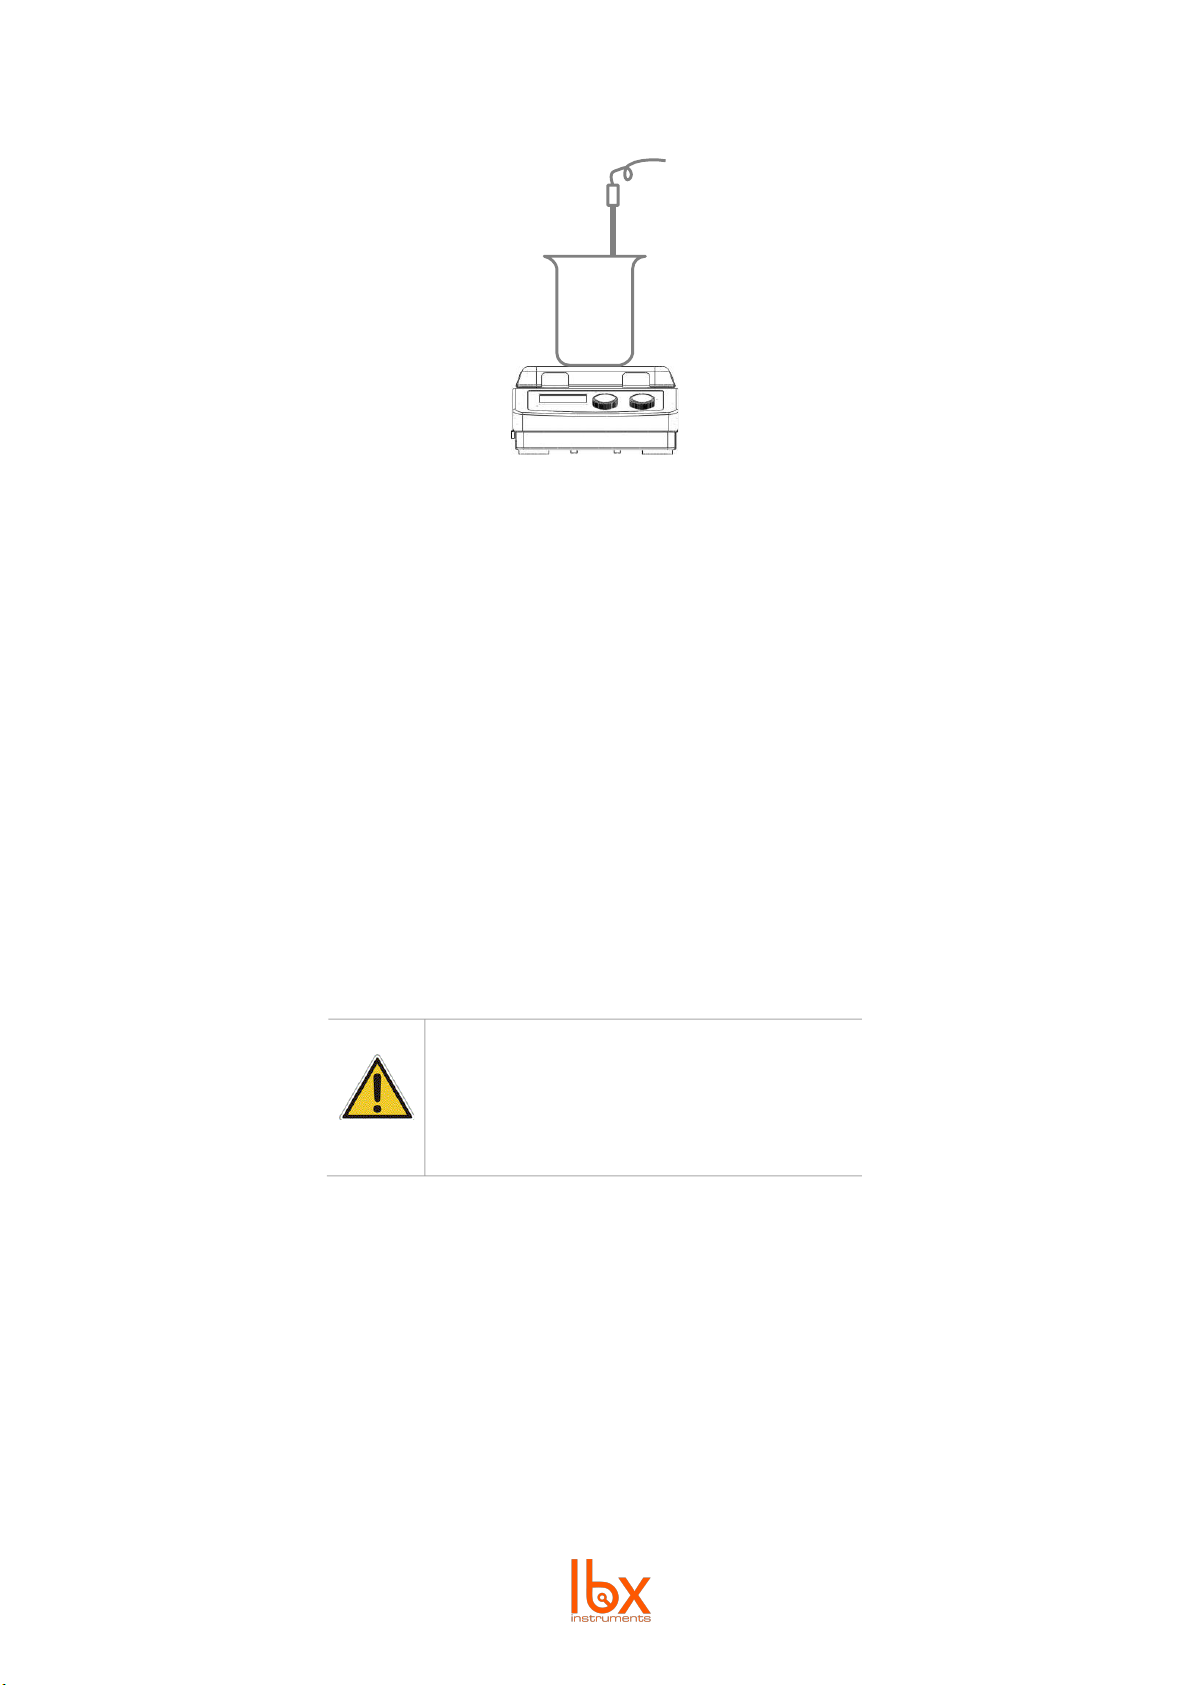
•If an external sensor PT1000 is used, always connect it to the device BEFORE turning the power
on and submerge it into the sample BEFORE starting to heat (see section 6.1).
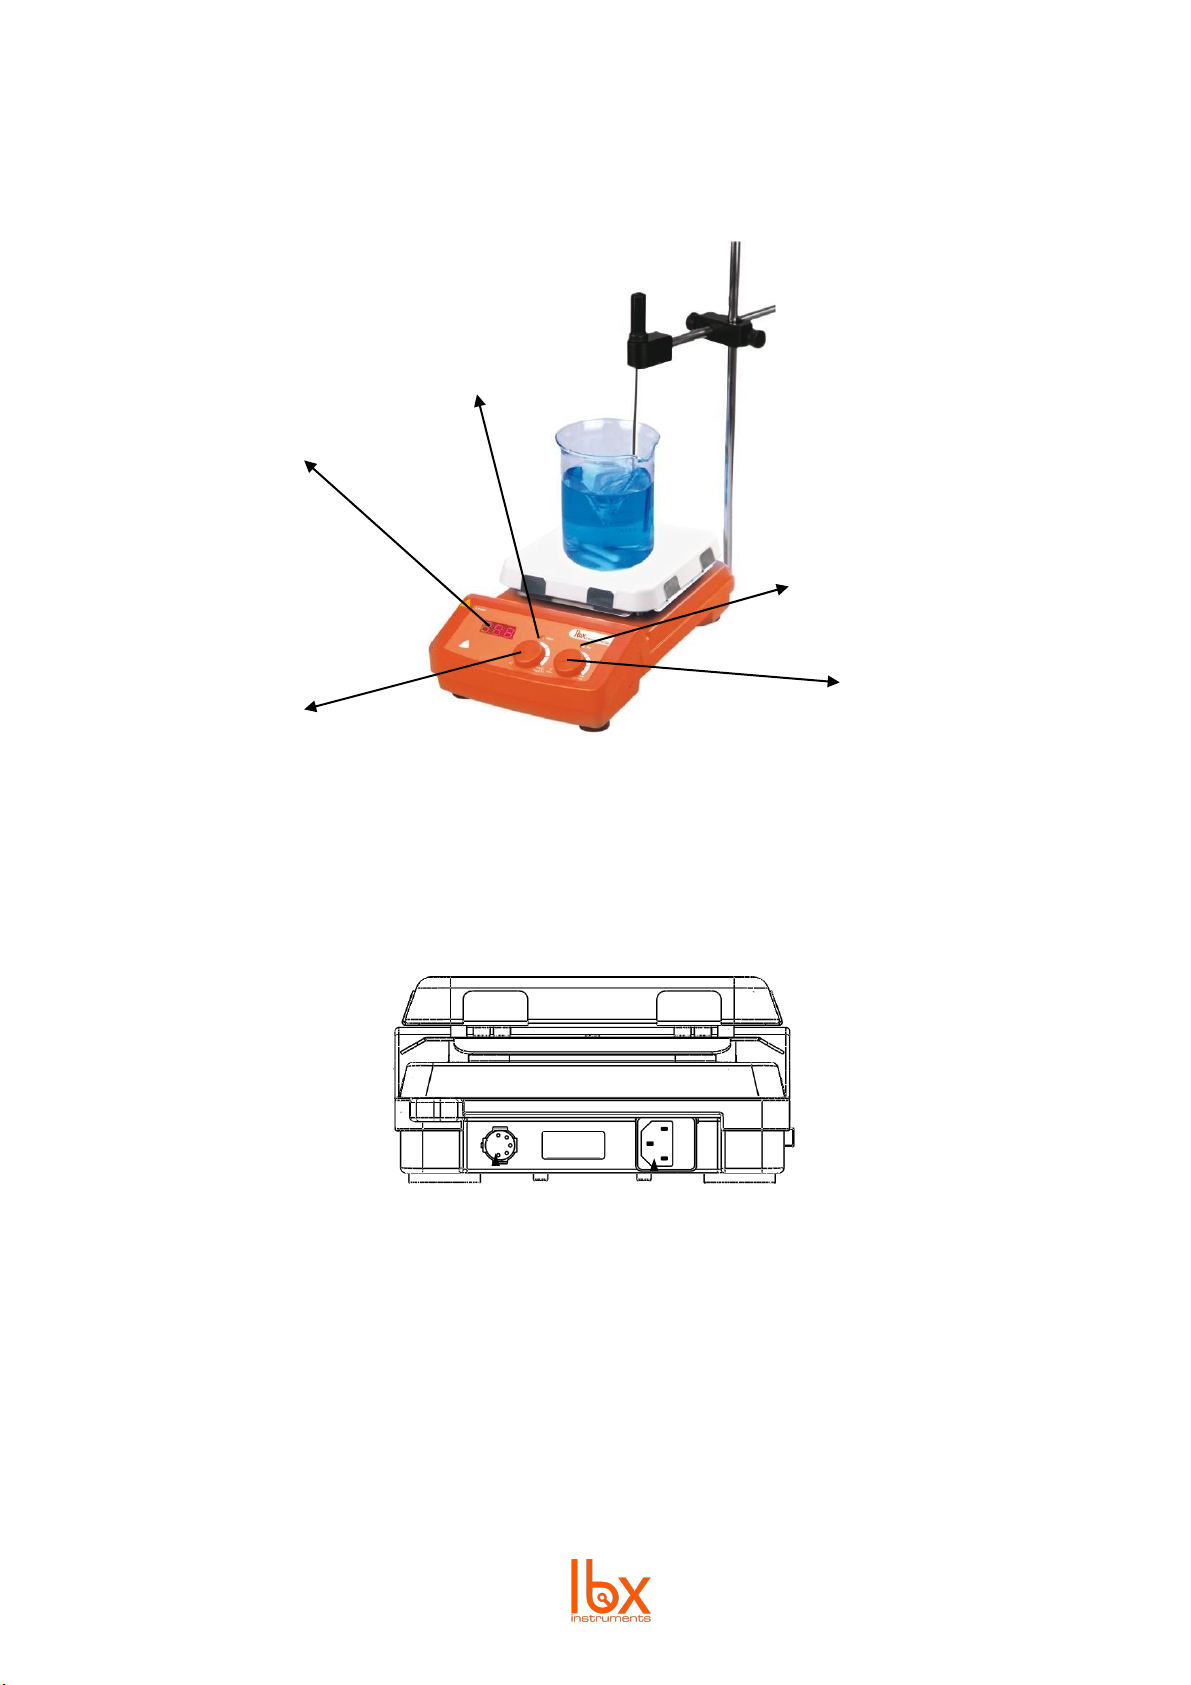
•Turn the unit on by pressing the ON/OFF switch.
•Select the target temperature by slowly turning the temperature knob towards the desired value.
•When the heating function is ON, the LED screen displays the target temperature value for 5
seconds and then shifts to the real value. The Heat LED also lights up until the set temperature is
reached.
•At the end of the operation, turn off the heating function by turning the temperature knob all the
way to the left.
•Turn off the unit by pressing the ON/OFF switch.
The heating function will be stopped automatically under abnormal conditions. The device has a fixed
safety temperature of 580ºC; therefore, it automatically stops heating once that temperature is
reached.
In that case, please follow the following instructions:
•Switch OFF the instrument.
•If working with an external temperature sensor, make sure it is inserted into the media to be
heated.
•Switch ON the instrument and run the heating function.
If the heating function is still not working, please contact the manufacturer/supplier for technical
support.
Generally, the LED display does not indicate the actual temperature of the sample in the vessel or on
the hotplate surface. There are temperatures differences between the following:
•Hotplate center and outer edge.
•The sample in the container and the hotplate.
In order to ensure an accurate measurement of the temperature inside the container, use the
external temperature sensor PT1000.

10
6.1 Working with an external temperature sensor
Figure 6
The external temperature sensor PT1000 is a standard accessory of the manufacturer. Compared to
the hotplate’s temperature control, the external temperature sensor can control the medium’s
temperature with a higher accuracy.
•If the external temperature sensor is needed, it must be plugged into the device BEFORE turning
ON the device.
•Ensure the external temperature sensor is firmly connected and inserted into the media before
heating.
•Switch ON the equipment and start heating.
•The LED screen displays the set target temperature for 5 seconds and then shifts to the real
temperature.
6.2 Residual heat warning (HOT)
In order to prevent the risk of burns from the hotplate, the digital hotplate has a residual heat
warning function.
While the heating function is switched OFF but the heating plate temperature is still above 50ºC,
“Hot” will flash on the LED screen to warn that there is a hazard of burns from the hotplate.
When the hotplate temperature drops to below 50ºC, the LED screen displays “0”.
If users want to turn OFF the LED display immediately (the warning message keeps popping up), just
pull out the plug directly. Once unplugged, the residual heat message stops flashing.
Warning!
Forbidden to plug in/pull out the
external temperature sensor while the
equipment is ON.

11
7.
Function: Stirring
The stirring function is turned ON/OFF by turning the speed control knob. The speed is adjusted
with the knob (from 100 to 1500 rpm in 10 rpm intervals). When the heating and stirring functions
are switched ON at the same time, the LED screen displays the set temperature value for 5 seconds
first and then shifts to the real temperature value.
•Turn the unit ON by pressing the ON/OFF switch.
•Adjust the stirring speed by slowly turning the speed control towards the desired value.
•When the stirring function is ON, the Stir LED lights up during the entire operation.
•At the end of the operation, turn OFF the stirring function by turning the speed control all the
way to the left.
•Turn the unit OFF by pressing the ON/OFF switch.
8.
Faults
•Instruments cannot be turned ON.
➢Check whether the power cable is plugged in.
➢Check whether the fuse is broken or loose.
•Stir speed cannot reach the set point.
➢Excessive medium viscosity may cause abnormal motor speed reduction.
•Unit cannot be powered OFF when pressing the ON/OFF switch.
➢Check if the residual heat warning function is still ON and the hotplate temperature is
above 50ºC (the LED screen still works and “Hot” flashes on the LED screen).
If these faults are not resolved, please contact the manufacturer/supplier.
9.
Maintenance and Cleaning
•Proper maintenance can keep instruments working properly and lengthen their lifetime.
•Do not spray cleanser onto the instrument when cleaning.
•Unplug the power line when cleaning.
•Only use recommended cleansers:

12
Dyes
Isopropyl alcohol
Construction materials
Water containing surfactants / Isopropyl alcohol
Cosmetics
Water containing surfactants / Isopropyl alcohol
Foodstuffs
Water containing surfactants
Fuels
Water containing surfactants
Table 4
•Before using another cleaning or decontamination method, the user must verify with the
manufacturer that this method will not harm the instrument.
•Wear proper protective gloves while cleaning the instrument.
•If maintenance service is needed, the equipment must be cleaned and shipped in its original
packaging in order to avoid pollution from hazardous substances.
•The ceramic coating makes the hotplate more resistant to acids and bases and easier to maintain.
However, it is equally vulnerable to extreme temperature fluctuations and impact forces (risk of
cracking and/or detaching of the coating).
Note:
•
Electronic devices cannot be cleaned with
cleanser.
•
If maintenance service is needed, the
equipment must be cleaned and packed into
the original carton before shipping in order
to avoid pollution from hazardous
substances.
•
If the instrument will not be used for a long
time, please power OFF and place in a dry,
clean, and stable location at room
temperature

13
10.
Associated Standards and Regulations
Construction in accordance with the following
safety standards:
EN 61010-1
UL 3101-1
CAN/CSA C22.2(1010-1)
EN 61010-2-10
Construction in accordance with the following EMC
standards:
EN 61326-1
Associated EU guidelines:
EMC-guidelines: 2004/108/CE
Instrument guidelines: 73/023/EWG
11.
Technical data
Voltage [VAC]
100-120/200-240
Frequency [Hz]
50/60
Power [W]
1030
Stirring point position quantity
1
Max. stirring quantity (H2O) [L]
10
Max. magnetic bar [Lר, mm]
80×10
Motor type
Shaded pole Motor
Max. power input of motor [W]
15
Max. power output of motor [W]
1.5
Speed range [rpm]
0-1500
Rotary speed display
Scale
Plate material
Glass ceramic
Dimensions of workplate [mm]
184×184
Heating power [W]
1000
Temperature range [°C]
25-550, increment:
5
Temperature display [°C]
LED

14
Temperature display accuracy [°C]
±1
The safety temperature of the hotplate
[℃]
580
Temperature sensor in medium
PT1000
Control accuracy of heating
temperature with temperature
sensor [ºC]
±0.5
Residual heat warning
50℃
Dimensions [mm]
215×360×112
Weight [kg]
4.5
Permitted ambient temperature [°C]
5-40
Permitted relative humidity
80%
Protection class acc. to DIN 60529
IP21
Table 5
12.
Accessories
Please contact our company to order the following accessories available for these devices: magnetic
stirring bars, PT1000 temperature sensor with glass coated and support clamp for temperature
sensor.

15
Manual de usuario
H20SQC Agitador magnético digital con calefacción y placa
vitrocerámica
Introducción
Los usuarios deben leer este manual cuidadosamente, seguir las instrucciones y los procedimientos,
y estar informados de todas las precauciones antes de usar este equipo.
Servicio
Cuando necesite ayuda, puede contactar con su distribuidor o con Labbox a través de:
www.labbox.com
Por favor proporcione al personal de Atención al Cliente la siguiente información:
▪Número de serie del equipo (en el panel trasero o debajo del equipo)
▪Descripción del problema
▪Sus datos de contacto
Garantía
Este equipo está garantizado contra cualquier defecto en los materiales y de fabricación bajo un uso
normal, por un período de 24 meses a partir de la fecha de la factura. La garantía se extiende
solamente al comprador original. La garantía no se aplicará a ningún producto o piezas que se hayan
dañado a causa de una instalación incorrecta, de conexiones incorrectas, de un uso erróneo, de
accidente o de condiciones anormales de operación.
Para las reclamaciones bajo garantía, por favor póngase en contacto con su proveedor.

16
1.
Instrucciones de seguridad
¡Advertencia!
•Lea el manual de instrucciones
detenidamente antes de usar el
equipo.
•Asegúrese de que solamente
personal debidamente formado
utiliza el equipo.
¡Riesgo de quemaduras!
•Tenga cuidado cuando toque
partes del chasis del equipo y el
plato calefactor puesto que puede
alcanzar temperaturas de hasta
550°C.
•Preste atención al calor residual
después de apagar el equipo.
¡Contacto a tierra de protección!
•Asegúrese de que la toma esté
conectada a tierra (contacto a tierra
de protección) antes de usar.
▪Durante el uso del equipo utilizar protección de seguridad personal para evitar riesgo de:
-Salpicaduras y evaporación de líquidos
-Emisión de gases tóxicos o combustibles
▪Coloque el equipo en una superficie espaciosa, estable, limpia, antideslizante, seca y a prueba
de fuego. No utilice el equipo en atmósferas explosivas, con sustancias peligrosas o debajo
del agua.
▪Aumente gradualmente la velocidad. Reduzca la velocidad si se producen las siguientes
situaciones:
-La varilla magnética se rompe debido a una elevada velocidad de agitación
-El funcionamiento del equipo es irregular, o el chasis se mueve sobre la base de la
placa

17
▪La temperatura debe ajustarse siempre al menos 50 ºC por debajo del punto de combustión
de los medios utilizados.
▪Sea consciente de los riesgos debido a:
-Materiales o medios inflamables con una temperatura de ebullición baja
-El llenado excesivo del recipiente
-Recipiente inseguro
▪Materiales de proceso patógeno sólo en recipientes cerrados.
▪En caso de que la varilla magnética sea de PTFE, por favor tenga en cuenta:
-El flúor elemental, el ión trifluoruro, y los metales alcalinos provocan la corrosión del
PTFE y los hidrocarburos halogenados lo hacen expandir a temperatura ambiente.
-Los metales alcalinos fundidos, los alcalinotérreos o sus soluciones, así como los
elementos de la segunda y tercera columna de la Tabla Periódica de los Elementos en
polvo tendrán reacción química con el PTFE cuando la temperatura alcanza los 300 ~
400 ºC.
▪Compruebe el equipo y los accesorios antes de cada uso. No utilice componentes en mal
estado. El funcionamiento seguro del equipo está garantizado solamente con los accesorios
descritos en el capítulo de “accesorios”. Los accesorios deben estar firmemente sujetos al
equipo y no pueden soltarse por sí mismos. Desconecte siempre la alimentación antes de
montar los accesorios.
▪Cuando necesite trabajar con el sensor de temperatura externo, el extremo del sensor debe
estar al menos a 5-10 mm de distancia del fondo del recipiente y de la pared.
▪El equipo sólo puede desconectarse de la línea eléctrica retirando el cable de alimentación de
la toma de red.
▪Comprobar que la toma eléctrica es del voltaje y potencia suficiente para este equipo.
▪Asegúrese que el cable de alimentación principal no esté en contacto con la placa. No cubra el
equipo.
▪Prohibido ejercer presión sobre la superficie de vidrio cerámico o exponer a medios
sobrecalentados, puede causar la rotura de la superficie.

18
▪Este equipo solo podrá ser abierto por técnicos electrónicos autorizados expertos.
▪Mantener el equipo alejado de campos electromagnéticos elevados.
▪Tenga en cuenta las distancias mínimas entre los equipos, entre el equipo y la pared y sobre
el montaje (mín. 100 mm)
Figura 1
2.
Normas de uso
Este equipo está diseñado especialmente para mezclar y calentar líquidos para propósitos
educacionales, laboratorios o fábricas.
Este aparato no es adecuado para trabajar fuera del laboratorio u otras restricciones mencionadas en
el capítulo 1.
3.
Inspección
3.1 Desembalaje
Desembale cuidadosamente el instrumento y verifique que el equipo y /o los accesorios hayan llegado
sin daños aparentes. En caso necesario póngase en contacto con el fabricante o el proveedor del
equipo para solicitar ayuda técnica.
Nota:
Si detecta cualquier daño aparente, por
favor no enchufe el equipo.

19
3.2 Lista de embalaje
El paquete incluye los siguientes elementos:
Contenido
Cantidad
Unidad principal
1
Cable de alimentación
1
Varilla magnética
1
Manual de usuario
1
Tabla 1
4.
Control
4.1 Elementos de control
Interruptor de encendido / apagado
Figura 2

20
LED “Heat”
Pantalla LED
LED “Stir”
Botón de control
de temperatura
Figura 3
Botón de control de
velocidad de agitación
Conexión para la sonda
PT1000
Conexión para el cable de
alimentación general
Figura 4
Table of contents
Languages:
Other lbx Laboratory Equipment manuals
Popular Laboratory Equipment manuals by other brands

Worthington
Worthington K Series instruction manual

TORREY PINES SCIENTIFIC
TORREY PINES SCIENTIFIC EchoTHerm RIC40 operating manual

Ametek
Ametek Reichert XCEL 255 user guide

Campbell
Campbell HFP01SC instruction manual

XD XCLUSIVE
XD XCLUSIVE Rena P301.13 Series manual

Pfeuffer
Pfeuffer Sample cleaner MLN operating instructions

THORLABS
THORLABS Vytran FFS2000 Series user guide

Thermo Scientific
Thermo Scientific Revco ULT1790-10-A operating manual

Thermo Scientific
Thermo Scientific 2032 Operating and maintenance manual

IKA
IKA Big Squid operating instructions

formlabs
formlabs BioMed Flex 80A Resin Instructions for use

Miele
Miele IR 6002 operating instructions