3 of 8
HP-4 Indirect/Direct Installation Instructions
© 2019 FINELITE, INC. ALL RIGHTS RESERVED. Form - 98519. V6 EFFECTIVE DATE: 01/17/19
HP4ID - X'
STARTER
ID: 1
HP4-D -32' - S - 8 3 5 - OPN - 120V - SC
ABCCorporatio n- A12345
HP4ID - X'
STARTER
ID:1
HP4-D -3 2 ' -S - 83 5 -O P N -120V- SC
A
BCC
o
rporati
o
n-
A
123
45
ID Labels
ID Labels
ABC Corporation - A12345
HP-4 ID - 32' - S - H - 835 - TG - F - 120V - SC - C1
HP-4 ID - X'
ID: 1
STARTER
Factory Order
Number
Job Name
Unique Luminaire
ID Number
Full Catalog
Order ID
Luminaire
Section Type
Luminaire Type
and/or Run Length
Kitted Hardware
• Finelite has provided
items listed here, with
their Finelite part numbers.
These items can be found
in separate boxes shipped
with the luminaire.
• Account for all parts
and set aside until they
are needed.
• All other hardware needed
for this installation will be
by others.
Caddy Clip
C1 Ceiling - Part# 94001
C2 Ceiling - Part# 94020
C3 Ceiling - Part# 94029
Mounting & Suspension
p. 2, Step 1
2" Drywall Support Canopy
Part# 94017
Mounting Starter to Structure
p. 4, Step 3
Joining Luminaires
p. 5, Step 4
5" Canopy
5" Dual Feed Canopy
Part# 94085
Part# 94145
Mounting Starter to Structure
p. 4, Step 3
Joining Luminaires
p. 5, Step 4
GridBox™
Dual GridBox™
Part# 89159
Part# 89199
Mounting & Suspension
p. 2, Step 1
Safety Crimp
Part# 94514
Closing Luminaires
p. 8, Step 7
Yoke Bracket
#10-32 x 5/8" Screw
Part# 45042
Part# 94144
Securing Luminaire Joints
p. 7, Step 6
3-1/2" Canopy
3-1/2" Dual Feed Canopy
Part# 89191
Part# 89192
Mounting Starter to Structure
p. 4, Step 3
Joining Luminaires
p. 5, Step 4
2" T-Bar Support Canopy
Part# 89193
Mounting Starter to Structure
p. 4, Step 3
Joining Luminaires
p. 5, Step 4
Mounting Option 2Mounting Option 1
Cable Bushing
Aircraft Cable
Part# 94014
50" - Part# 94515-12 (Std.)
100" - Part# 94515-14
150" - Part# 94515-18
Mounting Starter to Structure
p. 4, Step 3
Joining Luminaires
p. 5, Step 4
Slip Ring w/ Set Screw
Part# 94015
Mounting Starter to Structure
p. 4, Step 3
Joining Luminaires
p. 5, Step 4
#8-18 x 1/4" Screws
Part# 69026
Closing Luminaires
p. 8, Step 7
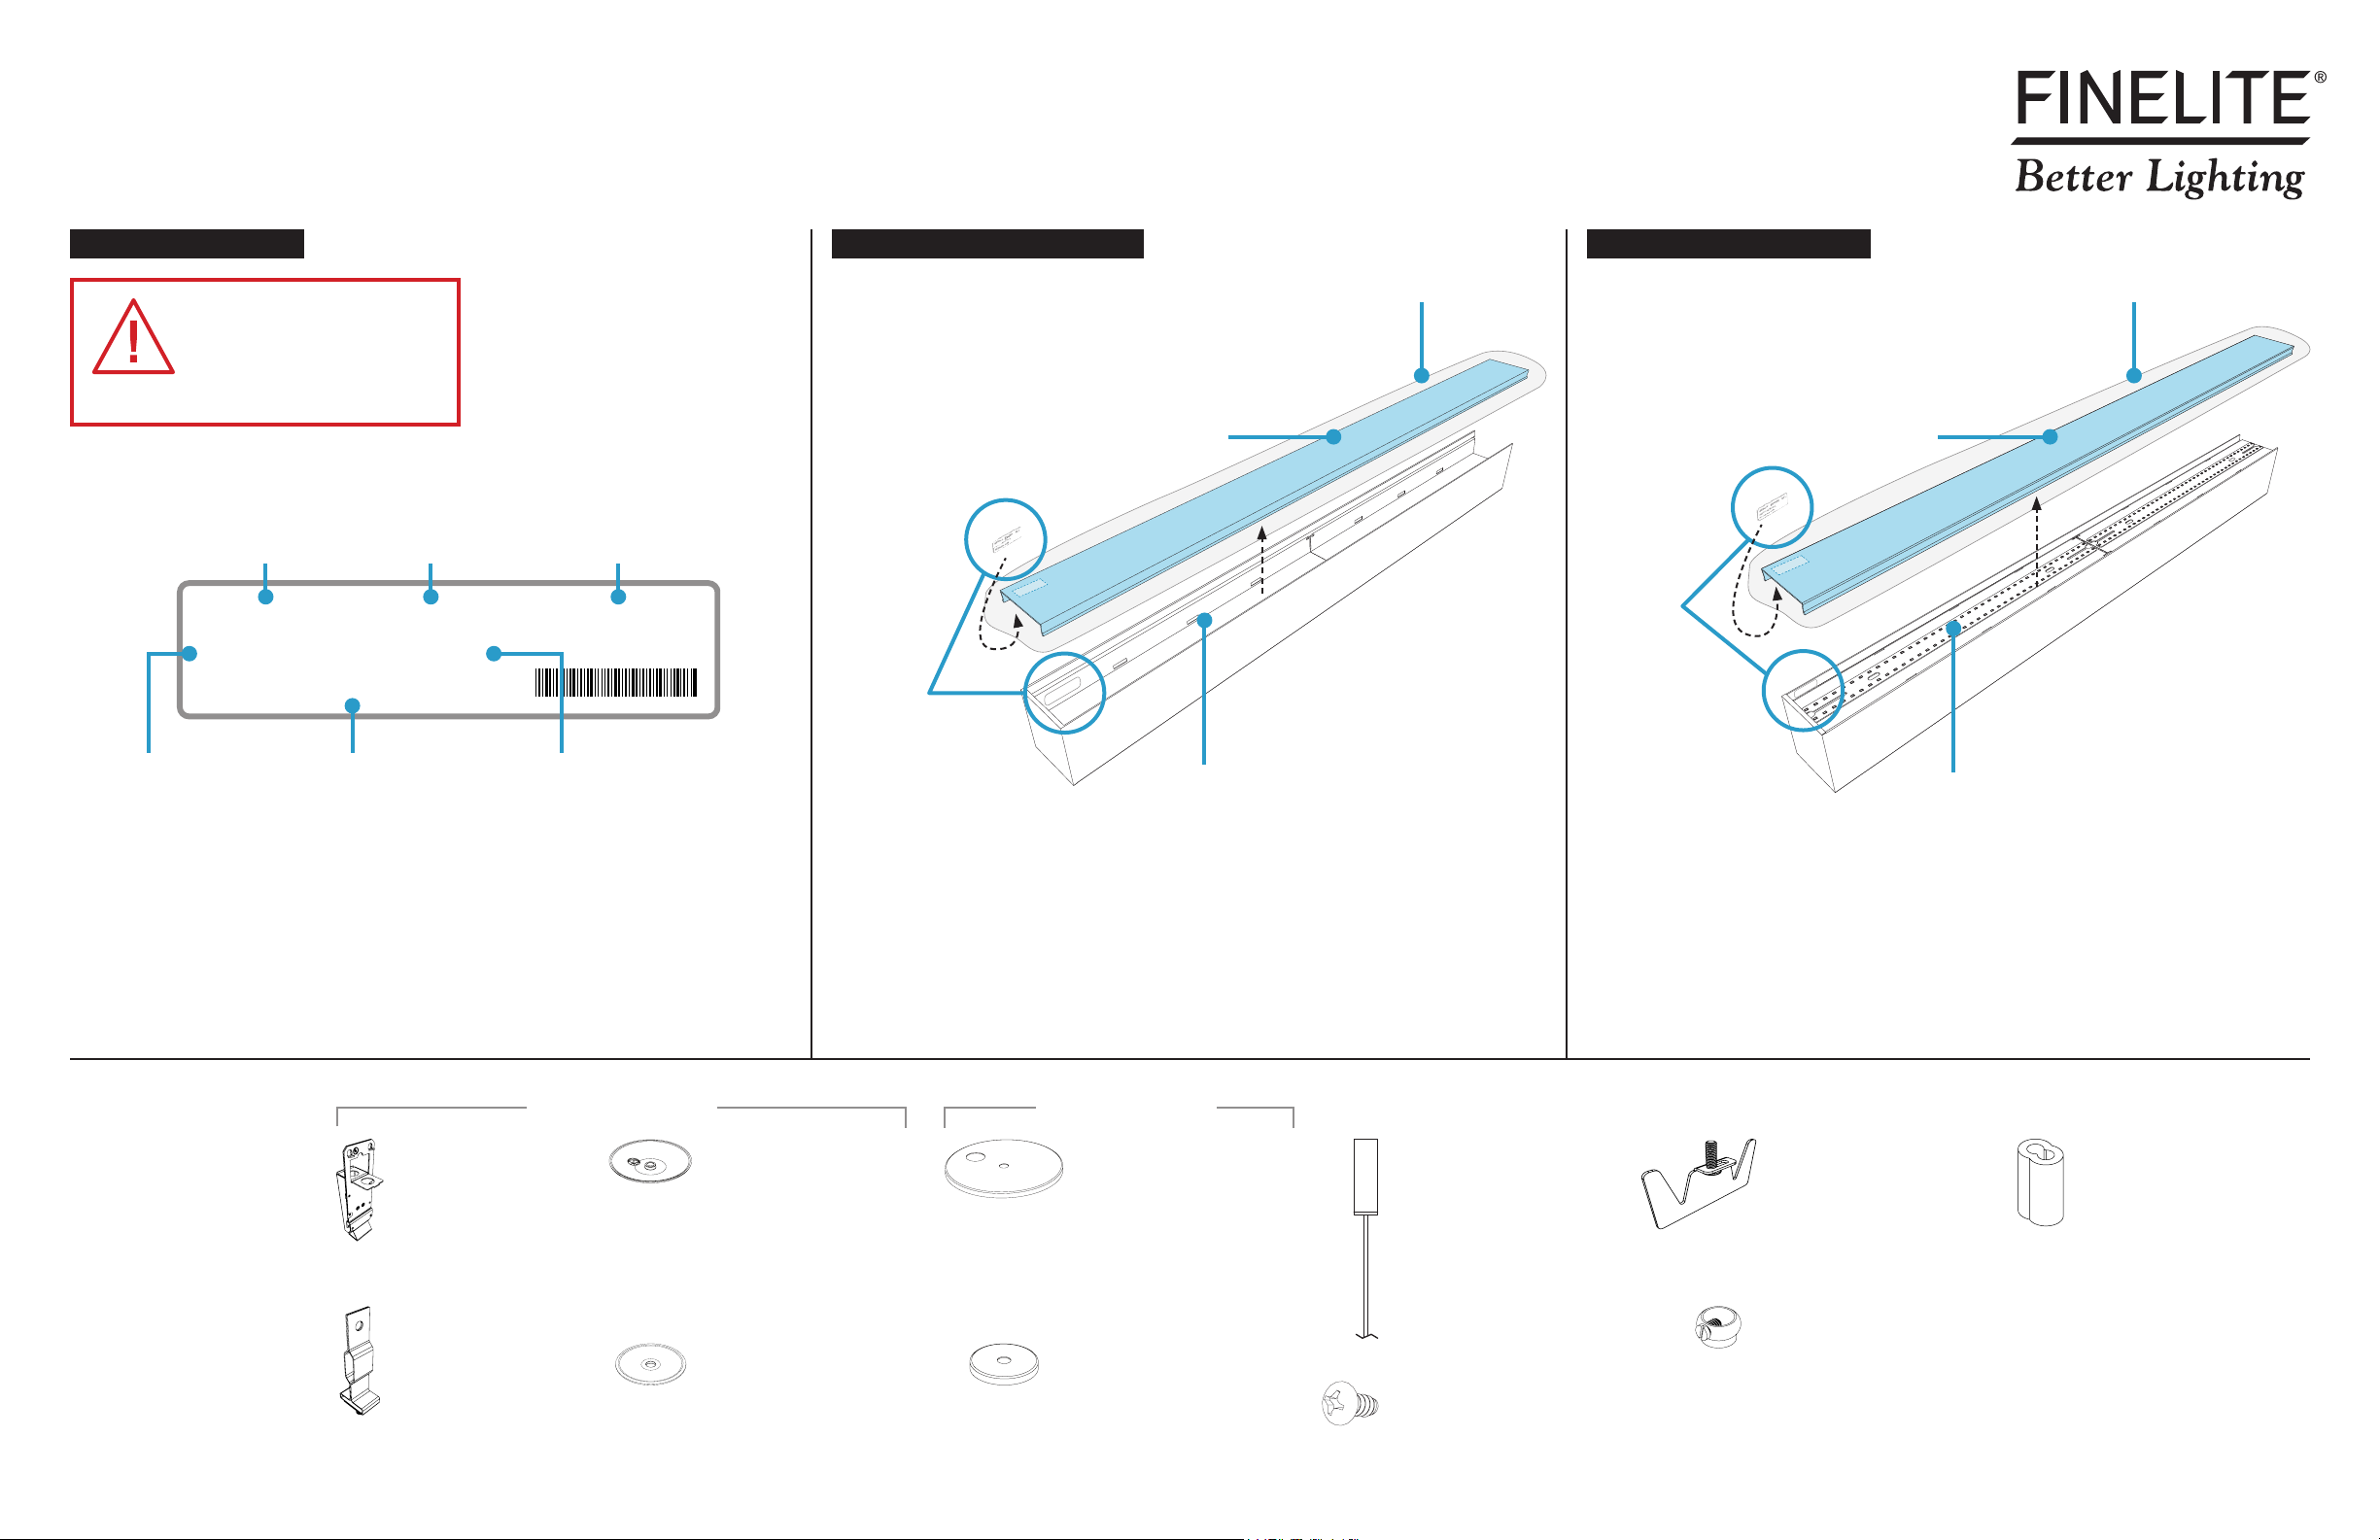
• Identify all luminaires by their ID label that can be found on the box, the diffuser, and inside
the luminaire.
• NOTE: Exact location of labels in these areas may vary.
• Remove all luminaires from their box.
• Refer to Record Drawings that can be found in the hardware kit.
Step 2 - Identification & Preparation
Backplate
Downlight Diffuser
Backplate
Uplight Diffuser
• Carefully remove all diffusers, keeping them inside their protective bags.
• Set aside all diffusers to prevent from getting dirty or damaged.
• Ensure diffusers can be clearly identified back to its corresponding luminaire.
Protective Bag Protective Bag
B. Remove Downlight Diffuser C. Remove Uplight DiffuserC. Remove Uplight DiffuserA. Identify Luminaires
CAUTION
Arrange luminaires in order
according to ID# at their
install locations.