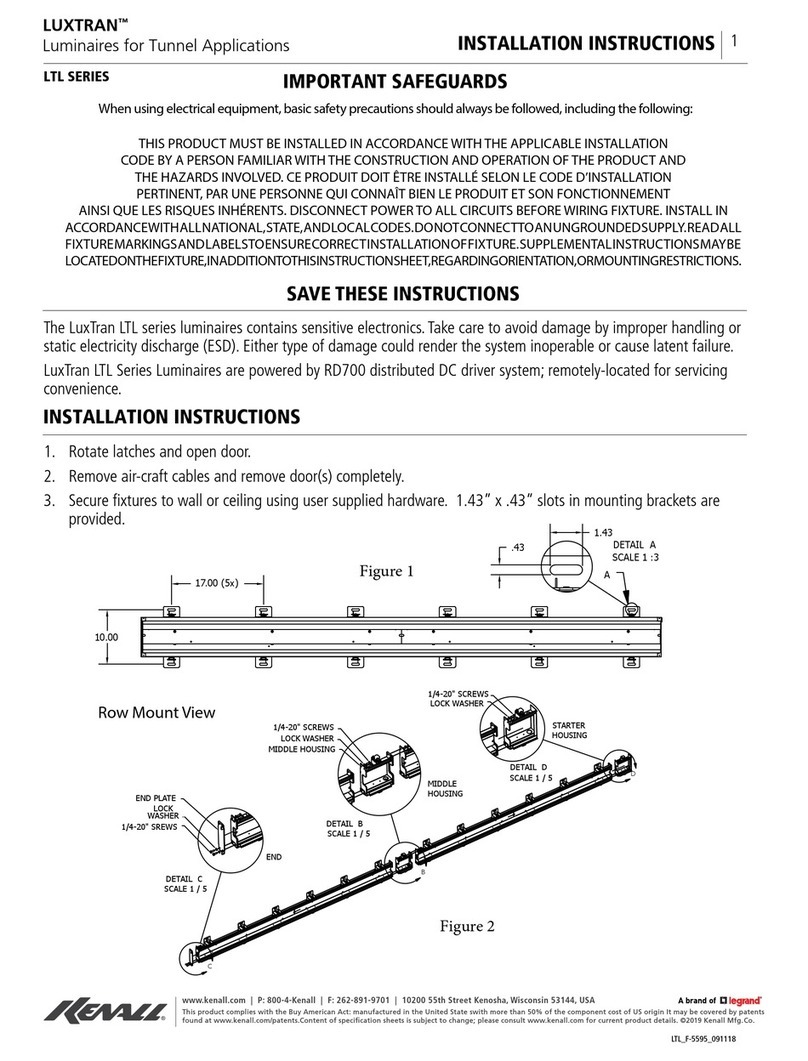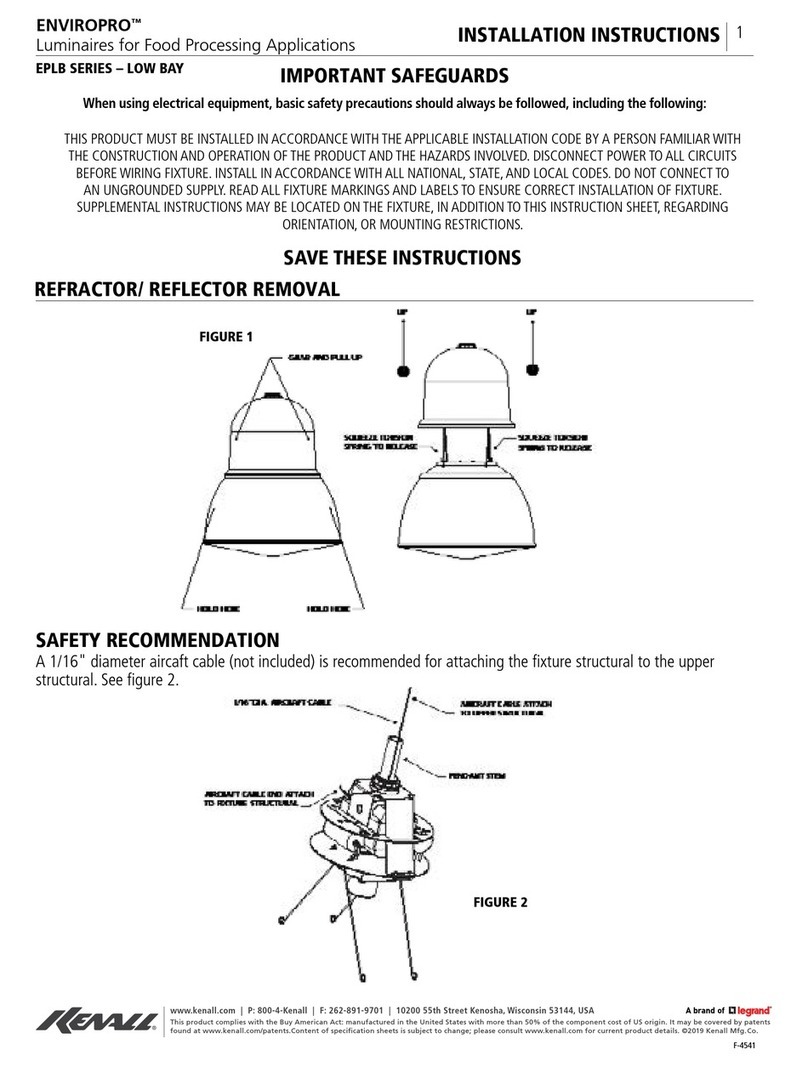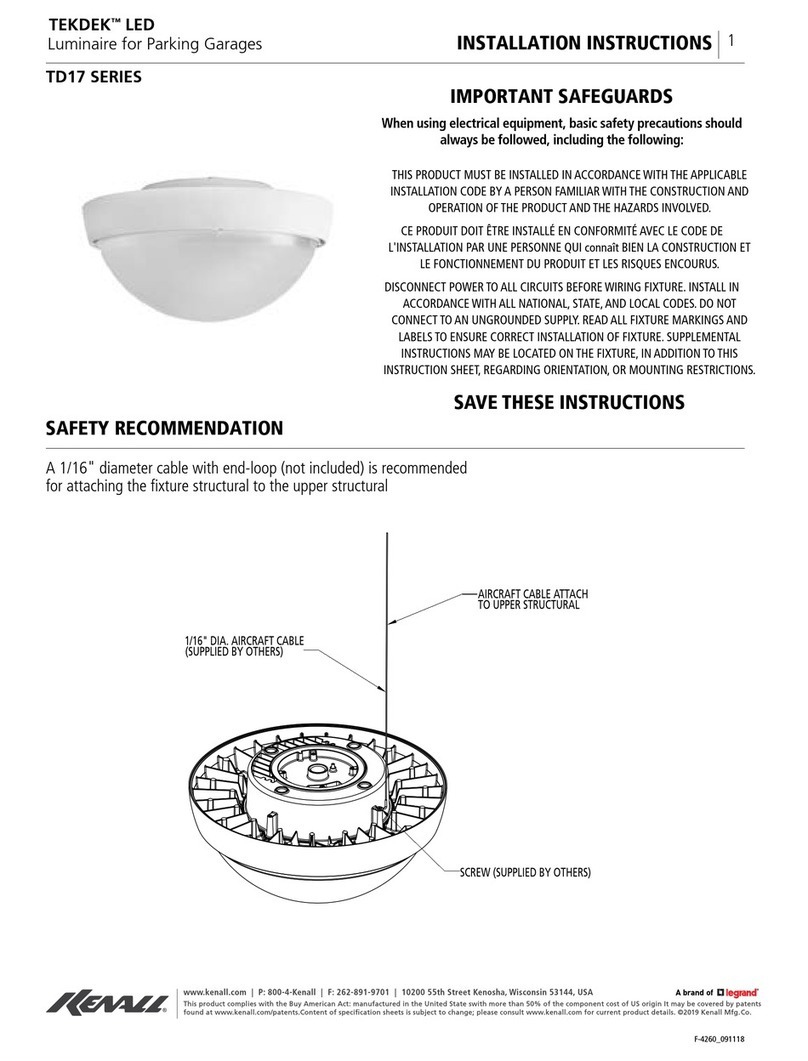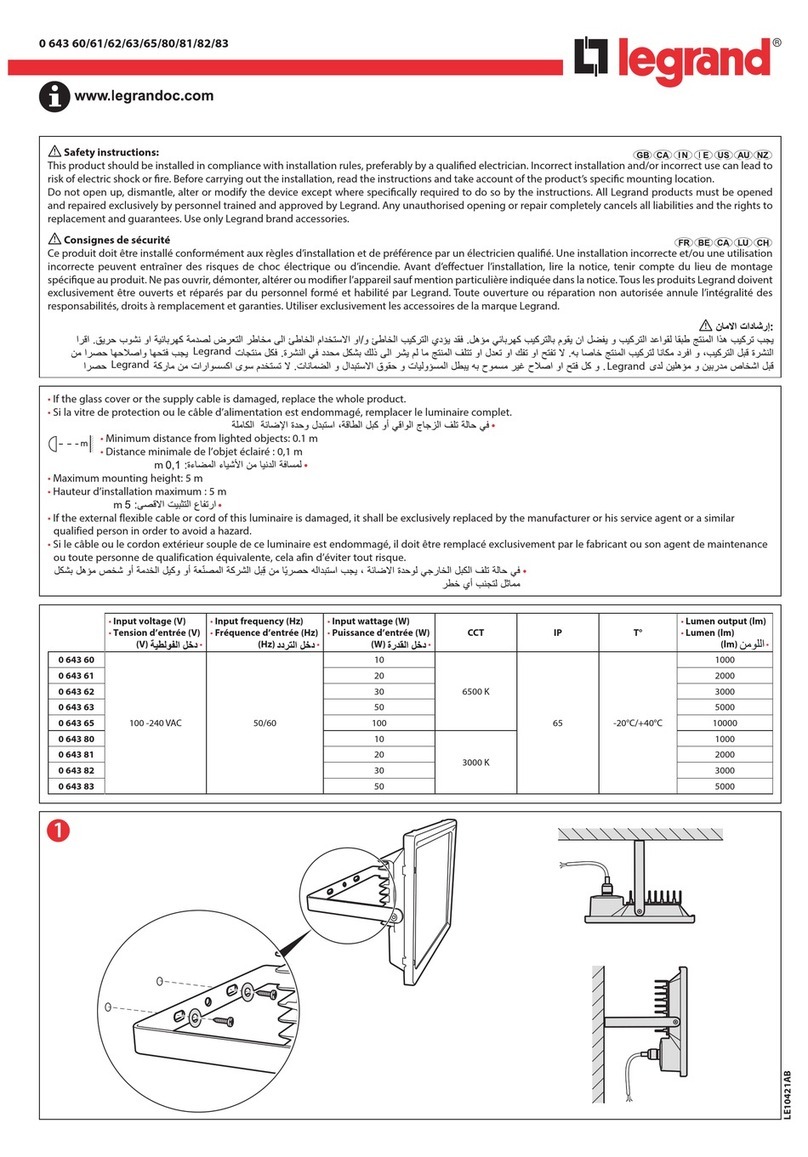
www.kenall.com |P: 800-4-Kenall |F: 262-891-9701 |10200 55th Street Kenosha, Wisconsin 53144, USA
This product complies with the Buy American Act: manufactured in the United State swith more than 50% of the component cost of US origin It may be covered by patents
found at www.kenall.com/patents.Content of specication sheets is subject to change; please consult www.kenall.com for current product details. ©2019 Kenall Mfg.Co.
1
INSTALLATION INSTRUCTIONS
MIGHTY-MAC_F-0939_091118
Luminaires for Correctional Applications
MIGHTY MAC™
SURFACE MOUNT INSTALLATION
• Disconnect the quick connect from the xture and wire to the appropriate supply wires. Connect xture leads
to power supply leads using connectors suitable for the gage and number of wires being used (not included).
Connections are to be made in the junction box, not the xture. Black and other colored wires connect to the
supply conductor, white xture lead connects to the neutral supply conductor, and the grounding wire must be
connected to a suitable ground.
• Place xture over an installed electrical junction box. Locate and drill pilot holes in mounting surface. Use
xture base as template. Using fasteners and anchors appropriate for the mounting surface and xture weight,
(not supplied), mount xture base to building.
• Pull quick connect through wiring access hole and connect to mating connector inside xture. Push quick
connector back into junction box.
Read all xture markings and labels to insure correct installation of the xture. Additional information may be
located on the xture, separate from this instruction sheet, regarding orientation and mounting restrictions.
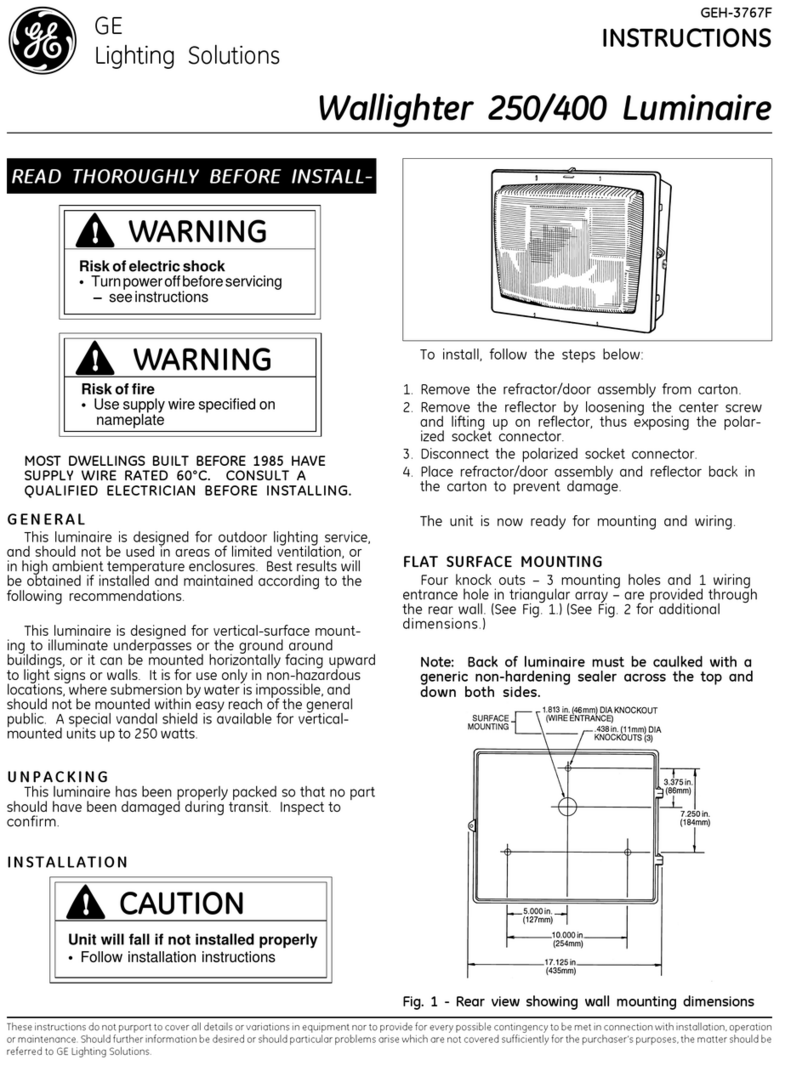
Disconnect power to nightlight and main circuits before wiring xture. Remove door/housing to gain access to the
inside of the xture.
RECESSED FLANGE INSTALLATION
• Install plaster frame appropriate for the xture (separately purchased accessory), or install threaded rod from
ceiling structure above ceiling, using same spacing as mounting holes on xture. Guide xture up into cutout,
guiding threaded rod into obround mounting holes in xture. Install washers and nuts to hold xture.
IMPORTANT SAFEGUARDS
When using electrical equipment, basic safety precautions should always be followed, including the following:
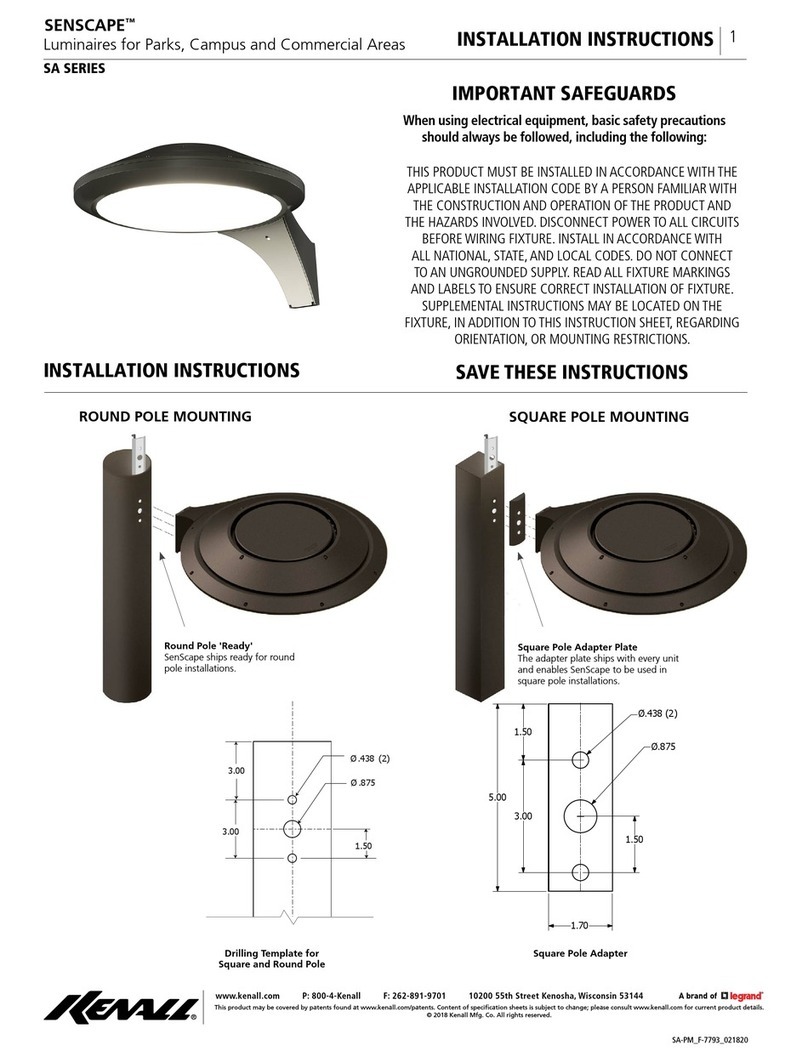
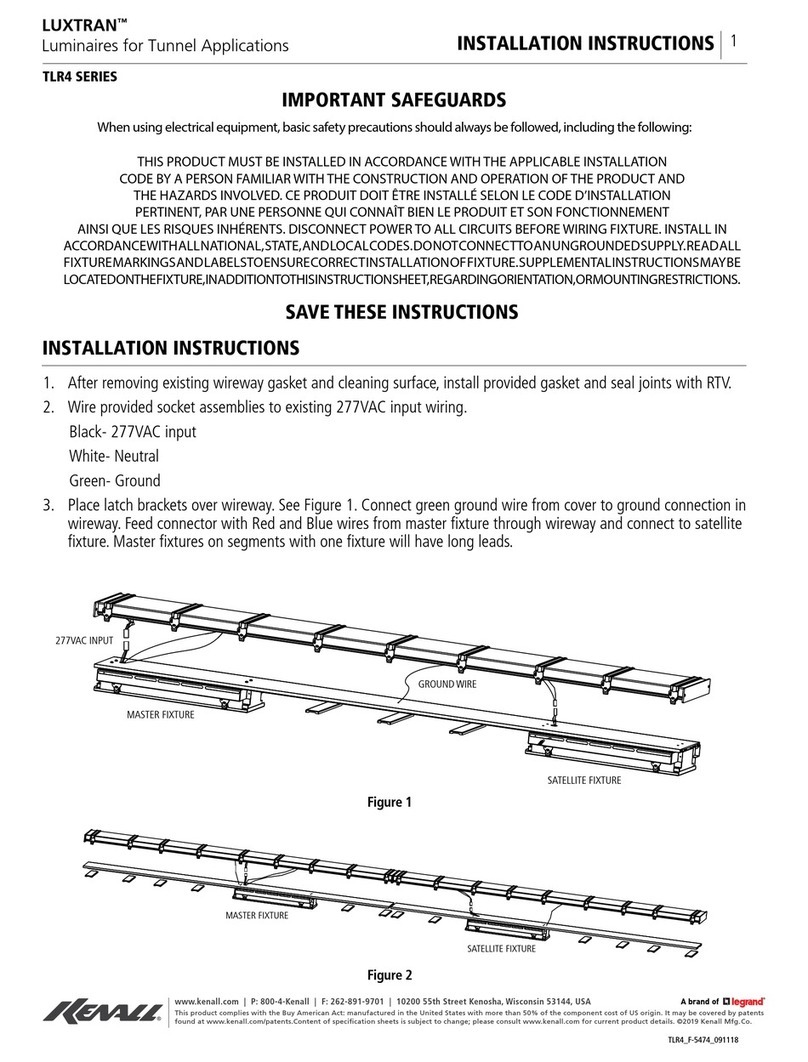
THIS PRODUCT MUST BE INSTALLED IN ACCORDANCE WITH THE APPLICABLE INSTALLATION CODE BY A PERSON FAMILIAR WITH
THE CONSTRUCTION AND OPERATION OF THE PRODUCT AND THE HAZARDS INVOLVED. DISCONNECT POWER TO ALL CIRCUITS
BEFORE WIRING FIXTURE. INSTALL IN ACCORDANCE WITH ALL NATIONAL, STATE, AND LOCAL CODES. DO NOT CONNECT TO
AN UNGROUNDED SUPPLY. READ ALL FIXTURE MARKINGS AND LABELS TO ENSURE CORRECT INSTALLATION OF FIXTURE.
SUPPLEMENTAL INSTRUCTIONS MAY BE LOCATED ON THE FIXTURE, IN ADDITION TO THIS INSTRUCTION SHEET, REGARDING
ORIENTATION, OR MOUNTING RESTRICTIONS.
SAVE THESE INSTRUCTIONS
RECESSED GRID INSTALLATION
• Angle the xture into the grid opening and lay the xture onto the suspended ceiling grid.
• Fixtures weighing over 50 lbs. should be fastened to the ceiling grid system, or to the ceiling structure above
the suspended ceiling by using threaded rod or steel wires (not provided ) appropriate for the weight of the
xture.
