manuals.online logo
Brands
  1. Home
  2. •
  3. Brands
  4. •
  5. LEGRAND
  6. •
  7. Security Sensor
  8. •
  9. LEGRAND CP Electronics EBDMR-DALI2 User manual

LEGRAND CP Electronics EBDMR-DALI2 User manual

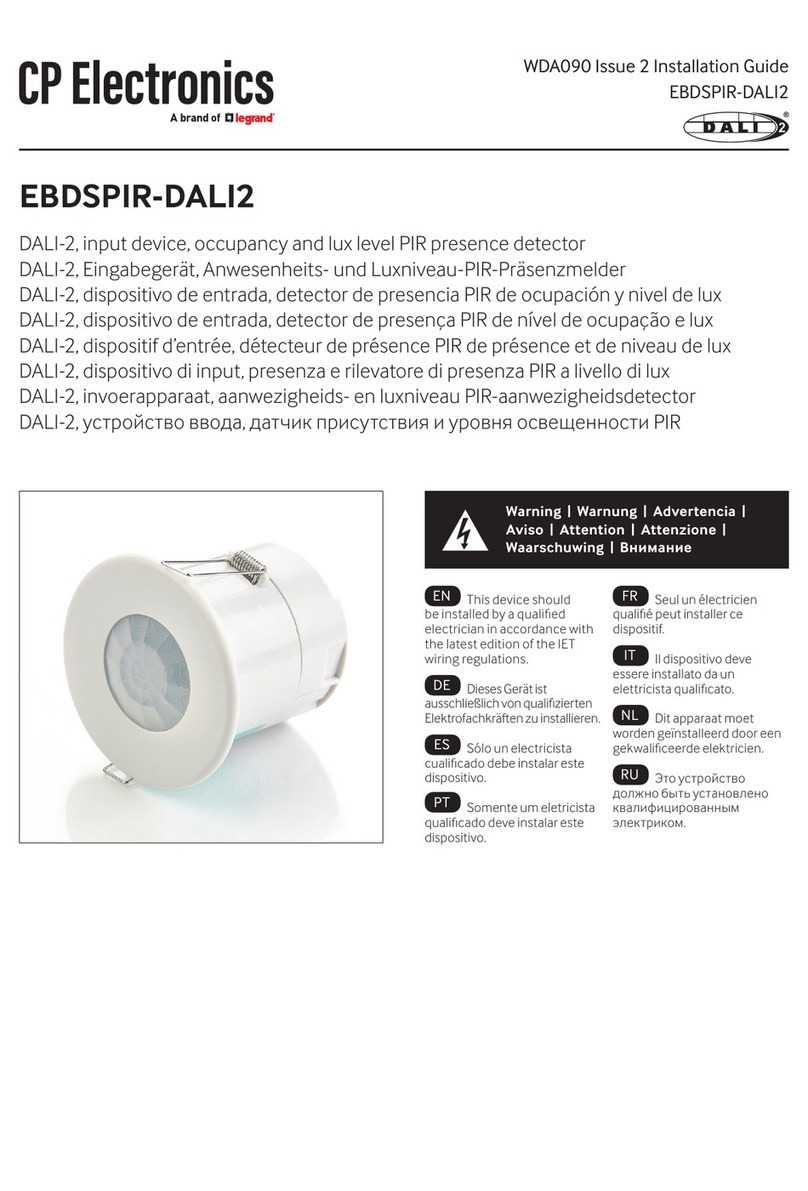
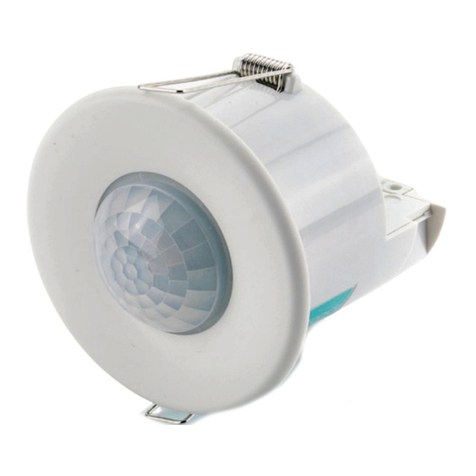
EBDMR-DALI2
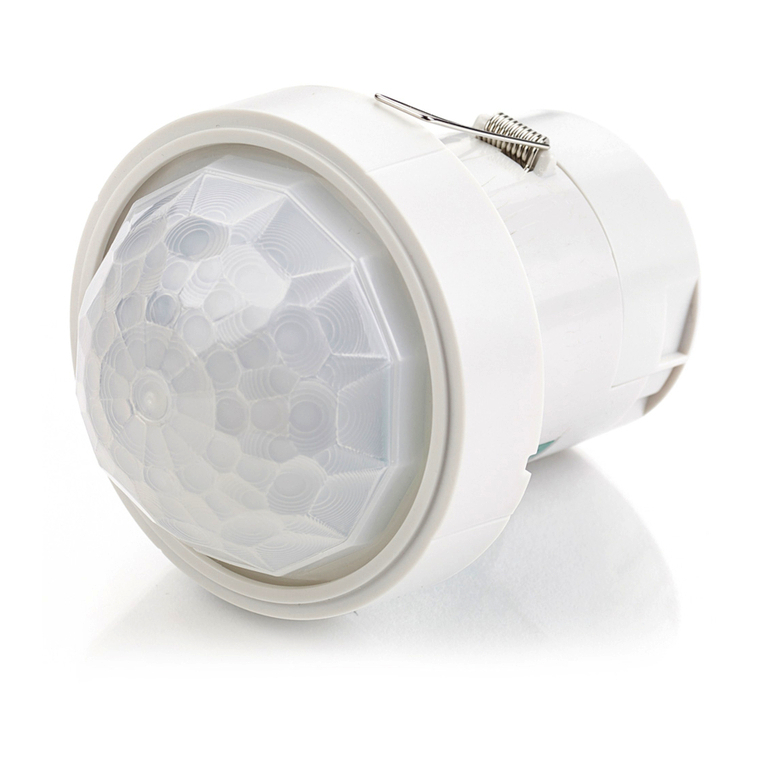
DALI-2, input device, mid-range, occupancy and lux level PIR presence detector
DALI-2, Eingabegerät, Midrange-, Anwesenheits- und Luxniveau-PIR-Präsenzmelder
DALI-2, dispositivo de entrada, detector de presencia PIR de rango medio, ocupación y nivel de lux
DALI-2, dispositivo de entrada, detector de presença PIR de médio alcance, nível de ocupação e lux
DALI-2, dispositif d’entrée, détecteur de présence PIR de milieu de gamme, d’occupation et de
niveau de lux
DALI-2, dispositivo di input, midrange, rilevatore di presenza PIR a livello di occupazione e lux
DALI-2, invoerapparaat, mid-range, aanwezigheids- en luxniveau PIR-aanwezigheidsdetector
DALI-2, устройство ввода, датчик присутствия среднего диапазона, присутствия и
уровня люкса
WDA092 Issue 3 Installation Guide
EBDMR-DALI2
Warning | Warnung | Advertencia |
Aviso | Attention | Attenzione |
Waarschuwing | Внимание
EN This device should
be installed by a qualied
electrician in accordance with
the latest edition of the IET
wiring regulations.
DE Dieses Gerät ist
ausschließlich von qualizierten
Elektrofachkräen zu installieren.
ES Sólo un electricista
cualicado debe instalar este
dispositivo.
PT Somente um eletricista
qualicado deve instalar este
dispositivo.
FR Seul un électricien
qualié peut installer ce
dispositif.
IT Il dispositivo deve
essere installato da un
elettricista qualicato.
NL Dit apparaat moet
worden geïnstalleerd door een
gekwaliceerde elektricien.
RU Это устройство
должно быть установлено
квалифицированным
электриком.
Dimensions (mm) | Abmessungen (mm) | Dimensiones (mm) | Dimensões (mm) | Dimensioni (mm) |
Dimensies (mm) | Размеры (мм)
Detection pattern | Erfassungsbereich | Patrón de detección | Padrão de detecção |
Performance de détection | Modello di rilevazione | Detectie zone | Шаблон обнаружения
high sensitivity low
2.8m
15m
76 12 65
Ø 64mm
EN Key
1. DA -
2. DA +
DE Zeichenerklärung
1. DA -
2. DA +
ES Leyenda
1. DA -
2. DA +
PT Legenda
1. DA -
2. DA +
FR Légende
1. DA -
2. DA +
IT Legenda
1. DA -
2. DA +
NL Legenda
1. DA -
2. DA +
RU ключ
1. DA -
2. DA +
DA -
DA +
1
2
Wiring | Verkabelung | Cableado | Ligações | Câblage | Cablaggio | Bedrading | электропроводка
EN This device is designed to be
ush ceiling-mounted. See page 8 for
additional mounting options.
• Do not site the unit where direct sunlight
might enter the sensor.
• Do not site the sensor within 1m of any
lighting, forced air heating or ventilation.
• Do not x the sensor to an unstable or
vibrating surface.
DE Das Modell ist für den Deckeneinbau
vorgesehen. Siehe Seite 8 für weitere
Mntagemöglichkeiten.
• Einheit so anbringen, dass der Sensor vor
direkter Sonneneinstrahlung geschützt ist.
• Sensor mit Mindestabstand von 1m
zu Lichtquellen, Luheizung oder
Ventilation anbringen.
• Sensor nicht an einer instabilen oder
vibrierenden Oberäche montieren.
ES Este producto está diseñado para
montarse empotrado en techo. Ver pag. 8
para otras opciones de montaje.
• Evite que la luz del sol incida directamente
sobre el sensor.
• No coloque el sensor a menos de 1m
de fuentes de iluminación, salidas de
calefacción por aire forzado o ventilación.
• No je el sensor a supercies que vibren o
no sean estables.
PT Este dispositivo foi projetado para
ser montado no teto. Veja a página 8 para
opções adicionais de montagem.
• Não instale a unidade num local onde a
luz solar direta possa incidir no sensor.
• Não coloque o sensor a menos de 1m de
qualquer iluminação, aquecimento ou
ventilação de ar forçado.
• Não xe o sensor em uma superfície
instável ou sujeito a vibrações.
FR Le produit est conçu pour être monté
au plafond en encastré. Voir page 8 pour
les options additionnelles de montage.
• Ne pas placer l’unité dans une position
où la lumière directe du soleil pourrait
pénétrer dans le capteur.
• Ne pas placer le capteur à moins
d’unmètre de tout dispositif d’éclairage,
de chauage ou de ventilation à air forcé.
• Ne pas xer le capteur sur une surface
instable ou vibrante.
IT Questo dispositivo è progettato per
essere a lo sotto. Vedi pagina 8 per
opzioni di montaggio aggiuntive.
• Non collocare l’unità in una posizione in
cui la luce diretta del sole possa entrare
nel sensore.
• Non posizionare il sensore a meno
di un metro da un qualsiasi tipo di
illuminazione, sistema di riscaldamento
o ventilazione.
• Non installare il sensore su superci
instabili o soggette a vibrazioni.
NL Dit apparaat is ontworpen voor
inbouwmontage in het plafond. Zie
pagina 8 voor optionele montage opties.
• Plaats het apparaat niet op een locatie
waar direct zonlicht de sensor kan
binnendringen.
• Plaats de sensor niet op minder dan 1
meter afstand van verlichting, geforceerde
luchtverwarming of ventilatie.
• Bevestig de sensor niet op een onstabiel
of trillend oppervlak.
RU Это устройство предназначено
для скрытого монтажа на потолке.
Смотрите стр. 8 для дополнительных
опций монтажа.
• Не размещайте устройство в местах,
где прямой солнечный свет может
попасть в датчик.
• Не размещайте датчик в пределах 1
м от освещения, принудительного
воздушного отопления или
вентиляции.
• Не закрепляйте датчик на
неустойчивой или вибрирующей
поверхности.
Installation | Instalación | instalação | Installazione | Installatie | Установка
Ø 64mm
1
35mm
6mm
2
Create cut out | Erstellen Sie einen Ausschnitt | Oricio de corte | Fixação no teto | Percer |
Creare il foro | Sparing maken | Выполните вырез в панели
EN Cut a 64mm diameter
hole in the ceiling.
DE Deckenausschnitt
64mm.
ES Cortar un oricio de 64
mm de diámetro en el techo
PT Efectuar um corte de
diâmetro de 64mm no teto.
FR Percer un trou de
64mm de diamètre dans le
plafond
IT Realizzare un foro di
64mm di diametro a sotto.
NL Maak een 64mm
diameter sparing in het
plafond.
RU Выполните
отверстие диаметром 64
мм в потолочной панели.
Wire stripping | Abisolieren | Pelado de cables | Descascamento do o | Dénudage des câbles |
Spelatura del lo | Kabelstrippen | Зачистка проводов
EN Strip the wires as shown opposite.
Presence detector does not require
earth conductor.
DE Abisolieren Sie die Kabel wie dargestellt.
Der Melder benötigt keinen Erdanschluß.
ES Pele los cables como se muestra en el
dibujo. El detector no requiere cable de tierra.
PT Descarne os cabos como mostrado
ao lado. Este detector não requer conductor
de terra.
FR Dénudez les câbles comme indiqué ci-
contre. Le détecteur de présence ne nécessite
pas de conducteur de terre.
IT Spelare i li come mostrato. Il rilevatore
di presenza non richiede il cavo di terra.
NL Strip de aders zoals weergegeven op
de aeelding hiernaast. Aardingsdraad is niet
vereist.
RU Выполните зачистку проводов, как
показано на рисунке. Датчик присутствия
не требует провода заземления.
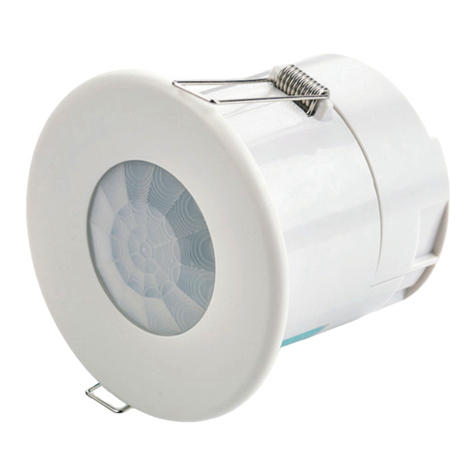
4
3
4
Clamp cable | Zugentlastung | Abrazadera para el cable | Fixação do cabo | Serrer les câbles |
Morsetto per il cavo | Trekontlasting | Фиксация кабеля
EN Continue tightening the screws
until the clamp bar snaps out and is tightly
engaged against the cable/s. The cable
clamp must clamp the outer sheath only.
DE Ziehen Sie die Schrauben weiterhin
an, bis die Klemme einrastet und fest am
Kabel sitzt. Die Kabelklemme darf nur die
äußere Ummantellung einklemmen.
ES Continuar apretando los tornillos
hasta que la barra abrazadera salga y se
ajuste bien con el cable. La abrazadera para
cables solo debe sujetar la funda.
PT Apertar os parafusos até que a
barra de xação se encaixe totalmente e
prenda bem o cabo. O grampo do cabo
deve xar apenas o revestimento externo.
FR Continuez de serrer les vis jusqu’à
ce que la barre de xation sorte et se serre
fortement sur le câble. Le serre-câbles doit
uniquement serrer la gaine extérieure.
IT Continuare a stringere le viti no
a quando la barra del morsetto non scatti
e si ssi leggermente sul cavo. Applica il
morsetto alla sola guaina esterna del cavo.
NL Blijf de schroeven aandraaien
totdat de beugel los komt en de kabel
stevig vastklemt. De beugel moet alleen de
buitenmantel vastklemmen.
RU Завинчивайте шурупы до
тех пор, пока зажимная планка не
защелкнется и не будет плотно
прилегать к кабелю. Кабельный хомут
должен обжимать только внешнюю
оболочку.
Wire in plugs & connect to detector | Verdrahtugn & Anschluß des Melders | Cableado y conexión del sensor |
Cablagem e ligação do sensor | Câbler le bornier et connecter au détecteur | Cablaggio e connessione al
rilevatore | Bedrading & aansluiten op detector | Соединение проводов и подключение к датчику
EN Wire in plug/s, using wiring
diagram on page 2 as a guide. Connect the
plug/s to the detector.
DE Zum Anschluß des Melders
verwenden Sie das Schaltbild. Verwenden
Sie dazu den /die beiliegenden Stecker.
ES Cablear siguiendo el esquema de
la página 2 como guía. Conectar las bornas
al sensor.
PT Efectuar as ligações seguindo o
esquema na pág.2 como indicação. Ligar
os bornes ao sensor.
FR Raccorder les câbles au bornier
débrochable en respectant le schéma
de câblage page 2. Connecter le bornier
au détecteur.
IT Collegare il morsetto usando il
cablaggio indicato a pagina 2 come guida.
Connetti il morsetto al rilevatore.
NL Aders aansluiten in de
aansluitklem(men), gebruik het
bedradingsschema op pagina 2 als
richtlijn. Steek de aansluitklem(men) in
de detector.
RU Подключите провода в
контактный разъем, используя схему
соединений на стр. 2 в качестве
руководства. Подключите контактный
разъем к датчику.
5
5EN Bend the springs up and push
detector through hole in ceiling. When fully
inserted the springs snap back to hold the
device in place.
To avoid injury, take care when
bending springs.
DE Federn nach oben biegen und
Detektor durch die Önung in der Decke
schieben. Sobald der Detektor vollständig
eingeschoben ist, schnappen die Federn
zurück und halten das Gerät fest an Ort
und Stelle.
Achten Sie auf die Spannfedern um
Verletzungen zu vermeiden
ES Doble los muelles hacia arriba
e introduzca el detector por el oricio
del techo. Cuando esté totalmente
introducido, los muelles saltan para
mantener el dispositivo en su lugar.
Doble los muelles con cuidado al
montar la unidad.
PT Dobre as molas para cima e empurre
detector através do furo no teto. Ao serem
totalmente inseridas as molas saltam de volta
para manter o dispositivo no lugar.
Para evitar ferimentos, tenha
cuidado quando manipule as molas.
FR Replier les ressorts vers le haut
et pousser le détecteur à travers le trou
dans le plafond. Quand les ressorts sont
complètement insérés, ils se remettent
dans leur position initiale pour maintenir le
dispositif en place.
Pour éviter toute blessure, faire
attention lors de la compression
des ressorts.
IT Piegare le molle verso l’alto e
inserire il rilevatore nel foro sul sotto.
Una volta inserito, le molle si riassestano
ssando il dispositivo in posizione.
per evitare infortuni, prestare
attenzione quando si piegano le
molle.
NL Buig de veren omhoog en duw het
apparaat door de sparing in het plafond.
Wanneer de veren volledig door de sparing
zijn klappen deze terug om het apparaat op
zijn plek te houden.
Om letsel te voorkomen, wees
voorzichtig met het buigen van de
veren.
RU Отведите пружины в верхнее
положение и вставьте датчик в
отверстие в потолке. После полного
погружения в отверстие пружины
вернутся в обратное положение для
фиксации устройства.
Во избежание травм, отводите
пружины с осторожностью.
Install detector | Melder installieren | Instalación del detector | Instalaçao do detector | Installer le détecteur |
Installazione del sensore | Installeer detector | Установка датчика
Default Settings | Werkseinstellung | Parámetros por defecto | Congurações por omissão |
Paramètres par défaut | Impostazioni predenite | Standaard instellingen | Настройки по умолчанию
EN Time out (hold Timer): 15 minutes.
Sensitivity (Adjustable): 85/100
Detection: Presence only
DE Nachlaufzeit (Haltetimer): 15
Minuten
Empndlichkeit (Einstellbar):
85/100
Betriebsart: Nur Präsenz
ES Tiempo retardo hasta apagado
(temporizador de espera): 20
minutos
Sensibilidad (Ajustable): 85/100
Detección: Solo presencia
PT Tempo limite (temporizador de
espera): 20 minutos.
Sensibilidade (Ajustável): 85/100
Detecção: Somente presença
FR Temporisation (minuterie): 20
minutes
Sensibilité (Ajustable): 85/100
Détection: Présence uniquement
IT Time out (tenere il timer): 20
minuti.
Sensibilità (Regolabile): 85/100
Rilevamento : Solo presenza
NL Uitschakeltijd (timer vasthouden):
20 minuten
Gevoeligheid (Verstelbaar):
85/100
Detectie: Alleen aanwezigheid
RU Время задержки (держать
таймер): 20 минут.
Чувствительность
(Регулируемый): 85/100
Обнаружение: Только
присутствие
6
Compliance
DALI-2 Certication
Material (casing)
Soware
Pollution
Humidity
Operating temperature
Type of action
Construction
Purpose
Rated impulse voltage
Terminal capacity
Max (Peak) Current Consumption
Nominal Current Consumption
Supply voltage DC
Weight
Part code
EN Technical Data
IEC62386 Parts
101,103, 303 & 304
Flame retardant ABS
and PC/ABS
Class A
Degree 2
5 to 95% non-
condensing
-10ºC to +35ºC
Type 1.B action
(micro disconnection)
Independent flush
mounted, electronic
control.
Sensing control
2500V
2.5mm²
18mA
8mA
9.5–22.5 VDC DALI bus
0.15kg
EBDMR-DALI2
DE Technische Daten
Eingehaltene normen
DALI-2 Zertizierung
Material (gehäuse)
Soware
Verschmutzung
Feuchtigkeit
Arbeitstemperaturbereich
Aktionsart
Bauweise
Zweck
Bemessungsstoßspannung
Leiterkapazität
Maximaler (Spitzen-)Stromverbrauch
Nomineller Stromverbrauch
Versorgungsspannung DC
Gewicht
Teile-code
IEC62386 Teile
101,103, 303 & 304
Flammenhemmendes
ABS
Klasse A
Degree 2
5 bis 95 % Luftfeuchtigkeit,
nicht kondensierend
-10 bis +35ºC
Aktion vom Typ 1.B
(Mikrounterbrechung)
Unabhängige bündige
elektronische Steuerung
Wahrnehmungskontrolle
2500V
2.5mm²
18mA
8mA
9.5–22.5 VDC DALI bus
0.15kg
EBDMR-DALI2
Conformidad con
normativas
Certicación DALI-2
Material (carcasa)
Soware
Contaminación
Humedad
Rango de temperatura de trabajo
Tipo de acción
Construcción
Finalidad
Voltaje nominal de impulso
Capacidad del terminal
Consumo de corriente máximo
(pico)
Consumo de corriente nominal
Voltaje de entrada de CC
Peso
Código de pieza
IEC62386 Partes
101,103, 303 & 304
Ignífugo ABS
Clase A
Degree 2
5 a 95 % sin
condensación
-10 a +35°C
Acción tipo 1.B
(micro desconexión)
Montaje empotrado
independiente, control
electrónico
Control de detección
2500V
2.5mm²
18mA
8mA
9.5–22.5 VDC DALI bus
0.15kg
EBDMR-DALI2
ES Datos Técnicos PT Dados Técnicos
Compatibilidade
Certicação DALI-2
Material (caixa)
Soware
Poluição
Umidade
Faixa de temperatura de trabalho
Tipo de ação
Construção
Objetivo
Tensão de impulso nominal
Capacidade do terminal
Consumo atual máximo (pico)
Consumo Corrente Nominal
Tensão de alimentação CC
Peso
Código da peça
IEC62386 Peças
101,103, 303 & 304
Retardante de chamas
ABS
Classe A
Degree 2
5 a 95% sem
condensação
-10 a +35°C
Tipo de ação 1.B
(micro desconexão)
Montagem
independente embutida,
controle eletrônico
Controle de detecção
2500V
2.5mm²
18mA
8mA
9.5–22.5 VDC DALI bus
0.15kg
EBDMR-DALI2
7
FR Données Techniques
Conformité
Certication DALI-2
Matériau (boîtier)
Logiciel
Pollution
Humidité
Plage de température de travail
Type d’action
Construction
Rôle
Tension nominale de tenue aux chocs
Capacité des terminaux
Consommation de courant
maximale (crête)
Consommation de courant
nominale
Tension d’alimentation CC
Poids
Code de la pièce
IEC62386 Sections
101,103, 303 & 304
Agent Ignifuge ABS
Classe A
Degree 2
5 à 95 % non-
condensable
-10 à +35°C
Action de type 1.B
(micro déconnexion)
Indépendante montée,
contrôle électronique
Contrôle de détection
2500V
2.5mm²
18mA
8mA
9,5–22,5 VDC DALI bus
0.15kg
EBDMR-DALI2
IT Speciche Tecnichev
Conformità
Certicazione DALI-2
Materiale (rivestimento)
Soware
Inquinamento
Umidità
Intervallo di temperatura di lavoro
Tipo di azione
Costruzione
Scopo
Tensione nominale a impulso
Capacità del morsetto
Consumo di corrente massimo
(di picco)
Consumo di corrente nominale
Tensione di alimentazione CC
Peso
Codice parte
IEC62386 Parti
101,103, 303 & 304
ABS ignifugo
Classe A
Degree 2
Dal 5 al 95% senza
condensa
-10 al +35°C
Azione di tipo 1.B
(micro disconnessione)
Controllo elettronico
indipendente da incasso
Controllo sensing
2500V
2.5mm²
18mA
8mA
9.5–22.5 VDC DALI bus
0.15kg
EBDMR-DALI2
Conformiteit
DALI-2-certicering
Materiaal (behuizing)
Soware
Verontreiniging
Luchtvochtigheid
Werktemperatuurbereik
Type actie
Bouw
Doel
Nominaal impulsspanning
Eindcapaciteit
Max (piek) stroomverbruik
Nominaal stroomverbruik
Voedingsspanning DC
Gewicht
Onderdeelcode
IEC62386 Onderdelen
101,103, 303 & 304
Brandvertragend ABS
Klasse A
Degree 2
5 tot 95% niet
condenserend
-10 tot 35°C
Type 1.B actie
(micro-uitschakeling)
Onafhankelijke inbouw,
elektronische bediening
Detectiecontrole
2500V
2.5mm²
18mA
8mA
9.5–22.5 VDC DALI bus
0.15kg
EBDMR-DALI2
NL Technische data
податливость
Сертификация DALI-2
Материал (корпус)
Программное обеспечение
загрязнение
Влажность
Диапазон рабочих температур
Тип действия
строительство
Цель
Номинальное импульсное
напряжение
Терминальная емкость
Максимальное (пиковое)
потребление тока
Номинальное потребление тока
Постоянное напряжение
питания (DC)
Вес
Наименование изделия
IEC62386 Части
101,103, 303 & 304
Огнестойкий пластик
АБС
Класс А
Степень 2
от 5 до 95% без
конденсации влаги
От -10 до 35 ° C
Тип 1.B Действие
(микроотключение)
Независимый скрытый
монтаж, электронное
управление
Зондирование
2500V
2.5mm²
18mA
8mA
9.5–22.5 VDC
DALI bus
0.15kg
EBDMR-DALI2
RU Технические характеристики
8
WDA092 Issue 3 Installation Guide, EBDMR-DALI2
Part Number | Artikelnummer |
Referencia | Referéncia | Référence |
Codice | Artikelnummer | Номер
Description | Beschreibung | Descripción | Descripção | Description |
Descrizione | Omschrijving | Описание
EXD-HSC
Extended wiring housing | Erweiterter Verdrahtungsraum | Ampliación de alojamiento
de cables | Extensor adicional para cabos | Enveloppe allongée pour câblage |
Estensore per i cavi | Verlengde behuizing voor bedrading | Удлиненный корпус
проводки
UNLCDHS
Universal LCD IR handset/commissioning handset | Fernbedienung und
Einstellwerkzeug | Mando profesional con pantalla LCD para programación y puesta
en marcha | Controle remoto LCD Universal | Outil universel de conguration / mise
en service avec écran LCD | Telecomando Universale LCD | Gevanceerde handset |
Универсальный ИК-пульт для ввода в эксплуатацию
DBB
Surface mounting box | Deckenauaudose | Caja para montaje en supercie |
Caixa para supercie | Accessoire pour montage en saillie | Scatola a supercie |
Opbouwdoos | Коробка поверхностного монтажа
DBB-EXT
Surface mount back box extender | Erweiterung für Deckenauaudose | Extensión
para montaje en supercie | Extensor de caixa de montagem em superfície | Extension
d’accessoire pour montage en saillie | Estensore per scatola per montaggio a supercie |
Verhogingsring | Удлинитель коробки поверхностного монтажа
Accessories & associated products | Zubehör | Accesorios y productos asociados | Acessórios e productos
associados | Accessoires et produits associés | Accessori e prodotti associati | Toebehoren | Аксессуары и
сопутствующие товары
CP Electronics
Brent Crescent, London NW10 7XR
t. +44 (0) 333 900 0671
customerservice.cpelectronic[email protected]
www.legrand.co.uk/en/brands/cp-electronics connect with us
Due to our policy of continual product improvement CP Electronics reserves the right to alter the specication of this product without prior notice.

Other LEGRAND Security Sensor manuals

LEGRAND SANUS SAL-IWP2 User manual

LEGRAND

LEGRAND SANUS SAL-IWP2 User manual

LEGRAND 0 884 09 User manual

LEGRAND

LEGRAND 0 884 09 User manual

LEGRAND Pass & Seymour WDT301 User manual

LEGRAND

LEGRAND Pass & Seymour WDT301 User manual

LEGRAND Wattstopper FS-555 User manual

LEGRAND

LEGRAND Wattstopper FS-555 User manual

LEGRAND Mosaic 493 31 User manual

LEGRAND

LEGRAND Mosaic 493 31 User manual

LEGRAND LE03020AB User manual

LEGRAND

LEGRAND LE03020AB User manual

LEGRAND Celiane 670 92 User manual

LEGRAND

LEGRAND Celiane 670 92 User manual

LEGRAND CP Electronics MWS3A-AT-DD User manual

LEGRAND

LEGRAND CP Electronics MWS3A-AT-DD User manual

LEGRAND CP Electronics EBMHS-BLV User manual

LEGRAND

LEGRAND CP Electronics EBMHS-BLV User manual

LEGRAND 0 883 09 User manual

LEGRAND

LEGRAND 0 883 09 User manual

LEGRAND 845 06 User manual

LEGRAND

LEGRAND 845 06 User manual

LEGRAND CP Electronics Casambi EBDMR-CB-DD User manual

LEGRAND

LEGRAND CP Electronics Casambi EBDMR-CB-DD User manual

LEGRAND Valena User manual

LEGRAND

LEGRAND Valena User manual

LEGRAND 845 02 User manual

LEGRAND

LEGRAND 845 02 User manual

LEGRAND Celiane Series User manual

LEGRAND

LEGRAND Celiane Series User manual

LEGRAND CP Electronics EBDRC-DD User manual

LEGRAND

LEGRAND CP Electronics EBDRC-DD User manual

LEGRAND 088230 User manual

LEGRAND

LEGRAND 088230 User manual

LEGRAND 0 672 26 User manual

LEGRAND

LEGRAND 0 672 26 User manual

LEGRAND 0 489 59 User manual

LEGRAND

LEGRAND 0 489 59 User manual

LEGRAND 3445 User manual

LEGRAND

LEGRAND 3445 User manual

LEGRAND 0 489 66 User manual

LEGRAND

LEGRAND 0 489 66 User manual

LEGRAND CP Electronics MWS3A-AT-AD User manual

LEGRAND

LEGRAND CP Electronics MWS3A-AT-AD User manual

LEGRAND 0 625 14 User manual

LEGRAND

LEGRAND 0 625 14 User manual

LEGRAND CP Electronics EBDSPIR-DALI2 User manual

LEGRAND

LEGRAND CP Electronics EBDSPIR-DALI2 User manual

Popular Security Sensor manuals by other brands

MSA Altair operating manual

MSA

MSA Altair operating manual

elobau 120 2 Series manual

elobau

elobau 120 2 Series manual

Cardin Elettronica MINI CDR Series manual

Cardin Elettronica

Cardin Elettronica MINI CDR Series manual

PIKO 56542 quick start guide

PIKO

PIKO 56542 quick start guide

Net Safety UV/IRS-A user manual

Net Safety

Net Safety UV/IRS-A user manual

Visonic NEXT CAM PG2 datasheet

Visonic

Visonic NEXT CAM PG2 datasheet

AiSight Aion Service and installation instructions

AiSight

AiSight Aion Service and installation instructions

C-LOGIC 610-MD instruction manual

C-LOGIC

C-LOGIC 610-MD instruction manual

HTC HP-500 quick start guide

HTC

HTC HP-500 quick start guide

Amcrest SmartHome AL-KIT1-PP quick start guide

Amcrest

Amcrest SmartHome AL-KIT1-PP quick start guide

Feig Electronic VEK MNE1 manual

Feig Electronic

Feig Electronic VEK MNE1 manual

Takex Quad PB-IN-50HF instruction manual

Takex

Takex Quad PB-IN-50HF instruction manual

RUBEZH HD29 Operation manual

RUBEZH

RUBEZH HD29 Operation manual

Datalogic SG2 BASE Series instruction manual

Datalogic

Datalogic SG2 BASE Series instruction manual

NOMA 052-7801-8 instruction manual

NOMA

NOMA 052-7801-8 instruction manual

BTI Multi-Detektor Original instructions

BTI

BTI Multi-Detektor Original instructions

DAITEM 191-21X user guide

DAITEM

DAITEM 191-21X user guide

Parker icountPD user manual

Parker

Parker icountPD user manual

manuals.online logo
manuals.online logoBrands
  • About & Mission
  • Contact us
  • Privacy Policy
  • Terms and Conditions

Copyright 2025 Manuals.Online. All Rights Reserved.