manuals.online logo
Brands
  1. Home
  2. •
  3. Brands
  4. •
  5. LEGRAND
  6. •
  7. Security Sensor
  8. •
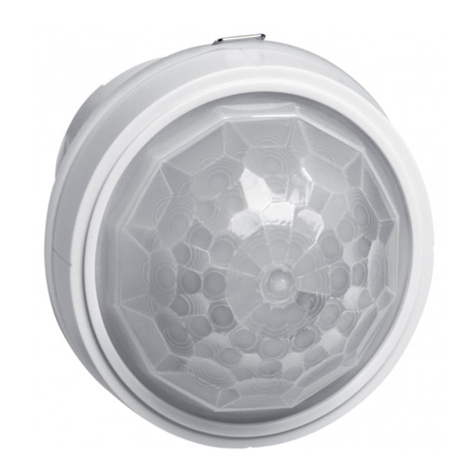
  9. LEGRAND CP Electronics Casambi EBDMR-CB-DD User manual

LEGRAND CP Electronics Casambi EBDMR-CB-DD User manual

EBDMR-CB-DD
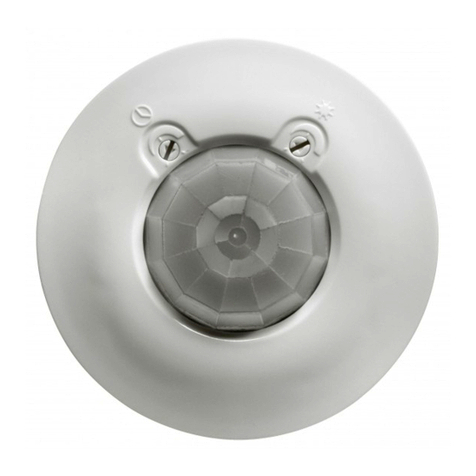
Casambi wireless, IP40, mid level, ush mounted, PIR presence detector with light sensor equipped
with DALI dimming and switched outputs
Casambi Wireless, IP40, Mittelstufe, Unterputz, PIR-Präsenzmelder mit Lichtsensor, ausgestattet mit
DALI-Dimmung und geschalteten Ausgängen
Inalámbrico Casambi, IP40, nivel medio, empotrado, detector de presencia PIR con sensor de luz
equipado con atenuación DALI y salidas conmutadas
Detector de presença PIR Casambi sem o, IP40, nível médio, embutido, com presença de PIR com
sensor de luz equipado com escurecimento DALI e saídas comutadas
Casambi sans l, IP40, niveau intermédiaire, encastré, détecteur de présence PIR avec capteur de
lumière équipé de gradation DALI et de sorties commutées
Casambi wireless, IP40, livello medio, incasso, rilevatore di presenza PIR con sensore di luce dotato di
dimmerazione DALI e uscite commutate
Casambi draadloos, IP40, middenniveau, inbouw, PIR-aanwezigheidsmelder met lichtsensor uitgerust
met DALI-dimmen en geschakelde uitgangen
Warning | Warnung | Advertencia | Aviso |
Attention | Attenzione | Waarschuwing
EN This device should be
installed by a qualied electrician in
accordance with the latest edition
of the IEE wiring regulations.
DE Dieses Gerät ist
ausschließlich von qualizierten
Elektrofachkräen zu installieren.
ES Sólo un electricista
cualicado debe instalar este
dispositivo.
PT Somente um eletricista
qualicado deve instalar este
dispositivo.
FR Seul un électricien
qualié peut installer ce dispositif.
IT Il dispositivo deve essere
installato da un elettricista
qualicato.
NL Dit apparaat moet
worden geïnstalleerd door een
gekwaliceerde elektricien.
WDA024 Issue 1 Installation Guide
EBDMR-CB-DD
Downloads and Videos | Downloads und Videos | Descargas y Videos | Descargas e Videos |
Téléchargements & Vidéos | Downloads e Video | Downloads en Video’s
cpelectronics.co.uk/cp/a024
Detection pattern | Erfassungsbereich | Patrón de detección | Padrão de detecção | Performance de détection |
Modello di rilevazione | Detectie zone
high sensitivity low
2.8m
15m
76 12 65
Dimensions (mm) | Abmessungen (mm) | Dimensiones (mm) | Dimensões (mm) | Dimensioni (mm) | Dimensies (mm)
Wiring | Verkabelung | Cableado | Ligações | Câblage | Cablaggio | Bedrading
EN Key
1. Neutral
2. Live
3. 10A circuit protection required
4. Load
5. DALI Dimming gear
DE Zeichenerklärung
1. Neutral
2. Netzspannungsführend
3. 10A Kurzschlusssicherung
nötig
4. Last
5. DALI Dimmausrüstung
ES Leyenda
1. Neutro
2. Fase
3. 10A protección de circuito
necesario
4. Carga
5. Equipo de atenuación DALI
PT Legenda
1. Neutro
2. Fase
3. 10A proteção do circuito
necessário
4. Carga
5. DALI Equipamento de
escurecimento
FR Légende
1. Neutre
2. Phase
3. 10A protection du circuit
nécessaire
4. Charge
5. Équipement de gradation DALI
IT Legenda
1. Neutro
2. Fase
3. 10A protezione del circuito
necessario
4. Carico
5. DALI Dimming gear
NL Legenda
1. Nul
2. Fase
3. 10A beveiliging nodig
4. Belasting
5. DALI Dimmen
Switched Load and DALI dimming | Switched Load und DALI-Dimmen | Carga conmutada y atenuación DALI |
Carga comutada e escurecimento DALI | Charge commutée et gradation DALI | Carico commutato e dimmerazione DALI |
Geschakelde belasting en DALI-dimmen
EN Use the switched output for non-
dimmable loads and the dim output for DALI
dimmable loads.
DE Verwenden Sie den Schaltausgang für
nicht dimmbare Lasten und den Dimmausgang
für dimmbare DALI-Lasten.
ES Utilice la salida conmutada para cargas
no regulables y la salida atenuada para cargas
regulables DALI.
PT Use a saída comutada para cargas
não reguláveis e a saída fraca para cargas
r e g u l á v e i s D A L I .
FR Utilisez la sortie commutée pour les
charges non dimmables et la sortie dim pour
les charges dimmables DALI.
IT Utilizzare l’uscita commutata per carichi
non dimmerabili e l’uscita dim per carichi
dimmerabili DALI.
NL Gebruik de geschakelde uitgang voor
niet-dimbare belastingen en de dim-uitgang
voor DALI-dimbare belastingen.
N
L-Out
L
DIM –
DIM +
5
4
3
2
1
4
Sensor Congurations | Sensorkongurationen | Conguraciones de sensores | Congurações do sensor |
Congurations des capteurs | Congurazioni del sensor | Sensorconguraties
EN Congure the sensor controls via the Casambi App from Apple
App Store or Google Play Store.
For light regulation control, ensure that the setting below is made and
allow for a few minutes to take eect:
[Use the full dim range] = enable
See CP Electronics Casambi Application Guide.
The communication range between two Casambi units is highly
dependant on the surrounding and obstacles, such as walls and building
materials. In indoor environments the range can be up to 30 m and in
outdoor conditions up to 50 m. In the majority of applications Casambi
units are only ever 5 to 6 meters away from each other to provide
excellent reliability in the communication network.
DE Kongurieren Sie die Sensorsteuerung über die Casambi-App im
Apple App Store oder Google Play Store.
Stellen Sie zur Steuerung der Lichtregulierung sicher, dass die folgende
Einstellung vorgenommen wurde, und warten Sie einige Minuten, bis sie
wirksam werden:
[Verwenden Sie den vollen Dimmbereich] = aktivieren
Siehe CP Electronics Casambi-Anwendungshandbuch.
Die Kommunikationsreichweite zwischen zwei Casambi-Geräten ist stark
abhängig von Umgebung und Hindernissen, beispielsweise Wänden und
Baustoen. Im Innenbereich beträgt die Reichweite bis zu 30 m und im
Außenbereich bis zu 50 m. Bei den meisten Anwendungen benden sich
die Casambi-Geräte höchstens 5 bis 6 Meter voneinander entfernt, damit
die optimale Zuverlässigkeit innerhalb des Kommunikationsnetzwerks
gewährleistet ist.
ES Congure los controles del sensor a través de la aplicación
Casambi de Apple App Store o Google Play Store.
Para el control de la regulación de la luz, asegúrese de realizar la
conguración siguiente y espere unos minutos para que surta efecto:
[Usar el rango de atenuación completo] = habilitar
Consulte la Guía de aplicación de CP Electronics Casambi.
El rango de comunicación entre dos unidades Casambi depende en gran
medida de los alrededores y de obstáculos como paredes y materiales de
construcción. El rango puede ser de hasta 30 m en interiores y hasta 50
m en exteriores. En la mayoría de las aplicaciones, las unidades Casambi
están siempre a una distancia de solo 5 a 6 metros una de la otra para
proporcionar una excelente abilidad en la red de comunicación.
PT Congure os controles do sensor via Casambi App da Apple App
Store ou Google Play Store.
Para controle de regulação de luz, certique-se de que a conguração
abaixo seja feita e aguarde alguns minutos para entrar em vigor:
[Use toda a gama de dimerização] = habilitar
Consulte o Guia de Aplicação da CP Electronics Casambi.
O alcance de comunicação entre duas unidades Casambi depende muito
do ambiente circundante e dos obstáculos, tais como paredes e materiais de
construção. Em ambientes interiores, o alcance pode ser de até 30 m e, em
condições exteriores, de até 50 m.Na maioria das aplicações, as unidades
Casambi estão apenas a cada 5 a 6 metros umas das outras, de forma a
garantir uma maior fiabilidade na rede de comunicação.
FR Congurez les commandes du capteur via l’application Casambi
depuis l’App Store d’Apple ou Google Play Store.
Pour le contrôle de la régulation de la lumière, assurez-vous que le
réglage ci-dessous est eectué et laissez quelques minutes prendre
eet:
[Utiliser la plage de variation complète] = activer
Voir le guide d’application CP Electronics Casambi.
La plage de communication entre deux unités Casambi dépend
fortement de l’environnement et des obstacles, comme les murs et
les matériaux de construction. La plage peut aller jusqu’à 30m dans
les environnements intérieurs et jusqu’à 50m à l’extérieur. Dans la
majorité des applications, les unités Casambi ne sont éloignées que
de 5 ou 6mètres pour fournir une abilité optimale du réseau de
communication.
IT Congura i controlli del sensore tramite l’app Casambi dall’Apple
App Store o Google Play Store.
Per il controllo della regolazione della luce, assicurarsi che
l’impostazione seguente sia stata eseguita e attendere alcuni minuti
anché abbia eetto:
[Usa l’intera gamma dim] = abilita
Vedi la Guida all’applicazione di CP Electronics Casambi.
La portata di comunicazione di due unità Casambi dipende dall’ambiente
circostante e da ostacoli come ad esempio muri e materiali da
costruzione. Negli ambienti interni, la portata può arrivare no a 30 m e
in condizioni esterne no a 50 m. In gran parte delle applicazioni, le unità
Casambi vengono collocate a 5 - 6 metri di distanza, in modo da orire
una rete di comunicazione di eccellente adabilità.
NL Congureer de sensorbediening via de Casambi-app vanuit de
Apple App Store of Google Play Store.
Zorg ervoor dat voor de regeling van de lichtregeling de onderstaande
instelling is gemaakt en wacht enkele minuten om in werking te treden:
[Gebruik het volledige dimbereik] = inschakelen
Zie CP Electronics Casambi toepassingsgids.
Het communicatiebereik tussen twee Casambi-eenheden is
sterk aankelijk van de omgeving en obstakels, zoals muren en
bouwmaterialen. Binnenshuis kan het bereik oplopen tot 30 m en
buitenshuis tot 50 m. In de meeste toepassingen zijn de Casambi-
eenheden slechts 5 tot 6 meter van verwijderd om een uitstekende
betrouwbaarheid in het communicatienetwerk te garanderen.
5
EN This device is designed to be ush ceiling-mounted.
• Do not site the unit where direct sunlight might enter the sensor.
• Do not site the sensor within 1m of any lighting, forced air
heating or ventilation.
• Do not x the sensor to an unstable or vibrating surface.
• Occupancy is best detected when the ambient temperature is
dierent to that of the human body, thus, use within -20 to 35ºC
ambient temperature.
DE Das Modell ist für den Deckeneinbau vorgesehen.
• Einheit so anbringen, dass der Sensor vor direkter
Sonneneinstrahlung geschützt ist.
• Sensor mit Mindestabstand von 1m zu Lichtquellen,
Luheizung oder Ventilation anbringen.
• Sensor nicht an einer instabilen oder vibrierenden Oberäche
montieren.
• Bezetting wordt het best gedetecteerd wanneer de
omgevingstemperatuur anders is dan die van het menselijk
lichaam, dus gebruik binnen een omgevingstemperatuur van
-20 tot 35 ° C.
ES Este producto está diseñado para montarse empotrado en techo.
• Evite que la luz del sol incida directamente sobre el sensor.
• No coloque el sensor a menos de 1m de fuentes de iluminación,
salidas de calefacción por aire forzado o ventilación.
• No je el sensor a supercies que vibren o no sean estables.
• La ocupación se detecta mejor cuando la temperatura ambiente
es diferente a la del cuerpo humano, por lo tanto, use dentro de
-20 a 35ºC de temperatura ambiente.
PT Este dispositivo foi projetado para ser montado no teto.
• Não instale a unidade num local onde a luz solar direta possa
incidir no sensor.
• Não coloque o sensor a menos de 1m de qualquer iluminação,
aquecimento ou ventilação de ar forçado.
• Não xe o sensor em uma superfície instável ou sujeito a vibrações.
• A ocupação é melhor detectada quando a temperatura
ambiente é diferente da do corpo humano, portanto, use entre
-20 a 35ºC.
FR Le produit est conçu pour être monté au plafond en encastré.
• Ne pas placer l’unité dans une position où la lumière directe du
soleil pourrait pénétrer dans le capteur.
• Ne pas placer le capteur à moins d’unmètre de tout dispositif
d’éclairage, de chauage ou de ventilation à air forcé.
• Ne pas xer le capteur sur une surface instable ou vibrante.
• L’occupation est mieux détectée lorsque la température
ambiante est diérente de celle du corps humain, utilisez donc
entre -20 et 35 ° C de température ambiante.
IT Questo dispositivo è progettato per essere a lo sotto.
• Non collocare l’unità in una posizione in cui la luce diretta del
sole possa entrare nel sensore.
• Non posizionare il sensore a meno di un metro da un qualsiasi tipo
di illuminazione, sistema di riscaldamento o ventilazione.
• Non installare il sensore su superci instabili o soggette a vibrazioni.
• L’occupazione viene rilevata meglio quando la temperatura
ambiente è diversa da quella del corpo umano, quindi utilizzare
entro -20 a 35 ° C.
NL Dit apparaat is ontworpen voor inbouwmontage in het plafond.
• Plaats het apparaat niet op een locatie waar direct zonlicht de
sensor kan binnendringen.
• Plaats de sensor niet op minder dan 1 meter afstand van verlichting,
geforceerde luchtverwarming of ventilatie.
• Bevestig de sensor niet op een onstabiel of trillend oppervlak.
• Bezetting wordt het best gedetecteerd wanneer de
omgevingstemperatuur anders is dan die van het menselijk
lichaam, dus gebruik binnen een omgevingstemperatuur van
-20 tot 35 ° C.
Installation | Instalación | instalação | Installazione | Installatie
Ø 64mm
1
35mm
6mm
2
Create cut out | Erstellen Sie einen Ausschnitt | Oricio de corte | Fixação no teto | Percer | Creare il foro | Sparing maken
EN Cut a 64mm diameter
hole in the ceiling.
DE Deckenausschnitt 64mm.
ES Cortar un oricio de 64
mm de diámetro en el techo
PT Efectuar um corte de
diâmetro de 64mm no teto.
FR Percer un trou de 64mm
de diamètre dans le plafond
IT Realizzare un foro di
64mm di diametro a sotto.
NL Maak een 64mm
diameter sparing in het
plafond.
Wire stripping | Abisolieren | Pelado de cables | Descascamento do o | Dénudage des câbles | Spelatura del lo | Kabelstrippen
EN Strip the wires as shown opposite. Presence
detector does not require earth conductor.
DE Abisolieren Sie die Kabel wie dargestellt. Der
Melder benötigt keinen Erdanschluß.
ES Pele los cables como se muestra en el
dibujo. El detector no requiere cable de tierra.
PT Descarne os cabos como mostrado ao
lado. Este detector não requer conductor de terra.
FR Dénudez les câbles comme indiqué
ci-contre. Le détecteur de présence ne nécessite
pas de conducteur de terre.
IT Spelare i li come mostrato. Il rilevatore di
presenza non richiede il cavo di terra.
NL Strip de aders zoals weergegeven op
de aeelding hiernaast. Aardingsdraad is niet
vereist.
6
3
Wire in plugs & connect to detector | Verdrahtugn & Anschluß des Melders | Cableado y conexión del sensor | Cablagem e
ligação do sensor | Câbler le bornier et connecter au détecteur | Cablaggio e connessione al rilevatore | Bedrading &
aansluiten op detector
EN Wire in plug/s, using wiring diagram
on page 2 as a guide. Connect the plug/s to
the detector.
DE Zum Anschluß des Melders
verwenden Sie das Schaltbild. Verwenden
Sie dazu den /die beiliegenden Stecker.
ES Cablear siguiendo el esquema de la
página 2 como guía. Conectar las bornas al
sensor.
PT Efectuar as ligações seguindo o
esquema na pág.2 como indicação. Ligar os
bornes ao sensor.
FR Raccorder les câbles au bornier
débrochable en respectant le schéma
de câblage page 2. Connecter le bornier au
détecteur.
IT Collegare il morsetto usando il
cablaggio indicato a pagina 2 come guida.
Connetti il morsetto al rilevatore.
NL Aders aansluiten in de
aansluitklem(men), gebruik het
bedradingsschema op pagina 2 als richtlijn.
Steek de aansluitklem(men) in de detector.
4
Clamp cable | Zugentlastung | Abrazadera para el cable | Fixação do cabo | Serrer les câbles | Morsetto per il cavo |
Trekontlasting
EN Continue tightening the screws
until the clamp bar snaps out and is tightly
engaged against the cable/s. The cable
clamp must clamp the outer sheath only.
DE Ziehen Sie die Schrauben weiterhin
an, bis die Klemme einrastet und fest am
Kabel sitzt. Die Kabelklemme darf nur die
äußere Ummantellung einklemmen.
ES Continuar apretando los tornillos
hasta que la barra abrazadera salga y se
ajuste bien con el cable. La abrazadera para
cables solo debe sujetar la funda.
PT Apertar os parafusos até que a barra
de xação se encaixe totalmente e prenda
bem o cabo. O grampo do cabo deve xar
apenas o revestimento externo.
FR Continuez de serrer les vis jusqu’à
ce que la barre de xation sorte et se serre
fortement sur le câble. Le serre-câbles doit
uniquement serrer la gaine extérieure.
IT Continuare a stringere le viti no a
quando la barra del morsetto non scatti e si
ssi leggermente sul cavo. Applica il morsetto
alla sola guaina esterna del cavo.
NL Blijf de schroeven aandraaien
totdat de beugel los komt en de kabel
stevig vastklemt. De beugel moet alleen de
buitenmantel vastklemmen.
7
EN Bend the springs up and push
detector through hole in ceiling. When fully
inserted the springs snap back to hold the
device in place.
To avoid injury, take care when
bending springs.
DE Federn nach oben biegen und
Detektor durch die Önung in der Decke
schieben. Sobald der Detektor vollständig
eingeschoben ist, schnappen die Federn
zurück und halten das Gerät fest an Ort und
Stelle.
Achten Sie auf die Spannfedern um
Verletzungen zu vermeiden
ES Doble los muelles hacia arriba e
introduzca el detector por el oricio del
techo. Cuando esté totalmente introducido,
los muelles saltan para mantener el
dispositivo en su lugar.
Doble los muelles con cuidado al
montar la unidad.
PT Dobre as molas para cima e empurre
detector através do furo no teto. Ao serem
totalmente inseridas as molas saltam de volta
para manter o dispositivo no lugar.
Para evitar ferimentos, tenha cuidado
quando manipule as molas.
FR Replier les ressorts vers le haut
et pousser le détecteur à travers le trou
dans le plafond. Quand les ressorts sont
complètement insérés, ils se remettent
dans leur position initiale pour maintenir le
dispositif en place.
Pour éviter toute blessure, faire
attention lors de la compression des
ressorts.
IT Piegare le molle verso l’alto e inserire
il rilevatore nel foro sul sotto. Una volta
inserito, le molle si riassestano ssando il
dispositivo in posizione.
per evitare infortuni, prestare
attenzione quando si piegano le
molle.
NL Buig de veren omhoog en duw het
apparaat door de sparing in het plafond.
Wanneer de veren volledig door de sparing
zijn klappen deze terug om het apparaat op
zijn plek te houden.
Om letsel te voorkomen, wees
voorzichtig met het buigen van de
veren.
5
Install detector | Melder installieren | Instalación del detector | Instalaçao do detector | Installer le détecteur | Installazione
del sensore | Installeer detector
Part Number | Artikelnummer |
Referencia | Referéncia | Référence |
Codice | Artikelnummer
Description | Beschreibung | Descripción | Descripção | Description |
Descrizione | Omschrijving
DBB Surface mounting box | Deckenauaudose | Caja para montaje en supercie | Caixa para
supercie | Accessoire pour montage en saillie | Scatola a supercie | Opbouwdoos
DBB-EXT
Surface mount back box extender | Erweiterung für Deckenauaudose | Extensión
para montaje en supercie | Extensor de caixa de montagem em superfície | Extension
d’accessoire pour montage en saillie | Estensore per scatola per montaggio a supercie |
Verhogingsring
EBD-ENCIP1
Pre-drilled 64mm hole IP65 detector enclosure | Vorgebohrtes 64mm-Aussparung für den IP 65
Sensor | Carcasa IP65 para detectores diámetro 64 mm | Boîtier étanche IP65 pré-percé d’un
diamètre de 64mm | Boîtier étanche IP65 pré-percé d’un diamètre de 64mm | Scatola IP65 con
foro di 64mm | IP65 behuizing met voorgeboorde 64mm sparing
EXD-HSC
Extended wiring housing | Erweiterter Verdrahtungsraum | Ampliación de alojamiento de
cables | Extensor adicional para cabos | Enveloppe allongée pour câblage | Estensore per i
cavi | Verlengde behuizing voor bedrading
EBDSPIR-MS
Masking shields for EBDSPIR range | Linsenabdeckung für die EBDSPIR Serie | Obturadores
para la gama EBDSPIR | Máscaras para a gama EBDSPIR | Ecrans de masquage pour la gamme
EBDSPIR | Maschere per la gamma EBDSPIR | Maskering voor EBDSPIR serie
Accessories & associated products | Zubehör | Accesorios y productos asociados | Acessórios e productos associados |
Accessoires et produits associés | Accessori e prodotti associati | Toebehoren
8
Eingehaltene normen
IP-schutzklasse
Isolationsklasse
Material (gehäuse)
Feuchtigkeit
Betriebstemperatur
Zweck
Bemessungsstoßspannung
Transceiver-Leistung
Transceiverfrequenz
Lichterkennungsbereich
Max DALI Dim Load
Einschaltdauer laden
Wolframhalogen
Induktiv/ventilatoren und
lüungssysteme
Widerstandsfähige heizungen
LED-beleuchtung
Kompakte neonbeleuchtung
Neonbeleuchtung
Glühlampen
Max geschaltete Last:
Leiterkapazität
Nennstrom
Versorgungsfrequenz
Versorgungsspannung AC
Gewicht
Teile-code
RED-2014/53/EU,
LVD-2014/35/EU
40
2
Flammenhemmendes ABS
5 bis 95 % Luftfeuchtigkeit,
nicht kondensierend
-20 bis 35°C
Sensorsteuerung
2500V
Up to 4 dBm output power
and -93 dBm RX sensitivity
2.4GHz ISM band
1-999 lux
Bis zu 10
200A for 300μs
10A
10A
10A
10A
10A
10A
10A
2.5mm²
10A
50Hz
230 VAC +/- 10%
0.2kg
EBDMR-CB-DD
DE Technische Daten
Compliance
IP rating
Insulation class
Material (casing)
Humidity
Operational temperature
Purpose
Rated impulse voltage
Transceiver power
Transceiver frequency
Light detection range
Max DALI dim load
Load Inrush rating
Tungsten halogen
Fans and ventilation equipment
Resistive heaters
LED lighting
Compact uorescent lighting
Fluorescent lighting
Incandescent lighting
Max switched load:
Terminal capacity
Rated Current
Supply frequency
Supply voltage AC
Weight
Part code
RED-2014/53/EU,
LVD-2014/35/EU
40
Class 2
Flame retardant ABS
5 to 95% non-condensing
-20 to 35°C
Sensing control
2500V
Up to 4 dBm output power
and -93 dBm RX sensitivity
2.4GHz ISM band
1-999 lux
Up to 10
200A for 300μs
10A
10A
10A
10A
10A
10A
10A
2.5mm²
10A
50Hz
230 VAC +/- 10%
0.2kg
EBDMR-CB-DD
EN Technical Data
Conformidad con normativas
Grado de protección IP
Clase de aislamiento
Material (carcasa)
Humedad
Temperatura de funcionamiento
Finalidad
Voltaje nominal de impulso
Potencia del transceptor
Frecuencia del transceptor
Rango de detección de luz
Max DALI carga tenue
Clasicación de carga de entrada
Halógeno de tungsteno
Inductivo/equipo de ventilación y
ventiladores
Calentadores resistiva
Iluminación LED
Iluminación uorescente compacta
Iluminación uorescente
Iluminación incandescente
Carga máxima conmutada:
Capacidad del terminal
Corriente nominal
Frecuencia de suministro
Voltaje de entrada de CA
Peso
Código de pieza
RED-2014/53/EU,
LVD-2014/35/EU
40
2
Ignífugo ABS
5 a 95 % sin condensación
-20 a 35°C
Control de detección
2500V
Up to 4 dBm output power
and -93 dBm RX sensitivity
2.4GHz ISM band
1-999 lux
Hasta 10
200A for 300μs
10A
10A
10A
10A
10A
10A
10A
2.5mm²
10A
50Hz
230 VAC +/- 10%
0.2kg
EBDMR-CB-DD
9
Conformidad con normativas
Grado de protección IP
Clase de aislamiento
Material (carcasa)
Humedad
Temperatura de funcionamiento
Finalidad
Voltaje nominal de impulso
Potencia del transceptor
Frecuencia del transceptor
Rango de detección de luz
Max DALI carga tenue
Clasicación de carga de entrada
Halógeno de tungsteno
Inductivo/equipo de ventilación y
ventiladores
Calentadores resistiva
Iluminación LED
Iluminación uorescente compacta
Iluminación uorescente
Iluminación incandescente
Carga máxima conmutada:
Capacidad del terminal
Corriente nominal
Frecuencia de suministro
Voltaje de entrada de CA
Peso
Código de pieza
RED-2014/53/EU,
LVD-2014/35/EU
40
2
Ignífugo ABS
5 a 95 % sin condensación
-20 a 35°C
Control de detección
2500V
Up to 4 dBm output power
and -93 dBm RX sensitivity
2.4GHz ISM band
1-999 lux
Hasta 10
200A for 300μs
10A
10A
10A
10A
10A
10A
10A
2.5mm²
10A
50Hz
230 VAC +/- 10%
0.2kg
EBDMR-CB-DD
ES Datos Técnicos PT Dados Técnicos
Compatibilidade
Classicação IP
Classe de isolamento
Material (caixa)
Umidade
Temperatura operacional
Objetivo
Tensão de impulso nominal
Potência do transceptor
Freqüência do transceptor
Faixa de detecção de luz
Carga fraca DALI máxima
Classicação de carga de irrupção
Halogênio de tungstênio
Iindutivo/ventiladores e equipamen-
tos de ventilação
Resistivas aquecedores
Lâmpada de LED
Lâmpada uorescente compacta
Lâmpada uorescente
Iluminação incandescente
Carga comutada máxima:
Capacidade do terminal
Corrente nominal
Freqüência de fornecimento
Tensão de alimentação CA
Peso
Código da peça
RED-2014/53/EU,
LVD-2014/35/EU
40
2
Retardante de chamas ABS
5 a 95% sem condensação
-20 a 35°C
Controle de detecção
2500V
Up to 4 dBm output power
and -93 dBm RX sensitivity
2.4GHz ISM band
1-999 lux
Até 10
200A for 300μs
10A
10A
10A
10A
10A
10A
10A
2.5mm²
10A
50Hz
230 VAC +/- 10%
0.2kg
EBDMR-CB-DD
10
FR Données Techniques
Conformité
Indice IP
Classe d’isolation
Matériau (boîtier)
Humidité
Température de fonctionnement
Rôle
Tension nominale de tenue aux chocs
Puissance de l’émetteur-récepteur
Fréquence de l’émetteur-récepteur
Plage de détection de lumière
Charge dim DALI max
Indice d’appel de charge
Lampes halogènes
Ventilateurs et équipements de
ventilation
Réchaueurs résistif
Éclairage LED
Éclairage uorescent compact
Éclairage uorescent
Éclairage incandescent
Charge commutée max:
Capacité des terminaux
Courant nominal
Fréquence d’alimentation
Tension d’alimentation CA
Poids
Code de la pièce
RED-2014/53/EU,
LVD-2014/35/EU
40
2
Agent Ignifuge ABS
5 à 95 % non-condensable
-20 à 35ºC
Contrôle de détection
2500V
Up to 4 dBm output power
and -93 dBm RX sensitivity
2.4GHz ISM band
1-999 lux
Jusqu’à 10
200A for 300μs
10A
10A
10A
10A
10A
10A
10A
2.5mm²
10A
50Hz
230 VAC +/- 10%
0.2kg
EBDMR-CB-DD
IT Speciche Tecnichev
Conformità
Classicazione IP
Classe di isolamento
Materiale (rivestimento)
Umidità
Temperatura operativa
Scopo
Tensione nominale a impulso
Potenza del ricetrasmettitore
Frequenza del ricetrasmettitore
Gamma di rilevamento della luce
Carico dim max DALI
Valutazione del carico di punta
Alogeno al tungsteno
Induttivo/ventole e apparecchiature
di ventilazione
Resistivo
Illuminazione LED
Illuminazione uorescente compatta
Illuminazione uorescente
Luce a incandescenza
Carico commutato massimo:
Capacità del morsetto
Corrente nominale
Frequenza di alimentazione
Tensione di alimentazione CA
Peso
Codice parte
RED-2014/53/EU,
LVD-2014/35/EU
40
2
ABS ignifugo
Dal 5 al 95% senza
condensa
-20 al 35ºC
Controllo del rilevamento
2500V
Up to 4 dBm output power
and -93 dBm RX sensitivity
2.4GHz ISM band
1-999 lux
Fino a 10
200A for 300μs
10A
10A
10A
10A
10A
10A
10A
2.5mm²
10A
50Hz
230 VAC +/- 10%
0.2kg
EBDMR-CB-DD
Conformiteit
IP classicatie
Isolatieklasse
Materiaal (behuizing)
Luchtvochtigheid
Operationele temperatuur
Doel
Nominaal impulsspanning
Zendontvanger
Transceiver frequentie
Lichtdetectiebereik
Max. DALI-dimbelasting
Laad Inrush-classicatie
Tungsten halogeen
Ventilatoren en ventilatieappa-
ratuur
Resistent kachels
LED verlichting
Compacte tl-verlichting
Tl-verlichting
Gloeilampverlichting
Max geschakelde belasting:
Eindcapaciteit
Nominale stroom
Voedingsfrequentie
Voedingsspanning AC
Gewicht
Onderdeelcode
RED-2014/53/EU,
LVD-2014/35/EU
40
2
Brandvertragend ABS
5 tot 95%, niet
condenserend
-20 tot 35°C
Detectiecontrole
2500V
Up to 4 dBm output power
and -93 dBm RX sensitivity
2.4GHz ISM band
1-999 lux
Tot 10
200A for 300μs
10A
10A
10A
10A
10A
10A
10A
2.5mm²
10A
50Hz
230 VAC +/- 10%
0.2kg
EBDMR-CB-DD
11
Conformiteit
IP classicatie
Isolatieklasse
Materiaal (behuizing)
Luchtvochtigheid
Operationele temperatuur
Doel
Nominaal impulsspanning
Zendontvanger
Transceiver frequentie
Lichtdetectiebereik
Max. DALI-dimbelasting
Laad Inrush-classicatie
Tungsten halogeen
Ventilatoren en ventilatieappa-
ratuur
Resistent kachels
LED verlichting
Compacte tl-verlichting
Tl-verlichting
Gloeilampverlichting
Max geschakelde belasting:
Eindcapaciteit
Nominale stroom
Voedingsfrequentie
Voedingsspanning AC
Gewicht
Onderdeelcode
RED-2014/53/EU,
LVD-2014/35/EU
40
2
Brandvertragend ABS
5 tot 95%, niet
condenserend
-20 tot 35°C
Detectiecontrole
2500V
Up to 4 dBm output power
and -93 dBm RX sensitivity
2.4GHz ISM band
1-999 lux
Tot 10
200A for 300μs
10A
10A
10A
10A
10A
10A
10A
2.5mm²
10A
50Hz
230 VAC +/- 10%
0.2kg
EBDMR-CB-DD
NL Technische data
12
WDA024 Issue 1 Installation Guide, EBDMR-CB-DD
19096
CP Electronics
A Business unit of Legrand Electric Limited,
Brent Crescent, London NW10 7XR, UK
t. +44 (0)333 900 0671
enquir[email protected]
www.cpelectronics.co.uk connect with us
Due to our policy of continual product improvement CP Electronics reserves the right to alter the specication of this product without prior notice.

Other LEGRAND Security Sensor manuals

LEGRAND 488 30 User manual

LEGRAND

LEGRAND 488 30 User manual

LEGRAND 431 17 User manual

LEGRAND

LEGRAND 431 17 User manual

LEGRAND Plexo 695 01 User manual

LEGRAND

LEGRAND Plexo 695 01 User manual

LEGRAND CP Electronics EBDHS-AT-PRM User manual

LEGRAND

LEGRAND CP Electronics EBDHS-AT-PRM User manual

LEGRAND Mallia Senses with Netatmo 2 815 02DS/MB/MW Original operating instructions

LEGRAND

LEGRAND Mallia Senses with Netatmo 2 815 02DS/MB/MW Original operating instructions

LEGRAND CP Electronics MWS6-KNX User manual

LEGRAND

LEGRAND CP Electronics MWS6-KNX User manual

LEGRAND 048822 User manual

LEGRAND

LEGRAND 048822 User manual

LEGRAND 0 489 58 User manual

LEGRAND

LEGRAND 0 489 58 User manual

LEGRAND HPM 630S01WE User manual

LEGRAND

LEGRAND HPM 630S01WE User manual

LEGRAND 0 489 54 Instruction Manual

LEGRAND

LEGRAND 0 489 54 Instruction Manual

LEGRAND 0 489 59 User manual

LEGRAND

LEGRAND 0 489 59 User manual

LEGRAND WattStopper LMUC-100-2 User manual

LEGRAND

LEGRAND WattStopper LMUC-100-2 User manual

LEGRAND CP Electronics EBMHS-BLV User manual

LEGRAND

LEGRAND CP Electronics EBMHS-BLV User manual

LEGRAND EMOS G1130 User manual

LEGRAND

LEGRAND EMOS G1130 User manual

LEGRAND Triscan 488TRI3W User manual

LEGRAND

LEGRAND Triscan 488TRI3W User manual

LEGRAND 0 489 53 User manual

LEGRAND

LEGRAND 0 489 53 User manual

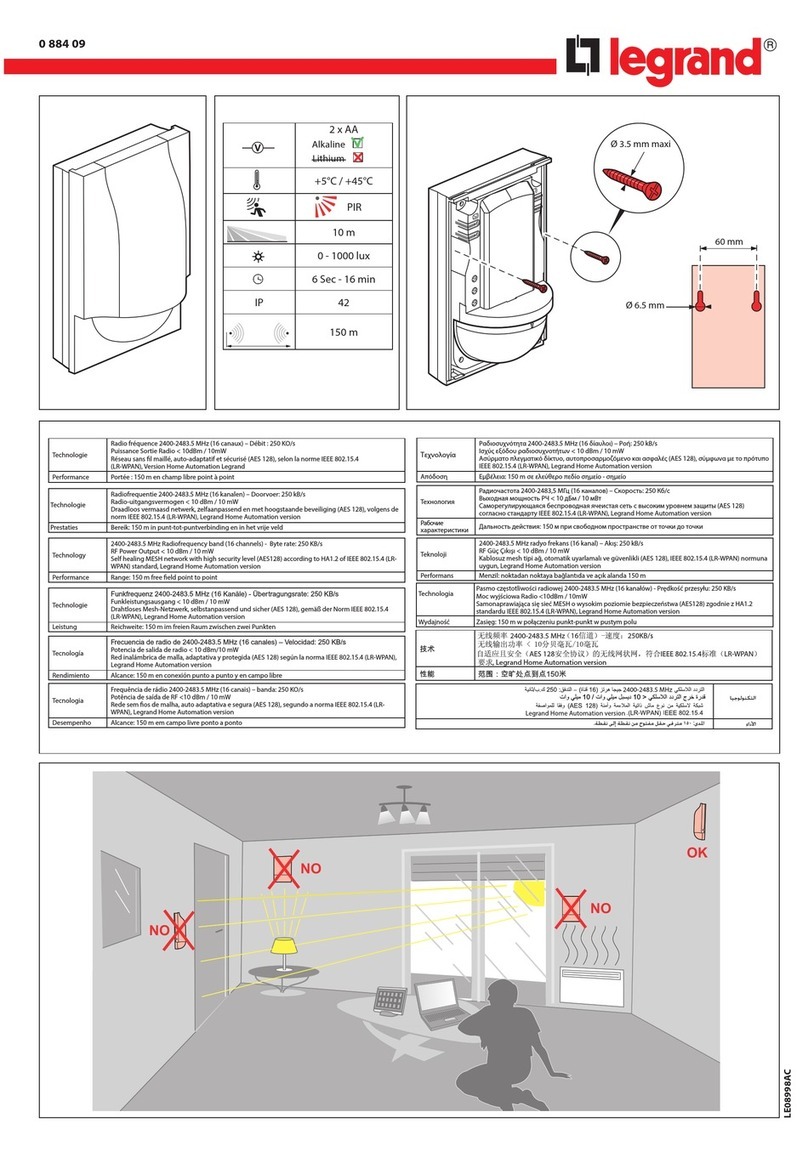
LEGRAND 0 884 09 User manual

LEGRAND

LEGRAND 0 884 09 User manual

LEGRAND Bticino MyHOME 3518MW User manual

LEGRAND

LEGRAND Bticino MyHOME 3518MW User manual

LEGRAND 488 21 User manual

LEGRAND

LEGRAND 488 21 User manual

LEGRAND HC4607 User manual

LEGRAND

LEGRAND HC4607 User manual

LEGRAND 0 883 09 User manual

LEGRAND

LEGRAND 0 883 09 User manual

LEGRAND 0 648 75 User manual

LEGRAND

LEGRAND 0 648 75 User manual

LEGRAND Wattstopper FDP-301SR User manual

LEGRAND

LEGRAND Wattstopper FDP-301SR User manual

LEGRAND 0 489 36 User manual

LEGRAND

LEGRAND 0 489 36 User manual

Popular Security Sensor manuals by other brands

SMART TL-2100CP Change Pad Indicator Installation and use instructions

SMART

SMART TL-2100CP Change Pad Indicator Installation and use instructions

AVS Electronics BF100 R manual

AVS Electronics

AVS Electronics BF100 R manual

Microlink 9448 manual

Microlink

Microlink 9448 manual

Hochiki IFD-E(Exd) user manual

Hochiki

Hochiki IFD-E(Exd) user manual

B.E.G. LUXOMAT PD4-M-HCL-FC Application description

B.E.G. LUXOMAT

B.E.G. LUXOMAT PD4-M-HCL-FC Application description

Vishay TSSP60 Series manual

Vishay

Vishay TSSP60 Series manual

Orbis MOVICAM CR quick start guide

Orbis

Orbis MOVICAM CR quick start guide

SSS Siedle BMM 611-0 Product information

SSS Siedle

SSS Siedle BMM 611-0 Product information

Pfeiffer Vacuum ASM 390 Additional Installation, Operation and Maintenance Instructions

Pfeiffer Vacuum

Pfeiffer Vacuum ASM 390 Additional Installation, Operation and Maintenance Instructions

Interlogix TX-2413-03-1 Installation sheet

Interlogix

Interlogix TX-2413-03-1 Installation sheet

Panasonic SF4B-F31G(V2) instruction manual

Panasonic

Panasonic SF4B-F31G(V2) instruction manual

BabySense 7 user guide

BabySense

BabySense 7 user guide

ChiliTec 23090 Operation manual

ChiliTec

ChiliTec 23090 Operation manual

System Sensor InnovAir DH100ACDCI Installation and maintenance instructions

System Sensor

System Sensor InnovAir DH100ACDCI Installation and maintenance instructions

Ecolink WST-302 manual

Ecolink

Ecolink WST-302 manual

Tecnosystemi Toolsplit TSCE-300 user manual

Tecnosystemi

Tecnosystemi Toolsplit TSCE-300 user manual

Rotech FJC-DL001 user manual

Rotech

Rotech FJC-DL001 user manual

Bosch D-tect 120 Professional instructions

Bosch

Bosch D-tect 120 Professional instructions

manuals.online logo
manuals.online logoBrands
  • About & Mission
  • Contact us
  • Privacy Policy
  • Terms and Conditions

Copyright 2025 Manuals.Online. All Rights Reserved.