manuals.online logo
Brands
  1. Home
  2. •
  3. Brands
  4. •
  5. Leica
  6. •
  7. Analytical Instrument
  8. •
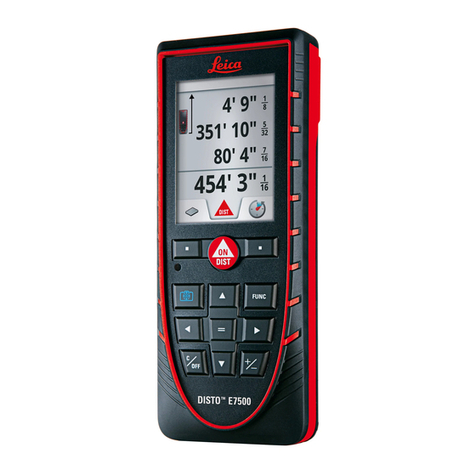
  9. Leica DISTO E7500i User manual

Leica DISTO E7500i User manual

Advantages Of Using The Leica Disto To Measure The Field Events:
1) Eliminates the need for a tape puller
2) Speeds up measuring of the event
3) No tape measure laying in sector
4) Consistent measuring for all athletes, i.e., no tape stretching
5) Horizontals—less ocials at board, therefore more fan & coach friendly viewing
Features Of The Leica Disto E7500i:
1) Water resistant—can use in rain
2) Drop resistant to 6 feet
3) Bluetooth connecon to [hone, iPad, etc...as long as Disto Sketch app is
installed (can only connect to 1 device at a me)
4) Builn camera with crosshair to see what you are focusing on, also has 2X & 4X
zoom
5) Keeps last 30 measurements in memory
6) 30 second auto shuto
7) Can compensate for vercal angle to give a true horizontal measurement.
Cannot be used to triangulate because it cannot compensate for horizontal angle.
8) Can input an oset to deduct the distance of the Disto to the measuring point
(edge of circle or takeo board) from the total measurement, giving you the true
measurement of the throw/jump
Using The Leica Disto E7500i Laser Distance
Measurer To Measure The Field Events
Any quesons about using this manual, contact Chris Marcellus at chrmarc@swbell.net or
[email protected]
A couple of things to remember about the Leica Disto E7500i:
1) The unit has an automac shuto aer 30 seconds of no use. If you have connected via Bluetooth, you will need to reconnect
(somemes, you may have to turn Bluetooth o on the Disto o then back on to reset it). Bluetooth setup at back of arcle.
2) The default device measuring posion is from the back of the device—i.e., if the unit auto shuts o the posion reverts to the
rear of the device. If you have set it to measure from the front or from the tripod pivot, you will have to set it again if the unit
auto shuts o.
3) The screwhole on the boom-rear of the Disto corresponds with the axis of rotaon on the tripod.
The Leica Disto at startup:
default seng of measuring from the rear of the device
set to measure point-to-point
Bluetooth on (will remain from last use)
full baeries
oset entered (will remain from last use)
measure metrically (will remain from last use)
le favorite buon set to change measuring posion (from back [default],
from front, or from tripod pivot) (will remain from last use)
right favorite buon set to measure true horizontal (will remain from last
use)
Determining Oset
1) If you input oset in imperial units, if you convert the measuring units to metric the oset will automacally convert to metric,
and vice versa.
2) The boom screwhole is 1 cm, or 3/8”, from the rear of the Disto. The back legs to the center of tripod is approximately 21.8
cm, making the back of the Disto approximately 20.8 cm from the back 2 legs. Easiest way to determine oset is to use an old
piece of a PV/HJ crossbar placed in the center riser of the tripod, and measuring from the edge of the ring/edge of toeboard
(through the center of the circle (if measuring SP/Disc), or at a right angle to the toeboard (if measuring LJ/TJ), to the middle of
the crossbar piece. If you want to keep the measuring point at the back of the device (in case of auto shuto) add 1 cm or 3/8” to
the oset.
3) Be sure to enter the oset as a negave number, else the oset will then be added to the total distance, rather than be sub-
tracted. Also useful to determine/input oset in metric, then switch to using imperial units for the actual measuring (if needed).
Press the “FUNC” key to
get to this screen
Press the gear key to
get to this screen
Use the arrow keys to
navigate to the de-
sired measurement
then press “=“. This is
the Imperial page
This is the Metric
page
Use the up arrow key
to get to the “Unit”
funcon. Press the
“=“ key to get to the
funcon
Seng The Measuring Units—Metric & Imperial
Measuring Using The “True Horizontal”
This icon is known as “True Horizontal” (my naming convenon). You can reach it by
pressing FUNC on the homescreen, then the right arrow key, then “=“. It is a good idea to
set this as one of your Favorite keys.
Angle at which measurement was taken
Point-to-point measurement
Vercal (or height, at 90° from Disto true horizontal)
True horizontal measurement (Press “=“ to get this measurement to replace point-to
-point in app. For this measurement, inially, the app will show 22’5 1/2”, press “=“,
then 21’ 8 3/4 will then show.)
**note that the measurement shown corresponds with the bold line on the icon to
its le, except for the true horizontal, whose icon is below**
Turn on Disto & press “FUNC” key Press the gear buon to get to this
screen
Press the right arrow buon twice to
get to this screen. This is the Oset
icon. Press the “=“ buon to get to
the input oset screen.
Use the up & down arrow to change the val-
ue, the le & right arrows to change which
digit needs to be adjusted. Use the “+/-” key
to make oset posive or negave. You can
use the top le buon to reset the oset to 0,
the top right buon when you are done.
1) It is best pracce to measure the oset from the back of the unit, mainly for
when the unit auto shuts o. The only me you would want to use the center
pivot is when you are placing the center of the tripod over the center of the ring
and rotang the tripod head le & right to hit the reector. This method is not
recommended because it will cause you to have to enter the ring (thereby in-
troducing debris into the ring) and having to make marks inside of the circle of
where to place the tripod legs. If measuring while pivong (method just men-
oned or measuring javelin) you can sll have the oset set to the back of the
device because the “tape” will sll extend through the back of the Disto when
tripod head is rotated.
2) The osets can then be reused for further events, provided you keep the
same number of tripod leg extensions each me. Raising or lowering the legs
will aect the oset. Raising the height of the tripod via the crank will not aect
the oset. Make sure you determine the oset for each dierent ring you
measure from, not all rings are alike.
3) Be sure to input oset as a negave number, else the oset will be added
to the total measurement, rather than be subtracted.
Inpung The Oset
Seng The Favorite Keys:
You can set the two favorite keys (the top right & top le buons, each with a square in the middle of it) for quick access to func-
ons without having to press the “FUNC” key to get to them. You can only set the funcons from the rst page (pressing “FUNC”
key) - you cannot set funcons from 2nd page (pressing “FUNC” key then the gear key)
Press the “FUNC” key then the gear (top
le, or the le Favorite) key to get to this
screen.
Press the down arrow key to get to the icon
with the gold star (the Favorites icon)
Press the “=“ buon to get to this screen—
noce the yellow bar & “Favorite” on the
top of the screen
With the yellow bar at the top, use the arrow buons to scroll to the funcon icon you want to set as a favorite, then press which-
ever Favorite key (top right or top le key, the one with a white square in the middle of it), then press ‘C/O” (lower le) twice to
get back to the main screen. Some of the more useful icons to set as a Favorite:
Set measure point (front, back, tripod swivel)
Measure True Horizontal (if Disto is lted to hit reector it will
give you the True Horizontal measurement)
Recall last 30 measurements (the Disto keeps the last 30 meas-
urements in memory, this allows you to recall them, use arrow
keys to ip through them)
You can use the right arrow key to go to the next page to select
one of those icons as a favorite, but there aren’t any on the 2nd
page that are useful to our purpose
Reector
1) try to use a reector that is close to the ground—this will keep the measurement as true as possible. If the reector is o the
ground, say at waist level (meaning you can use the point-to-point measurement rather than the True Horizontal measure-
ment on the Disto) the marker in the eld will have to keep the reector very steady, else you could have a 1-2 inch sway in
the measurement. It is a lot easier to keep the actual reector from swaying when it is closer to the ground.
2) Make sure the reector has a border of a bright/contrasng color to make it easy to nd—it is easier to see the laser in the
Shotput/LJ/TJ, harder to see in the longer throws (Disc/Javelin/Hammer).
Seng Up The Tripod For The Rings
1) On the boom of the tripod, screw the rubber donuts all the way in so only the metal ps protrude.
2) Extend the top leg out, as these are thicker & therefore more sturdier. You can use the telescoping crank to raise the Disto if
needed (especially for taller people) as this will not aect the measurement—changing the height of the tripod by extending the
legs or making them narrower will aect the oset!!!!
3) Make sure you have the true center of the ring marked, either by using a punch tool or a mark from a Sharpie. Pull a tape meas-
ure (preferably a cered steel tape) from a mark in the eld through the center & the back of the ring. The reector should be at
the mark in the eld, the tape should be in the middle of the reector. Set the tripod where 2 legs are abung the back of the cir-
cle, & the remaining leg will fall onto the tape measure (meaning that the tripod is now setup to measure through the center of the
ring & hit the middle of the reector).
4) Rotate the head of the tripod to make sure the Disto is poinng at the middle of the reector, lock down the le-right rotaon
by ghtening the knob. Make a mark (using a metallic Sharpie, nail polish, etc...whatever can leave a permanent mark on the black
tripod surface) where the tripod rotates le & right, so that if the head is ever moved, you can return it to its original posion in
line with the front leg. It is OK to move the tripod head up & down to focus on the reector. Moving the head le & right to nd
the reector will provide a false measurement, therefore the le-right movement needs to be secured.
5) Remember that the Disto E7500i is equipped with a camera that you can see through the screen on the Disto exactly where the
laser is poinng (it also has a crosshair that is viewable). There is a 2X & a 4X zoom with the camera, use the up arrow key to zoom
in. Using the camera does use extra baery life.
6) If using a reector close to ground: for Shotput, you need to use true horizontal measuring. For Discus/Hammer, if the throws
are consistently over 150’ you can get by with using the point-to-point measuring—at 120’, I’ve seen 1/2” discrepancy in the P2P &
the true horizontal measuring. When in doubt, use the True Horizontal measuring funcon.
Measuring The Shotput/Discus/Hammer
(assuming you have a reector close to ground, oset calculated to back of device)
Determining the oset: Set the tripod up as in numbers 3 & 4 on previous page (page 5). Use a plumbob or a piece of broken cross-
bar in the hollow metal centerpiece of tripod to measure the oset to the center of the tripod (oset=the distance from the edge
of the ring to the center of the tripod). Add 1 cm (or 3/8”) to the distance from the edge of the ring to the center of the tripod &
that is your oset set to measure to the back of the Disto for that ring (discus—approximately 2.20 m, shot/hammer—
approximately 1.80 m). Each ring is a dierent diameter (yes, it’s true) so your oset may be dierent for each dierent ring you
measure from. You can try to put the reector on the edge of the ring & use the True Horizontal measurement to determine the
oset, but somemes it is too steep of an angle which will read an error on the Disto. Be sure to shoot some dierent measure-
ments & then measure with a steel tape to verify that the oset is correct (using a nylon tape could be o due to the stretching of
the tape). I have also seen rings that are not uniform in their diameter, due to construcon issues or wear & tear through the
years.
If you have a straightedge or yardsck, an alternate way to nd the oset is to place the tripod in the ring as above, put the
straightedge abung the back two legs of the tripod, & measure the distance from the straightedge to the measuring edge of the
ring. Subtract 20.8 cm (approximate distance from the rear of the Disto to the back legs) from that measurement & you will have
your oset. Make several test measurements to verify that the oset is correct.
Aer the throw has been made, approach the back of the ring, rest the back two legs of the tripod against the back of the circle,
align the front leg visually with the center of the reector. Hint: use the camera funcon, along with the 2x & 4x zoom (by using up
& down arrows) to align the crosshairs with the middle of the reector. Make sure the Disto is on True Horizontal, press the red
“On/Dist” buon once to acvate the laser, once more to get the measurement. If using Bluetooth, be sure to press the “=“ buon
to get the True Horizontal measurement to the device connected to it. Be sure to turn o camera aer measurement to conserve
baery life.
Alternate method: make sure the true center of the ring is marked. Place the tripod over the center of the ring, using a plumbob
or piece of broken crossbar inserted into the hollow middle center piece, making sure the plumbob or crossbar piece is directly
over the center of the ring. Calculate oset to the back of the device & input it in, (using the technique above & making sure it is a
negave number), mark where the three legs of the tripod are in the circle (use a Sharpie? - this will allow for consistent measure-
ments every me). Now, with the proper oset entered, when the tripod is placed in the ring aer the throw you may rotate the
tripod head right & le to locate the reector, sll using the True Horizontal measurement. Advantages: can get measurement a
lile quicker by not having to align the front leg with the reector. Disadvantages: you are making marks inside the ring, you can
introduce foreign materials (dirt, grass, moisture, etc.) into ring.
Measuring The Long Jump/Triple Jump
(assuming reector is close to the ground, oset set to back of device)
Determining the oset: Set the tripod with the one leg forward (as set for the measuring in the rings, numbers 3 & 4 on page 4), &
two back legs on a line perpendicular to the runway (a T-square or sheetrock square comes in handy here) where the oset will be
20 m from the front (measuring) edge of the board. Use a tape measure to approximate (i.e., eyeball) where the legs go, you can
hold the reector at the front edge of the board & shoot the distance via the Disto (using the True Horizontal measurement & o-
set set to “0”). Move the tripod front or back unl the True Horizontal measurement reads “20.000 m”, making sure to keep the
front tripod legs perpendicular to the runway. (You can also preset the oset to “-20.000m” and move tripod unl the True Hori-
zontal measurement reads “0” - then you will have the oset already entered into the device.) Mark a line using a straightedge
across the runway (duct tape or Sharpie—remember to stay perpendicular to the runway), be sure to extend outside the runway
to accommodate for measurements o to the side of the pit—if the runway surface extends o the sides of the runway, this is
easy, if not, you may need to use paint on the grass. If you have a reector wide enough to reach from the edge of the pit to the
center, then you can get away with making a line only on the runway itself, or even making marks where the back two tripod legs
go—whoever is marking in the pit with the reector will need to be extra careful to keep the reector perpendicular to the run-
way/pit, else the mark will be o. If you are jumping from mulple boards, you will need to do this for each board—
communicaon between the Flight Coordinator, judge at board, & Disto measurer is crucial in this situaon. Be sure to mark which
line/marks go to which board.
Measuring the jump: As soon as the runner passes you on the runway, start seng the tripod in line with where the reector will be
placed (move tripod right & le to netune locaon (keeping back legs on line), & use camera with zoom to nd reector [see
Throws above]), or on the marks where the back legs go (when using wide reector). Move the tripod head up & down (do not
rotate right & le, measurement will be o), press the red “On/Dist” buon once to acvate laser, once more to measure. Be sure
to be on the True Horizontal measurement. If using Bluetooth, press “=“ to send it to the connected device.
Measuring The Javelin
(assuming reector is close to ground, oset calculated to back of the device)
Determining the oset: Hold reector at the edge of the arc, & place the tripod with the center over the 8 m mark (the triangular
mark where you pull the tape measure through), using either a broken piece of crossbar or a plumbob. Shoot a measurement us-
ing the True Horizontal measurement—the oset must be set to “0” for this. Input this as the oset into the Disto, be sure to
make it a negave number. Take another measurement with the reector at the edge of the arc & it should read “0”, if not, you
will need to recalculate the oset. Mark where the three legs of the tripod are on the throwing surface (duct tape, Sharpie, etc…).
The center of the tripod must be over the 8 m mark—if it isn’t, when you rotate the tripod head le & right, the actual mark will
be o. For the Javelin it does not maer where you put the legs (i.e., with the front leg poinng to the reector) - the pivot point
(center) of the tripod must be over the 8 m mark. The oset distance determined to the back of the tripod will remain the same
provided the tripod center is over the 8 m mark.
Aer the thrower has passed you on the runway, place the tripod on the three marks, pivot the tripod head le or right to align
with the center of the reector. Hint: use the camera funcon, along with the 2x & 4x zoom (by using the up & down arrows) to
align the crosshairs with the center of the reector. Press the red “On/Dist” buon once to acvate laser, once more to get meas-
urement. If using Bluetooth, be sure to press the “=“ buon to get the True Horizontal measurement to the device connected to it.
Be sure to turn o camera aer measurement to conserve baery life.
Using The Bluetooth Funcon & Measuring
1) Download the Leica Disto Sketch app onto your phone, iPad, etc...It is a free download, do not use the Disto Transfer app as
that is completely dierent.
2) Turn on Bluetooth on the Disto—press FUNC, then press the gear key, then the right arrow key to get to the Bluetooth func-
on.
Use the “=“ key to turn Bluetooth on or o.
3) You must connect to the Disto from the device through the Sketch app—do not connect to the Disto through your device
sengs. If you do, the app will not work.
4) If using point-to-point, the measurement from the Disto will appear in the boom of the app.
5) If using true Horizontal, the measurement that rst appears will be the point-to-point. To get the true horizontal to appear in
the app, press the “=“ key aer the measurement is taken.
Angle at which measurement was taken
Point-to-point measurement
Vercal (or height, at 90° from Disto true horizontal)
True horizontal measurement (Press “=“ to get this measurement to replace point-to
-point in app. For this measurement, inially, the app will show 22’5 1/2”, press “=“,
then 21’ 8 3/4 will then show.)
**note that the measurement shown corresponds with the bold line on the icon to
its le, except for the true horizontal, whose icon is below**
If using mulple Distos, press FUNC, then the gear key, then the right arrow
key 4 mes to get to this screen. The blue “I” should have the red box around
it. Press the “=“ buon and the serial number of the device you are trying to
connect to will be shown. This number should pop up among the selecons
when you are trying to connect to the Disto through the Sketch app.
You cannot connect mulple devices to one Disto. If you try to connect to a
Disto that is already “paired”, you cannot connect & will not bump o the
device already connected.
Remember that when the Disto auto powers o, you might/will lose Blue-
tooth connecvity with the device. You might have to turn the Bluetooth on
the Disto o then on again.
Useful Numbers to know:
Distance from screwhole (corresponds with tripod center) on boom of Disto to rear of Disto: 1 cm or 3/8”
Distance from center of tripod to rear legs: ~21.8 cm
Distance from rear of Disto to rear legs: ~20.8 cm
Oset for shot/hammer rings (to rear of Disto): 1.88 m (need to verify)
Oset for Discus rings (to rear of Disto): 2.26 m (need to verify)
Checklist For Using The Leica Disto
1) Baeries—plus spares
2) Reector
3) Umbrella? (if outside, to reduce glare)
4) Center extension (to ground) for tripod?—if measuring javelin, or placing tripod in center of ring for other throws
When measuring the Shotput/Discus/Hammer By Placing Center Of Tripod Over Center Of Ring
5) Check oset—is it set to a dierent event
6) Oset: -1.077 m, if ring is true 2.134 m in diameter (or 7’) for Shotput/Hammer, -1.26 m for Discus , if ring is true 2.50 meters
in diameter (or 8’ 2.5”) [these both have the 1 cm added to measure to back of device]
7) Center extension for tripod
8) Center of ring marked
When Measuring Shotput/Discus/Hammer By Placing 2 Legs Against Back Of Circle
5) check oset—is it set to a dierent event?
6) Oset: -1.88 m Shotput/Hammer (if ring is true 2.134 m), -2.26 m in Discus (if ring is true 2.50 m), both these have the 1 cm
added for measuring to the back of the device
7) Is front tripod leg set to point at target? i.e., will the front leg fall on the tape measure if both back legs are equidistant from
tape measure & against back of ring
When Measuring The Javelin
5) check oset—set it to “0”
6) Center extension on tripod
7) Find oset by pacing tripod center extension over 8 m arrow (where measuring tape is pulled through), put reector at inner
edge of foul arc, shoot the True Horizontal measurement. If the 8 m mark is accurate, the oset “should” be 8.01 m.
8) Input this measurement (as a negave number) as the oset
9) Verify oset at a couple of other places on the foul arc, True Horizontal should read “0”
When Measuring Long Jump/Triple Jump
5) Is tripod head set with front leg (which points to reector)?
6) Check oset—is it set to a dierent event?
7) Are oset lines drawn for each takeo board to be used? [suggested—where oset (not the line) will be 20 m]
8) Verify oset by seng oset to “0”, place back legs of tripod on line, place reector on edge of board, shoot True Horizontal
measurement. Input this oset as a negave number. Shoot True Horizontal again, should read “0”
9) Make sure the oset is the same for all oset lines to be used (i.e., when using mulple boards)
10) Runway—dos surface extend o sides of runway to measure marks that are o to one side of the pit? If not, is reector wide
enough to reach mark & Leica?

Other manuals for DISTO E7500i

1

Other Leica Analytical Instrument manuals

Leica DISTO D210 User manual

Leica

Leica DISTO D210 User manual

Leica Disto D510 Operating instructions

Leica

Leica Disto D510 Operating instructions

Leica DISTO X4 User manual

Leica

Leica DISTO X4 User manual

Leica Disto X310 Operating instructions

Leica

Leica Disto X310 Operating instructions

Leica DISTO D810 touch User manual

Leica

Leica DISTO D810 touch User manual

Leica DISTO D5 User manual

Leica

Leica DISTO D5 User manual

Leica DISTO D810 touch User manual

Leica

Leica DISTO D810 touch User manual

Leica DISTO S910 User manual

Leica

Leica DISTO S910 User manual

Leica DISTO D210 User manual

Leica

Leica DISTO D210 User manual

Leica DISTO D5 User manual

Leica

Leica DISTO D5 User manual

Leica DISTO D8 User manual

Leica

Leica DISTO D8 User manual

Leica DISTO E7500 User manual

Leica

Leica DISTO E7500 User manual

Leica Disto D510 User manual

Leica

Leica Disto D510 User manual

Leica 812795b User manual

Leica

Leica 812795b User manual

Leica DISTO D2 User manual

Leica

Leica DISTO D2 User manual

Leica DISTO E7300 User manual

Leica

Leica DISTO E7300 User manual

Leica DISTO A2 User manual

Leica

Leica DISTO A2 User manual

Leica DISTO D810 touch User manual

Leica

Leica DISTO D810 touch User manual

Leica RANGEMASTER CRF 1600-R User manual

Leica

Leica RANGEMASTER CRF 1600-R User manual

Leica Disto X310 User manual

Leica

Leica Disto X310 User manual

Leica DistoX User manual

Leica

Leica DistoX User manual

Leica Disto D510 Instruction Manual

Leica

Leica Disto D510 Instruction Manual

Leica DISTO D810 touch Instruction Manual

Leica

Leica DISTO D810 touch Instruction Manual

Leica DISTO X3 User manual

Leica

Leica DISTO X3 User manual

Popular Analytical Instrument manuals by other brands

SICK ZIRKOR200 Ex-G operating instructions

SICK

SICK ZIRKOR200 Ex-G operating instructions

Spartan TrapJumper product manual

Spartan

Spartan TrapJumper product manual

SICK MCS200HW operating instructions

SICK

SICK MCS200HW operating instructions

AND Density Determination Kit AD-1653 BM Series instruction manual

AND

AND Density Determination Kit AD-1653 BM Series instruction manual

geo-FENNEL FVE 150 user manual

geo-FENNEL

geo-FENNEL FVE 150 user manual

SPX CUES flexitrax Operation manual

SPX

SPX CUES flexitrax Operation manual

Green G36P manual

Green

Green G36P manual

Teledyne 3020P operating instructions

Teledyne

Teledyne 3020P operating instructions

Spartan Tool TRAVELER LITE product manual

Spartan Tool

Spartan Tool TRAVELER LITE product manual

RS Technical Services DD LITE 2 Operation manual

RS Technical Services

RS Technical Services DD LITE 2 Operation manual

PCE Instruments PCE-VE 3 N Series manual

PCE Instruments

PCE Instruments PCE-VE 3 N Series manual

ABB Endura AZ10 Operating	 instruction

ABB

ABB Endura AZ10 Operating instruction

Teledyne TED 200-T instruction manual

Teledyne

Teledyne TED 200-T instruction manual

Teledyne 402R-EU instruction manual

Teledyne

Teledyne 402R-EU instruction manual

EINHELL BDM 15 operating instructions

EINHELL

EINHELL BDM 15 operating instructions

Bosch GLM Professional 150 Original instructions

Bosch

Bosch GLM Professional 150 Original instructions

flexbar 13290 user manual

flexbar

flexbar 13290 user manual

Runpotec Runpocam RC2 instruction manual

Runpotec

Runpotec Runpocam RC2 instruction manual

manuals.online logo
manuals.online logoBrands
  • About & Mission
  • Contact us
  • Privacy Policy
  • Terms and Conditions

Copyright 2025 Manuals.Online. All Rights Reserved.