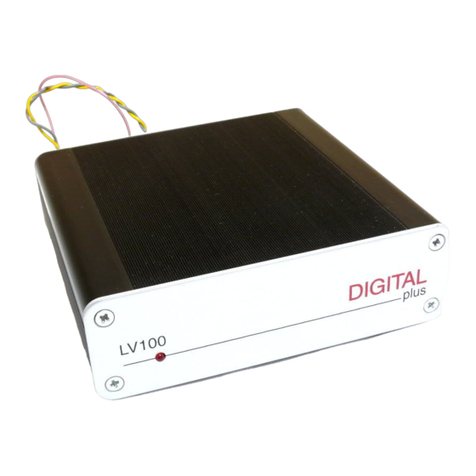
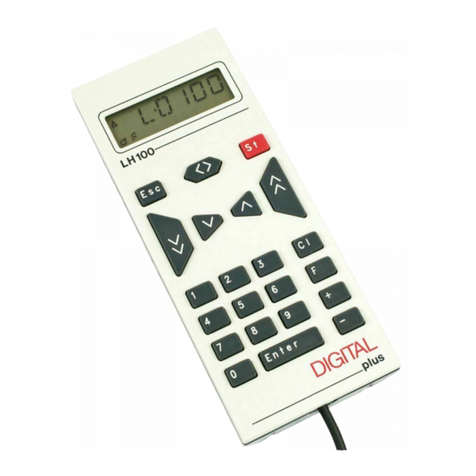
Lenz DIGITAL plus LZ100 Technical manual

1
Info Version 3.6
for LZ/LZV100 and LH100
04 08

2 Update LZ100 / LZV100 and LH100 to Version 3.6
1 New and changed features in version 3.6
Here is an overview of the new or changed features:
•Fast change between up to 12 freely selectable locomotive
addresses with the 'Esc' key.
•Functions F0 to F28 can now be switched.
•Functions F1 to F28 can be set to temporary or continuous
operation. This setting can be made individually for each
locomotive address. Ex-works, functions are set to continuous
operation.
•You can set which function information is to be stored in the
command station even when it is turned off. Ex-works,
functions F0 to F8 are stored.
•Function information stored in the command station is
transmitted cyclically via the track.
•The storage and cyclic transmission of information for
functions F5 to F28 can be activated and deactivated (only
LH100).
•Programming on the programming track from CV1 to CV1024.
•Programming in operational mode (PoM) from CV1 to
CV1024.
•Simple increasing and decreasing of CV values during
programming: Ideal, for example, for setting the maximum
speed of a locomotive (only LH100).
•Simple change to the next or previous CV during
programming (only LH100).
•Reading of CVs via PoM with the RailCom address display
LRC120.

Changes to the LH100 3
2 Changes to the LH100
Due to the new functions we have made some changes to the display
and operation of the LH100. These changes are described below.
2.1 Display when controlling a locomotive
12345678
Figure 9 indicates whether function 9 o
f
the newly selected function group is
activated or not.
The lamp symbol indicates whethe
r
function 0 of the newly selected function
group is activated or not.
The arrow indicates the direction of motion:
A
rrow upward: forward
A
rrow downward: backward
Lines indicate the function groups:
1 vertical line:
Function group 1 (F0 to F9)
2 vertical lines:
Function group 2 (F10 to 19)
3 vertical lines:
Function group 3 (F20 to F28)
This field indicates the address o
f
- a single locomotive (L),
- a locomotive in multiple traction operation (m),
- a double traction (D),
- a multiple traction (M) o
r
- the speed step (V)
Figures 1 to 8 indicate whethe
r
functions 1 to 8 of the newly selected
function group are activated or not.

4 Update LZ100 / LZV100 and LH100 to Version 3.6
2.1.1 Examples for the most important displays:
13 8
The single locomotive (L) with address
0003 is controlled.
The display of function group 1 is
selected; functions 0, 1, 3 and 8 are
activated.
34 8
The locomotive with address 1234 is in
multiple-traction operation (m).
The display of function group 2 is
selected; functions 10, 19, 13, 14 and 18
are activated.
The multiple traction with address 0033 is
controlled.
When the multiple-traction address is
displayed, no functions are displayed.
2.2 The expanded stack
Up to version 3 it was possible to change between two locomotive
addresses with the 'Esc' key of the LH100. With version 3.6 it is now
possible to scroll through a stack of up to 12 locomotive addresses
with the 'Esc' key. This is comparable to an index card box with 12
index cards. You can place any locomotive address in any stack slot.
Ex-works, locomotive addresses 1 to 12 are placed in this stack.
2.2.1 Scrolling through the stack
Each time the LH100 is turned on,
stack slot 1 is displayed. Ex-works,
this slot is occupied by locomotive
address 1.
Press 'Esc' to display the next stack
slot.

Changes to the LH100 5
Release 'Esc' to display the
locomotive address placed in this
slot.
Press 'Esc' again to change to the
next stack slot …
... and to display the locomotive
address placed in this slot.
. . .
Continue until the last stack slot is
displayed.
After the last stack slot, the first slot
will be displayed again …
... with the locomotive address placed
therein.
You can scroll through the stack only in forward direction.
2.2.2 Setting the stack size
Ex-works, the stack has 12 slots. The size can be set from 1 to 12.
To change the number of stack slots,
go to the 'SYS' menu:
The menu that was selected last is
displayed.

6 Update LZ100 / LZV100 and LH100 to Version 3.6
Select 'SYS'.
Select 'Setup'.
The current stack size is displayed.
Decrease the stack size with '-'.
Increase the stack size with '+'.
Confirm your selection.
Return to the 'SYS' menu.
Return to displaying the locomotive
address.
Locomotive addresses are set as with the last version.
2.3 Switching locomotive functions
As in previous versions of the LH100, locomotive decoder functions
can be activated and deactivated with keys 0 to 9 while controlling the
locomotive.
Depending on the selected function group (1 to 3), the following
functions are switched:

Changes to the LH100 7
Key:
Function group 1: 0 1 2 3 4 5 6 7 8 9
Function group 2: 10 11 12 13 14 15 16 17 18 19
Function group 3 20 21 22 23 24 25 26 27 28
The bottom line of the display shows the function status: If the function
number is visible, the function is activated; if the number is not visible,
the function is deactivated.
2.4 Changing function groups
Up to three vertical lines to the left of the display of the locomotive
address indicate the selected function group.
Press this key to change to the next function group.
Press this key to change to the previous function group.
Exception: A multiple-traction address (M) or the address of a
locomotive in multiple-traction operation (m) is displayed. In this case,
use the '-' key to scroll through the addresses of the locomotives in
multiple-traction operation.
13 8
Function group 1 is displayed;
functions 0, 1, 3 and 8 are activated.
257
3
Function group 2 is displayed;
functions 12, 13, 15, 17 and 19 are
activated.
2
18
Function group 3 is displayed;
functions 20, 21, 22 and 28 are
activated.
13 8
Displays function group 1 again.

8 Update LZ100 / LZV100 and LH100 to Version 3.6
2.5 Configuring locomotive decoder functions
Functions F1 to F12 of the locomotive decoder can be set to
continuous or temporary operation.
Continuous operation Temporary operation
Press the key to activate the
function; press the key again to
deactivate it.
Press the key to activate the
function; release the key to
deactivate it.
This information is stored in the command station LZ100/LZV100.
When calling the locomotive, the manual control queries the setting
from the LZ100/LZV100. This setting can be made individually for
each function and each locomotive address.
Proceed as follows:
13 8
Select the address of the locomotive
whose function setting you want to
display or change.
The menu that was selected
last is displayed.
23 78
The configuration of function group 1
(functions 0 to 9) is displayed first.
The figures in the bottom line show the function settings:
Visible functions: Functions are set to continuous
operation (here 9, 2, 3, 7 and 8).
Invisible functions: Functions are set to temporary
operation (here 1, 4, 5 and 6).
To change the setting, simply press the number key corresponding to
the function.
14 8
Press '+' to change to the next
function group (group 2, F10 to F19).
The setting is made analogously to
group 1.
12 45 78
Press '+' again to change to function
group 3 (F20 to F28).
The setting is made analogously to
group 1.

Changes to the LH100 9
13 8
Press 'Enter' to complete the entering
process and store the new setting in
the command station. Press 'Esc' to
return to controlling the locomotive
without storing the setting.
2.6 'Refreshing' functions
By 'refreshing' functions we mean the following: In defined regular
intervals the command station sends function information via the track
to all decoders located on the track. This ensures that a decoder does
not 'forget' all settings, even if the connection between command
station and decoder is interrupted intentionally (due to 'dead frogs') or
unintentionally (due to dirt on the track or power interruptions).
For very large layouts with very many locomotives or decoders it may
make sense to deactivate the cyclic transmission of individual
functions to decrease the time delay resulting from the total time
required for each transmission (typically 8 mS).
This way, you can decide which function information is transmitted
cyclically and which not. Ex-works, the information of functions 0 to 8
is transmitted cyclically. 'Refreshing' affects all locomotive addresses.
To 'refresh' functions, proceed as follows:
13 8
Start with 'controlling the locomotive'.
It does not matter which locomotive
address you select.
The menu that was selected
last is displayed.
Functions F0 to F8 are transmitted
cyclically.
Use '+' to scroll through the options:
Functions F0 to F12 are transmitted
cyclically.

10 Update LZ100 / LZV100 and LH100 to Version 3.6
Functions F0 to F20 are transmitted
cyclically.
Functions F0 to F28 are transmitted
cyclically.
Functions F0 to F4 are transmitted
cyclically.
13 8
Press 'Enter' to confirm your
selection.
2.7 Displaying and changing the speed-step mode
To display or change the speed-step mode, proceed as follows:
13 8
Select the address of the locomotive
whose speed-step mode you want to
display or change. Make sure that the
locomotive is set to speed step 0 (if
not, press the hexagonal key).
The menu that was selected
last is displayed.
Press '+' to display the speed-step
mode currently set.
Press '+' again to display the speed
steps available:

Changes to the LH100 11
13 8
Press 'Enter' to assign a specific
speed-step mode to the locomotive
address.
If the speed step of the locomotive is not 0, the speed-step mode
currently set will be displayed while you press '+' and cannot be
changed.

12 Update LZ100 / LZV100 and LH100 to Version 3.6
2.8 Enhancements for programming on the
programming track
With version 3.6 you can enter and read CVs from 1 to 1024 on the
programming track.
Depending on the selected CV, the display shows:
CV 1 – 99: CV 100 – 999: CV 1000 – 1024:
When you have selected a CV and entered or read a value, use the
arrow or plus and minus keys to:
23
14
3
read the next CV.
5678
read the next CV.
14
3
read the previous CV.
12 4
3
increase the displayed value and
enter it with
14
3
increase the displayed value and
enter it with

Changes to the LH100 13
2.9 Enhancements for programming in operational
mode (PoM)
2.9.1 Fast changing of a CV
13 8
Select the address of the locomotive
whose features you want to change
via PoM.
The menu that was selected
last is displayed.
The programming mode that
was selected last is displayed.
Use '-' to scroll to 'CV'.
Enter the number of the CV whose
value you want to change.
In our example we selected CV3
(starting delay).
Confirm your selection with 'Enter'.
Use the arrow keys to change the CV
selection.
Every time you change the CV number a PoM read command is sent
to the locomotive decoder. The result of this command can be
displayed with an address display LRC120; see Section ‘2.9.3’ below.

14 Update LZ100 / LZV100 and LH100 to Version 3.6
2.9.2 Fast changing of a CV value
If you have selected a CV or entered and confirmed a value with
'Enter' during programming in operational mode, you can increase or
decrease this value simply with '+' or '-'. The new value will be entered
immediately into the decoder.
This is particularly helpful if you, for example, want to adjust the
brightness of the locomotive lighting.
If you have selected a CV and entered a value, you can increase or
decrease this value with '+' or '-'. The new value will be entered
immediately after each change (unlike when programming on the
programming track).
Keep pressing '+' or '-‘ to increase or decrease the value.
2.9.3 Reading CVs with the address display LRC120
It is now possible to read CV values via PoM while in operation.
Requirements:
•Use of a RailCom-able locomotive decoder (GOLD series).
•The locomotive is located in a track section monitored by the
address display LRC120.
•RailCom transmission is activated in the decoder.
Information on how to connect the address display LRC120 and the
settings of RailCom-able locomotive decoders can be found in the
respective operating manuals.
Proceed as follows:
13 8
Enter the address of the locomotive
whose features you want to change
via PoM.
Move the locomotive whose CVs you want to read via PoM to the
track section monitored by the address display LRC120. The address
display now shows the address of the locomotive.
The menu that was selected
last is displayed.
The programming mode that
was selected last is displayed.

Changes to the LH100 15
Use '-' to scroll to ’CV’.
Enter the number of the CV whose
value you want to change.
The value for the starting delay is
stored in CV3.
The address display LRC120 displays
the value of CV3 for approx. 3
seconds.
'c' is flashing at the very left of the
display while the value is shown on
the right:
Whenever you
•enter the number of a CV,
•change this number with the arrow keys,
•change the value of the CV with the '+' or '-' keys,
a PoM read command is sent to the decoder which sends the content
of the respective CV via RailCom. The address display LRC120
receives this information and displays it for approx. 3 seconds.

16 Update LZ100 / LZV100 and LH100 to Version 3.6
We reserve the right to make changes in line with technical progress, product
maintenance or changes in production methods.
Hüttenbergstrasse 29
35398 Giessen
Hotline: 06403 900 133
Fax: 06403 900 155
www.digital-plus.de
www.lenz.com
Please keep this information or future reference!
Other manuals for DIGITAL plus LZ100
1
This manual suits for next models
2
Table of contents
Other Lenz Controllers manuals

Lenz
Lenz Digital plux LH101-R User manual

Lenz
Lenz Digital plus Set-01 User manual

Lenz
Lenz Digital plus LH101 User manual

Lenz
Lenz Digital Plus LH100 Manual

Lenz
Lenz DIGITAL plus LZ100 Owner's manual
Lenz
Lenz digital plus lh01 Manual

Lenz
Lenz Digital plus LH101 User manual

Lenz
Lenz PositionServo 940 User manual
Lenz
Lenz Digital plus LH101 User manual