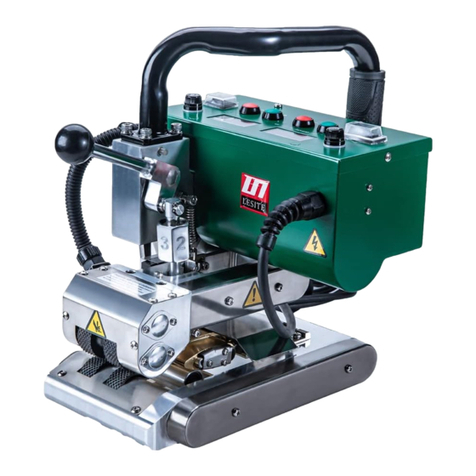
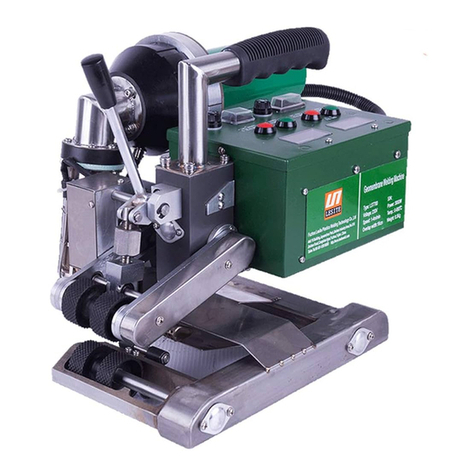
LESITE LST900 User manual

Lesite Technology
LST900/900D
Hot Wedge Welder
Manual
LESITE

LST900/900D EN
Please read this manual carefully before using this machine,
and keep it for future reference.
This machine adopts an advanced hot wedge structure,which has better heating
efficiency and faster welding speed.It specially for welding 1.0mm-3.0mm
HDPE、LDPE、PP、TPO、PVC
Application
Precautions
- Solid Waste Lanfills - Chemical Mining
- Sewage Treatment - Water Conservancy
- Anti-seepage Project - Aquacuture
Please confirm that the machine is turned off and unplugged
before disassembling the welding machine, so as not to be
injured by live wires or components inside the machine.
The welding machine generates high temperature and high
heat, which may cause fire or explosion when used incorrectly,
especially when it is close to combustible materials or explosive gas.
Please do not touch the hot wedge (during welding work or when the
welding machine has not completely cooled down) so as not to burn.
The power supply voltage must match the rated voltage
marked on the welding machine and be reliably grounded. Connect the
welding machine to a socket with a protective ground conductor.
In order to ensure the safety of the operators and the reliable
operation of the equipment, the power supply at the construction site
must be equipped with a regulated power supply and a leakage
protector.
The welding machine must be operated under the correct control of the
operator, otherwise it may cause combustion or explosion due to
high temperature.
It is strictly forbidden to use the welding machine in water or muddy
ground, avoid soaking, rain or damp.
LESITE

Parameter
Model LST900
Rated Voltage
Frequency
Power
Welding Speed
Heating Temperature
Welding Pressure
Thickness Welded
Overlap Width
Seam Width
Seam Strength
Net Weight
Digital Display
Certificate
Warranty
230 V / 120 V
50 / 60 Hz
1800 W / 1650 W
1 - 5 m/min
50 - 450 ℃
100-1000N
1.0 mm - 3.0 mm (Single Layer)
12 cm
15 mm *2 ,Interior Cavity 15mm
≥ 85 % Material
13.0 Kg
Temperature
CE
One Year
Model LST900D
LST900/900D EN
LESITE
Rated Voltage
Frequency
Power
Welding Speed
Heating Temperature
Welding Pressure
Thickness Welded
Overlap Width
Seam Width
Seam Strength
Net Weight
Digital Display
Certificate
Warranty
230 V / 120 V
50 / 60 Hz
1800 W / 1650 W
1 - 5 m/min
50 - 450 ℃
100-1000N
1.0 mm - 3.0 mm (Single Layer)
12 cm
15 mm *2 ,Interior Cavity 15mm
≥ 85 % Material
13.0 Kg
Temperature and Speed
CE
One Year

LST900 Main Parts
LST900/900D EN
LESITE
1、Pressure Handle 2、Operation Handle 3、Control Box
4、 Hot Wedge 5、Pressure Roller 6、Creeping Wheel
7、Swing Head 8、Pressure Adjustment
1
2
3
4
5
6
7
8

LST900 Control Panel
Steps for Machine On/Off
9、Temperature Controller 10、Power Fuse
11、Power Switch 12、 Motor Fuse 13、Motor Switch
14、Voltmeter 15、 Speed Control Knob
LST900/900D EN
LESITE
91110
14 15
1312
1
2
3
4
5
1、Connect the power supply, lift up the pressure handle (1) and the pressure roller (5) to
separate automatically, and press the power on/off switch(11)
2、Check whether the voltage value displayed on the voltmeter (14) is normal
3、Turn on the temperature controller (9), set to the temperature required for welding, and
wait for the temperature to reach the preset value
4、Turn on the motor switch (13) and set the speed control knob (15) to the required figure
5、Place the welding machine and insert the membrane layers
6、Put down the pressure handle(1) ,the machine starts to move and weld
7、Keep observing the welding trail and the position of the upperlayer and lower
layer sat any time to adjustincase of deviation
8、After finishing welding, lift up the pressure handle (1), and move the machine away
from the welding position
9、Turn off the motor switch (13), turn off the temperature controller (9), the hot wedge
stops heating
10、Turn off the power switch (11)

1. Welding temperature:
Press the buttons on the panel to set the required welding temperature ,
which depends on the weldiing material and ambient temperature. The LCD screen will
display the preset temperature and the current actual temperature.
2. Welding speed:
Press the buttons on the panel to set the required welding speed,which
matchs the welding temperature.The LCD screen will display the preset speed and the
current actual speed.
3.Motor is on:
Press the motor moves
● This machine has a parameter storage memory function that the welding machine will
automatically use the last parameters without resetting the parameters when the machine
is turned on next time.
16、Power Switch 17、Temperature Rise Knob
18、Temperature Drop Knob 19、Speed Increase Knob
20、Speed Down Knob 21、Motor Switch
22、Power Fuse 23、Welding Temperature Display
24、Welding Speed Display 25、Motor Fuse
LST900D Control Panel
LST900/900D EN
LESITE
16 17 18 19 20 21
22 23 24 25
CT 016°C
ST - OFF
CV: 0M
SV: 5.0M

LST900D Switching Steps
LST900/900D EN
LESITE
4、Turn on the motor switch (21), and turn the speed knobs (19) (20) to set the required
welding speed
(the LCD screen displays as shown in Drawing 3.), then insert the membrane layers after
placing the machine
5、Put down the pressure handle(1) ,the machine starts to move and weld
6、Keep observing the welding trail and the position of the upper layer and lower layer at
any time to adjust in case of deviation
7、After finishing welding, lift up the pressure handle (1),move the machine away from the
welding position
8、Turn off the motor switch(21),press the temperature rise knob (17)and the
temperature drop knob at the same time(18)(As shown in drawing 4),or turn the
temprature drop knob to “OFF”,the hot wedge will stop heating
9、Turn off the power switch
Current Temperature
Current Temperature
Preset Temperature
Current Speed
Drawing 1
Drawing 2
Drawing 3
Drawing 4
Preset Speed
Current Speed
Preset Speed
Current Temperature
Preset Temperature
Current Speed
Preset Speed
Current Temperature Current Speed
Preset Speed
1、Connect the power supply, lift up the pressure handle (1) and the pressure roller (5)
to separate automatically
2、Turn on the power switch (16), the LCD screen displays as shown in drawing 1 While
the hot wedge has not started to heat up
3、Turn the temperature rise knob (17) so the LCD screen displays as shown in drawing 2
While the hot wedge starts to heat until the actual temperature is equal to the preset
temperature

Fault & Solutions
LST900/900D EN
LESITE
Fault
Screen shows
nothing
Power failure or low voltage Check the voltage and power wire
Replace fuse 15APower fuse has blown
Power switch doesn't work Replace the power switch
Speed knob can't
be adjusted
or the motor
moves at a
abnormal speed
Replace the motorMotor doesn't work
Drive board fuse has blown Replace the drive board fuse
Replace the speed knobSpeed knob doesn't work
Sensor can't detect the data
Drive board doesn't work Replace the drive board
Replace the photo sensor board
and sensor wire
Hot wedge
doesn't heat
Replace the heating tubesHeating tubes do not work
Hot wedge doesn't work
Drive board doesn't work Replace the drive board
Replace the hot wedge
Replace the drive boardDrive board doesn't work
Motor doesn't
move
Motor fuse has blown Replace fuse 1A
Replace the power switchPower switch doesn't work
Causes Solutions

LST900/900D EN
LESITE
Fault & Solutions
Fault
Hot wedge
burned
Thermocouple failure Replace the thermocouple
Replace the drive boardDrive board doesn't work
Wires "+" and "-" of
thermocouple were
connected wrongly Connect correctly
Shows on display:
Mosaicgarbled
Press two buttons at the same
time so that it heats
Stop heating
Change the display screen
or board
Display screen or board
doesn't work
Shows on diplay
“thermoc-ouple
ERR”
Shows on diplay
“CT:016℃
ST:Pause”
No thermocouple Check whether the thermocouple
wire in the display board is off
Replace the thermocoupleThermocouple burned
Causes Solutions

LST900/900D Nameplate
Maintenance
LST900/900D EN
LESITE
Do clean the hot wedge and pressure rollers after welding

LST900/900D EN
LESITE
Warranty
Maintenance
· This product guarantees a 12-month shelf life from the day it is sold to consumers.
We will be responsible for failures caused by material or manufacturing defects. We
will repair or replace defective parts at our sole discretion to meet the warranty
requirements.
· The quality assurance does not include damage to wearing parts (heating elements,
carbon brushes, bearings, etc.), damage or defects caused by improper handling or
maintenance, and damage caused by falling products. Irregular use and unauthorized
modification should not be covered by the warranty.
· It is strongly recommended to send the product to Lesite company or
authorized repair center for professional inspection and repair.
· Only original Lesite spare parts are allowed.
1
One year
warranty

FUZHOU LESITE PLASTICS WELDING TECHNOLOGY CO.,LTD
Add: 5# Jingpu Road, Pushang Industry Park,
Cangshan, Fuzhou, 350007, Fujian, China
Tel:+86(591)83818890
E-mail:info@lesite.com.cn
Web:www.lesiteweld.com
Lesite Hot Wedge Welder 09/2021-EN
This manual suits for next models
1
Table of contents
Other LESITE Welding System manuals

LESITE
LESITE LST-WP1 User manual

LESITE
LESITE LST610A User manual

LESITE
LESITE LST-WP4 User manual
LESITE
LESITE LST800 User manual

LESITE
LESITE LST-WP2 User manual

LESITE
LESITE LST-TAC User manual

LESITE
LESITE LST-GM1 User manual

LESITE
LESITE LST-UME User manual
LESITE
LESITE LST1600 User manual

LESITE
LESITE LST620C User manual