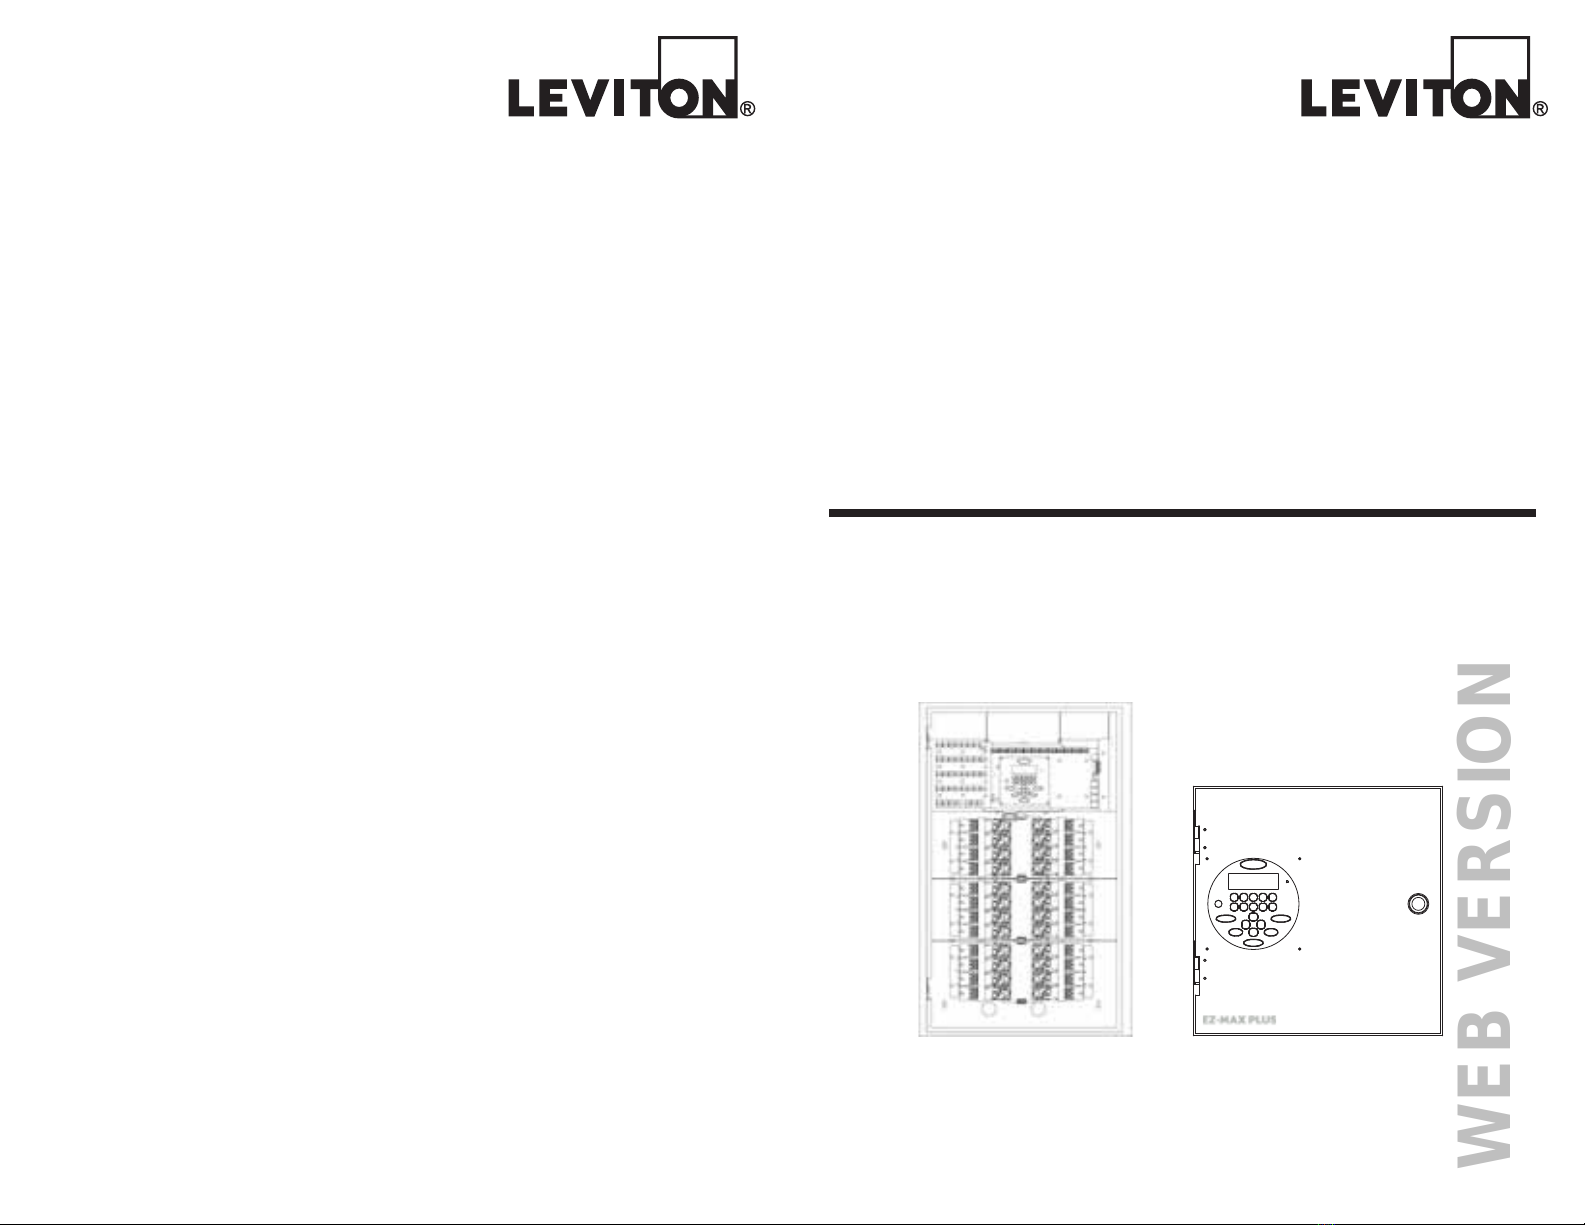
Leviton EZ-Max Plus User manual

EZ-MAX PLUS™ RELAY PANEL ACCESSORY:
Modem/Wi-Fi card
EZ-MAX Plus
Installation &
Quick Start Guide
Leviton Lighting Management Systems Division Headquarters
20497 SW Teton Avenue, Tualatin, OR 97062
Customer Service Telephone: 1-800-736-6682 • FAX: 1-503-404-5600
Tech Line: 1-800-959-6004
Leviton Manufacturing Co., Inc.
201 North Service Road, Melivlle, N.Y. 11747
Telephone: 1-800-323-8920 • FAX: 1-800-832-9538
Visit Leviton’s Web site at http://www.leviton.com
© 2015 Leviton Manufacturing Co., Inc. All Rights Reserved
6SHFL¿FDWLRQVDQG3ULFH6XEMHFWWR&KDQJHDWDQ\WLPHZLWKRXWQRWLFH
3.$$
WEB VERSION

WEB VERSION

NOTES
Page 25
EZ-MAX Plus Quick Start Guide
___________________________________________________
___________________________________________________
___________________________________________________
___________________________________________________
___________________________________________________
___________________________________________________
___________________________________________________
___________________________________________________
___________________________________________________
___________________________________________________
___________________________________________________
___________________________________________________
___________________________________________________
___________________________________________________
___________________________________________________
___________________________________________________
___________________________________________________
___________________________________________________
___________________________________________________
___________________________________________________
___________________________________________________
___________________________________________________
___________________________________________________
___________________________________________________
___________________________________________________
___________________________________________________
___________________________________________________
___________________________________________________
___________________________________________________
___________________________________________________
___________________________________________________
WARNINGS AND CAUTIONS
• TO AVOID FIRE SHOCK OR DEATH; TURN OFF POWER
at circuit breaker or fuse and test that power is off before
installation of Modem or Wi-Fi accessory card.
• To be installed and/or used in accordance with electrical codes
and regulations.
• If you are unsure about any part of these instructions, consult an
electrician.
• For indoor applications ONLY.
• Observe Electrostatic Discharge (ESD) precautions during
installation.
• No person should be within 20 cm (8 in.) from Wi-Fi card
antenna when powered.
• Devices are NOT hot swappable.
EZ-MAX Plus Quick Start Guide
Page 2
INTRODUCTION
WEB VERSION

Page 3
EZ-MAX Plus Quick Start Guide
Introduction
Thank you for choosing the Leviton®(=0$;3OXVOLQHRISURGXFWV
IRU\RXUUHOD\QHHGV7KHPRGHPDQG:L)LFDUGDORQJZLWK3&8VHU
$SSOLFDWLRQDOORZWKHHQGXVHUWRHDVLO\DGMXVWWKHVFKHGXOHRIWKH
(=0$;3OXVFDELQHWIURPDUHPRWHORFDWLRQYLDWHOHSKRQHOLQHRU
internet.
7KLVPDQXDOFRYHUVWKHLQVWDOODWLRQFRQ¿JXUDWLRQDQGXVDJHRIERWK
the Leviton®MultiTech modem (RAC00-MOD) and Leviton®Wi-Fi
card (RAC00-802) to allow for remote schedule updates.
NOTES
EZ-MAX Plus Quick Start Guide
Page 24
___________________________________________________
___________________________________________________
___________________________________________________
___________________________________________________
___________________________________________________
___________________________________________________
___________________________________________________
___________________________________________________
___________________________________________________
___________________________________________________
___________________________________________________
___________________________________________________
___________________________________________________
___________________________________________________
___________________________________________________
___________________________________________________
___________________________________________________
___________________________________________________
___________________________________________________
___________________________________________________
___________________________________________________
___________________________________________________
___________________________________________________
___________________________________________________
___________________________________________________
___________________________________________________
___________________________________________________
___________________________________________________
___________________________________________________
___________________________________________________
___________________________________________________
WEB VERSION

NOTES
___________________________________________________
___________________________________________________
___________________________________________________
___________________________________________________
___________________________________________________
___________________________________________________
___________________________________________________
___________________________________________________
___________________________________________________
___________________________________________________
___________________________________________________
___________________________________________________
___________________________________________________
___________________________________________________
___________________________________________________
___________________________________________________
___________________________________________________
___________________________________________________
___________________________________________________
___________________________________________________
___________________________________________________
___________________________________________________
___________________________________________________
___________________________________________________
___________________________________________________
___________________________________________________
___________________________________________________
___________________________________________________
___________________________________________________
___________________________________________________
___________________________________________________
Page 23
EZ-MAX Plus Quick Start Guide
INSTALLATION OF MODEM OR
WI-FI ACCESSORY CARD
The installation of the Modem and Wi-Fi card are the same. These
steps can be skipped if your cabinet came pre-installed with these
devices.
Step 1: Turn off power to the relay cabinet at the main circuit
breaker/fuse.
Step 2: Observe Electrostatic Discharge (ESD) precautions when
removing card from ESD packaging. Either wear an ESD grounded
strap or assure you have grounded yourself prior to installation
into cabinet.
Step 3: ,QVWDOOWKH0RGHPRU:L)L&DUGLQWRVRFNHW-3
(Ethernet/Modem slot).
a. Note:,WLVYHU\LPSRUWDQWWRDOLJQWKHSLQVPDNLQJVXUH3,1
RQFDUGDOLJQVZLWK3,1RQWKH(=0$;3OXVERDUG3LQ
is upper left for 8-relay cabinets and upper right for 24-relay
FDELQHWVDVVKRZQLQ¿JXUHV$DQG%
EZ-MAX Plus Quick Start Guide
Page 4
INSTALLATION
Figure 1A.
Install locations for 8-relay cabinets
Switch
Inputs
OUT JP9
RELAY 8
RELAY 7
RELAY 6
AC1
18 VAC IN
AC2
SERVICE ONLY
INTER-
FACE
J1
LCD
IN S8
RELAY 5
RELAY 4
RESET
JUMPE
R
JUMPE
R
JP41
ETHERNET/MODEM
ALL RIGHTS RESREVED WORLDWIDE
OX-70129-00-00-02 BASIC
OX-70129-00-00-01 NETWORK
OUT
SELECTOR S1 THRU S8
ANALOG/SWITCH I/O*
COM
+24V
+24V
COM
OUT
IN
IN
1
TB8
S7
TB7
S6
+24V
COM
+24V
COM
OUT
IN S5
TB6
}
TB5
S1
LEVITON ASSEMBLY
C 2004 LEVITON MFG. CO.
OUT
IN S4
HEARTBEAT-R
5V POWER
/O
D12
D27
Switch Inputs and DMX Connector-
Wire Range #14 - #24 AWG
Torque2 LB-IN
Luma-Net Connector
Wire Range #12 - #24 AWG
Torque 5 LB-IN
Location of
Modem/Wi-Fi Card
Module Socket
Install Modem/
Wi-Fi Card with
“Gold Dot” at
this location.
WEB VERSION

Figure 1B.
Install locations for 24-relay cabinets
IN
COMMON
NC
NO
SERVICE
J15
KEYBOARD/LCD
RESET
ONLY
J7
RELAY BUS BOARD
J16
KEYBOARD/LCD
(ALT)
J13
JP11
AC1
AC2
18 VAC IN TERM
TB16
1
TB19
1
1
TB15
COM
ETHERNET/MODEM
DMX 512
SELECT
VOLTAGE INPUT
LUMA-NET TB13**
+24V
ANALOG/SWITCH INPUT/OUTPUTS TB 1-12*
}
ALL RIGHTS RESERVED WORLDWIDE
ANALOG/SWITCH I/O*
(OPTIONAL)
USB TYPE B
J6
SWITCH BOARD
EMERGENCY
INPUT - TB21 *
EMERGENCY
EMERG
COM
RELAY
SELECTOR S1 THRU S12
C 2004 LEVITON MFG. CO.
IN
+24V
OUT
IN
COM
OUT
+24V
TB1
S1
TB2
S2
COM
IN
OUT
+24V
COM
TB3
S3
+24V
TB5
IN
OUT
COM
OUT
+24V
TB4
S4 S5
COM
IN
OUT
+24V
COM
TB6
S6
JUMPER ON PULLS INPUT HIGH
5V POWER
OX-70121-00-00-02 SLAVE
OX-70121-00-00-01 MASTER
JUMPER OFF IS DEFAULT
ETH/MODEM
HEARTBEAT-C
LUMANET
EMERGENCY
CAN1
CAN2
DMX
MASTER/SLAVE
TB17
SERIAL
TX
INPUT
RX
AUX.
COM
JP9 TERM
JP7
1TB 14**
TERM
JP6
JP36
COM
OUT
S8
TB8
IN
COM
IN
OUT
+24V
TB7
S7
IN
OUT
+24V
COM
+24V
TB9
S9
OUT
S11
TB11
IN
COM
IN
OUT
+24V
TB10
S10
IN
OUT
+24V
COM
+24V
TB12
S12
JP30
1
TB20
D-
D+
COM
123
REM-
TERM
+12V
LOCK
TERM
COM
+V
REM+
1
Location of
Modem
Module Socket
Install Modem/
Wi-Fi Card with
“Gold Dot” at
this location.
Page 5
EZ-MAX Plus Quick Start Guide
Step 4: Modem Card Install Only: Route phone line into cabinet
and insert into the RJ Connector (J9)
Step 5: Apply power to the system
Step 6: ,QVWDOOODWHVWVRIWZDUH¿UPZDUHIURP/HYLWRQZHEVLWH
www.leviton.com to support the new accessory. Refer to the
EZ-MAX Advanced programming guide for details on updating the
¿UPZDUHYLD86%SRUW
SPECIFICATIONS
EZ-MAX Plus Quick Start Guide
Page 22
TRADEMARK DISCLAIMER
8VHKHUHLQRIWKLUGSDUW\WUDGHPDUNV VHUYLFH PDUNV WUDGHQDPHV
brand names and/or product names are for informational purposes
only, are/may be the trademarks of their respective owners; such use
LVQRWPHDQWWRLPSO\DI¿OLDWLRQVSRQVRUVKLSRUHQGRUVHPHQW
FOR CANADA ONLY
For warranty information and/or product returns, residents of Canada
should contact Leviton in writing at Leviton Manufacturing
of Canada Ltd to the attention of the Quality Assurance
Department, 165 Hymus Blvd, Pointe-Claire (Quebec),
Canada H9R 1E9 or by telephone at 1 800 405-5320.
LIMITED WARRANTY
Leviton Manufacturing Co Inc. warrants the products represented
in this manual to be free of material and workmanship defects for
a period of two years after system acceptance or 26 months after
VKLSPHQWIURP/HYLWRQZKLFKHYHUFRPHV¿UVW7KH(=0$;3OXVUHOD\
FDUGV DUH FRYHUHG IRU D SHULRG RI WHQ \HDUV /LJKWLQJ ¿[WXUHV
manufactured by Leviton are covered for a period of one year. This
Warranty is limited to repair or replacement of defective equipment
UHWXUQHG )UHLJKW 3UH3DLG WR /HYLWRQ 0DQXIDFWXULQJ DW 6:
7HWRQ$YH7XDODWLQ2UHJRQ86$8VHUVKDOOFDOO
6004 and request a return authorization number to mark on the
outside of the returning carton, to assure that the returned material
will be properly received at Leviton. All equipment shipped back to
Leviton must be carefully and properly packed to avoid shipping
damage. Replacements or repaired equipment will be returned to
VHQGHUIUHLJKWSUHSDLG)2%IDFWRU\/HYLWRQLVQRWUHVSRQVLEOHIRU
UHPRYLQJRUUHSODFLQJHTXLSPHQWRQWKHMREVLWHDQGZLOOQRWKRQRU
charges for such work. Leviton will not be responsible for any loss
of use time or subsequent damages should any of the equipment
fail during the warranty period, but agrees only to repair or replace
defective equipment returned to its plant in Tualatin, Oregon. This
Warranty is void on any product that has been improperly installed,
overloaded, short circuited, abused, or altered in any manner. Neither
WKHVHOOHUQRU/HYLWRQVKDOOEHOLDEOHIRUDQ\LQMXU\ORVVRUGDPDJH
direct or consequential arising out of the use of or inability to use the
equipment. This Warranty does not cover lamps, ballasts, and other
equipment which is supplied or warranted directly to the user by
their manufacturer. Leviton makes no warranty as to the Fitness for
3XUSRVHRURWKHULPSOLHG:DUUDQWLHV
WEB VERSION

Page 21
EZ-MAX Plus Quick Start Guide
Wi-Fi Card Contains FCC ID: AZY-HF-LPB200
7KHHQFORVHGGHYLFHFRPSOLHVZLWK3DUWRIWKH)&&5XOHV
2SHUDWLRQLVVXEMHFWWRWKHIROORZLQJWZRFRQGLWLRQV
(i.) This device may not cause harmful interference
(ii.) This device must accept any interference received,
including interference that may cause undesired operation.
$Q\FKDQJHVRUPRGL¿FDWLRQVQRWH[SUHVVO\DSSURYHGE\/HYLWRQFRXOG
void the user’s authority to operate this equipment.
This equipment has been tested and found to comply with the limits
IRU D &ODVV % GLJLWDO GHYLFH SXUVXDQW WR SDUW RI WKH )&& 5XOHV
These limits are designed to provide reasonable protection against
harmful interference in a residential installation. This equipment
generates uses and can radiate radio frequency energy and, if not
installed and used in accordance with the instructions, may cause
harmful interference to radio communications. However, there is no
guarantee that interference will not occur in a particular installation. If
this equipment does cause harmful interference to radio or television
reception, which can be determined by turning the equipment off and
on, the user is encouraged to try to correct the interference by one or
more of the following measures:
• Reorient or relocate the receiving antenna.
• Increase the separation between the equipment and receiver.
• Connect the equipment into an outlet on a circuit different from that
to which the receiver is connected.
&RQVXOWWKHGHDOHURUDQH[SHULHQFHGUDGLR79WHFKQLFLDQIRUKHOS
INDUSTRY CANADA COMPLIANCE STATEMENT
EZ-MAX Plus System
This Class A digital apparatus complies with Canadian ICES-003.
Wi-Fi Card Contains IC: 12243A-HFLPB200
7KLV GHYLFH FRPSOLHV ZLWK ,QGXVWU\ &DQDGD OLFHQVHH[HPSW 566
VWDQGDUGV2SHUDWLRQLVVXEMHFWWRWKHIROORZLQJWZRFRQGLWLRQV
this device may not cause interference, and (2) this device must accept
any interference, including interference that may cause undesired
operation of the device.
IMPORTANT!$Q\FKDQJHVRUPRGL¿FDWLRQVQRWH[SUHVVO\DSSURYHG
by the party responsible for compliance could void the user’s authority
to operate this equipment.
7KLV&ODVV%GLJLWDODSSDUDWXVFRPSOLHVZLWK&DQDGLDQ,&(6
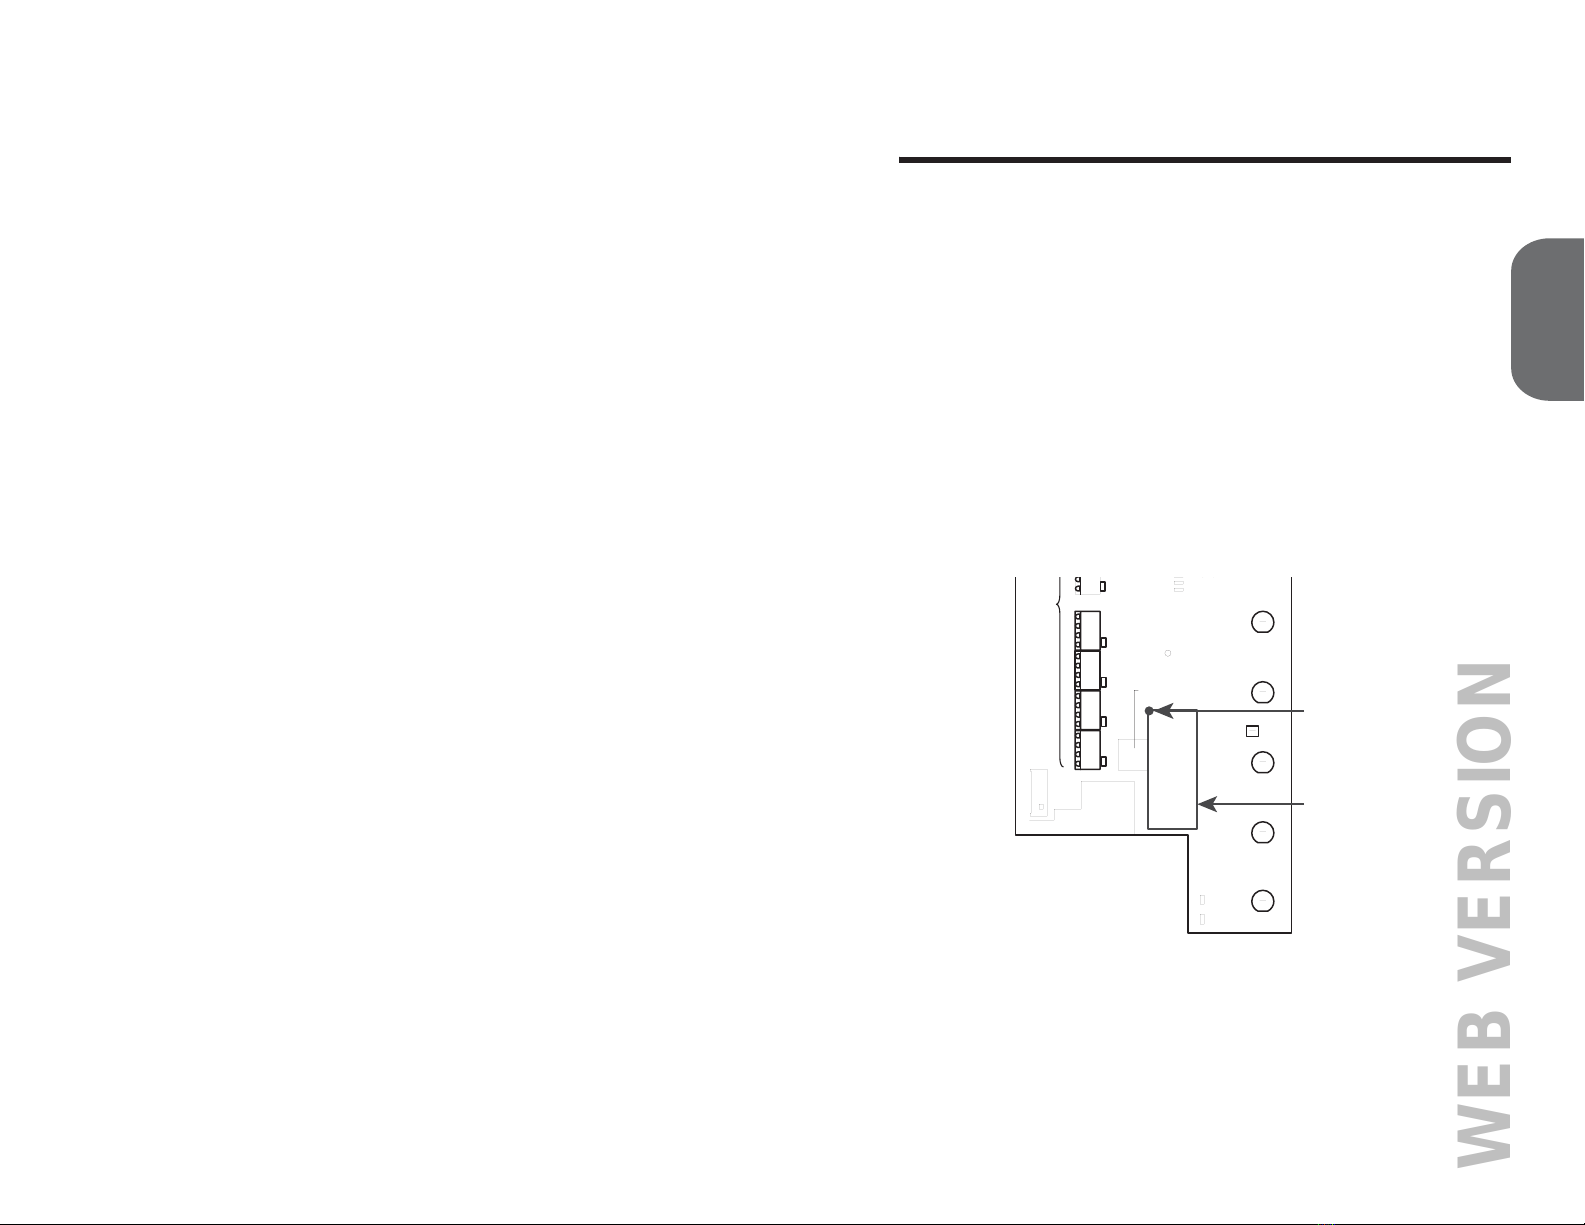
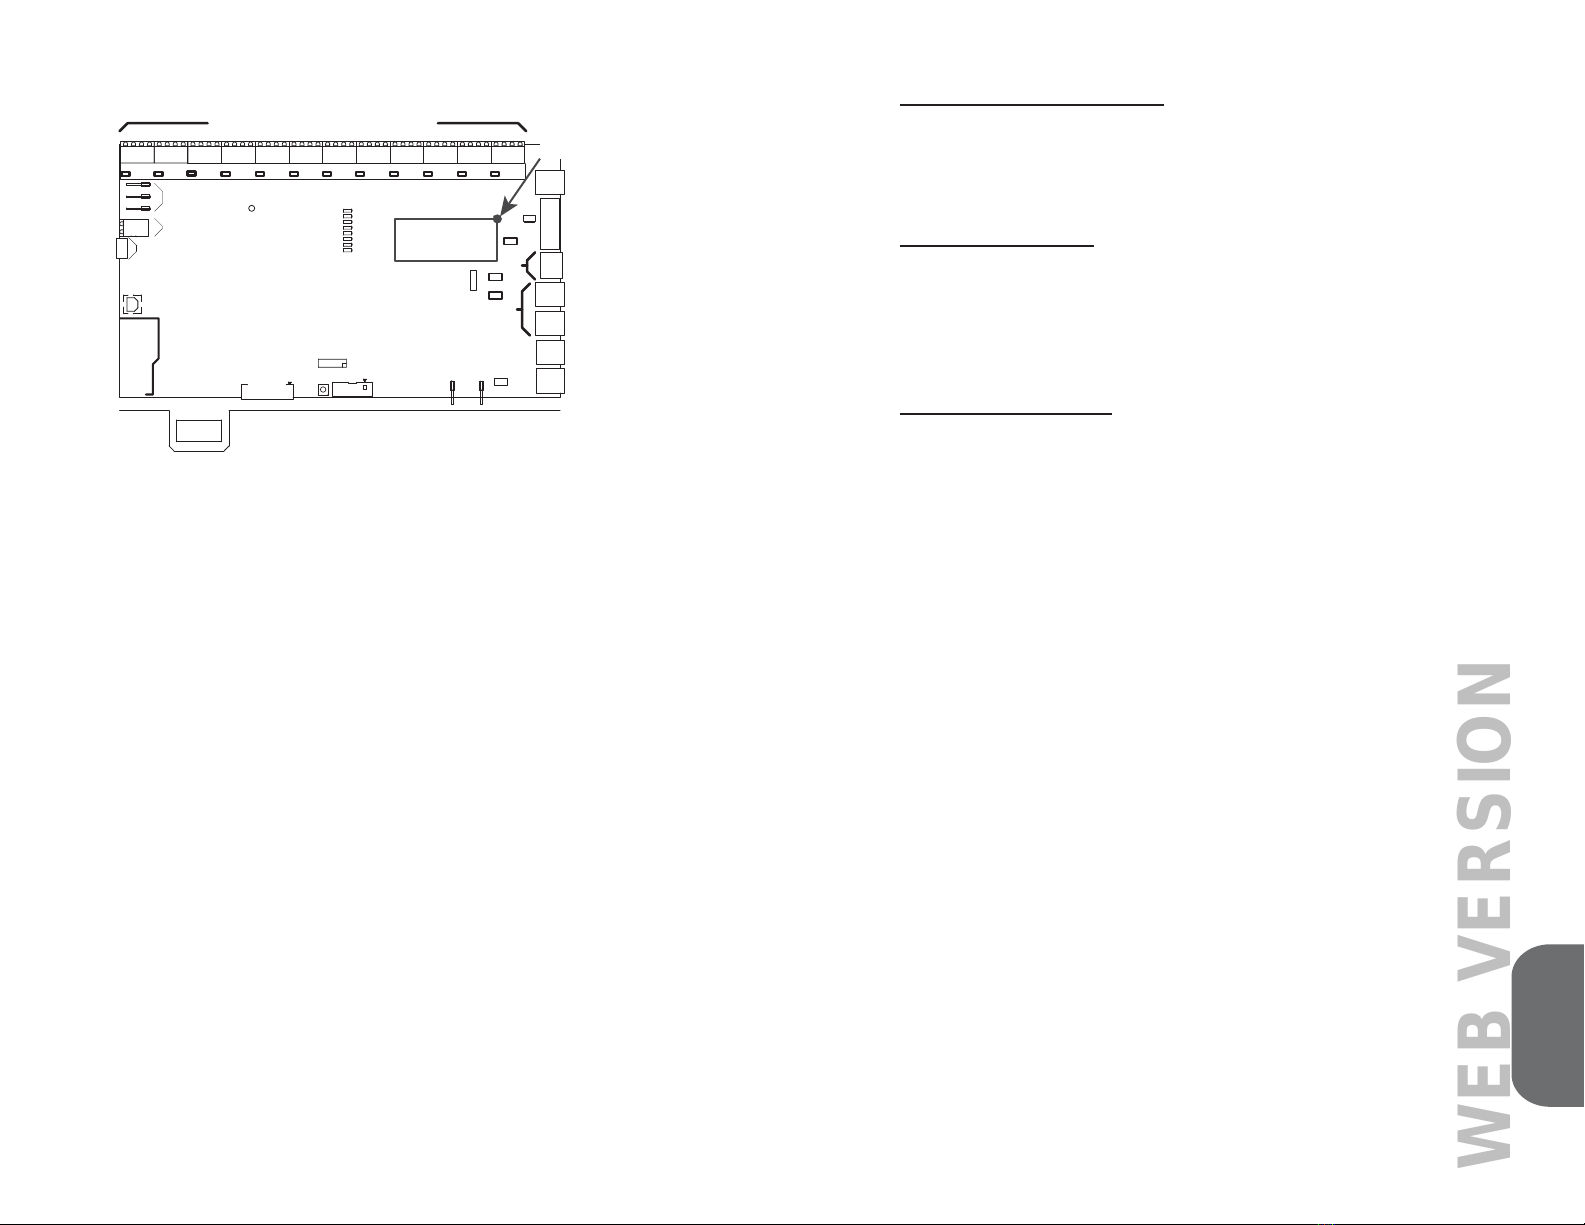
SYSTEM CONFIGURATION FOR
MODEM OR WI-FI ACCESSORY CARD
Once the Modem or Wi-Fi card is installed the system software
QHHGVWREHFRQ¿JXUHGVRLWNQRZVWKHFDUGZDVLQVWDOOHGLQRUGHUWR
activate communication to the outside world. This is done manually
through the front LCD panel.
LCD Menu
3UHVVWKH0(18EXWWRQ
6HOHFW0$,10(186(/(&76<67(06(77,1*61(7:25.6(783
- MODE: NONE/MODEM/WI-FI
Select for the MODE:
• None – Disables the interface whether a card is installed or not
• Modem – Modem Card is installed (Default: 1st ring answer,
1 second delay for password prompt, and 30 second hang-up delay)
• Wi-Fi – Wi-Fi Card is installed
7KHUHDUHQRRWKHUFRQ¿JXUDWLRQVQHFHVVDU\WRDFWLYDWHWKHDFFHVVRU\
card.
0RGHP&RQ¿JXUDWLRQ
$WWKLVSRLQWLQWLPHWKHPRGHPFRQ¿JXUDWLRQLVFRPSOHWH7KH
V\VWHPZLOOGHIDXOWWKHEDXGUDWHWRDQGDQVZHURQWKH¿UVW
ring. The hang-up delay option disconnects the Telco line after 30
seconds of no activity.
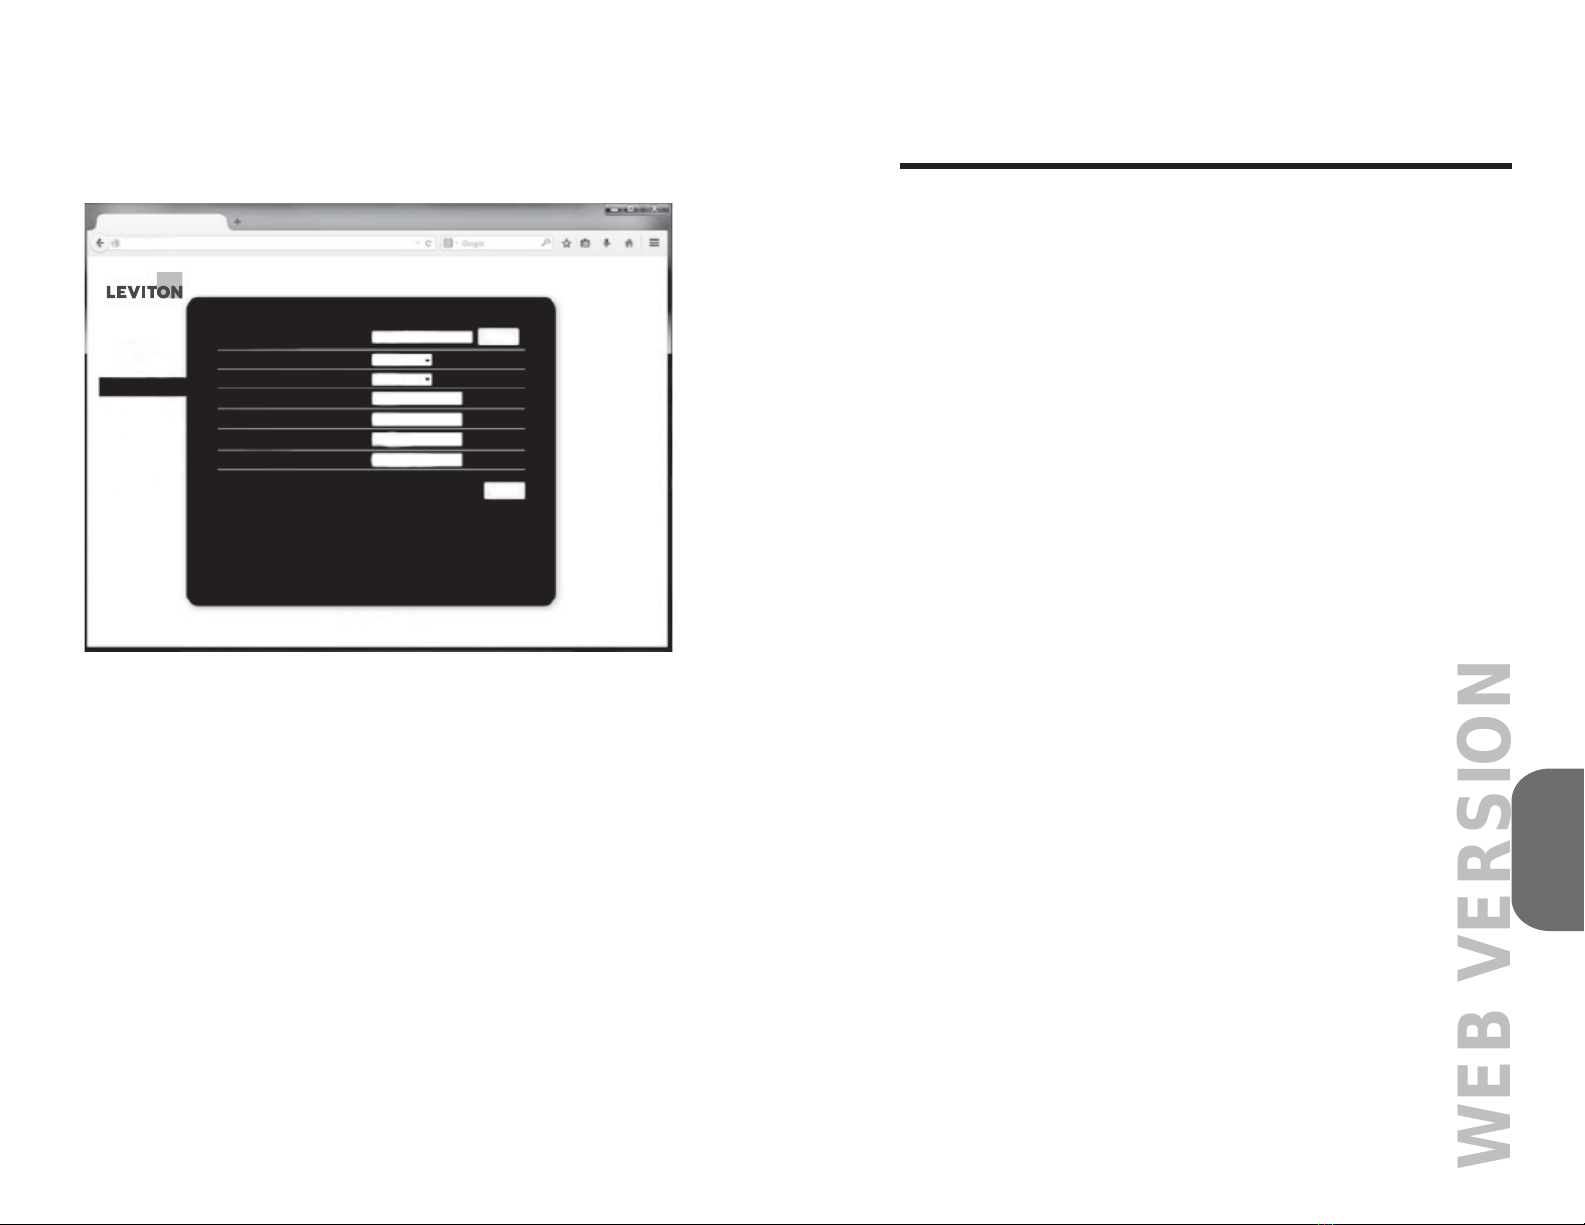
:L)L&RQ¿JXUDWLRQ
Once the Wi-Fi card is installed and the cabinet power is restored
WKHXVHUZLOOKDYHWKHDELOLW\WRFRQQHFWDQGFRQ¿JXUHWKH:L)LFDUG
for accessibility. This process requires a router that has access to a
QHWZRUNZKLFKZLOOEHDFFHVVLEOHUHPRWHO\IRUFRQ¿JXUDWLRQRIWKH
EZ-MAX cabinet.
The Wi-Fi card has two LEDs:
• GREEN: Will light up when one card is connected to a router and
link is established.
• RED: Will light up when card is installed correctly and receiving
power.
Page 6
EZ-MAX Plus Quick Start Guide
CONFIGURATION
WEB VERSION

Page 7
EZ-MAX Plus Quick Start Guide
The Wi-Fi card has two buttons on it:
• RST6WDQGDUG5HVHWEXWWRQ3UHVVWRUHVHWWKH:L)LFDUG
• DEF)DFWRU\5HVHW3UHVVDQGKROGWKHEXWWRQIRURUPRUH
VHFRQGVWRUHVHWWKHGHYLFHWRIDFWRU\GHIDXOW,IWKH*5((1
LED was lit prior to factory reset it will turn off once the device
has been factory reset as the connection to the router will have
been cleared.
Step 1: &RQ¿UPWKH5('³3RZHU´/('OLJKWLVYLVLEOHRQWKH5$&
802 Wi-Fi card. This means the device is plugged in properly and
receiving power.
Step 2: 8VHD:L)LHQDEOHGGHYLFHVXFKDVDSKRQHRUODSWRSZLWK
Wi-Fi card: ) to access the Wi-Fi card. Look for and connect to:
LEV-LPB200.
WIDF5
TestNetwork_TG5
EngTest2GHz1
WIDF
LEV-LPB200
Information sent over this network
might be visible to others.
Connect automatically
HF-EZMAX
LS-ColumbiaRiver
EngTest2GHz2
guest
Connect
Open Network and Sharing Center
Figure 2.
Visible WI-FI Networks
SPECIFICATIONS
EZ-MAX Plus Quick Start Guide
Page 20
SPECIFICATIONS
Modem Card Protocol 9N9N%DXG5DWHVHW
to V.32, 9,600 baud for improved
reliability)
Wi-Fi Card Protocol IEEE 802.11b/g/n Wireless
Standards
Operational Temperature ÛWRÛ&
Power Supply 9'&
Power Consumption
(Typical)
Modem Card: 125 mA
(.62 W @ 5 VDC)
Wi-Fi Card: 150mA
(.75W @ 5VDC)
Antenna Wi-Fi Card:,QWHJUDWHG3&%7UDFH
Antenna
EMC Modem Card:)&&3DUW
&ODVV%&DQDGD&ODVV%
(1&ODVV%(1
Wi-Fi Card: FCC ID: AZY-HF-
/3%,&$+)/3%
RoHS Compliant Yes
FCC COMPLIANCE STATEMENT
EZ-Max Plus System
This equipment has been tested and found to comply with the limits
for a Class A digital device, pursuant to part 15 of the FCC Rules.
These limits are designed to provide reasonable protection against
harmful interference when the equipment is operated in a commercial
environment. This equipment generates, uses, and can radiate radio
frequency energy and, if not installed and used in accordance with
the instruction manual, may cause harmful interference to radio
communications. Operation of this equipment in a residential area
is likely to cause harmful interference in which case the user will be
UHTXLUHGWRFRUUHFWWKHLQWHUIHUHQFHDWKLVRZQH[SHQVH
WEB VERSION

• NO GREEN LED7KH*5((1/('VLJQDOVWKH:L)LFDUGLV
FRQQHFWHGWRDQHWZRUNURXWHU,IWKH*5((1/('RQWKH
Wi-Fi card and Cabinet (ETH/MODEM) are not lit then there is no
FRQQHFWLRQHVWDEOLVKHG8VHUZLOOQHHGWRUHWXUQWRFRQ¿JXUDWLRQ
screen to re-setup the connection.
• FIND THE STATIC IP ADDRESS7KH67$7,&,3ZLOOQHYHU
show in the Wi-Fi System mode. It is important to write this and
DQ\DVVLJQHG,3DGGUHVVGRZQVRLWLVQRWIRUJRWWHQ
• WI-FI RANGE: Wi-Fi card will need to be within 50 ft of the
router it is talking to. During STA Setting and selecting a network
to connect to make sure the RSSI strength is strong. Higher is
better for this device.
• STATION CONFLICT: If multiple stations are in an area the
SSID should be changed by the user in order to help determine
what station is being addressed.
PC Application
$OOWKHWLPHVQHHGWREHGH¿QHGLQWKHDSSOLFDWLRQSURJUDP
The program does not do a read, modify, write so any original
settings and times will be wiped and cannot be read by the
application.
8VHUPD\QHHGWRFKDQJHWKHFRPSXWHUV8VHU$FFRXQW&RQWURO
6HWWLQJV8$&LQRUGHUWRHGLWFRQ¿JXUDWLRQ¿OH
Page 19
EZ-MAX Plus Quick Start Guide
Step 3: 2SHQDEURZVHUZLQGRZWDE,QWHUQHW([SORUHU)LUHIR[HWF
Step 4: *RWR,3$GGUHVV
Step 5: $8VHU3DVVZRUGZLOOEHUHTXHVWHG
8VHU,'leviton3DVVZRUGleviton
Step 6: 7KHFRQ¿JXUDWLRQVFUHHQZLOOEHORDGHGLQWRWKHEURZVHU
Step 7:
1RWHWKHPRGXOHIURPWKHIDFWRU\GHIDXOWVWRWKH$3$FFHVV
3RLQWPRGH,QRUGHUWRDFFHVVWKH(=0$;3OXVFDELQHWLWLV
QHFHVVDU\WRFRQ¿JXUHWKHGHYLFHWR67$6WDWLRQPRGHDQGFRQQHFW
it to a router.
Step 8:
*RWRWKH:RUN0RGHWDE6HOHFW³67$PRGH´DQGWKHQFOLFN
Save button.
Note:8VHWKHEURZVHUEDFNEXWWRQWROHDYHWKHVFUHHQDQGFDQFHO
any changes. Changes on a screen are only stored when the save
button is pressed before leaving the screen.
Step 9:
*RWRWKH³67$6HWWLQJ´WDE
Page 8
EZ-MAX Plus Quick Start Guide
CONFIGURATION
Setting
10.10.100.254
System
Work Mode
STA Setting
AP Setting
Other Setting
Account
Upgrade SW
Restart
Restore
Software Version
WiFi Work Mode
AP Mode
STA Mode
MID
V1.0.3
AP
HF-LPB200
SSID
IP Address
MAC Address
Router SSID
LEV-LPB200
10.10.100.254
ACCF233BECB9
IP Address
MAC Address
Signal Strength
Web Ver. 1.0.4.1-LEV
Figure 3.
WI-FI System Page
WEB VERSION

Page 9
EZ-MAX Plus Quick Start Guide
Setting
10.10.100.254
System
Work Mode
STA Setting
AP Setting
Other Setting
Account
Upgrade SW
Restart
Restore
Web Ver. 1.0.4.1-LEV
DNS Server Address
Gateway Address
Subnet Mask
IP Address
Network Name (SSID)
Note: case sensitive
Encryption Method
Obtain an IP address automatically
Save
ScanLEV-LPB200
Disable
Enable
0.0.0.0
0.0.0.0
0.0.0.0
208.67.222.222
Figure 4.
WI-FI STA Settings
Step 11:
Select the network SSID provided from the scan you need
to contact to for remote access. This will likely be determined by your
1HWZRUN$GPLQLVWUDWRU3UHVVWKH³2.´EXWWRQ7KH66,'FDQEHDQ\
name based on available SSIDs on a wireless network.
Step 12:
$IWHUSUHVVLQJ2.LIWKH66,'UHTXLUHVDSDVVZRUGFOLFN2.
RQ³7KHSDVVZRUGLVHPSW\´SRSXSDQGHQWHUWKHQHWZRUNSDVVZRUG
IRUWKHVHOHFWHG66,'QHWZRUNWRMRLQ
Step 13:
There are two ways to setup the system at this time. Once
again, this will be determined by your Network Administrator which
method is selected.
a.2EWDLQDQ,3DGGUHVVDXWRPDWLFDOO\FXUUHQWO\(QDEOHG
b.'LVDEOHWKHDELOLW\WRREWDLQDQ,3DGGUHVVDXWRPDWLFDOO\DQG
DVVLJQD67$7,&,3$GGUHVVRQWKHOLQHEHORZ
Step 10:
3UHVV6FDQRQWKH³1HWZRUN1DPH66,'´OLQHWRVFDQIRU
networks.
Note:&OLFN³6FDQ´DJDLQWRUHIUHVKWKHOLVWLIWKHQHWZRUNOLVWVFUHHQ
does not properly display a list of networks.
EZ-MAX Plus Quick Start Guide
Page 18
TROUBLESHOOTING
• TO AVOID FIRE SHOCK OR DEATH; TURN OFF POWER
at circuit breaker or fuse and test that power is off before
installation of Modem or Wi-Fi accessory card. Devices are NOT
hot swappable.
Modem
• BAUD RATE: The modem card used is the Multi-Tech
MT5692MI-V-92 SocketModem®. It can work up to 56k baud
however we restrict it to 9,600 baud to improve reliability
HVSHFLDOO\ZKHQXVLQJ92,3SKRQHOLQHV,IWU\LQJWRUXQIDVWHU
than 9,600 the device will likely encounter connection and data
corruption issues.
• BAUD RATE: The system connection speed works best at
9600 baud. It may be necessary to force modem to work at
EDXG%DXGUDWHFDQEHIRUFHGLQWHUPLQDODSSOLFDWLRQ
SURJUDPXVLQJ$7FRPPDQGVHJ$706 9RU06 9RU
$706 7KH$7FRPPDQGVZLOOYDU\GHSHQGLQJ
on manufacturer.
• CONNECTION DIFFICULTIES: If modem used still does not
work there may be a compatibility issue. A MultiTech MultiMobile
86%0RGHP0RGHO0708&'&;5FDQEHSXUFKDVHG
IURP'LJLNH\RUVLPLODUVXSSOLHUZKLFKKDVEHHQFRQ¿UPHG
FRPSDWLEOHZLWKWKH(=0$;3OXVPRGHPFDUG,QVWDOODWLRQ
drivers can be found on the MultiTech website
(www.multitech.com/).
Wi-Fi
• NO RED LED: The RED LED indicates the Wi-Fi card has power.
If the RED LED is not lit on the card either the cabinet doesn’t
have power or the Wi-Fi card has not been plugged in correctly.
Wi-Fi card may need to be removed and reseated into the
socket.
TROUBLESHOOTING
WEB VERSION

Sunrise and Sunset (SR & SS)
• SR is SunriseLIWKLVER[LVFKHFNHGWKHHYHQWZLOODFWLYDWHDW
Sunrise
• SS is SunsetLIWKLVER[LVFKHFNHGWKHHYHQWZLOODFWLYDWHDW
Sunset
&KHFNLQJHLWKHU66RU65ER[HVZLOO]HURRXWWKHFRUUHVSRQGLQJWLPH
value, and becomes an offset value from sunrise or sunset.
The Cancel Changes button will only cancel the values that are
highlighted in yellow.
Any changes being made here can be sent directly to the individual
cabinet by clicking on the Save and Send button.
Copying schedule from one store to another: Once you have changed
WKHUHTXLUHGYDOXHVRQWKH¿UVWVWRUHDQG\RXZDQWWRFRS\WKRVH
FKDQJHVWRRWKHUVWRUHV\RXFDQFOLFN³&RS\+LJKOLJKW'DWDWR
3DQHOV´7KLVZLOORQO\FRS\ZKDWLVLQJUHHQ
Page 17
EZ-MAX Plus Quick Start Guide
At this point you have the option of choosing one or more stores to
copy to as well as if you want to only save the changes or save and
send to the cabinets directly.
Cancel and
Return Save Only Save and
Send
S#101
EZ-max08
S#102
Z-max24
S#103
EZ-max24
Select Relay Panels to Send Selected Schedule Changes
EZ-MAX Plus Quick Start Guide
Page 10
Note:7KHSUHIHUUHGPHWKRGLVWRXVHDVWDWLF,3DGGUHVVVLQFHWKHUH
LVDULVNRIWKH'\QDPLF,3DGGUHVVFKDQJLQJZKLFKZRXOGUHVXOWLQ
the system not working.
Step 14: Select Save at the bottom of the screen when completed.
Step 15: 9HULI\FRQQHFWLRQWRH]0D[3OXVE\DFFHVVLQJWKHORFDWLRQQHWZRUN
DQGFRQQHFWLQJWRSDQHOYLD,QWHUQHW%URZVHU(QWHUWKHFDELQHW,3DGGUHVV
RQWKH$GGUHVV%DURIWKHEURZVHU2EVHUYHWKHLQLWLDWLRQDQGIXQFWLRQDOLW\RI
WKHLQWHUIDFHSDJH7KLVLQGLFDWHVYDOLG,3DQGQHWZRUNVHWWLQJV
Step 16: ,IWKHGHFLVLRQLVPDGHWR2EWDLQDQ,3DGGUHVVDXWRPDWLFDOO\
(QDEOHWKHQLWLVEHVWWRFKDQJHWKH:RUN0RGH,WHPWR$367$DQG
do a Save and Restart.
a.5HFRQQHFWWRWKH:L)L66,'/(9/3%
b. Refresh your browser (10.10.100.254) and login as necessary.
c. Click on the System tab
d.,GHQWLI\\RXU³,3DGGUHVV´DWWKHERWWRPRIWKHVFUHHQVR\RXNQRZ
KRZWRDFFHVVWKH(=0$;3OXVFDELQHWWrite this number (e.g.
192.168.1.xxx) on the inside label of the EZ-MAX Plus cabinet
so it isn’t lost or forgotten.
Note: This number can change if the network system or the cabinet is
SRZHUHGGRZQIRUDQH[WHQGHGSHULRGRIWLPHXQOHVVWKHQHWZRUNVHWWLQJV
are set correctly: see network admin for details.
Step 17: *REDFNWR:RUN0RGH&KDQJHWKHGHYLFHWR³67$PRGH´WKHQ
Save and Restart.
Step 18: If the decision is to assign a STATIC IP address then write
this number on the inside label of the EZ-MAX Plus cabinet so it
isn’t lost or forgotten.
Step 19: Make sure Work Mode is set to STA mode then Save and Restart.
Step 20: From here on out access to the cabinet will be via this Static or
'\QDPLF,3DGGUHVV7KLVDFFHVVZLOOEHDFFRPSOLVKHGWKURXJKWKHURXWHU
which the Wi-Fi card is directly connected to.
Step 21: If testing is desired Run a terminal program like Tera-term. Select
¿OH!QHZFRQQHFWLRQDQGHQWHUWKH,3DGGUHVV
a. Hit okay and press enter key
b. Tera-term will prompt for the password at this time. This is how you
NQRZ\RXKDYHUHDFKHGWKH(=0$;3OXV&DELQHW
Step 22: 7KH*5((1/('VKRXOGJRRQDWWKLVSRLQWRQFHD67$7,21PRGH
FRQQHFWLRQLVPDGHWRWKHURXWHUWKH*5((1/('RQWKHFDUGDQGFDELQHW
(ETH/MODEM) will both light.
Once the Wi-Fi connection has been established the application program can
QRZEHVHWXSSURSHUO\LQRUGHUWRFRQ¿JXUHWKHV\VWHP
CONFIGURATION
WEB VERSION

Page 11
EZ-MAX Plus Quick Start Guide EZ-MAX Plus Quick Start Guide
Page 16
REMOTE ACCESS
Color Indicators:
Red,IWKHER[HVFKDQJHWRUHGWKHUHLVDQHUURULQGLFDWLQJWKHRII
time is earlier than the on time.
Yellow - The yellow highlight indicates this has been edited but not
saved.
Green7KHJUHHQKLJKOLJKWLQGLFDWHVWKHER[KDVEHHQVDYHGEXW
not yet sent to the cabinet.
,IWKHER[LVQRWKLJKOLJKWHGDWDOOWKHQLWHLWKHUKDVQRWEHHQWRXFKHG
or has already been saved and sent to the cabinet.
EZMAX Scheduler main view
Cancel Changes Save Only Copy Highlight
Data to Panels Save and Send
23:00
23:00
23:00
23:00
23:00
23:00
23:00
23:00
23:00
1/1/2001
1/1/2001
Date
16:00
16:00
16:00
16:00
16:00
16:00
16:00
16:00
16:00
Copy to
Weekends
Copy to
Weekdays
SSSITE OFFSRSITE ONSSCLOSEDSROPEN
EZMAX
S#101 EZ-max08
Relay Scheduler
S#101 EZ-max08 S#102 Z-max24 S#103 EZ-max24
Monday
Tuesday
Wednesday
Thursday
Friday
Saturday
Sunday
Special 1
Special 2 17:0008:00
17:0008:00
17:0008:00
17:0008:00
17:0008:00
17:0008:00
17:0009:00
17:0007:00
07:0007:00
WEB VERSION

>*HQHUDO@
1XPEHU6WRUHV This will change the number of tabs
seen on the program. It should match
the total quantity of stores.
&RP3RUW Settings for modem only. These values
shall not change unless your modem
VSHFL¿HVGLIIHUHQWO\,IWKLVLVXWLOL]HG
you will need the phone number of
each cabinet.
ATE1
$706 9
>6WRUH@
1DPH 6(=PD[ This is the name of the store. It can
be any sequence and length. This will
DGMXVWWKHWDEZLGWKLQWKHSURJUDP
3KRQH Cabinet phone number. Only used with
the modem connection.
,3 &DELQHW,3DGGUHVVLQ:L)LV\VWHP
This will need to be recorded when
the system is installed. A static value is
recommended.
,33RUW ,3SRUWQXPEHUVKDOOPDWFKV\VWHP
setting. All instructions indicate using
³´
(YHQW1DPH 23(1 (YHQWQDPHVFKDQJHVWKHWH[WLQWKH
program for the corresponding columns
(YHQW1DPH &/26('
(YHQW1DPH 6,7(21
(YHQW1DPH 6,7(2))
Page 15
EZ-MAX Plus Quick Start Guide
(GLWLQJWKH&RQ¿JXUDWLRQ¿OH
&RS\DQGSDVWH³VWRUH´DQGUHQDPH³VWRUH´WRHGLWWKHQH[WVWRUH
0DNHVXUH,3DGGUHVVHVDUHVHWFRUUHFWO\IRUWKHLGHQWL¿HGVWRUH
EZ-MAX Plus Quick Start Guide
Page 12
REMOTE ACCESS
APPLICATION DETAILS
In order for the remote access program to operate properly the
(=0$;3OXVFDELQHWPXVWEHVHWXSE\FUHDWLQJHYHQWV7KLV
LVDVLPSOHPDWWHURIFUHDWLQJWKHHYHQWVLQ9LVXDO3URJUDPPHU
and saving as a template which can be loaded on site, remotely or
preloaded. Then it is easy to modify the relay numbers in Visual
3URJUDPPHUGXULQJFRPPLVVLRQLQJ
$Q\(=0D[FDELQHWWKDWZLOOEHXWLOL]LQJWKH(=0$;6FKHGXOHUPXVW
have 36 event list programmed into the cabinet. This is to be done
at a per cabinet basis on site once and may change relay values
depending on the site requirements. This list coordinates days of the
week as well as the store open and close times and site on and off
ZLWKWKHYDOXHVWKDWWKHVFKHGXOHUFDQDGMXVW
Store open is suggested the time the business hours are open for
customer access, close is when the store closes. Site on and off are
the times that the outside parking lights are controlled.
EZMAX Scheduler
Installation:
2Q:LQGRZV;3WKURXJKWKHGLIIHUHQFHVEHWZHHQ26V\VWHPV
are minimal. These setup instructions will follow Windows 7 OS.
• Open EZ-MAX Scheduler Install folder
2SHQ6HWXSH[H
Welcome to the EZMAXscheduler installation program.
Setup cannot install system files or update shared files if they are in use.
Before proceeding, we recommend that you close any applications you may
be running.
OK Exit Setup
REMOTE ACCESS
&OLFN2.
WEB VERSION

Exit Setup
Change Directory
Directory:
C:\Program Files\EZMAXscheduler\
Click this button to install EZMAXscheduler software to the specified
destination directory.
Begin the installation by clicking the button below.
Page 13
EZ-MAX Plus Quick Start Guide
• Click on install button (picture of computer)
• Choose program group
• Click continue
Setup will add items to the group shown in the Program Group box.
You can enter a new group name or select one from the Existing
Groups list.
Program Group:
EZMAXscheduler
Existing Groups:
EZMAXscheduler
Accessories
Administrative Tools
Cadence
Citrix
HI-TECH Software
IP Office
Leviton
Maintenance
Microsoft Lync
Continue Cancel
&OLFN2.
EZMAXscheduler Setup was completed successfully.
OK
EZ-MAX Plus Quick Start Guide
Page 14
REMOTE ACCESS
Note:LWLVUHFRPPHQGHGWRKDYH8VHU$FFRXQW&RQWURO6HWWLQJV
8$&VHWWRQHYHUQRWLI\7RVHWWKLVJRWRVWDUWEXWWRQDQGHQWHU8$&
LQWKHVHDUFKEDU7KH8$&VHWWLQJSDJHZLOOVWDUWFKDQJHWKHVOLGHU
WRWKHERWWRPQHYHUQRWLI\KLW2.7KHQUHERRWWKHPDFKLQH7KLV
VHWWLQJZLOOVDYHWKHFRQ¿JXUDWLRQ¿OHQHHGHGWRHGLWIRUDOOV\VWHP
ORFDWLRQVLQWKHSURJUDP¿OHIRU(=0$;6FKHGXOHU
If you do not have the capability to or want to change this setting
\RXZLOOQHHGWRGRDVHDUFKIRU(=0$;RQWKHGULYHWR¿QGWKH
³(=0$;6FKHGXOHU&RQ¿JLQL´¿OHWKLVPD\EHORFDWHGLQ«?XVHUV?
>ORJLQQDPH@?DSSGDWD?ORFDO?(=0$;VFKHGXOHU
• Completed successfully will popup
WEB VERSION
Other manuals for EZ-Max Plus
2
This manual suits for next models
2
Table of contents
Other Leviton Control Panel manuals

Leviton
Leviton 408CP Original operating instructions

Leviton
Leviton LP-SRL Series User manual

Leviton
Leviton EZ-MAX PLUS series User manual

Leviton
Leviton Z-MAX Series Operating instructions

Leviton
Leviton 400CP Original operating instructions

Leviton
Leviton 804CP Original operating instructions

Leviton
Leviton Z-MAX r24sd Service manual

Leviton
Leviton Melange Pro User manual

Leviton
Leviton 52120-0M1 User manual

Leviton
Leviton EZ-MAX H Series User manual