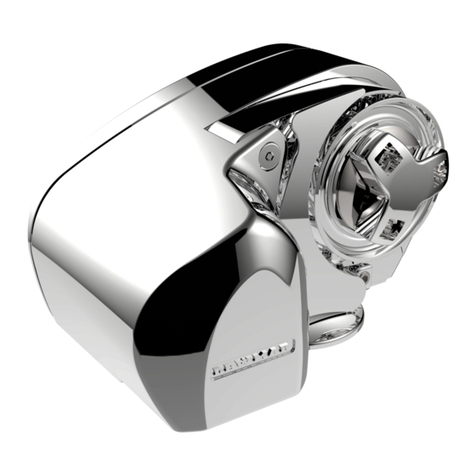
Lewmar Integra Autopilot Drive User manual

Autopilot Drive
Product manual
Owner’s Installation, Operation & Servicing manual

2
IMPORTANT: Read these notes before continuing.
!Responsibility for the safe and prudent operation of a vessel rests with the owner and/or operator of the
vessel. The Integra drive is one of many devices to aid in the general operation of a vessel, it does not relieve
the operator from the responsibility of safety or maritime procedures of the vessel.
!Avoid navigational hazards and never leave the helm unattended.
!Always be prepared to immediately regain manual control of the vessel.
!Learn to operate the autopilot in calm open water with minimum hazards.
!Use caution when the vessel is at high speeds near hazards in the water, such as pilings, docks and other
vessels.
!Keep up to date with any product safety information published at Lewmar.com
!This equipment must be installed and operated in accordance with the instructions contained in this manual.
Failure to do so could result in poor product performance, personal injury and/or damage to your boat.
!Always wear safety goggles, ear protection and a dust mask when using power tools. When drilling or cutting
check the opposite side of the surface. Be aware of fuel tanks, electrical cables, hydraulic hoses etc.
!Consult the boat manufacturer if you have any doubt about the strength or suitability of the mounting
location.
!Make sure you have switched off the power before you start installing this product.
!If in doubt about installing electrical equipment please seek advice from a suitably qualified electrical
engineer.
EMC Recommended guidelines
All Lewmar equipment and accessories are designed to conform to the appropriate Electromagnetic Compat-
ibility (EMC) standards. Correct installation is required to ensure that performance is not compromised. The
guidelines given here describe the conditions for optimum EMC performance, but it is recognised that it may
not be possible to meet all of these conditions in all situations. To ensure the best possible conditions for EMC
performance within the constraints imposed by any location, always ensure the maximum separation possible
between different items of electrical equipment. For optimum EMC performance, it is recommended that wher-
ever possible Lewmar equipment and cables connected to it are:
!At least 3ft (1m) from any equipment transmitting or cables carrying radio signals e.g. VHF radios, cables and
antennas.
!In the case of SSB radios, the distance should be increased to 7ft (2m).
#WARNING!
2- Safety Notice
1- Introduction
Dear Customer,
Thank you for choosing Lewmar. Lewmar products are world renowned for their quality, technical innovation and
proven performance. With a Lewmar product you will be provided with many years of outstanding service.
Product support
Lewmar products are supported by a worldwide network of distributors and Authorised Service Representatives.
If you encounter any difficulties with this product, please contact your national distributor, or your local Lewmar
dealer. Details are available at: www.lewmar.com
CE Approvals
For CE approval certificates contact Lewmar.
Important information about this manual
Throughout this manual, you will see safety and product damage warnings. You must follow these warnings
carefully to avoid possible injury or damage.
GB
Lewmar Integra Autopilot Drive Manual ref B10420 iss.1 | 3
3- Installation
1- Bavaria & Constellation drive
89300136 Bavaria Kit
This drive kit is suitable for Constellation and Bavaria single
helm systems and consists of the following:
A.Drive unit
B.Constellation: 2m chain
Bavaria: Custom chain length
C. Autopilot drive clutch relay 12V
D. Clutch relay instruction leaflet
2- Mamba drive
89300137 Mamba kit
This drive kit directly couples to gearboxes and consists of
the following:
A.Drive unit
B.Autopilot drive clutch relay 12V
C. Clutch relay instruction leaflet
3- Cobra drive
89300203 Cobra Pedestal Kit
This drive kit directly couples to Integra Pedestal and con-
sists of the following:
A.Drive unit
B.Interface plate
C. Autopilot clutch relay 12V
D.Clutch relay installation leaflet
3.1 Overview
!More than 7ft (2m) from the path of a radar beam. A radar beam can normally be assumed to spread 20° above
and below the radiating element
!The equipment is supplied from a separate battery from that used for engine start. Voltage drops below 10V,
and starter motor transients, can cause the equipment to reset. This will not damage the equipment, but may
cause the loss of some information and may change the operating mode.
!Other information Protected for use in engine compartments CE approvals conforms to:
89/336/EC (EMC)
BS EN60945:1997
94/25/ec (RCD)
BS EN28846:1993
A
B
C
AB
B
A

4
GB
3.2 Preparation
General position:
!Refer to the EMC installation guidelines.
!Make sure the drive will be accessible for future servicing.
!Mamba drives can be installed in any orientation directly onto the mounting flange on the bevel head or
reduction gearbox.
Environment:
!The drive should be mounted in a dry location, clear of any bilge water.
!Potentiometer (if installed) is not waterproof
Constellation & Bavaria drive structural strength:
!This drive produces a considerable amount of force, so you must mount it on a solid structure
(i.e. a substantial frame member) in the boat. In some cases you may need to build a special frame to mount
the drive unit.
!To prevent excess noise and vibration, do not attach this drive to any structures that support cabins.
Mamba drive Structural strength:
The Mamba drive is designed for mounting directly onto a bevel head or reduction gearbox in the steering sys-
tem, structural mounting instructions will apply chiefly to the gearbox that the autopilot is mounted to.
Cobra drive Structural strength:
The Cobra drive retrofits directly into the Integra Pedestal.
3.3 Optional rudder reference unit setup
!Before installation of the autopilot, ensure the potentiometer used for rudder referencing is set to the middle
point of its total range (5 turns from either stop).
!To do this, align the white marks on each pulley with the corresponding marks on the bracket/faceplate.
Be aware that the potentiometer will only turn 5 rotations in either direction from its centre point. If any
resistance is felt from the potentiometer do not apply force. Turn the sprocket in the opposite direction until
the white markings are aligned.
!When both sets of markings are aligned the potentiometer should be at its mid point and ready for
installation. Note the markings will only line up at the mid point of the potentiometers range.
Constellation / Bavaria Drive Mamba Drive

Lewmar Integra Autopilot Drive Manual ref B10420 iss.1 | 5
C
B
A
5 mm
2.5 mm
0.312”
20 mm
25 mm
Chain size
The chain kit, 5/8” pitch is suitable for most applications.
Sprocket sizes
To stop the drive sprocket rotating on the drive sha%, the sha%has a 5 mm square key that fits into a keyway at
the centre of the sprocket. Use only Lewmar approved drive sprockets, its bore and keyway dimensions must fall
within the ranges specified in Fig.3.4 for it to lock correctly to the drive sha%.
Sprocket for steering sha!
!If the steering shaft does not already have a second, or assigned, autopilot sprocket then an additional
sprocket will be required, size 5/8” pitch, number of teeth to be determined depending upon steering system.
!Due to the large variation in sprocket sizes, Lewmar recommends obtaining a steering sprocket from the
steering manufacturer. The sprocket will have to be attached to the steering shaft, in vertical alignment to the
sprocket on the autopilot drive.
To determine the sprocket size required for the steering sha%, follow this procedure:
!Count the number of times the steering shaft turns when the rudder is moved from hard over to hard over.
!Use the table 3.4 (above) to determine the sprocket size required at the steering shaft by matching number of
turns hard over to hard over.
Note:
!The Integra drive unit is supplied with a chain kit suitable for a sprocket centre distance of 560- 600mm. If the
distance between your two sprockets is greater you will need to increase the chain length by inserting extra
links.
!The sprocket sizes shown in table 3.4 provide good steering performance for most boats. If you think your
boat may have unusual steering characteristics, contact Lewmar’s Technical Services or an authorized service
representative for advice.
!The additional sprocket must be keyed and screwed to the shaft with a grub screw and secured with thread-
locking compound.
A.Bore
B.Keyway
C. 1.8” PCD - 9 tooth, 5/8” pitch
3.4 Constellation chain and sprockets
NUMBER OF
TURNS LOCK TO
LOCK
STANDARD
DRIVING SPROKET
NUMBER OF TEETH
DRIVEN SPROCKET
NUMBER OF TEETH
1
9
15
1.2 13
1.5 11
Fig 3.4
Table 3.4

6
1. Disconnect steering chain.
Remove control panel & pedestal head from console. Disconnect
the steering chain by slackening the chain tensioner and removing
the chain completely from the steering unit.
2. Mount drive to base.
Position the mounting bracket over the studs on the base plate &
secure lightly with M8 nuts and washers.
Single wheel yachts post 2005
Ensure rudder is at Mid-Ship position
and locked in place.
3.6 Bavaria drive installation
GB
3.6-1
M8
3.6-2
1. Mounting the drive and connecting to the steering
system
!Complete a steering check
!Before you secure the drive to your boat, you must first check
the suitability of the mounting location.
!Attach the drive to a suitable mounting position with M8 bolts,
washers and lock nuts
!Use Loctite™ or similar on threads.
2. Sprocket alignment
!Attach chain.
!Both sprockets must be accurately aligned to run in the
same plane when viewed from the side. Check for correct
alignment by holding a ‘straight edge’ between the edges of
the sprockets.
!The Drive Unit can slide Fore and Aft +/- 6 mm to align the
chain sprockets.
Adjusting the chain tension
!Adjust the chain tension until it is just tight, so there is minimal
lost motion between the drive sprocket and the rudder stock.
!To adjust chain tension use the turnbuckle to take up the slack.
Ensure the locknuts are tightened afterwards to maintain this
position
Note: If the chain tension is not set correctly, the resulting lost
motion will impair steering performance.
Over tension will diminish drive performance and reduce feel
when manual helming.
3.5 Typical Constellation drive installation
3.5-1
3.5-2

Lewmar Integra Autopilot Drive Manual ref B10420 iss.1 | 7
3.7 Mamba drive installation
3. Drive chain installation
Assemble the chain by looping round the spare
sprocket on the helm and the 9T sprocket on the
Drive Unit.
4. Re-assemble steering chain.
Re-assemble the steering chain by looping round
the 11T sprocket on the helm & the 11T sprocket
on the base unit.
Note: For both chains ensure that the chain
tensioners sit central between the two sprockets
so there is an equal amount of chain between the
two sprockets.
Drive adjustment.
!While no chain tension is present ensure both locking bolts are loosened before adjusting drive position within
mounting slot.
!The drive unit can slide Fore and Aft +/- 6 mm to align the chain sprockets.
!Once aligned the fasteners can be secured. Use Loctite™ or similar on threads.
Chain tensioning
Both chain tensioners are tightened by turning the central body anticlockwise then secure with the locknuts on
each side of the tensioner body.
Proceed to section 3.9
2 X
M10
Parts Supplied
!Mamba drive
Further requirements:
!A Mamba system bevelhead or reduction gearbox with the relevant
drive interface plate.
(Return gearbox for conversion if necessary.)
!Suitable securing bolts with washers and lock-nuts
!Suitable cable and electrical connectors for the drive motor and
clutch (see Section 4.2)
!Before installation a smear of grease onto the drive output shaft, is
recommended.
Note: Make sure you have obtained these additional parts before
you start installation.
1. Mounting the drive and connecting the steering system
The autopilot drive connects to the steering system via the splined
output sha%of a bevel-head or gearbox. The autopilot pushes over this
sha%and is fixed in place with two M10 bolts.
2. Gearbox mounting
The gearbox onto which the drive is to be attached must be fitted with
the drive interface plate. If there is no interface plate already included
in the steering system, the gearbox can be returned to our factory for
adaptation at the owner’s cost.
Proceed to section 3.9
3.6-3 3.6-4
3.7-1
3.7-2

8
GB
3.9 Final checks all models
Complete a steering check
!When you have tensioned the chain correctly, turn the steering wheel from hard over to hard over to check
that the chain and sprockets move freely and are correctly aligned.
!Check that the rudder can travel lock to lock freely and that the chain tensioning turnbuckle does not interfere
with either the driving or driven sprocket.
!Is the drive securely mounted?
!Are the drive and steering sprockets in line when viewed side-on?
!Have you securely locked both sprockets to the shafts?
!Have you tensioned the chain correctly?
!Have you tightened the chain tensioner locking nuts?
!Are the motor and clutch cables correctly routed and securely connected to the course computer?
!Complete a hand-steering check: Do the chain and sprockets move freely and in correct alignment from hard-
over to hard-over?
!Complete an autopilot steering check. (Refer to the course computer handbook for details).
!Keep clear of moving steering systems at all times.
!Protect moving parts from access during normal use.
The Cobra drive unit mounts directly inside the Integra Pedestal.
Basic requirements:
!Suitable cable and electrical connectors for the drive motor and clutch (see Section 4.2)
!Apply a smear of grease onto the drive output shaft before installation.
Note: Make sure you have obtained these additional parts before you start installation.
Mounting the drive and connecting the steering system
1. Remove the 4 bolts on the Integra Pedestal drive cover.
Insert the interface plate into the pedestal and secure with three M6 x 15mm screws supplied. Tighten to
8-9Nm
2. Insert autopilot drive and secure with four M6x20 screws supplied, ensuring the gear pinion is correctly nestled
with the gear in the pedestal. Tighten to 8-9Nm
3.8 Cobra drive installation
4 X
M6 x 20mm
3.8-2
3 X
M6 x 15mm
3.8-1
#WARNING!

Lewmar Integra Autopilot Drive Manual ref B10420 iss.1 | 9
4.1 Generally
The wiring system should be of the fully insulated type, which avoids possible electrolytic corrosion problems.
We recommend the use of type III stranded, tinned copper wire with copper crimp terminals.
Most modern installations are negative return (negative ground) but polarity should be checked.
Overload protection, in the form of the circuit breaker (not supplied), must be built into the wiring circuit of both
the motor and clutch. Refer to table 5.4 for circuit breaker specification requirement.
!The circuit breaker should be positioned close to the battery in a dry, readily accessible place.
!The breaker must be manually reset should an overload occur that causes it to trip to the off position.
!Lewmar recommends to source and install cable that meets the requirements of the standards and
regulations relevant to the installation and codes of practice.
!The cable sizes are calculated in order to maintain a maximum overall voltage drop of 10% supply over whole
cable installation at max load current as per ISO10133.
!If you are not sure you understand these guidelines, seek professional help. Ensure that the installation
complies with USCG, ABYC, NMMA or other local regulations.
4- Electrical Wiring
CABLE SIZING FOR LENGTH OF CABLE RUN
up to 2 m up to 40 ft 4 m 41 - 66 ft
6 mm²10 AWG 10 mm²8 AWG
4.2 Electric cable selection
Lewmar recommends the installer source and install cable that meets the requirements of the standards and
regulations relevant to the installation and codes of practice.
The cable table gives recommended cable sizes based on total length of cable required, from the battery, follow-
ing the route of the cables.
DO NOT confuse cable length
with the length of the vessel
4.3 Electrical wiring
1. The Integra drive has electrical connections for:
!Drive motor: two single-core cables, twisted as a pair, sleeved with Black (+) and Blue (-) cores
!Clutch: a two core cable with Black (+) and White (-) cores.
2. Follow these steps to connect the drive to the course computer:
!Connect cables to the Integra drive cables using appropriate electrical connectors or junction boxes at the
correct power rating.
!Route the cables back to the course computer, taking into account the EMC installation guidelines
!Fit circuit breakers as specifi ed on page 8 between the Course Computer and the Drive Unit.
3. Connect the cables to the course computer
!(See manufacturer’s manual for full information)
!Clutch terminals: black core to +VE, white core to -VE.
!Motor terminals: at this stage you can connect either motor cable to either terminal.
#WARNING! All electrical work must be carried out with
the power OFF. Isolate using circuit breaker/isolator. NOTE! If Raymarine SPX10
go directly to 4.4

10
89300148 - Relay and loom assembly for connection to Raymarine SPX10 course computer:
Install in suitable dry location close to the course computer and power supply.
Connect as per above figure extending wires as necessary matching size and grade where appropriate.
A.Connect to course computer clutch control output. (1) BLUE -VE (2) RED +VE.
B.Connect to Lewmar autopilot drive clutch. (3) BLACK -VE (4) BROWN +VE.
C. Connect to battery power 12VDC 5A. (5) BLACK -VE (6) ORANGE +VE.
D.In-line fuse ATO Blade 5A (tan)
NOTE: Refere to installation manuals of all equipment involved and perform work to meet all relevant standards.
4.4 Electrical wiring for Raymarine SPX10
5- Servicing
On a regular basis
!Check all connections and mountings are secure.
!Check chain and sprockets are correctly aligned and
tensioned.
!Lightly grease chain and sprockets.
!Check cables for signs of wear or damage.
GB
#WARNING! Isolate using circuit
breaker/isolator when not in use.
#WARNING! Electric motors become hot
during and for some time after use.
5.1 Integra Bavaria & Constellation dimensions
5.2 Integra Mamba dimensions
5
6
1
2
3
4
D
A
B
C
58.0
225
47.0
6260
184.0
123.5
6356.5
149.0
175.0
148.5
85.0
15
275
80.0
75.0

Lewmar Integra Autopilot Drive Manual ref B10420 iss.1 | 11
5.3 Spares
89300211: Gear Kit
89300212: Constellation sprocket Kit
Motor Kit:12V - 89300210
24V - 89300214
Shimmed clutch kit:12V - 89300213
24V - 89300215

12
5.4 Bavaria & Constellation drives specifications
PART NO DESCRIPTION
SPROCKET
SIZE POWER VOLTAGE
MAXIMUM
OUTPUT
LOAD
SPEED
AVERAGE
CURRENT
CONSUMP
TION
MOTOR
CIRCUIT
BREAKER
CLUTCH
CIRCUIT
BREAKER WEIGHT
MAX BOAT
SIZE
kW HP V ft lbs Nm rpm A A A kg lb m ft
89300136 Integra base drive unit 12V (Bavaria) 9T/5-8P 0.186 1/4 12 169 125 10 6 16 3 10 16.7 60
89300176 Integra base drive unit with rudder
feedback system & bracket 12V
9T/5-8P 0.186 1/4 12 169 125 10 6 16 3 10 16.7 60
89300145 Integra base drive unit 24V 9T/5-8P 0.186 1/4 24 169 125 10 3 10 2 10 16.7 60
89300164 Integra base drive unit with rudder
feedback system & bracket 24V
9T/5-8P 0.186 1/4 24 169 125 10 3 10 2 8.5 16.7 60
89300137 Integra Mamba drive unit 12V N/A 0.186 1/4 12 169 125 10 6 16 3 8.5 16.7 60
89300177 Integra Mamba drive unit with rudder
feedback system 12V
N/A 0.186 1/4 12 169 125 10 6 16 3 8.5 16.7 60
89300204 Integra Mamba drive unit with rudder
feedback system 24V
N/A 0.186 1/4 24 169 125 10 3 10 2 8.5 16.7 60
89300207 Integra Mamba drive unit 24V N/A 0.186 1/4 24 169 125 10 3 10 2 8.5 16.7 60
89300203 Integra drive for integra pedestal 12V N/A 0.186 1/4 12 169 125 10 6 16 3 8.5 13.7 45
89300216 Integra drive for integra pedestal 24V N/A 0.186 1/4 24 169 125 10 3 10 2 8.5 13.7 45
89300217 Integra drive for integra pedestal with
rudder feedback system 12V
N/A 0.186 1/4 12 169 125 10 6 16 3 8.5 13.7 45
89300218 Integra drive for integra pedestal with
rudder feedback system 24V
N/A 0.186 1/4 24 169 125 10 3 10 2 8.5 13.7 45
89300170 Integra drive unit and bracket (Dufour) 9T/5-8P 0.186 1/4 12 169 125 10 6 16 3 10 16.7 60
GB

Lewmar Integra Autopilot Drive Manual ref B10420 iss.1 | 13
6- Warranty
Lewmar warrants that in normal private pleasure boat usage
and with proper maintenance its products will conform with
their specification for a period of three years from the date of
purchase by the end user, subject to the conditions, limitations
and exceptions listed below. Any product, which proves to be
defective in normal usage during that three-year period, will be
repaired or, at Lewmar’s option, replaced by Lewmar.
A CONDITIONS AND LIMITATIONS
i Lewmar’s liability shall be limited to the repair or replace-
ment of any parts of the product which are defective in
materials or workmanship.
ii Responsibility for the selection of products appropriate for
the use intended by the Buyer shall rest solely with the
Buyer and Lewmar accepts no responsibility for any such
selection.
iii Lewmar shall not be liable in any way for Product failure, or
any resulting loss or damage that arises from:
a. use of a product in an application for which it was not
designed or intended;
b. corrosion, ultra violet degradation or wear and tear;
c. a failure to service or maintain the product in accordance
with Lewmar’s recommendations;
d. faulty or deficient installation of the product (unless
conducted by Lewmar);
e. any modification or alteration of the product;
f. conditions that exceed the product’s performance specifi-
cations or safe working loads.
g. Abuse
iv Product subject to a warranty claim must be returned to the
Lewmar outlet that supplied the product for examination
unless otherwise approved by Lewmar in writing.
v This warranty does not cover any incidental costs incurred
for the investigation, removal, carriage, transport or instal-
lation of product.
vi Service by anyone other than authorized Lewmar repre-
sentatives shall void this warranty unless it accords with
Lewmar guidelines and standards of workmanship.
vii Lewmar’s products are intended for use only in the marine
environment. Buyers intending to use them for any other
purpose should seek independent professional advice as
to their suitability. Lewmar accepts no liability arising from
such other use.
B EXCEPTIONS
Cover under this Warranty is limited to a period of one year
from the date of purchase by the end user in the case of any
of the following products or parts of products:
• Electric motors and associated electrical equipment
• Electronic controls
• Hydraulic pumps, valves and actuators
• Hatch & Portlight weather seals
• Products used in “Grand Prix” racing applications
• Products used in commercial or charter applications
• Anchor rodes
C LIABILITY
i Lewmar’s liability under this warranty shall be to the
exclusion of all other warranties or liabilities (to the extent
permitted by law). In particular (but without limitation):
a. Lewmar shall not be liable for:
• Any loss of anticipated turnover or profit or indirect, conse-
quential or economic loss;
• Damages, costs or expenses payable to any third party;
• Any damage to yachts or equipment;
• Death or personal Injury (unless caused by Lewmar’s negli-
gence).
Some states and countries do not allow the exclusion or
limitation of incidental or consequential damages, so the
above limitation or exclusion may not apply to you
b. Lewmar grants no other warranties regarding the fitness for
purpose, use, nature or satisfactory quality of the products.
ii Where applicable law does not permit a statutory or implied
warranty to be excluded, then such warranty, if permitted
by that state or country’s law, shall be limited to a period of
one year from the date of purchase by the end user. Some
states and countries do not allow limitations on how long
an implied warranty lasts, so this limitation may not apply
to you.
D PROCEDURE
Notice of a claim for service under this warranty shall be
made promptly and in writing by the end user to the Lew-
mar outlet that supplied the product or to Lewmar Limited
at Southmoor Lane, Havant, Hampshire PO9 1JJ, England.
E SEVERANCE CLAUSE
If any clause of this warranty is held by any court or other
competent authority to be invalid or unenforceable in whole
or in part, the validity of the remaining clauses of this war-
ranty and the remainder of the clause in question shall not
be affected.
F OTHER RIGHTS
This warranty gives you specific legal rights, and you may
also have other legal rights, which vary from state to state
and country to country.
In the case of European States a Consumer customer (as
defined nationally) has legal rights under the applicable
national law governing the sale of Consumer Goods; this
Warranty does not affect those rights.
G LAW
This warranty shall be governed by and read in accordance
with the laws of England or the state or country in which
the first end user is domiciled at the time of purchase of the
product.
H DISPUTES
Any dispute arising under this warranty may, at the option
of the end-user, be referred to alternative dispute resolution
under the rules of the British Marine Federation or to the
Courts of the State whose law shall govern the warranty or
to the Courts of England and Wales.
The British Marine Federation may be contacted at Marine
House, Thorpe Lea Road, Egham, England, TW20 8BF
Limited Warranty and Key Terms of Supply by Lewmar
GB

© Copyright 2014 Lewmar Ltd. All rights reserved.
www.lewmar.com
Ref B10420
UK & International Distribution
Lewmar / Navtec
Southmoor Lane
Havant
Hampshire
PO9 1JJ
England
Tel: +44 (0)23 9247 1841
Fax: +44 (0)23 9248 5720
Email: info@lewmar.com
USA
Lewmar / Navtec
351 New Whitfield Street
Guilford, CT
06437
USA
Tel: +1 203 458 6200
Fax: +1 203 453 5669
Email: [email protected]
This manual suits for next models
3
Table of contents
Other Lewmar Marine Equipment manuals

Lewmar
Lewmar Pro Series Quick start guide

Lewmar
Lewmar 140 User manual

Lewmar
Lewmar V1 Quick start guide

Lewmar
Lewmar VX Series User manual

Lewmar
Lewmar 300 SVTAH User manual

Lewmar
Lewmar 3500 User manual

Lewmar
Lewmar AutoAnchor 560 User manual

Lewmar
Lewmar V1/Sport User manual

Lewmar
Lewmar AutoAnchor 150 User manual

Lewmar
Lewmar V8 Quick start guide