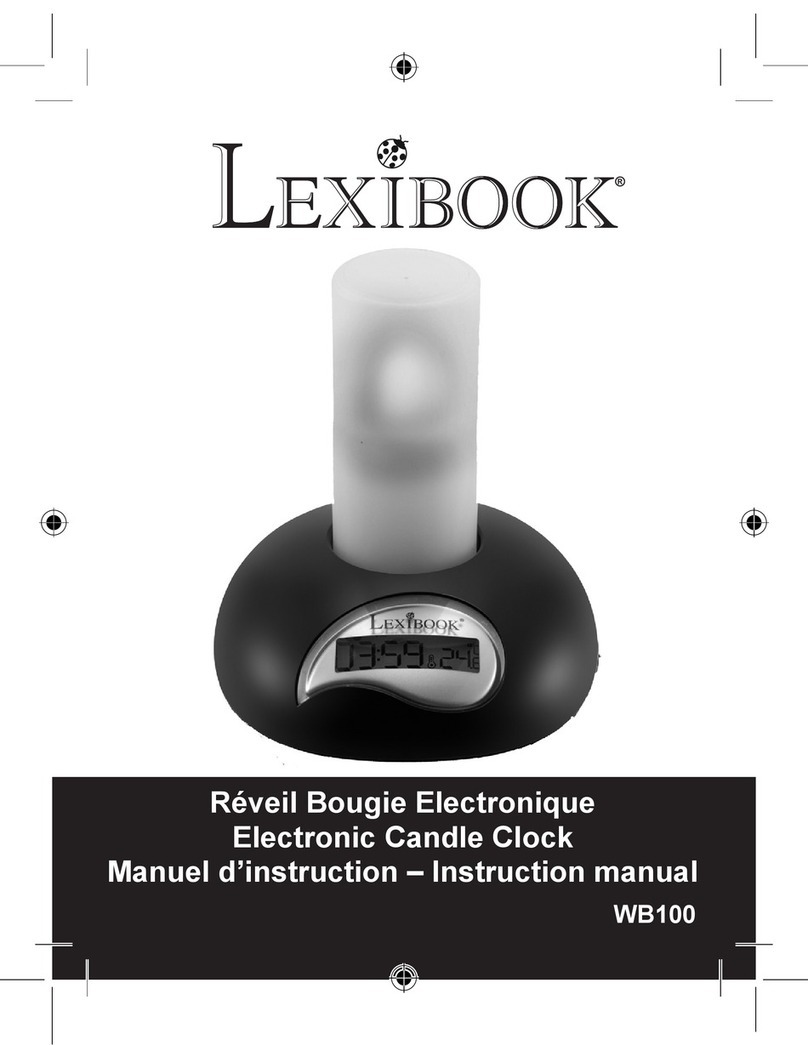
LEXIBOOK MP3 THERMOCLOCK User manual

MP3 THERMOCLOCK®
RLR920
Manuel d’instruction – Instruction manual
RLR920IM0328.indb 1 18/8/08 16:30:18

2
RLR920IM0328.indb 2 18/8/08 16:30:18

3
OPEN
A
B
C
1
2
3
4
5
6
7
RLR920IM0328.indb 3 18/8/08 16:30:18

4
FRANÇAIS
Introduction
Félicitations ! Nous sommes heureux de vous compter aujourd’hui parmi les très nombreux
utilisateurs des produits LEXIBOOK®. Vous venez d’acheter l’horloge de voyage MP3 RLR920 de
LEXIBOOK®. Nous vous invitons à lire attentivement ce mode d’emploi pour proter pleinement de
toutes les fonctions offertes par votre appareil.
Déballage de l’appareil
Lors du déballage, assurez-vous que les pièces suivantes soient incluses :
Une horloge de voyage MP3 Thermoclock® RLR920
Une coque de protection/support de table
Un CD-ROM
Un câble USB
Un manuel d’instruction
Conservez les matériaux d’emballage en lieu sûr, vous pourriez en avoir besoin pour
transporter l’unité. Conservez le ticket de caisse, qui sert également de garantie.
Bien démarrer
1. Enlevez la pellicule statique de l’écran LCD en tirant sur la languette.
2. Déverrouillez le compartiment des piles situé à l’arrière de l’unité en
poussant le bouton vers le haut, dans le sens de la èche (voir
gure C, p.3).
3. Retirez le couvercle du compartiment et insérez 2 piles de type
LR03/AAA de 1,5V (non fournies) en respectant la polarité
(signes +/-) indiquée au fond du compartiment et selon le schéma
ci-contre.
4. Replacez le couvercle des piles et poussez le bouton vers le bas pour verrouiller le compartiment
(voir gure C, p.3). L’heure, la date et la température s’afcheront sur l’écran LCD.
Note: Le compartiment des piles doit être fermé à l’aide du bouton de verrouillage pour que l’unité
puisse fonctionner.
Ne pas recharger les piles non rechargeables. Retirer les accumulateurs du produit avant
de les recharger. Ne charger les accumulateurs que sous la surveillance d’un adulte. Ne pas
mélanger différents types de piles ou accumulateurs, ou des piles et accumulateurs neufs et
usagés. Les piles et accumulateurs doivent être mis en place en respectant la polarité. Les
piles et accumulateurs usagés doivent être enlevés du produit. Les bornes d’une pile ou d’un
accumulateur ne doivent pas être mises en court-circuit. Ne pas jeter les piles au feu. Retirer
les piles en cas de non utilisation prolongée.
AVERTISSEMENT : Si le produit présente un mauvais fonctionnement ou subit des décharges
électrostatiques, localisez le trou du RESET au dos de l’appareil. Insérez une pointe ne et appuyez
doucement puis relâchez. Si le produit ne fonctionne toujours pas correctement, enlevez puis
remettez les piles.
Description de l’appareil
Référez-vous aux images au dos de la page de couverture.
Figure A
1. Touche MODE/SET
2. Touche BACKLIGHT/SNOOZE
(Rétro-éclairage / répétition de l’alarme)
3. Touche de sélection
4. Touche de sélection
Figure B
5. Prise USB
Figure C
6. Bouton RESET
7. Bouton de verrouillage/déverrouillage
du compartiment à piles
RLR920IM0328.indb 4 18/8/08 16:30:19

5
FRANÇAIS
Installer le logiciel ThermoClock MP3 Voyage
Suivez les instructions suivantes pour installer le logiciel ThermoClock MP3 Voyage. Ce logiciel
vous permet de télécharger un chier audio au format MP3 ou WAV pour l’utiliser comme sonnerie
d’alarme ou vous aider à vous endormir (mode « Sommeil », voir p.7).
1. Insérez le CD du logiciel (inclus) dans votre lecteur de CD-ROM.
2. Cliquez sur « Démarrer », sélectionnez « Poste de travail » puis double-cliquez sur votre lecteur CD-ROM.
3. Double-cliquez sur le chier « Setup.exe »pour lancer l’installation.
4. Sélectionnez la langue d’installation puis cliquez sur « OK ».
5. Suivez les instructions à l’écran pour installer le logiciel ThermoClock MP3 Voyage.
6. A la n de l’installation, si l’horloge est connectée à l’ordinateur, le programme ThermoClock se
lancera automatiquement.
Note : Pour lancer directement l’installation, allez dans la barre des tâches, cliquez sur
« Démarrer », « Exécuter », écrivez « D:\setup.exe » dans la boîte de dialogue d’exécution (où D:\
est votre lecteur CD-ROM) et appuyez sur Entrée.
Télécharger des mélodies MP3 ou WAV
1. Connectez l’horloge de voyage MP3 RLR920 au port USB de votre ordinateur à l’aide du câble
USB fourni. L’heure reste afchée, mais la date et la température disparaissent et « CON »
(conversion) s’afche sur l’écran de l’horloge.
Note : Les touches de l’horloge sont désactivées quand l’appareil est connecté à l’ordinateur.
2. L’interface de téléchargement apparaît dès que l’unité est connectée au PC. Dans le cas
contraire, double-cliquez sur l’icône « ThermoClock » sur le bureau pour ouvrir le logiciel.
3. Cliquez sur le bouton « Parcourir » pour parcourir vos dossiers et sélectionner un chier audio
MP3 ou WAV. Vous pouvez aussi choisir une des mélodies ou un des effets sonores enregistrés
sur le CD d’installation.
4. Lorsque vous avez sélectionné le chier désiré, cliquez sur le bouton « Télécharger » pour lancer
la conversion du chier et le téléchargement. « DWL » clignote sur l’écran LCD de l’horloge
pendant le transfert du chier.
5. Une fois le téléchargement terminé, le logiciel afche le message « Terminé !» et « END »
apparaît sur l’écran LCD de l’horloge.
Note :
• Pour annuler la conversion et le téléchargement d’un chier, cliquez à tout moment sur le bouton
« Annuler ».
• L’horloge doit être connectée à l’ordinateur pour que vous puissiez utiliser le logiciel Thermo
clock MP3 Voyage.
ATTENTION :
• Vous ne pouvez télécharger qu’un seul chier audio à la fois dans la mémoire ash de l’appareil.
Quand vous téléchargez une nouvelle mélodie, elle remplace automatiquement l’ancien chier.
• L’horloge MP3 peut enregistrer jusqu’à environ 30 secondes de son au format MP3 ou WAV
(si la durée totale du chier téléchargé est plus longue, l’unité ne sauvegardera que les 30
premières secondes).
• Les chiers MP3 mono ou d’une qualité inférieure à 80 kbps (kilobit par seconde) peuvent
provoquer un mauvais fonctionnement du logiciel ThermoClock MP3 Voyage.
Réglage de l’heure et de la date
1. En mode d’afchage de l’heure, appuyez et maintenez la touche MODE/SET jusqu’à ce que les
chiffres des heures clignotent.
2. Pour régler l’heure, utilisez les touches et puis appuyez sur la touche MODE/SET pour
conrmer votre réglage et accéder au réglage des minutes.
3. Pour régler les minutes, utilisez les touches et puis appuyez sur la touche MODE/SET pour
conrmer votre réglage et accéder au réglage de l’année.
RLR920IM0328.indb 5 18/8/08 16:30:19

6
FRANÇAIS
4. Pour régler l’année, utilisez les touches et puis appuyez sur la touche MODE/SET pour
conrmer votre réglage et accéder au réglage du mois.
5. Pour régler le mois, utilisez les touches et puis appuyez sur la touche MODE/SET pour
conrmer votre réglage et accéder au réglage du jour.
6. Pour régler le jour, utilisez les touches et puis appuyez sur la touche MODE/SET pour
conrmer votre réglage et accéder au réglage du mode d’afchage 12H ou 24H.
7. Pour alterner entre le mode 12 H et le mode 24 H, utilisez les touches et puis appuyez sur
la touche MODE/SET pour conrmer votre réglage et accéder au réglage de la langue d’afchage.
8. Pour sélectionner une langue d’afchage, utilisez les touches et . Vous avez le choix entre
l’Anglais (ENG), le Français (FRA), l’Italien (ITA), l’Espagnol (ESP), l’Allemand (DEU) et le
Portugais (POR). Appuyez sur la touche MODE/SET pour conrmer votre réglage et revenir à
l’afchage de l’heure.
Note : Durant les réglages, si aucune touche n’est activée pendant environ 1 minute, l’unité
retournera au mode d’afchage de l’heure.
Réglage de l’alarme
Régler l’heure d’alarme
1. En mode d’afchage de l’heure, appuyez une fois sur la touche MODE/SET pour accéder au
mode d’alarme (« ALM » est afché à l’écran).
2. Appuyez sur les touches et pour activer/désactiver l’alarme. L’icône d’alarme s’afche
lorsque l’alarme est activée.
3. Appuyez et maintenez la touche MODE/SET durant environ 2 secondes pour régler l’alarme. Les
chiffres des heures clignotent.
4. Utilisez les touches et pour régler l’heure d’alarme, puis appuyez sur la touche MODE/SET
pour conrmer votre réglage et accéder au réglage des minutes.
5. Utilisez les touches et pour régler les minutes, puis appuyez sur la touche MODE/SET pour
conrmer votre réglage et accéder au réglage de la sonnerie d’alarme.
6. Utilisez les touches et pour sélectionner la sonnerie d’alarme. Vous pouvez choisir l’une des
5 sonneries préprogrammées ou une mélodie au format MP3 ou WAV téléchargée depuis votre
PC (pour plus d’informations concernant le téléchargement des sonneries, consultez la section
« Télécharger des mélodies MP3 ou WAV » p.5). Appuyez sur la touche MODE/SET pour
conrmer votre réglage et retourner à l’afchage de l’heure d’alarme.
Note :
• Lorsque l’alarme est activée, l’icône reste afchée à l’écran dans tous les modes.
• L’alarme sonnera à l’heure choisie tous les jours sauf si elle est désactivée.
• Durant le réglage de l’alarme, si aucune touche n’est activée pendant 1 minute, l’horloge
retournera au mode d’afchage de l’heure.
Fonction répétition d’alarme
1. Lorsque l’alarme sonne, l’icône clignote. Appuyez sur la touche BACKLIGHT/SNOOZE pour
l’arrêter temporairement et activer la fonction « Répétition d’alarme ».
2. Lorsque la fonction de répétition d’alarme est activée, l’icône ne clignote plus mais reste à
l’écran et l’icône de répétition clignote.
3. L’alarme sonnera toutes les 7 minutes jusqu’à ce que vous l’arrêtiez complètement.
Arrêter l’alarme
Lorsque l’alarme sonne, appuyez sur n’importe quelle touche autre que la touche BACKLIGHT/
SNOOZE pour l’arrêter complètement. L’alarme sonnera à nouveau le lendemain à l’heure
programmée. Quand la fonction SNOOZE est activée, appuyez et maintenez n’importe quelle autre
touche que la touche BACKLIGHT/SNOOZE pour l’arrêter complètement. L’alarme sonnera à
nouveau le lendemain à l’heure programmée.
RLR920IM0328.indb 6 18/8/08 16:30:20

7
FRANÇAIS
Mode « Sommeil »
L’horloge de voyage MP3 RLR920 propose un mode « Sommeil » pour vous aider à vous endormir
paisiblement. Lorsque ce mode est activé, la mélodie ou le son téléchargé dans l’appareil sera joué
en boucle pendant une durée sélectionnée (de 1minute à 60 minutes). Pour activer le mode
« Sommeil » :
1. En mode d’afchage de l’heure, appuyez deux fois sur la touche MODE/SET pour accéder au
mode « Sommeil » (« SLE » s’afche à l’écran).
2. Pour sélectionner une durée de lecture pour le son ou la mélodie, appuyez et maintenez la
touche MODE/SET jusqu’à ce que les chiffres commencent à clignoter.
3. Utilisez les touches et pour régler la durée (entre 1 minute et 60 minutes), puis appuyez sur
la touche MODE/SET pour conrmer votre choix.
4. Appuyez sur la touche pour activer le mode « Sommeil » et lancer la lecture. Le son s’arrêtera
automatiquement à la n du délai programmé.
5. Pour désactiver la fonction et interrompre la lecture :
• en mode « Sommeil », appuyez sur la touche ou maintenez enfoncée la touche BACKLIGHT/
SNOOZE pendant au moins deux secondes.
• dans tous les autres modes, maintenez enfoncée la touche BACKLIGHT/SNOOZE pendant au
moins deux secondes.
Note : Si aucune touche n’est activée pendant 1 minute, l’horloge retournera au mode d’afchage
de l’heure.
Réglage du fuseau horaire
1. En mode d’afchage de l’heure, appuyez trois fois sur la touche MODE/SET pour accéder au
mode de réglage du fuseau horaire (l’icône est afchée sur l’écran).
2. Appuyez sur la touche pour faire déler l’heure dans 37 villes du monde.
3. Appuyez sur la touche pour afcher l’heure d’été (le symbole apparaît à l’écran). Appuyez
encore une fois sur la même touche pour revenir à l’heure d’hiver (le symbole disparaît).
4. Une fois la ville désirée sélectionnée, appuyez et maintenez la touche MODE/SET pendant au
moins 2 secondes pour conrmer votre choix et revenir au mode d’afchage de l’heure. L’heure
afchée sera l’heure de la ville sélectionnée.
Note :
• En mode d’afchage de l’heure, appuyez une fois sur la touche pour afcher le nom de la ville
sélectionnée dans le mode de réglage du fuseau horaire. Appuyez une nouvelle fois sur pour
revenir à l’afchage du jour.
• En mode de réglage du fuseau horaire, l’icône clignote lorsque la ville afchée est la même que
celle sélectionnée pour le mode d’afchage de l’heure.
• Si vous activez l’heure d’été lors du réglage du fuseau horaire, le symbole sera également
afché en mode d’afchage de l’heure.
NOM DE LA VILLE ABRÉVIATION HEURE DE DIFFÉRENCE
1 Londres LON 0
2 Paris PAR + 1
3 Berlin BER + 1
4 Milan MIL + 1
5 Rome ROM + 1
6 Le Caire CAI + 2
7 Istanbul IST + 2
8 Jérusalem JRS + 2
9 Moscou MOW + 3
10 Doubaï DXB + 4
11 Karachi KHI + 5
12 Dacca DAC + 6
13 Bangkok BKK + 7
14 Hong Kong HKG + 8
15 Singapour SIN + 8
16 Tokyo TYO + 9
17 Séoul SEL + 9
18 Sydney SYD + 10
19 Nouméa NOU + 11
20 Wellington WLG + 12
21 Majuro MAJ - 12
22 Apia APW - 11
23 Honolulu HNL - 10
24 Anchorage ANC - 9
25 San Francisco SFO - 8
26 Los Angeles LAX - 8
27 Vancouver VAR - 8
28 Denver DEN - 7
29 Chicago CHI - 6
30 Mexico MEX - 6
31 New York NYC - 5
32 Miami MIA - 5
33 Saint Domingue SDO - 4
34 Rio de Janeiro RIO - 3
35 Buenos Aires BAI - 3
36 Fernando de Noronha FEN - 2
37 Tasiilaq AGM - 1
RLR920IM0328.indb 7 18/8/08 16:30:21

8
FRANÇAIS
NOM DE LA VILLE ABRÉVIATION HEURE DE DIFFÉRENCE
1 Londres LON 0
2 Paris PAR + 1
3 Berlin BER + 1
4 Milan MIL + 1
5 Rome ROM + 1
6 Le Caire CAI + 2
7 Istanbul IST + 2
8 Jérusalem JRS + 2
9 Moscou MOW + 3
10 Doubaï DXB + 4
11 Karachi KHI + 5
12 Dacca DAC + 6
13 Bangkok BKK + 7
14 Hong Kong HKG + 8
15 Singapour SIN + 8
16 Tokyo TYO + 9
17 Séoul SEL + 9
18 Sydney SYD + 10
19 Nouméa NOU + 11
20 Wellington WLG + 12
21 Majuro MAJ - 12
22 Apia APW - 11
23 Honolulu HNL - 10
24 Anchorage ANC - 9
25 San Francisco SFO - 8
26 Los Angeles LAX - 8
27 Vancouver VAR - 8
28 Denver DEN - 7
29 Chicago CHI - 6
30 Mexico MEX - 6
31 New York NYC - 5
32 Miami MIA - 5
33 Saint Domingue SDO - 4
34 Rio de Janeiro RIO - 3
35 Buenos Aires BAI - 3
36 Fernando de Noronha FEN - 2
37 Tasiilaq AGM - 1
Rétro éclairage
Appuyez une fois sur la touche BACKLIGHT/SNOOZE pour activer le rétro éclairage pendant
5 secondes.
Température
En mode d’afchage de l’heure, utilisez la touche pour faire permuter l’afchage de la
température entre Celsius (°C) et Fahrenheit (°F).
Support de table
Vous pouvez utilisez la coque de protection fournie avec votre RLR920 comme support de table.
Installez simplement l’horloge dans l’encoche prévue à cet effet .
RLR920IM0328.indb 8 18/8/08 16:30:22

9
FRANÇAIS
Nettoyage et entretien
Ne nettoyez aucune partie de votre horloge de voyage MP3 RLR920 avec du benzène, du diluant
ou d’autres solvants chimiques. Cela peut entraîner un dommage permanent qui n’est pas couvert
par la garantie. Si nécessaire, nettoyer avec un chiffon humide. Evitez de soumettre votre horloge
RLR920 aux températures extrêmes, aux chocs sévères, et évitez de la mouiller. Quand l’intensité
de l’écran LCD diminue, remplacez les piles. Evitez toute utilisation en présence de champs magné-
tiques comme dans les aéroports. Tout a été fait pour assurer une grande abilité de votre RLR920.
Toutefois, en cas de problème, ne tentez pas de la réparer vous-même, consultez votre fournisseur
ou la ligne d’aide LEXIBOOK®.
Garantie
Ce produit est couvert par notre garantie de deux ans. Pour toute mise en œuvre de la garantie ou
de service après vente, vous devez vous adresser à votre revendeur muni de votre preuve d’achat.
Notre garantie couvre les vices de matériel ou de montage imputables au constructeur à l’exclusion
de toute détérioration provenant du non respect de la notice d’utilisation ou de toute intervention
intempestive sur l’article (telle que démontage, exposition à la chaleur ou à l’humidité…).
Note : la garantie ne couvre pas le bris de l’écran LCD.
NOTE : Veuillez garder ce mode d’emploi, il contient d’importantes informations. Dans un souci
constant d’amélioration, nous pouvons être amenés à modier les couleurs et les détails du produit
présenté sur l’emballage.
Référence: RLR920
©2008 LEXIBOOK®
Conçu en Europe – Fabriqué en Chine
LEXIBOOK S.A
2, avenue de Scandinavie
91953 Courtaboeuf Cedex France
Assistance technique : 0892 23 27 26 (0,34 € TTC/Min), www.lexibook.com
Informations sur la protection de l’environnement
Tout appareil électrique usé est une matière recyclable et ne devrait pas faire partie
des ordures ménagères! Nous vous demandons de bien vouloir nous soutenir
en contribuant activement au ménagement des ressources et à la protection de
l’environnement en déposant cet appareil dans des sites de collecte (si existants).
RLR920IM0328.indb 9 18/8/08 16:30:23

10
ENGLISH
Introduction
Congratulations for the purchase of your MP3 Thermoclock® RLR920 from LEXIBOOK®! We invite
you to read this manual attentively as it will help and guide you with the usage of your new product.
Unpacking the device
When unpacking, ensure that the following elements are included:
1 x MP3 Thermoclock® RLR920
1 x protective cover/stand
1 x CD-ROM
1 x USB cable
1 x instruction manual
Please keep all packaging in a safe place for future reference. Please keep your sales (till)
receipt – this is your guarantee.
Getting started
1. Remove the clear lm label from the LCD screen by pulling the tab.
2. Push the lock button up, in the direction of the arrow, to unlock the
battery compartment located on the back side of the unit
(see image C, p.3).
3. Remove the battery door and install 2 x 1,5V LR03/AAA type
batteries (not included) according to the polarity (+/- signs) indicated
at the bottom of the battery compartment, and as per the diagram shown opposite.
4. Replace the battery door and push the lock button down to lock the battery compartment
(see image C, p.3). The time, date, and temperature will be displayed on the LCD screen.
Note: The battery door must be locked with the lock button in order for the unit to operate.
Non-rechargeable batteries are not to be recharged. Remove the storage batteries before
recharging. Recharge storage batteries under adult supervision. Do not mix different types of
battery and storage battery, or new and old batteries or storage batteries. Insert batteries and
storage batteries according to the polarity. Remove used storage batteries from product. Do
not short-circuit the battery or storage battery terminals. Keep batteries away from re. If the
product remains unused for an extended period, remove batteries.
WARNING: If the unit malfunctions or receives an electrostatic shock, locate the small RESET hole
on the back of the product. Insert a small, thin, blunt instrument, such as a paperclip, into the hole,
press gently and then release. If this proves to be ineffective, remove the batteries and insert them
again.
Product description
Please refer to the images at the back of the cover page.
Image A
1. MODE/SET key
2. BACKLIGHT/SNOOZE key
3. Up arrow key
3. Down arrow key
Image B
5. USB port
Image C
6. RESET key
7. Battery compartment lock/unlock button
RLR920IM0328.indb 10 18/8/08 16:30:23

11
ENGLISH
Installing the ThermoClock MP3 Voyage software
Follow these instructions to install the Thermoclock MP3 Voyage software on your PC system. This
software allows you to download an audio le in MP3 and WAV format. You can use the le as an
alarm ringtone or to help you go to sleep (refer to the “Sleep” mode section, p.12).
1. Insert the CD Software (included) in your CD-ROM drive.
2. Click “Start”, then “My Computer” and double-click your CD-ROM drive.
3. Double-click the “Setup.exe” le to launch the installation.
4. Select the installation program language and click the “Ok” key.
5. Follow the instructions to install the ThermoClock MP3 Voyage software.
6. If your ThermoClock is connected to your PC system, the program will launch automatically once
the installation process is completed.
Note: To launch the installation directly, click “Start”, “Run”, type in “D:\setup.exe” in the Run dialog
text box (where D:\ is your CD-ROM drive) and press Enter.
Downloading MP3 and WAV melodies
1. Connect the MP3 Thermoclock® RLR920 to your computer’s USB port via the USB cable
provided. The date and weather information disappeared; the time and “CON” (conversion) are
displayed on the LCD screen.
Note: The unit’s keys are disabled when the clock is connected to the computer.
2. The download screen will be displayed automatically when the unit is connected to the computer.
If the download screen does not appear, double-click on the “ThermoClock” icon on the desktop to
launch the software.
3. Click on the “Browse” key to browse through your folders. Select an audio le in MP3 or WAV
format. You can also select one of the melodies or sound effects that are included on the
installation CD.
4. When you have selected the desired sound or melody, click on the “Download” key to start the le
conversion and the download process. During the transfer, “DWL” blinks on the LCD screen of the
clock.
5. When the downloading process ends, the software displays the message “Finished!” and “END”
appears on the clock’s LCD screen.
Note:
• To cancel the le conversion and the download, you can click at any moment on the “Cancel” key.
• To use the ThermoClock MP3 Voyage software, the clock must be connected to the computer.
WARNING:
• Only one audio le can be saved in the unit’s ash memory. When you download a new melody,
it will automatically replace the previous le.
• The MP3 clock can store up to around 30 seconds of sound in MP3 or WAV format (if the length of
the downloaded le exceeds the maximum length, the unit will only download and save the rst 30
seconds).
• MP3 les in mono or below 80 kbps (kilobit per second) might cause the Thermoclock MP3 Voyage
software to malfunction.
Setting the time and date
1. In time display mode, press and hold the MODE/SET key until the hour’s digits start ashing.
2. To adjust the hour, press the and keys and then press MODE/SET to conrm. The minute’s
digits ash.
3. To adjust the minutes, press the and keys and then press MODE/SET to conrm. The year’s
digits ash.
4. To adjust the year, press the and keys and then press MODE/SET to conrm. The month’s
digits ash.
5. To adjust the month, press the and keys and then press MODE/SET to conrm. The date’s
digits ash.
RLR920IM0328.indb 11 18/8/08 16:30:23

12
ENGLISH
6. To adjust the date, press the and keys and then press MODE/SET to conrm and enter the
12 or 24 hour mode selection.
7. To toggle between the 12 or 24 hour mode, press the and keys and then press MODE/SET
to conrm and select the language.
8. To select the language, press the and keys. You can choose between English (ENG), French
(FRA), Italian (ITA), Spanish (ESP), German (DEU) and Portuguese (POR). Press the MODE/SET
key to conrm and go back to the time display.
Note: During the setting process, if there is no input within 1 minute, the display will automatically go
back to the normal time display mode.
Alarm mode
Setting the alarm time
1. In normal time display mode, press the MODE/SET key once to enter the alarm mode (“ALM” is
displayed on screen).
2. Press the and keys to turn the alarm on/off. A clock icon is displayed when the alarm is
turned on.
3. Press and hold MODE/SET for about 2 seconds to set the alarm. The hour’s digits are ashing.
4. To adjust the hour, press the and keys and then press MODE/SET to conrm and set the
minutes.
5. Press the and keys to adjust the minutes. Press the MODE/SET key to conrm the alarm
time and select the alarm ring tone.
6. Use the and keys to choose a ring tone. You can select one of the 5 pre-loaded ringtones or
a MP3 or WAV melody downloaded from your computer (for more information regarding the
download of ringtones, consult the “Downloading MP3 or WAV melodies” section p.11). Press
MODE/SET to conrm your settings and go back to the alarm time display mode.
Note:
• When the alarm is clock on, the icon is displayed in all modes.
• The alarm will ring at the time set every day unless it is turned off.
• During the setting process, if there is no input within 1 minute, the display will automatically go
back to the normal time display mode.
Snooze function
1. When the alarm is ringing, the clock icon ashes on the display.
Press the BACKLIGHT/SNOOZE key to temporarily turn off the alarm and use the snooze function.
2. When the snooze function is on, the icon stays constant on the display and the snooze icon
ashes.
3. The alarm will be repeated every 7 minutes until you turn it off.
Turning off the alarm
When the alarm is ringing, press any key other than the BACKLIGHT/SNOOZE key to turn it off. It
will ring again the next day at the set time.
When Snooze is activated, press and hold any key other than the BACKLIGHT/SNOOZE key to turn
it off. It will ring again the next day at the set time.
“Sleep” mode
The MP3 Thermoclock® RLR920 includes a “Sleep” mode feature to help you go to sleep
peacefully. When this mode is enabled, the downloaded sound or melody will be played in a loop for
a specied time period (from 1 minute to 60 minutes). To turn on the “Sleep” mode:
1. In time display mode, press the MODE/SET key two times to enter the “Sleep” mode (“SLE” is
displayed on screen).
2. To set the sound duration, press and hold the MODE/SET key until the digits start ashing.
RLR920IM0328.indb 12 18/8/08 16:30:24

13
ENGLISH
Time-zone setting
1. In time display mode, press the MODE/SET key three times to enter the time-zone setting mode
(the icon is displayed on screen).
2. Press the key to browse the time in 37 world cities.
3. Press the key to turn the daylight saving time (DST) function on or off (the is displayed on
screen when the DST function is enabled).
4. When you have selected the desired city, press and hold MODE/SET for about 2 seconds to
conrm your settings and go back to the normal time display mode. The displayed time will be the
time of the selected city.
Note:
• In normal time display mode, press the key once to display the name of the city selected in the
time-zone setting mode. Press again to go back to the date display.
• In time-zone setting mode, the icon ashes when the displayed word city is the same as the
currently selected city in time display mode.
• If the DST function has been turned on, the icon will also be displayed in time display mode.
CITY NAME ABBREVIATION TIME DIFFERENCE
1 London LON 0
2 Paris PAR + 1
3 Berlin BER + 1
4 Milan MIL + 1
5 Rome ROM + 1
6 Cairo CAI + 2
7 Istanbul IST + 2
8 Jerusalem JRS + 2
9 Moscow MOW + 3
10 Dubai DXB + 4
11 Karachi KHI + 5
12 Dhaka DAC + 6
13 Bangkok BKK + 7
14 Hong Kong HKG + 8
15 Singapore SIN + 8
16 Tokyo TYO + 9
17 Seoul SEL + 9
18 Sydney SYD + 10
19 Noumea NOU + 11
20 Wellington WLG + 12
21 Majuro MAJ - 12
22 Apia APW - 11
23 Honolulu HNL - 10
24 Anchorage ANC - 9
25 San Francisco SFO - 8
26 Los Angeles LAX - 8
27 Vancouver VAR - 8
28 Denver DEN - 7
29 Chicago CHI - 6
30 Mexico MEX - 6
31 New York NYC - 5
32 Miami MIA - 5
33 Santo Domingo SDO - 4
34 Rio de Janeiro RIO - 3
35 Buenos Aires BAI - 3
36 Fernando de Noronha FEN - 2
37 Tasiilaq AGM - 1
3. Use the and keys to select a time (between 1 minute and 60 minutes), then press MODE/SET
to conrm.
4. Press the key to turn on the “Sleep” mode and start the playback. The sound will automatically
turn off when the selected time expires.
5. To turn off the function:
• in “Sleep” mode, press the key or press and hold the BACKLIGHT/SNOOZE key for about
2 seconds.
• in all the other modes, press and hold the BACKLIGHT/SNOOZE key for about 2 seconds.
Note: If no key is pressed within 1 minute, the display will automatically go back to the normal time
display mode.
RLR920IM0328.indb 13 18/8/08 16:30:25

14
ENGLISH
CITY NAME ABBREVIATION TIME DIFFERENCE
1 London LON 0
2 Paris PAR + 1
3 Berlin BER + 1
4 Milan MIL + 1
5 Rome ROM + 1
6 Cairo CAI + 2
7 Istanbul IST + 2
8 Jerusalem JRS + 2
9 Moscow MOW + 3
10 Dubai DXB + 4
11 Karachi KHI + 5
12 Dhaka DAC + 6
13 Bangkok BKK + 7
14 Hong Kong HKG + 8
15 Singapore SIN + 8
16 Tokyo TYO + 9
17 Seoul SEL + 9
18 Sydney SYD + 10
19 Noumea NOU + 11
20 Wellington WLG + 12
21 Majuro MAJ - 12
22 Apia APW - 11
23 Honolulu HNL - 10
24 Anchorage ANC - 9
25 San Francisco SFO - 8
26 Los Angeles LAX - 8
27 Vancouver VAR - 8
28 Denver DEN - 7
29 Chicago CHI - 6
30 Mexico MEX - 6
31 New York NYC - 5
32 Miami MIA - 5
33 Santo Domingo SDO - 4
34 Rio de Janeiro RIO - 3
35 Buenos Aires BAI - 3
36 Fernando de Noronha FEN - 2
37 Tasiilaq AGM - 1
Backlight
Press the BACKLIGHT/SNOOZE key once to turn on the backlight for 5 seconds.
Temperature
In time display mode, use the key to toggle between temperature display in Celsius (°C) and
Fahrenheit (°F).
Clock stand
You can use the protective cover provided with your RLR920 as a stand. Simply place the clock in
the cover’s notch and install it on a table.
Maintenance
Don’t clean any part of your RLR920 with benzene, thinners or other solvent chemicals—this may
cause permanent damage which is not covered by the guarantee. When necessary, clean it with a
damp cloth. Keep your RLR920 away from extreme temperature, water or severe shock. When the
LCD screen turns unclear, replace the batteries. Avoid using in the presence of magnetic elds such
as in airports. Every effort has been made to ensure high standards of reliability for your RLR920.
However, if something does go wrong, please do not try to repair it yourself – consult your supplier
or the LEXIBOOK® help line.
RLR920IM0328.indb 14 18/8/08 16:30:26

15
ENGLISH
Warranty
This product is covered by our two-year guarantee*. For all matters relating to the guarantee or our
after-sales service, please contact your retailer and have your receipt on hand. Our guarantee cov-
ers manufacturing or assembly defects with the exception of all damage resulting from a failure to
respect the instructions, or any inappropriate handling of the article (such as taking it apart, exposing
it to heat or humidity, etc).
* excluding the deterioration of the LCD screen.
NOTE: It is recommended that all packaging be kept for future reference.
Keep this instruction manual in a safe place as it contains important information. In our constant
concern for improvement, the colours and details of the product may differ slightly from those shown
on the packaging.
Reference: RLR920
©2008 LEXIBOOK®
Designed and developed in Europe – Made in China
Lexibook UK Ltd,
Unit 10 Peterseld Industrial Estate,
Bedford Road, Peterseld,
Hampshire, GU32 3QA, United Kingdom.
Helpline: 0808 1003015, www.lexibook.com
Environmental Protection:
Unwanted electrical appliances can be recycled and should not be discarded
along with regular household waste! Please actively support the conservation
of resources and help protect the environment by returning this appliance to a
collection centre (if available).
RLR920IM0328.indb 15 18/8/08 16:30:26

16
ESPAÑOL
Introducción
¡Enhorabuena por su compra del MP3 Thermoclock® RLR920 de LEXIBOOK®! Le pedimos que lea
este manual con atención porque esto le servirá de ayuda y guía para usar el producto.
Desembalaje del aparato
Al desembalar el aparato compruebe que los siguientes elementos se encuentran dentro:
1 MP3 Thermoclock® RLR920
1 soporte/cubierta protectora
1 CD-ROM
1 cable USB
1 manual de instrucciones
Guarde el embalaje para futuras consultas. Por favor, guarde el recibo porque éste es la garantía
del producto.
Inicio
1. Retire la lámina transparente de la pantalla LCD tirando de la lengüeta.
2. Presione hacia arriba el botón de cierre en la dirección que marca la
echa para abrir el compartimiento de las pilas que se encuentra
situado en la parte posterior del aparato (ver imagen C, pág. 3).
3. Retire la tapa de las pilas e instale 2 pilas de 1,5V de tipo LR03/AAA
(no incluidas) de acuerdo a las indicaciones sobre polaridad (+/-) que
se encuentran en la parte inferior del compartimiento de las pilas. Siga
las indicaciones de los diagramas ilustrados.
4. Coloque de nuevo la tapa de las pilas y presione el cierre hacia abajo para cerrarla
(ver imagen C, pág. 3). La hora, la fecha y la temperatura aparecerán en la pantalla LCD.
Nota: Para que la unidad funcione debe jarse la puerta del compartimento de las pilas con el
botón de bloqueo.
Las pilas no recargables no deben ser recargadas. Retirar las pilas recargables del aparato
antes de proceder a su recarga. Las pilas recargables deben ser recargadas solamente bajo
supervisión adulta. No mezclar tipos de pilas diferentes o pilas nuevas con pilas usadas. Usar
solamente pilas del tipo recomendado o equivalentes. Insertar las pilas con las polaridades en
posición correcta. Retirar las pilas gastadas de dentro del aparato. No provocar cortocircuitos
en los terminales. No echar las pilas al fuego. Retirar las pilas de dentro del aparato si éste no
va a ser utilizado por un periodo de tiempo prolongado.
ADVERTENCIA: Si el aparato funcionara de forma defectuosa o recibe una descarga electrostática
busque el pequeño oricio de REINICIO situado en la parte posterior del aparato e inserte un
instrumento pequeño, no y de punta roma, como por ejemplo un clip, en el mismo. Presione con
cuidado y a continuación sáquelo. Si esta operación no soluciona el problema, retire las pilas y
colóquelas de nuevo.
Descripción del producto
Imagen A
1. Tecla MODO/PROGRAMACIÓN
2. Tecla LUZ DE FONDO/REPETICIÓN ALARMA
3. Tecla de echa ascendente
4. Tecla de echa descendente
Imagen B
5. Puerto USB
Imagen C
6. Tecla REINICIO
7. Botón de cierre/abertura del compartimiento
de pilas
RLR920IM0328.indb 16 18/8/08 16:30:27

17
ESPAÑOL
Instalación del software del Thermoclock MP3 Voyage
Siga estas instrucciones para instalar el software del Thermoclock MP3 Voyage en su PC. Este
software le permite descargar archivos de audio en formatos MP3 y WAV. Puede usar el archivo
como tono de timbre de alarma o como ayuda para dormir (ver la sección modo “Dormir”, pág. 18).
1. Introduzca el CD con el software (incluido) en la unidad de CD-ROM de su PC.
2. Pulse en “Inicio”, luego en “Mi PC”, y pulse dos veces sobre el icono de la unidad CD-ROM.
3. Pulse dos veces sobre el icono del archivo “Setup.exe” para que se ejecute la instalación.
4. Seleccione el idioma del programa de instalación y pulse el botón “Aceptar”.
5. Siga las instrucciones que se mostrarán en la pantalla para instalar el programa ThermoClock
MP3 Voyage.
6. Si el ThermoClock está conectado al PC, el programa se ejecutará automáticamente una vez que
termine el proceso de instalación.
Nota: Para ejecutar directamente la instalación, seleccione “Inicio” => “Ejecutar” e introduzca
“D:\setup.exe” en el campo de texto del diálogo (sustituya “D” por la unidad de CD-ROM de su
ordenador), y pulse luego Aceptar.
Descarga de melodías MP3 y WAV
1. Conecte el MP3 Thermoclock® RLR920 al puerto USB con el cable USB incluido. La fecha y la
información sobre el tiempo desaparecerán; la hora y “CON” (conversión) aparecerán en la
pantalla LCD.
Nota: Las teclas del aparato quedan inutilizadas cuando el reloj está conectado al ordenador.
2. La pantalla de descarga aparecerá automáticamente cuando el aparato esté conectado al
ordenador. Si no apareciera la pantalla de descarga haga un clic doble en el icono del
“ThermoClock” del escritorio para lanzar el software.
3. Haga clic en “Browser” (Hojear) para ver los archivos. Seleccione un archivo de audio en formato
MP3 o WAV. También puede seleccionar una melodía o efectos de sonido que vienen incluidos
en el CD de instalación.
4. Cuando haya seleccionado el sonido o melodía deseados haga clic en “Download” (Descargar)
para iniciar el proceso de conversión y de descarga. Durante la transferencia “DWL” parpadeará
en la pantalla LCD del reloj.
5. Cuando el proceso de descarga termine aparecerá en pantalla el mensaje “Finished” (Finalizado)
y “END” (FIN) aparecerá en la pantalla LCD del reloj.
Nota:
• Para cancelar la conversión del archivo haga clic en cualquier momento en “Cancel” (Cancelar).
• Para usar el software del ThermoClock MP3 Voyage el reloj debe estar conectado al ordenador.
ADVERTENCIA:
• Solamente se puede guardar un archivo de audio en la memoria ash del aparato. Cuando
descargue una nueva melodía ésta reemplazará automáticamente el archivo anterior.
• El reloj MP3 puede guardar hasta 30 segundos de sonido en formato MP3 o WAV (si la longitud
del archivo excede el máximo el aparato descargará solamente los primeros 30 segundos).
• Los archivos MP3 monoaurales o por debajo de 80 kbps (kilobits por segundo) pueden hacer que
el software Thermoclock MP3 Voyage funcione mal.
Programación de la hora y la fecha
1. En el modo de hora pulse y mantenga pulsada la tecla MODO/PROGRAMACIÓN hasta que los
dígitos de las horas comiencen a parpadear.
2. Para programar la hora pulse las teclas y y a continuación pulse MODO/PROGRAMACIÓN
para conrmar. Los dígitos de los minutos parpadearán.
3. Para programar los minutos pulse las teclas y y a continuación pulse MODO/PROGRAMACIÓN
para conrmar. Los dígitos del año parpadearán.
4. Para programar el año pulse las teclas y y a continuación pulse MODO/PROGRAMACIÓN
para conrmar. Los dígitos del mes parpadearán.
5. Para programar el mes pulse las teclas y y a continuación pulse MODO/PROGRAMACIÓN
para conrmar. Los dígitos de la fecha parpadearán.
6. Para programar la fecha pulse las teclas y y a continuación pulse MODO/PROGRAMACIÓN
para conrmar e introducir el formato de 12 o 24 horas.
RLR920IM0328.indb 17 18/8/08 16:30:27

18
ESPAÑOL
7. Para alternar entre los formatos de 12 y 24 horas pulse las teclas y a continuación pulse
MODO/PROGRAMACIÓN para conrmar y seleccionar el idioma.
8. Para seleccionar el idioma pulse las teclas y . Puede elegir entre inglés (ENG),
francés (FRA), italiano (ITA), español (ESP), alemán (DEU) y portugués (POR). Pulse la tecla
MODO/PROGRAMACIÓN para conrmar y volver a la pantalla de la hora.
Nota: Durante el proceso de programación si no se pulsa ninguna tecla durante 1 minuto la pantalla
volverá automáticamente al modo normal de hora.
Modo alarma
Programación de la hora de alarma
1. En el modo de pantalla de hora normal pulse la tecla MODO/PROGRAMACIÓN una vez para ir al
modo de alarma (“ALM” aparecerá en pantalla).
2. Pulse las teclas y para activar y desactivar la alarma. El icono del reloj aparecerá en
pantalla cuando la alarma está activada.
3. Pulse y mantenga pulsada la tecla MODO/PROGRAMACIÓN durante unos 2 segundos para
programar la alarma. Los dígitos de la hora parpadearán.
4. Para programar la hora pulse las teclas y y a continuación pulse la tecla
MODO/PROGRAMACIÓN para conrmar y programar los minutos.
5. Pulse las teclas y para programar los minutos. Pulse la tecla MODO/PROGRAMACIÓN para
conrmar la hora de alarma y seleccione el tono de timbre.
6. Utilice las teclas y para elegir el tono de timbre. Puede seleccionar uno de los 5 tonos
previamente descargados o una melodía MP3 o WAV descargada de su ordenador (para más
información sobre como descargar tonos de timbre consulte la sección “Descarga de melodías
MP3 y WAV”’ pág. 17). Pulse MODO/PROGRAMACIÓN para conrmar y volver al modo de hora
de alarma en pantalla.
Nota:
• Cuando la alarma está activada el icono aparece en todos los modos.
• La alarma sonará a la hora programada al menos que se haya desactivado previamente.
• Durante el proceso de programación si no se pulsa ninguna tecla por un minuto la pantalla volverá
automáticamente al modo de hora normal.
Función de repetición de alarma
1. Cuando la alarma está tocando el icono parpadeará en pantalla.
Pulse la tecla LUZ DE FONDO/REPETICIÓN DE ALARMA para detener la alarma temporalmente
y utilizar la función de repetición de alarma.
2. Cuando la función de repetición de alarma está activada el icono permanece jo en pantalla y
el icono parpadea.
3. La alarma tocará cada 7 minutos si no se desactiva.
Cómo desactivar la alarma
Cuando la alarma está tocando pulse cualquier tecla excepto LUZ DE FONDO/REPETICIÓN DE
ALARMA para desactivarla. La alarma tocará al día siguiente a la misma hora.
Cuando la repetición de alarma está activada pulse y mantenga pulsada cualquier tecla excepto
LUZ DE FONDO/REPETICIÓN DE ALARMA para desactivarla. La alarma tocará al día siguiente a
la misma hora.
Modo “Dormir”
El MP3 Thermoclock® RLR920 posee un modo “Dormir” para ayudarle a quedarse dormido plá-
cidamente. Cuando este modo está activado el sonido o melodía descargados se escucharán sin
descanso por un periodo especico de tiempo (de 1 minuto a 60 minutos). Para activar el modo
“Dormir”:
1. En el modo de hora en pantalla pulse la tecla MODO/PROGRAMACIÓN dos veces para entrar
en el modo “Dormir” (“SLE” aparecerá en pantalla).
RLR920IM0328.indb 18 18/8/08 16:30:28

19
ESPAÑOL
Programación del huso horario
1. En el modo de hora pulse la tecla MODO/PROGRAMACIÓN tres veces para entrar en el modo
de programación de huso horario (el icono aparecerá en pantalla).
2. Pulse la tecla para ver el horario de 37 ciudades del mundo.
3. Pulse la tecla para activar o desactivar la función de horario de verano, (el icono aparecerá
en pantalla cuando dicha función esté activada).
4.Cuando haya seleccionado la ciudad deseada pulse y mantenga pulsada la tecla
MODO/PROGRAMACIÓN durante 2 segundos para conrmar la programación y volver a la
pantalla de hora normal. La hora en pantalla será la hora de la ciudad seleccionada.
Nota:
• En el modo de hora normal pulse la tecla una vez para ver el nombre de la ciudad seleccionada
en el huso horario, pulse de nuevo la tecla para ir a la pantalla de la fecha.
• En el modo de huso horario el icono parpadeará cuando la ciudad que aparece en pantalla es
la misma que la ciudad seleccionada en el modo de hora.
• Si la función “Horario de verano” está activada el icono aparecerá también en la pantalla de la
hora normal.
NOMBRE DE LA CIUDAD ABREVIATURA DIFERENCIA HORARIA
1 Londres LON 0
2 París PAR + 1
3 Berlín BER + 1
4 Milán MIL + 1
5 Roma ROM + 1
6 El Cairo CAI + 2
7 Estanbul IST + 2
8 Jerusalén JRS + 2
9 Moscú MOW + 3
10 Dubái DXB + 4
11 Karachi KHI + 5
12 Dhaka DAC + 6
13 Bangkok BKK + 7
14 Hong Kong HKG + 8
15 Singapur SIN + 8
16 Tokio TYO + 9
17 Seúl SEL + 9
18 Sídney SYD + 10
19 Numea NOU + 11
20 Wellington WLG + 12
21 Majuro MAJ - 12
22 Apia APW - 11
23 Honolulu HNL - 10
24 Anchorage ANC - 9
25 San Francisco SFO - 8
26 Los Ángeles LAX - 8
27 Vancouver VAR - 8
28 Denver DEN - 7
29 Chicago CHI - 6
30 México MEX - 6
31 Nueva York NYC - 5
32 Miami MIA - 5
33 Santo Domingo SDO - 4
34 Rio de Janeiro RIO - 3
35 Buenos Aires BAI - 3
36 Fernando de Noronha FEN - 2
37 Tasiilaq AGM - 1
2. Para programar la duración de la melodía pulse y mantenga pulsada la tecla
MODO/PROGRAMACIÓN hasta que los dígitos comiencen a parpadear.
3. Utilice las teclas y para seleccionar la hora (entre 1 minuto y 60 minutos) y a continuación
pulse MODO/PROGRAMACIÓN para conrmar.
4. Pulse la tecla para activar el modo “Dormir” y comenzar la reproducción de la música.
La música se apagará automáticamente cuando el tiempo programado nalice.
5. Para desactivar esta función:
• En el modo “Dormir” pulse la tecla o pulse y mantenga pulsada la tecla
LUZ DE FONDO/REPETICIÓN DE ALARMA durante 2 segundos.
• En los demás modos pulse y mantenga pulsada la tecla LUZ DE FONDO/REPETICIÓN DE
ALARMA durante 2 segundos.
Nota: Si no se pulsa ninguna tecla durante 1 minuto la pantalla volverá automáticamente al modo
de hora normal.
RLR920IM0328.indb 19 18/8/08 16:30:28

20
ESPAÑOL
NOMBRE DE LA CIUDAD ABREVIATURA DIFERENCIA HORARIA
1 Londres LON 0
2 París PAR + 1
3 Berlín BER + 1
4 Milán MIL + 1
5 Roma ROM + 1
6 El Cairo CAI + 2
7 Estanbul IST + 2
8 Jerusalén JRS + 2
9 Moscú MOW + 3
10 Dubái DXB + 4
11 Karachi KHI + 5
12 Dhaka DAC + 6
13 Bangkok BKK + 7
14 Hong Kong HKG + 8
15 Singapur SIN + 8
16 Tokio TYO + 9
17 Seúl SEL + 9
18 Sídney SYD + 10
19 Numea NOU + 11
20 Wellington WLG + 12
21 Majuro MAJ - 12
22 Apia APW - 11
23 Honolulu HNL - 10
24 Anchorage ANC - 9
25 San Francisco SFO - 8
26 Los Ángeles LAX - 8
27 Vancouver VAR - 8
28 Denver DEN - 7
29 Chicago CHI - 6
30 México MEX - 6
31 Nueva York NYC - 5
32 Miami MIA - 5
33 Santo Domingo SDO - 4
34 Rio de Janeiro RIO - 3
35 Buenos Aires BAI - 3
36 Fernando de Noronha FEN - 2
37 Tasiilaq AGM - 1
Luz de fondo
Pulse la LUZ DE FONDO/REPETICIÓN DE ALARMA una vez para encender la luz de fondo
durante 5 segundos.
Temperatura
En el modo de hora normal utilice la tecla para elegir entre la temperatura en grados Celsius (°C)
y Fahrenheit (°F).
Soporte del reloj
Puede usar la cubierta protectora incluida con el RLR920 como soporte. Simplemente introduzca el
reloj en la muesca de la cubierta y colóquelo sobre una mesa.
Mantenimiento
No limpie ninguna parte del RLR920 con bencina, disolventes o cualquier otro solvente
químico—esto puede causar daños permanentes que no están cubiertos por la garantía. Cuando
sea necesario, limpie el aparato con un paño limpio y húmedo. Mantenga el RLR920 alejado de
lugares con temperaturas extremas o agua y evite darle golpes severos. Cuando la pantalla LCD
no se vea clara deberá reemplazar las pilas. Evite usar el aparato en lugares donde haya campos
magnéticos tales como aeropuertos. Se han realizado los máximos esfuerzos para asegurar que
el RLR920 posee un alto estándar de abilidad. Sin embargo, si no funcionará correctamente no
deberá intentar repararlo por sí mismo – consulte con una línea de atención al consumidor de un
distribuidor de LEXIBOOK®.
RLR920IM0328.indb 20 18/8/08 16:30:30
This manual suits for next models
2
Table of contents
Languages:
Other LEXIBOOK Clock manuals

LEXIBOOK
LEXIBOOK Serenity RL960 User manual

LEXIBOOK
LEXIBOOK PL200 User manual

LEXIBOOK
LEXIBOOK TH030 THERMOCLOCK ABSOLUTE User manual

LEXIBOOK
LEXIBOOK Serenity Mini RL940 User manual

LEXIBOOK
LEXIBOOK RL400 User manual

LEXIBOOK
LEXIBOOK COACH LEON User manual

LEXIBOOK
LEXIBOOK Barbie Flower Clock RL010BB User manual

LEXIBOOK
LEXIBOOK Design TimeProjector RP170 User manual

LEXIBOOK
LEXIBOOK DPC280FRB User manual

LEXIBOOK
LEXIBOOK Meteoclock RL2000 User manual