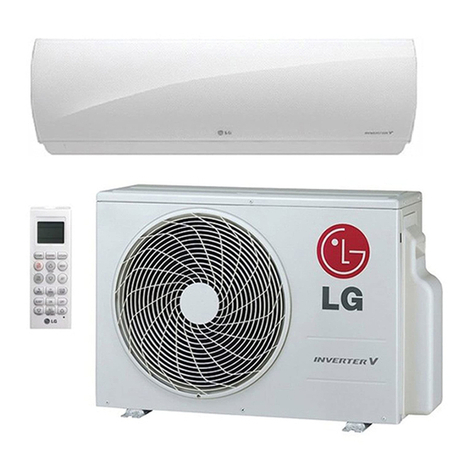
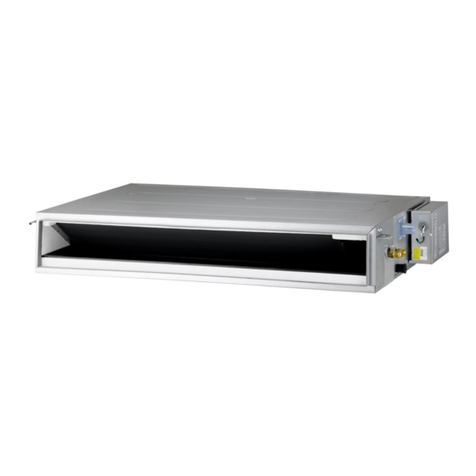
LG Artcool Mirror AM07BP User manual

www.lg.com
INSTALLATION MANUAL
AIR CONDITIONER
• Please read this installation manual completely before installing the product.
• Installation work must be performed in accordance with the national wiring
standards by authorized personnel only.
• Please retain this installation manual for future reference after reading it
thoroughly.
ƓThis product contains Fluorinated Greenhouse Gases. (R410A)
TYPE : WALL MOUNTED
Original instruction
P/NO : MFL67855414
ENGLISH ITALIANO ESPAÑOL FRANÇAIS DEUTSCH
ΕΛΛΗΝΙΚΆ
ČEŠTINA
NEDERLANDS
POLSKI
LIMBA ROMÂNĂ
ТОО "Everest climate", Р. К., г.Алматы | Телефон: +7 727 230 00 10, +7 777 250 10 90 | www.aircon.kz, e-mail: [email protected]

2TIPS FOR SAVING ENERGY
ENGLISH
• Do not cool excessively indoors. This may be harmful for your health and may consume more
electricity.
• Block sunlight with blinds or curtains while you are operating the air conditioner.
• Keep doors or windows closed tightly while you are operating the air conditioner.
• Adjust the direction of the air flow vertically or horizontally to circulate indoor air.
• Speed up the fan to cool or warm indoor air quickly, in a short period of time.
• Open windows regularly for ventilation as the indoor air quality may deteriorate if the air condi-
tioner is used for many hours.
• Clean the air filter once every 2 weeks. Dust and impurities collected in the air filter may block the
air flow or weaken the cooling / dehumidifying functions.
For your records
Staple your receipt to this page in case you need it to prove the date of purchase or for warranty
purposes. Write the model number and the serial number here:
Model number :
Serial number :
You can find them on a label on the side of each unit.
Dealer’s name :
Date of purchase :
Here are some tips that will help you minimize the power consumption when you use the air
conditioner. You can use your air conditioner more efficiently by referring to the instructions
below:
TIPS FOR SAVING ENERGY
ТОО "Everest climate", Р. К., г.Алматы | Телефон: +7 727 230 00 10, +7 777 250 10 90 | www.aircon.kz, e-mail: [email protected]

IMPORTANT SAFETY INSTRUCTIONS 3
ENGLISH
IMPORTANT SAFETY INSTRUCTIONS
READ ALL INSTRUCTIONS BEFORE USING THE APPLIANCE.
Always comply with the following precautions to avoid dangerous situations and ensure peak
performance of your product
WARNING
It can result in serious injury or death when the directions are ignored
CAUTION
It can result in minor injury or product damage when the directions are ignored
WARNING
• Installation or repairs made by unqualified persons can result in hazards to you and others.
• Installation MUST conform with local building codes.
• The information contained in the manual is intended for use by a qualified service technician
familiar with safety procedures and equipped with the proper tools and test instruments.
• Failure to carefully read and follow all instructions in this manual can result in equipment mal-
function, property damage, personal injury and/or death.
Installation
• Don’t use a power cord, a plug or a loose socket which is damaged.
- Otherwise, it may cause a fire or electrical shock.
• For electrical work, contact the dealer, seller, a qualified electrician, or an Authorized Service Center.
- Do not disassemble or repair the product. There is risk of fire or electric shock.
• Always ground the product.
- There is risk of fire or electric shock.
• Install the panel and the cover of control box securely.
- There is risk of fire or electric shock.
• Always install a dedicated circuit and breaker.
- Improper wiring or installation may cause fire or electric shock.
• Use the correctly rated breaker or fuse.
- There is risk of fire or electric shock.
• Do not modify or extend the power cable.
- There is risk of fire or electric shock.
• Do not let the air conditioner run for a long time when the humidity is very high and a door or a win-
dow is left open.
- Moisture may condense and wet or damage furniture.
• Be cautious when unpacking and installing the product.
- Sharp edges could cause injury. Be especially careful of the case edges and the fins on the con-
denser and evaporator.
• For installation, always contact the dealer or an Authorized Service Center.
- There is risk of fire, electric shock, explosion, or injury.
• Do not install the product on a defective installation stand.
- It may cause injury, accident, or damage to the product.
• Be sure the installation area does not deteriorate with age.
- If the base collapses, the air conditioner could fall with it, causing property damage, product failure,
and personal injury.
!
!
!
ТОО "Everest climate", Р. К., г.Алматы | Телефон: +7 727 230 00 10, +7 777 250 10 90 | www.aircon.kz, e-mail: [email protected]

4IMPORTANT SAFETY INSTRUCTIONS
ENGLISH
• There is a risk of fire and explosion.
- Inert gas (nitrogen) should be used when you check plumbing leaks, cleaning or repairs of pipes
etc. If you are using combustible gases including oxygen, product may have the risk of fires and ex-
plosions.
• Use a vacuum pump or Inert (nitrogen) gas when doing leakage test or air purge. Do not compress
air or Oxygen and Do not use Flammable gases. Otherwise, it may cause fire or explosion.
- There is the risk of death, injury, fire or explosion.
Operation
• Do not store or use flammable gas or combustibles near the product.
- There is risk of fire or failure of product.
CAUTION
Installation
• Always check for gas (refrigerant) leakage after installation or repair of product.
- Low refrigerant levels may cause failure of product.
• Install the drain hose to ensure that water is drained away properly.
- A bad connection may cause water leakage.
• Keep level even when installing the product.
- To avoid vibration or water leakage.
• Do not install the product where the noise or hot air from the outdoor unit could damage the neigh-
borhoods.
- It may cause a problem for your neighbors.
• Use two or more people to lift and transport the product.
- Avoid personal injury.
• Do not install the product where it will be exposed to sea wind (salt spray) directly.
- It may cause corrosion on the product. Corrosion, particularly on the condenser and evaporator
fins, could cause product malfunction or inefficient operation.
• Thickness of copper pipes used are as shown “Flaring work” Table.
- Never use copper pipes thinner than that in the table even when it is available on the mar-
ket
• Do not use copper pipes having a collapsed.
- Otherwise, the expansion valve or capillary tube may become blocked with contaminants.
• For R410A model, use piping, flare nut and tools which is specified for R410A refrigerant.
- Using of (R22) piping, flare nut and tools may cause abnormally high pressure in the refriger-
ant cycle (piping), and possibly result in explosion and injury.
• It is desirable that the amount of residual oil less than 40 mg/10m.
!
ТОО "Everest climate", Р. К., г.Алматы | Телефон: +7 727 230 00 10, +7 777 250 10 90 | www.aircon.kz, e-mail: [email protected]

TABLE OF CONTENTS 5
ENGLISH
2TIPS FOR SAVING
ENERGY
3IMPORTANT SAFETY
INSTRUCTIONS
6INSTALLATION PARTS
6INSTALLATION TOOLS
7INSTALLATION MAP
8INSTALLATION
8Select the best Location
8Fixing InstallationPlate
9Drill aHole inthe Wall
9Flaring Work
10 Connecting the Piping
14 Checking the Drainage
15 Te s t R unning
TABLE OF CONTENTS
ТОО "Everest climate", Р. К., г.Алматы | Телефон: +7 727 230 00 10, +7 777 250 10 90 | www.aircon.kz, e-mail: [email protected]

6INSTALLATION PARTS
ENGLISH
INSTALLATION TOOLS
INSTALLATION PARTS
Name Quantity Shape
Installation plate 1 EA
Type "A" screw
5 EA
Type "B" screw
2 EA
Type "C" screw
2 EA
Remote control
holder
1 EA
The feature can be changed according to type of model.
Screws for fixing panels are attached to decoration panel.
Figure FigureName
Screw driver
Electric drill
Measuring tape, Knife
Hole core drill
Spanner
Torque wrench
Multi-meter
Hexagonal wrench
Ammeter
Gas-leak detector
Thermometer,
Level
Flaring tool set
Name
ТОО "Everest climate", Р. К., г.Алматы | Телефон: +7 727 230 00 10, +7 777 250 10 90 | www.aircon.kz, e-mail: [email protected]

MAPPA DI INSTALLAZIONE 7
ITALIANO
MAPPA DI INSTALLAZIONE
Nastro adesivo (largo) ( )
Carrello ( )
Tubatura lato gas ( ) (pezzo opzionale)
Tubatura lato liquio ( ) (pezzo opzionale)
Tubo di scarico aggiuntivo ( )
Nastro adesivo (stretto) ( )
Tubo flessibile di scarico
Cavo di collegamento ( )
(pezzi opzionali)
Piastra di installazione
Manicotto ( )
Bussola-Manicotto ( )
Mastice (sigillante gomma) ( )
Piegare il tubo quanto più
possibile vicino alla parete
ma fare attenzione a non
romperlo.
• Applicare dopo aver
effettuato un test di scarico.
• Per eseguire il test di scarico,
rimuovere il filtro dell’aria e
versare acqua nello
scambiatore di calore.
NOTA
!
• Le parti di installazione non sono fornite.
* Questo particolare può cambiare in funzione del prodotto.
ТОО "Everest climate", Р. К., г.Алматы | Телефон: +7 727 230 00 10, +7 777 250 10 90 | www.aircon.kz, e-mail: [email protected]

8INSTALLAZIONE
ITALIANO
Scelta della posizione migliore
- Non deve esserci alcuna fonte di calore o va-
pore vicino all'unità.
- Selezionare un posto in cui non vi sono osta-
coli attorno all'unità.
- Accertarsi che lo scarico della condensa
possa essere comodamente realizzato.
- L’unità non deve essere installata vicino a vie
d'accesso.
- Accertarsi che lo spazio esistente a sinistra e
a destra dell'unità sia superiore ai 100 mm.
L'unità deve essere installata a muro più in
alto possibile, con un minimo di 200mm dal
soffitto.
- Utilizzare un metal detector / rilevatore di
metalli per evitare di forare tubazioni nel.
* Questo particolare può cambiare in funzione
del prodotto.
Fissaggio della piastra di
installazione
Il muro scelto deve essere forte e solido suffi-
cientemente da evitare vibrazioni.
1Montare la piastra di installazione sulla
parete mediante viti di tipo "A" Se l’unità
viene montata su pareti in calcestruzzo, uti-
lizzare bulloni di ancoraggio.
- Montare la piastra di installazione orizzon-
talmente allineando la linea centrale con
una livella.
2Misurare la parete e contrassegnare la
linea centrale. È importante fare attenzione
alla posizione di installazione dei cablaggi
alle prese di uscita. Questi generalmente
sono attraverso le pareti. La foratura delle
pareti per il collegamento delle tubature
deve essere praticata con molta atten-
zione.
Più di 200
Più di 100
Più di 2300
Più di
100
(Unità: mm)
ATTENZIONE
Installare l’unità interna sulla parete ad al-
tezza dal suolo superiore a 2,3 metri.
!
Piastra di installazione
Gancio telaio
Viti di tipo "A"
Ø65
Ø65
145 75
Tubatura posteriore destra
Tubatura posteriore sinistra
Piastra di installazione
Collocare una livella sulla
linguetta sollevata
Profilo unità
192
192
(Unità: mm)
378 378
INSTALLAZIONE
ТОО "Everest climate", Р. К., г.Алматы | Телефон: +7 727 230 00 10, +7 777 250 10 90 | www.aircon.kz, e-mail: [email protected]

INSTALLAZIONE 9
ITALIANO
Praticare un foro nella parete
- Forare il foro della tubatura mediante un tra-
pano con punta da ø65 mm. Forare il foro
della tubatura sul lato destro o sinistro; il foro
deve essere leggermente inclinato sul lato
esterno.
Svasatura
La causa principale delle perdite di gas è
un’errata procedura di svasatura. Eseguire il la-
voro di svasatura seguendo la procedura ripor-
tata di seguito:
Tagliare tubi e il cavo
1Utilizzare tubazioni in rame ad uso frigorif-
ero reperite da un rivenditore locale.
2Misurare la distanza tra l’unità interna ed
esterna.
3Tagliare i tubi un po’ più lunghi della dis-
tanza misurata.
4Tagliare il cavo 1,5 m più della lunghezza
del tubo.
Rimozione delle sbavature
1Rimuovere ogni sbavatura dalla sezione
tagliata in trasversale del tubo.
2Nel rimuovere le sbavature, posizionare
l’estremità del tubo in rame verso il basso
durante la rimozione delle sbavature per
evitare la caduta delle stesse nella tu-
batura.
Montaggio del dado
- Rimuovere i dadi svasati fissati all’unità in-
terna ed esterna, posizionarli sul tubo com-
pletamente privo di sbavature (non è
possibile montarli prima).
Montaggio del dado
1Tenere saldamente il tubo in rame in una
barra delle dimensioni indicate nella tabella
in basso.
2Eseguire la svasatura con l’attrezzo appos-
ito.
5-7mm
(3/16"~5/16")
Interno
PARETE
All'aperto
Tubo in
rame
90°
Inclinato
Non uniforme
Grezzo
Tubo
Alesatore
Punta verso
il basso
Dado svasato
Tubo in rame
Diametro esterno A Spessore
mm pollici mm mm
Ø6.35 1/4" 1.1~1.3 0.7
Ø9.52 3/8" 1.5~1.7 0.8
Ø12.7 1/2" 1.6~1.8 0.8
Ø15.88 5/8" 1.6~1.8 1.0
Ø19.05 3/4" 1.9~2.1 1.0
ТОО "Everest climate", Р. К., г.Алматы | Телефон: +7 727 230 00 10, +7 777 250 10 90 | www.aircon.kz, e-mail: [email protected]

10 INSTALLAZIONE
ITALIANO
Verifica
1Confrontare la svasatura con la figura in
basso.
2Se la svasatura è difettosa, tagliare la
sezione svasata e ripetere la svasatura.
Collegamento dei tubi
1Tirare i tappi viti nella parte inferiore dell’u-
nità interna.
2Rimuovere il coperchio del telaio dall’unità
allentando le due viti.
3Rimuovere il supporto dei tubi.
4Rimuovere il coperchio della porta dei tubi
e posizionare i tubi.
* Questo particolare può cambiare in funzione
del prodotto.
Corretto
- Premere il coperchio della tubatura e svol-
gerla lentamente verso il basso. Quindi, pie-
gare lentamente verso sinistra.
Destra
Vista laterale posteriore
unità interna
Supporto tubatura
Indietro
Sinistra
Coperchio telaio
Barra
Tubo in rame
Maniglia di presa Contrassegno di
freccia rossa
Cono
Forcella
Maniglia
Barra
"A"
Inclinata
Interno privo di graffi
Uniforme per tutta
la circonferenza
Lunghezza uniforme per
tutta la circonferenza
Superficie
danneggiata Fessurata Spessore
non uniforme
= Svasatura errata =
ТОО "Everest climate", Р. К., г.Алматы | Телефон: +7 727 230 00 10, +7 777 250 10 90 | www.aircon.kz, e-mail: [email protected]

INSTALLAZIONE 11
ITALIANO
ATTENZIONE
Informazioni sull'installazione. Per il col-
legamento delle tubazioni da destra.
Seguire le istruzioni in basso.
!
Errato
- Il seguente tipo di piegatura direttamente da
destra a sinistra può danneggiare la tubatura.
* Questo particolare può cambiare in funzione
del prodotto.
Installazione dell’unità interna
1Appendere l’unità interna sulla parte supe-
riore della piastra di installazione (fissare i
tre ganci nella parte superiore dell’unità in-
terna al bordo superiore della piastra di in-
stallazione). Verificare che i ganci siano
saldamente alloggiati sulla piastra di instal-
lazione spostandoli verso destra e verso
sinistra.
2Sbloccare il supporto della tubatura dal
telaio e montarlo tra il telaio e la piastra di
installazione per separare la parte inferiore
dell’unità interna dalla parete.
* Questo particolare può cambiare in funzione
del prodotto.
Tubatura
1Inserire il cavo di collegamento dal fondo
dell’unità interna e collegare il cavo (vedere
la sezione “Collegamento dei cavi”).
<Per la tubatura laterale sinistra>
Vista
Morsettiera
Cavo di collegamento
1(L) 2(N) 3(C)
1(L) 2(N)
3
4
Piastra di installazione
1
2
Supporto tubatura
ТОО "Everest climate", Р. К., г.Алматы | Телефон: +7 727 230 00 10, +7 777 250 10 90 | www.aircon.kz, e-mail: [email protected]

12 INSTALLAZIONE
ITALIANO
Diametro esterno Coppia
<Per la tubatura laterale destra>
2Fissare il cavo sulla scheda di controllo con
l'apposito elemento di fissaggio.
3Legare con nastro le tubature, il tubo
flessibile e il cavo di collegamento. Accer-
tarsi che il tubo flessibile sia posizionato
nel lato inferiore del gruppo.Posizionandolo
nel lato superiore si può verificare un tra-
boccamento della vaschetta di scarico den-
tro l'unità.
<Per la tubatura laterale sinistra>
<Per la tubatura laterale destra>
* Questo particolare può cambiare in funzione
del prodotto.
1Allineare il centro dei tubi e serrare
sufficientemente a mano il dado svasato.
2
Serrare il dado svasato con una chiave inglese.
3Quando occorre estendere il tubo flessibile
dell'unità interna, installare il tubo di
scarico come mostrato in figura.
mm pollici kgf.m
Ø6.35 1/4 1.8~2.5
Ø9.52 3/8 3.4~4.2
Ø12.7 1/2 5.5~6.5
Ø15.88 5/8 6.3~8.2
Ø19.05 3/4 9.9~12.1
Chiave inglese
Tubatura dell'unità interna
Chiave aperta (fissa)
Tubo di collegamento
Dado svasato
Nastro adesivo (stretto)
Adesivo
Tubo di scarico
Tubo flessibile dell'unità interna
Vista
Morsettiera
Cavo di collegamento
1(L) 2(N) 3(C)
1(L) 2(N)
3
4
Tubo flessibile di scarico
Tubo di collegamento
Cavo di
collegamento
Nastro
Tubo flessibile
di scarico
Tubo di collegamento
Cavo di
collegamento
Nastro
Tubo flessibile
di scarico
Tubatura dell'unità interna Dado svasato Tubi
ATTENZIONE
Se il tubo flessibile di scarico viene dire-tto
all'interno della stanza, isolarlo con del ma-
teriale isolante* in modo che il gocciola-
mento derivante dalla condensa non
danneggi mobilia o pareti.
*
Consigliato polietilene espanso o equivalente.
!
Collegamento del tubo di instal-
lazione e del tubo flessibile di
scarico all’unità interna.
ТОО "Everest climate", Р. К., г.Алматы | Телефон: +7 727 230 00 10, +7 777 250 10 90 | www.aircon.kz, e-mail: [email protected]

INSTALLATION 13
ENGLISH
Wrap the insulation material
around the connecting portion.
1Overlap the connection pipe insulation ma-
terial and the indoor unit pipe insulation
material. Bind them together with vinyl
tape so that there may be no gap.
2Set the tubing cutting line upward.
Wrap the area which accommodates the
rear piping housing section with vinyl tape.
3Bundle the piping and drain hose together
by wrapping them with vinyl tape sufficient
enough to cover where they fit into the
rear piping housing section.
Finishing the indoor unit
installation
1Mount the tubing holder in the original
positon.
2Ensure that the hooks are properly seated
on the installation plate by moving it left
and right.
3Press the lower left and right sides of the
unit against the installation plate until the
hooks engage into their slots (clicking
sound).
4Finish the assembly by screwing the unit
to the installation plate by using two
pieces of type "C" screws. And assemble a
chassis cover.
Insulation material
Gas Pipe Liquid Pipe
Cutting Line
Cutting Line
Good Case Bad Case
* Tubing cutting line have to be upward.
Vinyl tape(narrow)
Connection pipe
Connecting cable
Vinyl tape (wide) Wrap with vinyl tape
Indoor unit pipe
Pipe
Type 'C' screw
Wrap with vinyl tape
Drain hose
Pipe
Vinyl tape(wide)
ТОО "Everest climate", Р. К., г.Алматы | Телефон: +7 727 230 00 10, +7 777 250 10 90 | www.aircon.kz, e-mail: [email protected]

14 INSTALLATION
ENGLISH
Checking the Drainage
To check the drainage.
1Pour a glass of water on the evaporator.
2Ensure the water flows through the drain
hose of the indoor unit without any leak-
age and goes out the drain exit.
Drain piping
1The drain hose should point downward for
easy drain flow.
2Do not make drain piping like the follow-
ing.
* The feature can be changed according to
type of model.
Drain pan
Drain
hose
Leakage
checking
Connecting area
drain hose
Leakage
checking
Downward slope
Do not raise
Water
leakage
Accumulated
drain water
Air
Waving
Water
leakage
Tip of drain hose
dipped in water
Water
leakage Ditch
Less than
50mm gap
ТОО "Everest climate", Р. К., г.Алматы | Телефон: +7 727 230 00 10, +7 777 250 10 90 | www.aircon.kz, e-mail: [email protected]

INSTALLATION 15
ENGLISH
Test Running
- Check that all tubing and wiring are properly
connected.
- Check that the gas and liquid side service
valves are fully open.
Prepare remote controller
1Remove the battery cover by pulling it ac-
cording to the arrow direction.
2Insert new batteries making sure that the
(+) and (–) of battery are installed correctly.
3Reattach the cover by pushing it back into
position.
NOTE
!
• Use 2 AAA(1.5volt) batteries. Do not use
rechargeable batteries.
• Remove the batteries from the remote
controller if the system is not used for a
long time
ТОО "Everest climate", Р. К., г.Алматы | Телефон: +7 727 230 00 10, +7 777 250 10 90 | www.aircon.kz, e-mail: [email protected]

16
ENGLISH
ТОО "Everest climate", Р. К., г.Алматы | Телефон: +7 727 230 00 10, +7 777 250 10 90 | www.aircon.kz, e-mail: [email protected]

[
Representative
] LG Electronics Inc. EU Representative
Krijgsman 1, 1186 DM Amstelveen, The Netherlands
[Manufacturer]
LG Electronics Inc. Changwon 2nd factory
84, Wanam-ro, Seongsan-gu, Changwon-si, Gyeongsangnam-do, KOREA
ТОО "Everest climate", Р. К., г.Алматы | Телефон: +7 727 230 00 10, +7 777 250 10 90 | www.aircon.kz, e-mail: [email protected]
Table of contents
Languages:
Other LG Air Conditioner manuals

LG
LG HSN12IVP User manual

LG
LG ARNU073SER2 Instruction Manual

LG
LG LS120CE.AWHAEUS Instruction Manual

LG
LG LSN305HV User manual

LG
LG Art Cool LS240CE User manual

LG
LG AMNW09GEBA0 User manual

LG
LG LW1814HR User manual

LG
LG LW2513ER Assembly instructions

LG
LG ARNU18GV1A4 User manual

LG
LG AS-H096PBC0 User manual
Popular Air Conditioner manuals by other brands

Fujitsu
Fujitsu AIRSTAGE AU 20UF Series operating manual

General
General AUHA12LAL Service manual

Fujitsu
Fujitsu ABYG18KRTA Design & technical manual

Panasonic
Panasonic CS-V9BKPG Service manual

Argo
Argo AER608SH Technical data & service manual

Olimpia splendid
Olimpia splendid DOLCECLIMA COMPACT Instructions for installation, use and maintenance