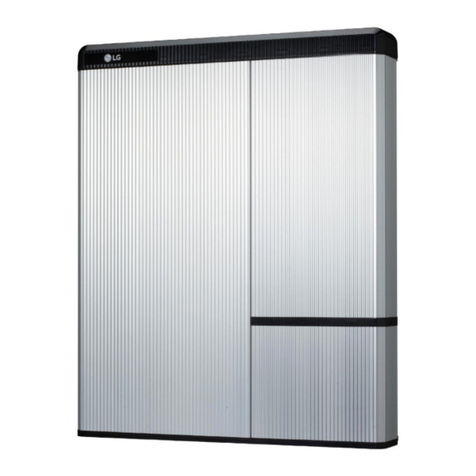
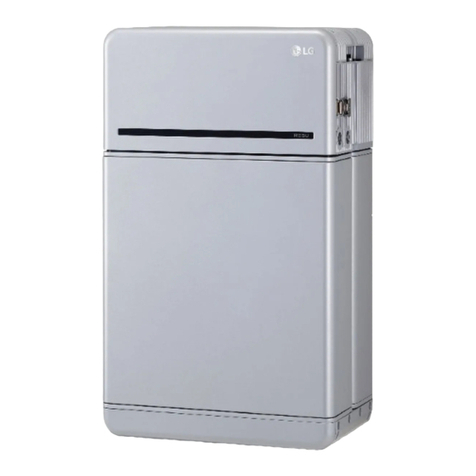
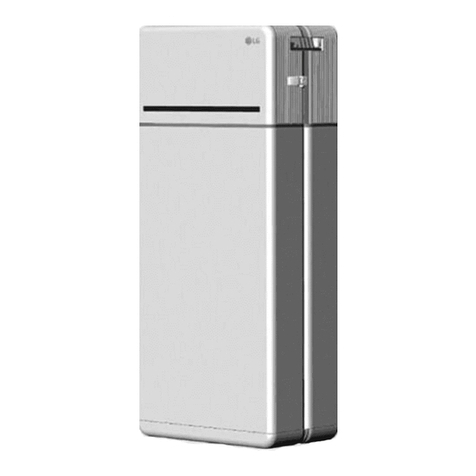
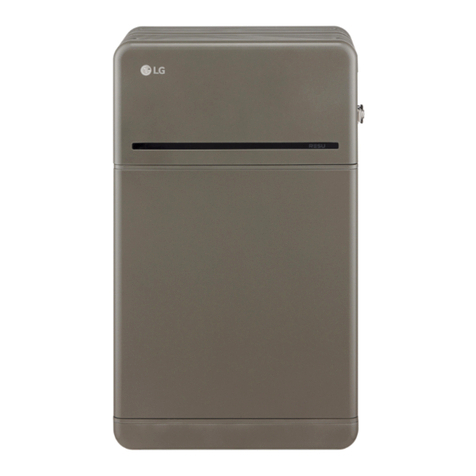
LG HBP10H User manual

16/04/2021
INSTALLATION MANUAL
Residential
Battery unit
Part 1
LG Electronics strongly advises users to exercise due care in following LGE’s
product installation manual. A warranty claims are invalid if damage is
caused by human error, inconsistent with the installation manual.
MODEL
LG HBP10H
(BLGRESU10HP)
Read in conjunction with Part 2.

ENGLISH
2
The information included in this manual is accurate at the time of publication.
However, this manual is subject to change without prior notice. In addition, the illustrations
in this manual are meant only to help explain system conguration concepts and installation
instructions.
Please note the images shown are for illustration purposes only.
Contents
1Safety
1.1 Symbols
1.2 Safety Instructions
1.2.1 General Safety Precautions
1.2.2 Battery Handling Guide
1.2.3 Response to Emergency Situations
1.3 Warning Label
1.4 Qualied Personnel
2Product Introduction
2.1 Technical Data
2.1.1 Dimensions and Weight
2.1.2 Performance
2.2 Features
2.3 Maintenance
2.4 Packaging Specications
3Installation
3.1 Mechanical Requirements
3.1.1 Package Contents
3.1.2 Basic lifting guide
3.1.3 Unboxing the Package
3.1.4 Installation Location
3.1.5 Clearance
3.1.6 Tools & Safety Gear Required
3.1.7 Appearance and Dimensions
3.1.8 System Clearance
3.1.9 Installing the Battery Pack
3.2 Installation process for Remote Monitoring Device (RMD)
3.2.1 Prepare for installation using RMD
3.2.2 Installation via RMD
3.3 Cable Connections
3.3.1 Cable Conguration
3.3.2 Guide for cable connection and setting the DIP switch
3.3.3 Spring Terminal Blocks
4Commissioning
4.1 LED Indicators
4.2 Powering On the Battery Pack
4.3 Shutting O the Battery Pack
5Troubleshooting
5.1 Troubleshooting Overview
5.1.1 Post-Installation Checklist
5.1.2 Troubleshooting Guidelines
6Uninstallation & Return
6.1 Return/Replacement Instructions
6.1.1 Uninstallation
6.1.2 Contact Information
7. Appendix
7.1 Connection in BLG RESU10HP parallel battery system
7.1.1 Setting for communication termination resistor (About Section B)
7.2 RMD Applications
7.2.1 Battery Status check via RMD
7.2.2 BMS, DC/DC and RMD Update via RMD
7.2.3 Installation via RMD for web user

3
1 Safety
1.1 Symbols
Caution, risk of electric shock
Do not place or install near ammable or explosive materials
Install the product out of reach of children
Read the instruction manual, in its entirety, before starting installation
and operation
Heavy weight may cause serious back injuries
Do not dispose of the product with household waste
Recyclable
Disconnect the equipment before carrying out maintenance or repair
Observe precautions for handling electrostatic-sensitive devices
Protective Class 1
Caution, risk of electric shock, energy storage timed discharge.
1.2 Safety Instructions
For safety reasons, installers are responsible for familiarizing themselves with the contents of
this document and all warnings before performing installation and servicing.
1.2.1 General Safety Precautions
Over-voltages or wrong wiring can damage the battery pack and cause combustion which can
be extremely dangerous.
Any type of product breakdown may lead to a leakage of electrolytes or ammable gas.
Avoid installing the battery pack where ammable materials are stored. Do not install in places
where explosive gas or chemicals are present.
During installation of the battery, the utility grid and solar input must be disconnected from the
Battery Pack wiring. Wiring must be carried out by qualied personnel.
Battery pack should only be serviced by qualied personnel.
The electronics inside the battery pack are vulnerable to electrostatic discharge.
Be sure to be grounded before handling the battery pack.
Read the label with Warning Symbols and Precautions, which are visible under the Battery
Cover (see Section 1.3 Warning Label).
1.2.2 Battery Handling Guide
• Do not expose the battery to an open ame.
• Do not place the product near to highly ammable materials.
•Do not expose or place near water sources such as downspouts or sprinklers.
•Do not store or install the product in direct sunlight.
•Do not install the product in an airtight enclosure or in an area without ventilation.
•Do not install the product in living area of dwelling units or in sleeping units other
than within utility closets and storage or utility spaces.
•Store in a cool and dry place. (Do not store in greenhouses or storage areas for
hay, straw, cha, animal feed, fertilizer, vegetables, or fruit products.)
• Store the product on a at, level surface.
•Store the product out of reach of children and animals.
•Store the product in clean environment, free of dust, dirt and debris.
• Do not disconnect, disassemble or repair the product unqualied personnel. Only
qualied personal are to handle, install and service the Product.
•Do not damage the Product by dropping, deforming, impacting, cutting or
penetrating with a sharp object. Doing so may cause a re or leakage of
electrolytes.
•Do not touch the product if liquid spills on it. There is a risk of electric shock.
Handle the battery wearing insulated gloves.
• Do not step on the product or the product՚s packaging since the product may be
damaged.
• Do not place any foreign objects on top of the Battery Pack and on the cooling n.
•Do not put the battery pack upside down on the ground.
•Do not connect the power cables at terminal the block in the opposite direction.
•Do not charge or discharge a damaged battery.
•If the Product is installed in a garage or carport, ensure there is adequate clearance
from vehicles.
• The battery pack has been certied IP55 and can be installed indoors as well
as outdoors. However, if installed outdoors, do not allow the battery pack to be
exposed to direct sunlight or water sources, as they may cause:
- Power limitation phenomena in the battery (with a resulting decrease in energy
production by the system).
- Premature wear of the electrical/electromechanical and mechanical components.
- Reduction in performance, performance warranty and possible damage of the battery
•Do not connect any AC conductors or photovoltaic conductors directly to the
battery pack. These are only to be connected to the inverter.
1.2.3 Response to Emergency Situations
The Product includes internal fault mechanisms designed to prevent failures and subsequent
risk hazards. However, LG Electronics cannot guarantee safety performance of the Product is
ever exposed to abuse, damage or negligence.
•If a user happens to be exposed to the internal materials of the battery cell due to
damage on the outer casing, the following actions are recommended.
In case of inhalation: Leave the contaminated area immediately and seek medical
attention.
In case of contact with eyes: Rinse eyes with running water for 15 minutes and
seek medical attention.
In case of contact with skin: Wash the contacted area with soap thoroughly and
seek medical attention.
In case of ingestion: Induce vomiting and seek medical attention.
If a re breaks out at the location where the battery pack is installed, perform the following
countermeasures.
• Utilize re-extinguishing media
A respirator is not required during normal operation.
Use an FM-200 or CO2 extinguisher for battery res.
Use an ABC re extinguisher if the re is not from the battery and has not yet spread to it.
• Follow proper re-ghting instructions
1. If a re occurs when charging batteries, provided it is safe to do so, disconnect
the battery pack circuit breaker to shut o the power charge.
2. If the battery pack is not on re yet, extinguish the re before the battery pack
catches re preferably with water.
3. If the battery pack is on re, do not try to extinguish it, and evacuate people
from the premises immediately.
WARNING
There may be a possible explosion when batteries are heated above 150°C. When a
battery pack is burning, it will leak poisonous gases. Do not approach it.
• Eective ways to deal with accidents
On land: Place the damaged battery into a segregated place and call your local re
department or service engineer.
In water: Stay out of the water and do not touch anything if any part of the battery, inverter,
or wiring is submerged.
Do not use the submerged battery again. Contact your service engineer for assistance.
ENGLISH
4
1.3 Warning Label
Product/warning label and Battery Control Unit’s traceability label are behind the front cover.
The front cover opens by turning the front cover handle counterclockwise. Battery Modules’
traceability labels are attached to the side of the Battery Modules.
1. Product/Warning Label
2. Traceability label
2-1. Battery Control Unit 2-2. Battery Module
EH153064P8S7DMA
○○○○○○○○○○
SH077064P8S7BMA
○○○○○○○○○○A
SH077064P8S7BMA
○○○○○○○○○○B
1.4 QualiedPersonnel
This guide for the tasks and procedures described herein is intended for use by skilled sta
only. A skilled sta is de ned as a trained and quali ed electrician or installer who has all of
the following skills and experience:
• Knowledge of the functional principles and operation of on-grid and o -grid
(backup) systems
• Knowledge of the dangers and risks associated with installing and using electrical
devices and acceptable mitigation methods
• Knowledge of the installation of electrical devices
• Knowledge of and adherence to this guide and all safety precautions and best
practices
• Quali cation speci ed in battery warranty le
: BLG RESU-certi cation in the battery website
: Knowledge of local installation standards
: Electrical license for battery installation required by the country or state
• Repair the battery by disassembly is possible only at the LG Service Center or by
a person who is specially authorized separately from the installation quali cation
2 Product Introduction
2.1 Technical Data
2.1.1 Dimensions and Weight
BLG RESU10HP
Part Number TLB00983101
Width 504 mm (19.8”)
Height 817 mm (32.2”)
Depth 295 mm (11.6”)
Weight 1) 111 kg (244 lbs)
1) Battery pack weights may vary slightly.
2.1.2 Performance
Electrical Characteristics
Usable Energy 1) 9.6 kWh
Battery Capacity 64.1 Ah
Voltage Range 350 to 450 VDC
Absolute Max. Voltage 595 VDC
Max. Current (charging/discharging) 14.3A @ 350V
Max. Power (charging/discharging) 5 kW
Peak Power 2) (only discharging) 7 kW for 10 sec.
Peak Current (only discharging) 20.9 A for 10 sec.
Communication Interface RS485/ CAN
DC Disconnect Circuit Breaker
Connection Method Spring Type Connector
User Interface LEDs for Normal and Fault Operation
Operating Conditions
Installation Location Indoor/Outdoor
Operating Temperature charge 14°F to 122°F (-10°C to 50°C)
discharge -4°F to 122°F (-20°C to 50°C)
Operating Temperature
(Recommended) 59°F to 86°F (15°C to 30°C)
Storage Temperature -22°F to 140°F (-30°C to 60°C), acceptable for 7
days in total
-4°F to 113°F (-20°C to 45°C), acceptable for the
rst 6 months
-4°F to 86°F (-20°C to 30°C), acceptable for months
7~12
Humidity 5% to 95%
Altitude Max. 6,562 ft (2,000 m)
Cooling Strategy Natural Convection
Certication
Safety Cell
Battery
Pack
UL1642
CE / RCM / IEC 62619 / UL1973 /
IEC62477-1
Emissions FCC
Hazardous Materials Classi cation Class 9
Transportation UN38.3
Ingress Rating IP55
※ Test Conditions: Temperature 25°C/77°F, at the beginning of life.
※ Energy is measured under speci c conditions from LG Electronics (0.3CPCV/0.3CP).
1) Value for battery pack only. Maximal usable energy at the AC output may vary by condition,
such as inverter effi ciency, con guration and temperature.
2) Peak current excludes repeated short duration (less than 10 sec. of current pattern).

5
1. Short Circuit Current/Duration
Short Circuit Current 1.106 kA
Duration 0.97 ms
2. Arc Flash Protection Calculations
In order to protect personnel from the possibility of getting injured by an arc ash
hazard, Arc ash calculation of the battery system is estimated with the Incident Energy
Calculations refer to Annex D of NFPA 70E.
Battery System Voltage 171.4V
Battery System Internal Resistance 0.04Ω
Bolted Fault Current 1.106 kA
Arcing Current 0.553 kA
Clearing Time 792 us
Arc Flash Incident Energy 0.000088 Cal/cm2
Working Distance 450 mm (18inches)
Battery system installers must wear PPE (Personal Protective Equipment) according to
NFPA 70E Article 130.
WARNING
•When installing the battery system, the worker shall wear arc-rated clothing
in every occasions and places to protect him/her from any possible exposure
to an electric arc ash.
•The arc-rated clothing worn by the worker must assure the worker’s
movement and visibility while covering all ignitable clothing.
•The worker shall always wear the non-conductive safety helmet every
occasions and places to protect him/her from any danger of head injury
from electric shock or burns due to the contact with energized electrical
conductors or circuit parts resulting from electrical explosion.
•The worker shall wear non-conductive protective equipment for the face,
neck, and chin at every occasion and location to protect him/her from danger
of injury from exposure to electric arcs or ashes resulting from an electrical
explosion.
•The worker shall wear non-conductive protective equipment for the eyes at
every occasion and location to protect him/her from any danger of injury
from electric arcs or ashes resulting from an electrical explosion.
• The worker shall wear hearing protection within the arc ash boundary.
•The worker shall wear heavy-duty leather gloves or arc-rated gloves,
satisfying the following regulation level, for arc ash protection. In the case
of wearing the rubber gloves for the shock protection, he/she shall wear
additional leather protectors above the gloves.
•The worker shall wear heavy-duty leather footwear or dielectric footwear or
both to provide some arc ash protection.
•The worker shall inspect arc-rated apparel before every use. Work clothing
or arc ash suits that are contaminated or damaged to the extent, impairing
the protective qualities, shall not be used. Protective items that become
contaminated with grease, oil, ammable liquids or combustible materials
shall not be used.
•The garment manufacturer’s instructions for care and maintenance of arc-
rated apparel shall be followed.
•Arc-rated apparel shall be stored in a manner that prevents physical damage;
damage from moisture, dust, or other deteriorating agents; or contamination
from ammable or combustible materials.
2.2 Features
•Compact energy storage unit for domestic photovoltaic system compatibility
•Residential 400V DC battery pack system: Daily cycle and emergency back up
capability.
DC/DC Circuit
Breaker
(600V)
+ +
- -
Circuit Breaker
Battery Inverter
Battery Power
Interface Inverter Power
Interface
•Protection devices included as follows:
- Inverter Power Interface for protection against overvoltage, overcurrent, external
short-circuit, reverse polarity, inrush current and over temp.
- Battery Power Interface for protection against internal short-circuit, overvoltage,
overcurrent, over temp and undervoltage.
•Flexible installation: Indoors or Outdoors
2.3 Maintenance
BLG RESU10HP does not require maintenance during normal operation if properly installed
per the installation manual. In the event of fault, contact the regional service center.
2.4 Packaging Specications
Category Contents
Size (L×W×H) 720 mm
(28.3”) 845 mm
(33.3”) 910 mm
(35.8”) Outer Size
Qty/Box (ea) 1
Packaging
Materials
Box Corrugated Cardboard Disposable
Inner Corrugated Cardboard Disposable
Pallet Wood Disposable
Weight Product 111 kg (244.7 lbs) 1 pack/box
(Battery Module (x2) + Battery
Control Unit + enclosed items)
Packaging 39 kg (86.0 lbs) Pallet (10.5kg) + Box (28.5kg)
Gross 150 kg (330.7 lbs) Product + Packaging
3 Installation
3.1 Mechanical Requirements
3.1.1 Package Contents
The following items are included in the package:
Battery Module A&B Battery Control Unit Module Connect
Plate Module Support
BRKT (x2)
Standing Bracket
1 & 2 Spacer (x2) M6 x L10 Flange
Bolt (x18) M5 × L200 Long
Flange Bolt (x6)
INSTALLATIONMANUAL
Residential
Battery unit
MODEL
LGESSHBP 10H
(BLGRESU10HP)
LGElectronicsstrongly advises users to exercise due care in following LGE’s
productinstallation manual. A warrantyclaims are invalid if damage is caused
byhuman error,inconsistent with the installation manual.
3/4"-1" Adapter (x2) Cap (x2) Manual Drill template
Cable ties (Optional)
Wall Mounting
Bracket Bottom
(Optional)
Wall Mounting
Bracket Top
(Optional)
Wall Mounting
Bracket Top Support
(Optional)
M6 x L10 Flange
Bolt (x3)
(Optional)
M8 x L15 Sems
Bolt (x8)

ENGLISH
6
3.1.2 Basic lifting guide
Refer to below guide for lifting and carrying the Battery Control Unit and Battery Modules
during installation.
Handling position
Battery Module
(2 installer)
Battery Module
(1 installer)
Battery Control Unit
Handling position
Battery Module
(2 installer)
Battery Module
(1 installer)
Battery Control Unit
Handling position
Battery Module
(2 installer)
Battery Module
(1 installer)
Battery Control Unit
Handling position
Battery Module
(2 installer)
Batter
(1 installer)
Battery Control Unit
Handling position
(2 installer)
Battery Module
(1 installer)
Battery Control Unit
3.1.3 Unboxing the Package
1. Cut the packing strap and remove
the top lid.
2. Remove the sleeve.
3. Pull out the Battery Control Unit. and
the Spacers (x2).
INSTALLATIONMANUAL
Residential
Batteryunit
MODEL
LGESSHBP10H
(BLGRESU10HP)
LGElectronicsstronglyadvisesuserstoexerciseduecareinfollowing LGE’s
productinstallationmanual.Awarrantyclaimsareinvalidifdamageis caused
byhumanerror,inconsistentwiththeinstallationmanual.
4. Pull out the bundled items, including
the Module Connecting Plate.
5. Pull out Battery Module B.
6. Pull out Battery Module A.
7. (Optional) Pull out the parts for wall
mounting.
CAUTION
According to regional regulations, several people may be required for moving equipment.
3.1.4 Installation Location
Requirements:
• There must be no highly ammable or explosive materials nearby.
•The ambient temperature should be within the range of -4°F to 122°F (-20°C to
50°C).
•The battery pack must be installed on level ground that can support its weight.
•Product shall be installed indoors (ex. in a basement or a garage) or outdoors
under an eave and out of direct sunlight.
Recommendations:
•The building should be designed to withstand earthquakes.
•The area should be waterproof and properly ventilated. (IP55)
•The product should be installed out of reach of children and animals.
CAUTION
If the ambient temperature is outside operating range, the battery pack will stop
operating to protect itself. The optimal temperature range for the battery pack to operate
is from 59℉ to 86℉(15℃ to 30℃).
Frequent exposure to harsh temperatures may deteriorate the performance and life of the
battery pack.

7
3.1.5 Clearance
Recommended clearances for the left, right and top of the product are shown in the gure for
the proper ventilation and installer convenience.
Ceiling
Floor
500 mm
(20")
300 mm
(12")
300 mm
(12")
Ceiling
Floor
500 mm
(20")
300 mm
(12")
300 mm
(12")
300 mm
(12")
<Standing type> <Wall Mounting type>
3.1.6 Tools & Safety Gear Required
• Tools
The following tools are required to install the battery pack :
Precision screwdriver M5 torque wrench Inclinometer
14
Drill
(min. diameter 10 mm, 0.4") Pencil or marker Tape measure
* The fasteners are needed for xing the bracket on the wall.
• Safety Gear for Personal Protection
It is required to wear the following safety gears when handling the battery pack.
Insulated gloves Safety goggles Safety shoes
3.1.7 Appearance and Dimensions
• Appearance
Proper handling and care are recommended as disassembly, change of color,
scratches, leakage of liquid, and stains may in uence the economic value of the
battery pack.
• Pack appearance and dimensions
817 mm
(32.2”)
295 mm
(11.6")
504 mm
(19.8")
• Color and materials
- Battery Module front/rear case:
metallic gray, steel
- Battery Control Unit cover &
Module Connect Plate: metallic gray,
aluminum
- LED cover: black, plastic
3.1.8 System Clearance
The battery requires adequate clearance for installation, cabling, and air ow. The minimum
clearance for system con guration is provided below. The cable connecting between battery
pack and inverter should be in accordance with the installation guide manual of the inverter.
NOTE
An external DC isolator may be installed within the clearance zone. Minimum clearances
may be greater according to local regulations.
Inverter
Ceiling
Floor
500mm
(20”)
300mm
(12”)
300mm
(12”)
500mm
(20") 300mm
(12")
300mm
(12")
Inverter
Ceiling
Floor
Inverter
Ceiling
500mm
(20”)
300mm
(12”)
300mm
(12”)
500mm
(20") 300mm
(12")
300mm
(12")
300mm
(12")
Inverter
Ceiling
Floor
<Standing type> <Wall Mounting type>
3.1.9 Installing the Battery Pack
3.1.9.1 Standing Type
CAUTION
Make sure that the inverter AC and DC disconnects are turned o before connecting the
power cable to the battery pack.
Install the battery pack through the following steps:
Area1
OK
OK
Ex) If min. clearance is 200mm,
305mm
203mm
Area2
RESU10HPrime
DrillTemplate
Area2Area1
Ex) If min. clearance is 200 mm,
Wall Ok
Ok
203 mm
305 mm
1. Place the Drill template to the wall
where the battery pack will be
installed. After that, drill holes on the
position marked on the Drill template.
* Recommended fastener count:
1(Area1)/1(Area2)
* Recommended fastener diameter/
length: 10mm/40mm Min.
* Fastener separation should observe
the regional building code.
* Check “LG HBP10H Standing”
on the middle side of Drill
Template before drilling.
Front
MODULECONNECT
LATE1호
Rear
Front
Wall direction
Front
Wall
direction
2. Place a spacer to the position marked
on the Drill template. After that, place
the Module connect plate in contact
with the Spacer and align center lines.
* Pay attention to the direction of
the Spacer. Refer to left image for
correct orientation.
*Do not use anchor bolts to x the
Module connect plate to the oor.
* Be careful not to damage the
aluminum foil attached on the
bottom of Module connect plate
during handling.

ENGLISH
8
Standing bracket_1
RESU10HPrime
DrillTemplate
Standing bracket 1
3. Remove the Drill template and x the
Standing bracket 1 on the wall.
Battery Module B
Label
Wall
Rear
Front
Front
Rear
Battery Module Direction
4. Place Battery Module B on the rear
side of Module Connect plate.
* The side without bolts is the front
of the Battery Module.
*Check the label to con rm the
battery pack is of B. Label is
attached on the left side of Battery
Module.
FrontFront
Battery Module A
Label
Front
Front
Battery Module B
Battery Module A
TOP VIEW
Rear
Front
Wall
5. Place Battery Module A on the front
side of Module Connect plate. The
Rear side of each Battery Module
should face each other. After that,
remove the Spacer between the wall
and Battery Module.
*Check the label to con rm the
Battery pack is of A. Label is
attached on the left side of Battery
Module.
Front
Front
Module Support BRKT
Front
Front
6. Assemble Module Support BRKTs
using 6 bolts each.
* Tighten the M6 Flange Bolts (x12)
with a torque of 5N·m.
Placethe spacer
Inthe line HERE
Placethe spacer
Inthe line HERE Placethe spacer
Inthe line HERE
Placethe spacer
Inthe line HERE
Placethe spacer
Inthe line HERE
Placethe spacer
Inthe line HERE
Placethe spacer
Inthe line HERE
P
la
c
e
thespa
c
er
I
nthe line HERE
Placethe spacer
Inthe line HERE
P
la
c
ethe spa
c
er
I
nthe line HERE
Placethe spacer
Inthe line HERE
P
la
c
ethe spa
c
er
I
nthe line HERE
Placethe spacer
Inthe line HERE
P
la
c
ethe spa
c
er
I
nthe line HERE
Battery Control Unit
Battery Modules
7. Remove bubble wrap from
connectors of Battery Control Unit
and the warning label of Battery
Modules.
Placethe spacer
Inthe line HERE
P
la
c
ethe spa
c
er
I
nthe line HERE
Placethe spacer
Inthe line HERE
P
la
c
ethe spa
c
er
I
nthe line HERE
Placethe spacer
Inthe line HERE
P
la
c
ethe spa
c
er
I
nthe line HERE
Placethe spacer
Inthe line HERE
P
la
c
ethe spa
c
er
I
nthe line HERE
Place the spacer
In the line HERE
Place the spacer
In the line HERE
Place the spacer
In the line HERE
Place the spacer
In the line HERE
Spacer
(used for assmbly ang disassembly)
TOP
Placethe spacer
Inthe line HERE
Placethe spacer
Inthe line HERE Placethespacer
Inthe line HERE
Placethe spacer
Inthe line HERE
Place the spacer
In the line HERE
Place the spacer
In the line HERE
P
la
c
e the spa
c
er
I
n the line HERE
Place the spacer
In the line HERE
Place the spacer
In the line HERE
Spacer
(used for assmbly ang disassembly)
TOP
Spacer
Spacer
TOP VIEW
8. Place the spacers on the position
marked with label on Battery
Modules.
Placethe spacer
Inthe line HERE
P
la
c
e
thesp
a
c
er
I
n
th
eline HERE
Placethe spacer
Inthe line HERE
P
la
c
ethe
spa
c
er
I
nt
heline HERE
Placethe spacer
Inthe line HERE
P
la
c
ethe spa
c
er
I
nt
he
line
H
ERE
Placethe spacer
Inthe line HERE
P
la
c
ethe spa
c
er
I
nthe line HERE
Placethe spacer
Inthe line HERE Placethe spacer
Inthe line HERE
Placethe spacer
Inthe line HERE
Placethe spacer
Inthe line HERE
Battery Control Unit
Placethespacer
Intheline HERE Placethespacer
Intheline HERE
Placethespacer
Intheline HERE
Placethespacer
Intheline HERE
Placethe spacer
Inthe line HERE
P
la
c
ethe spa
c
er
I
nthe line HERE
Placethe spacer
Inthe line HERE
P
la
c
ethe spa
c
er
I
nthe line HERE
Placethe spacer
Inthe line HERE
P
la
c
ethe spa
c
er
I
nthe line HERE
Placethe spacer
Inthe line HERE
P
la
c
ethe spa
c
er
I
nthe line HERE
Battery Control Unit
9. Place the Battery Control Unit on
top of the spacers, and align with the
Battery Module.
* Be careful not to break the
connector between the spacers and
the Battery Control Unit.

9
Placethespacer
Intheline HERE
P
la
c
ethespa
c
er
I
ntheline HERE
Placethespacer
Intheline HERE
P
la
c
ethespa
c
er
I
ntheline HERE
Placethespacer
Intheline HERE
P
la
c
ethespa
c
er
I
ntheline HERE
Placethespacer
Intheline HERE
P
la
c
ethespa
c
er
I
ntheline HERE
TPA
Sensing connector Power connector
Front
Front
Front
Front
Sensing connector Power connector
“Click!” TPA
10.Connect the power and sensor
connectors on the right and left sides
(2 each). Assemble the connectors
until you hear a “Click”. After that,
lock the power connector by pressing
TPA (Terminal Position Assurance).
Placethe spacer
Inthe line HERE
P
la
c
ethe spa
c
er
I
nthe line HERE
Placethe spacer
Inthe line HERE
P
la
c
ethe spa
c
er
I
nthe line HERE
Placethe spacer
Inthe line HERE
P
la
c
ethe spa
c
er
I
nthe line HERE
Placethe spacer
Inthe line HERE
P
la
c
ethe spa
c
er
I
nthe line HERE
Handle
LED power indicator
LED fault indicator
11. Check the operation of the battery
pack by following the steps below.
1) Hold and turn the handle
counterclockwise.
2) Open the front cover and turn on
the circuit breaker switch.
3) If there are no problems with the
assembly process or the product
itself, the LED power indicator will
turn on. Sixty (60) seconds later,
the LED fault indicator will blink
(due to a lack of communication
with the inverter, not due to a
product defect).
4) Turn o the Circuit Breaker switch.
Then, close the front cover and turn
the handle counterclockwise.
* If you experience any problems
at this stage, go to Section 5
Troubleshooting.
Placethe spacer
Inthe line HERE
P
la
c
ethe spa
c
er
I
nthe line HERE
Placethe spacer
Inthe line HERE
P
la
c
ethe spa
c
er
I
nthe line HERE
Placethe spacer
Inthe line HERE
P
la
c
ethe spa
c
er
I
nthe line
H
ERE
Placethe spacer
Inthe line HERE
P
la
c
ethe spa
c
er
I
nthe line HERE
12.Double-check the alignment of the
Battery Control Unit.
Placethe spacer
Inthe line HERE
Placethe spacer
Inthe line HERE
P
la
c
ethe spa
c
er
I
nthe line HERE
Placethe spacer
Inthe line HERE
P
la
c
ethe spa
c
er
I
nthe line HERE
Placethe spacer
Inthe line HERE
P
la
c
ethe spa
c
er
I
nthe line HERE
Placethe spacer
Inthe line HERE Place the spacer
Inthe line HERE
Placethe spacer
Inthe line HERE
Placethe spacer
Inthe line HERE
Placethe spacer
Inthe line HERE Place the spacer
Inthe line HERE
Placethe spacer
Inthe line HERE
Placethe spacer
Inthe line HERE
P
la
c
ethe spa
c
er
I
nthe line HERE
Placethe spacer
Inthe line HERE
P
la
c
ethe spa
c
er
I
nthe line HERE
Placethe spacer
Inthe line HERE
P
la
c
ethe spa
c
er
I
nthe line HERE
CRemove a spacer
AGrab
here
ERemove another one in
the same way DSettle slowly
BLift (just few mm)
13.Remove one spacer by lifting one
side of the Battery Control Unit. After
that, remove the other spacer in the
same way.
* Be careful not to pull on the cables
by lifting the Battery Control Unit
too high. Doing so may cause
damage to the cables or cause the
unit to disconnect.
* Before setting down the Battery
Control Unit, the cable connection
should be checked once more.
Placethe spacer
Inthe line HERE Place the spacer
Inthe line HERE
Placethe spacer
Inthe line HERE
Placethe spacer
Inthe line HERE
Placethe spacer
Inthe line HERE
P
la
c
ethe spa
c
er
I
nthe line HERE
Placethe spacer
Inthe line HERE
P
la
c
ethe spa
c
er
I
nthe line HERE
Placethe spacer
Inthe line HERE
P
la
c
e
thespa
c
er
I
nthe line HERE
Placethe spacer
Inthe line HERE
P
la
c
ethe spa
c
er
I
nthe line HERE
Placethe spacer
Inthe line HERE
P
la
c
ethe spa
c
er
I
n
theline HERE
Placethe spacer
Inthe line HERE
P
la
c
et
hespa
c
er
I
nthe line HERE
Placethe spacer
Inthe line HERE
P
la
c
ethe spa
c
er
I
nthe line HERE
Placethe spacer
Inthe line HERE
P
la
c
ethe spa
c
er
I
nthe line HERE
Placethe spacer
Inthe line HERE Place the spacer
Inthe line HERE
Placethe spacer
Inthe line HERE
Placethe spacer
Inthe line HERE
14.Realign the Battery Control Unit.
Placethe spacer
Inthe line HERE
P
la
c
ethe spa
c
er
I
nthe line HERE
P
lacethe spacer
I
nthe line HERE
P
la
c
ethe spa
I
nthe line HERE
Placethe spacer
Inthe line HERE
Placethe spacer
Inthe line HERE
Placethe spacer
Inthe line HERE Place the spacer
Inthe line HERE
Placethe spacer
Inthe line HERE
Placethe spacer
Inthe line HERE
M5xL65 Flange Bolt
Top Cover
15.Loosen 4 bolts and remove the Top
Cover.
M5xL200 Flange long Bolt
16.Tighten six (6) long ange bolts with
a torque of 5N·m.
* While assembling, open the front
cover and check that all M5 Flange
long bolts are placed accordingly.
17.Move the Battery pack to set the right
position for assembly of the Standing
bracket.
Standing bracket_2
Standing bracket 2
18.Assemble Standing Bracket 2 ( at)
using six (6) M6 bolts to x the pack
onto the wall.

ENGLISH
10
Placethe spacer
Inthe line HERE Place the spacer
Inthe line HERE
Placethe spacer
Inthe line HERE
Placethe spacer
Inthe line HERE
Placethe spacer
Inthe line HERE
P
la
c
ethe spa
c
er
I
nthe line HERE
Placethe spacer
Inthe line HERE
P
la
c
ethe spa
c
er
I
nthe line HERE
Placethe spacer
Inthe line HERE
ethe spa
c
er
nthe line HERE
Placethe spacer
Inthe line HERE
19.Re-attach the top cover.
* Tighten the M5xL65 Flange Bolt
(4ea) with a torque of 5N·m.
Placethe spacer
Inthe line HERE
P
la
c
ethe spa
c
er
I
nthe line HERE
Placethe spacer
Inthe line HERE
P
la
c
ethe spa
c
er
I
nthe line HERE
Placethe spacer
Inthe line HERE
P
la
c
ethe spa
c
er
I
nthe line HERE
Placethe spacer
Inthe line HERE
P
la
c
ethe spa
c
er
I
nthe line HERE
Placethe spacer
Inthe line HERE Placethe spacer
Inthe line HERE
Placethe spacer
Inthe line HERE
Placethe spacer
Inthe line HERE
Handle
Front Cover
20.Open the front cover.
* Hold the handle and turn it
counterclockwise.
M5 PH Bolt 6ea
Front Protection Cover
21.Loosen 6 bolts and remove the Front
Protection Cover.
* Be careful not to drop the bolts into
the pack at this stage.
Connector for
Ethernet cable
Hole #2
Hole #1
22.Assemble the adapter or cap
according to regional regulations.
Insert the RMD ethernet cable
through Hole #2 and connect the
cable. Then proceed to Section 3.2
Installation for Remote Monitoring
Device (RMD).
Internal cable
Hole #2 Communication cable
Hole #1 Power cable
23.Assemble the adapter or cap
according to regional regulations.
Then insert the power and
communication cables through the
holes from outside of the pack.
* Arrange the internal cable as
required to avoid blocking the holes
for external cables.
24.Connect the cables according to their
application.
* Refer to Section 3.3 Cable
Connections.
25.Arrange the power cables and
communication cables separately
using cable ties.
M5 PH Bolt 6ea
Front Protection Cover
26.Re-attach the Front Protection Cover
with M5 PH bolt 6ea.
Placethespacer
Intheline HERE
P
la
c
ethespa
c
er
I
ntheline HERE
Placethespacer
Intheline HERE
P
la
c
ethespa
c
er
I
ntheline HERE
Placethespacer
Intheline HERE
P
la
c
ethespa
c
er
I
ntheline HERE
Placethespacer
Intheline HERE
P
la
c
ethespa
c
er
I
ntheline HERE
Handle
Handle
27.Close the front cover.
* Hold the handle and turn it
clockwise.
* Make sure the Front Cover is
closed.

11
3.1.9.2 Wall Mounting Type (Optional)
Wall
1. Place the Drill template to the wall
where the battery pack will be
installed. After that, drill holes on the
position marked on the Drill template.
* The number of fastener should
observe the regional building code.
LGES recommends the use of at
least 8 fasteners for Wall Mounting
Bracket Bottom and 2 fasteners for
Wall Mounting Bracket Top.
* Check “LG HBP10H Wall
Mounting (Optional)” on the
middle side of Drill Template
before drilling.
2. Fix the Wall Mounting Bracket
Bottom and Wall Mounting Bracket
Top on the wall.
Top View
Front
Rear
Bottom View
Wall
Wall
3. Place and x the Module Connect
Plate on the Wall Mounting Bracket
Bottom using eight (8) M8 Sems
Bolts.
* Tighten the M8 Sems Bolts with a
torque of 5Nm.
Battery
Module B
Label
Rear
Front
Front
Rear
Battery Module Direction
Wall
4. Place Battery Module B on the rear
side of Module Connect plate.
* The side without bolts is the front
of the Battery Module.
*Check the label to con rm the
battery pack is of B. Label is
attached on the left side of Battery
Module.
Battery Module A
Label
Front
Front
Battery Module B
Battery Module A
TOP VIEW
Rear
Front
Wall
5. Place Battery Module A on the front
side of Module Connect plate. The
Rear side of each Battery Module
should face each other.
*Check the label to con rm the
Battery pack is of A. Label is
attached on the left side of Battery
Module.
Front
Front
Module Support BRKT
Front
Front
6. Assemble Module Support BRKTs
using 6 bolts each.
* Tighten the M6 Flange Bolts (x12)
with a torque of 5N·m.
Placethe spacer
Inthe line HERE
Placethe spacer
Inthe line HERE Placethe spacer
Inthe line HERE
Placethe spacer
Inthe line HERE
Placethe spacer
Inthe line HERE
Placethe spacer
Inthe line HERE
Placethe spacer
Inthe line HERE
P
la
c
e
thespa
c
er
I
nthe line HERE
Placethe spacer
Inthe line HERE
P
la
c
ethe spa
c
er
I
nthe line HERE
Placethe spacer
Inthe line HERE
P
la
c
ethe spa
c
er
I
nthe line HERE
Placethe spacer
Inthe line HERE
P
la
c
ethe spa
c
er
I
nthe line HERE
Battery Control Unit
Battery Modules
7. Remove bubble wrap from
connectors of Battery Control Unit
and the warning label of Battery
Modules.
Placethe spacer
Inthe line HERE
P
la
c
ethe spa
c
er
I
nthe line HERE
Placethe spacer
Inthe line HERE
P
la
c
ethe spa
c
er
I
nthe line HERE
Placethe spacer
Inthe line HERE
P
la
c
ethe spa
c
er
I
nthe line HERE
Placethe spacer
Inthe line HERE
P
la
c
ethe spa
c
er
I
nthe line HERE
Place the spacer
In the line HERE
Place the spacer
In the line HERE
Place the spacer
In the line HERE
Place the spacer
In the line HERE
Spacer
(used for assmbly ang disassembly)
TOP
Placethe spacer
Inthe line HERE
Placethe spacer
Inthe line HERE Placethespacer
Inthe line HERE
Placethe spacer
Inthe line HERE
Place the spacer
In the line HERE
Place the spacer
In the line HERE
P
la
c
e the spa
c
er
I
n the line HERE
Place the spacer
In the line HERE
Place the spacer
In the line HERE
Spacer
(used for assmbly ang disassembly)
TOP
8. Place the spacers on the position
marked with label on Battery
Modules.

ENGLISH
12
Placethe spacer
Inthe line HERE
P
la
c
e
thesp
a
c
er
I
n
th
eline HERE
Placethe spacer
Inthe line HERE
P
la
c
ethe
spa
c
er
I
nt
heline HERE
Placethe spacer
Inthe line HERE
P
la
c
ethe spa
c
er
I
nt
he
line
H
ERE
Placethe spacer
Inthe line HERE
P
la
c
ethe spa
c
er
I
nthe line HERE
Placethe spacer
Inthe line HERE Placethe spacer
Inthe line HERE
Placethe spacer
Inthe line HERE
Placethe spacer
Inthe line HERE
Battery Control Unit
Placethespacer
Intheline HERE Placethespacer
Intheline HERE
Placethespacer
Intheline HERE
Placethespacer
Intheline HERE
Placethe spacer
Inthe line HERE
P
la
c
ethe spa
c
er
I
nthe line HERE
Placethe spacer
Inthe line HERE
P
la
c
ethe spa
c
er
I
nthe line HERE
Placethe spacer
Inthe line HERE
P
la
c
ethe spa
c
er
I
nthe line HERE
Placethe spacer
Inthe line HERE
P
la
c
ethe spa
c
er
I
nthe line HERE
Battery Control Unit
9. Place the Battery Control Unit on
top of the spacers, and align with the
Battery Module.
* Be careful not to break the
connector between the spacers and
the Battery Control Unit.
Placethespacer
Intheline HERE
P
la
c
ethespa
c
er
I
ntheline HERE
Placethespacer
Intheline HERE
P
la
c
ethespa
c
er
I
ntheline HERE
Placethespacer
Intheline HERE
P
la
c
ethespa
c
er
I
ntheline HERE
Placethespacer
Intheline HERE
P
la
c
ethespa
c
er
I
ntheline HERE
TPA
Sensing connector Power connector
Front
Front
Front
Front
Sensing connector Power connector
“Click!” TPA
10.Connect the power and sensor
connectors on the right and left sides
(2 each). Assemble the connectors
until you hear a “Click”. After that,
lock the power connector by pressing
TPA (Terminal Position Assurance).
Placethe spacer
Inthe line HERE
P
la
c
ethe spa
c
er
I
nthe line HERE
Placethe spacer
Inthe line HERE
P
la
c
ethe spa
c
er
I
nthe line HERE
Placethe spacer
Inthe line HERE
P
la
c
ethe spa
c
er
I
nthe line HERE
Placethe spacer
Inthe line HERE
P
la
c
ethe spa
c
er
I
nthe line HERE
Handle
LED power indicator
LED fault indicator
11. Check the operation of the battery
pack by following the steps below.
1) Hold and turn the handle
counterclockwise.
2) Open the front cover and turn on
the circuit breaker switch.
3) If there are no problems with the
assembly process or the product
itself, the LED power indicator will
turn on. Sixty (60) seconds later,
the LED fault indicator will blink
(due to a lack of communication
with the inverter, not due to a
product defect).
4) Turn o the Circuit Breaker switch.
Then, close the front cover and turn
the handle counterclockwise.
* If you experience any problems
at this stage, go to Section 5
Troubleshooting.
Placethe spacer
Inthe line HERE
P
la
c
ethe spa
c
er
I
nthe line HERE
Placethe spacer
Inthe line HERE
P
la
c
ethe spa
c
er
I
nthe line HERE
Placethe spacer
Inthe line HERE
P
la
c
ethe spa
c
er
I
nthe line
H
ERE
Placethe spacer
Inthe line HERE
P
la
c
ethe spa
c
er
I
nthe line HERE
12.Double-check the alignment of the
Battery Control Unit.
Placethe spacer
Inthe line HERE
Placethe spacer
Inthe line HERE
P
la
c
ethe spa
c
er
I
nthe line HERE
Placethe spacer
Inthe line HERE
P
la
c
ethe spa
c
er
I
nthe line HERE
Placethe spacer
Inthe line HERE
P
la
c
ethe spa
c
er
I
nthe line HERE
Placethe spacer
Inthe line HERE Place the spacer
Inthe line HERE
Placethe spacer
Inthe line HERE
Placethe spacer
Inthe line HERE
Placethe spacer
Inthe line HERE Place the spacer
Inthe line HERE
Placethe spacer
Inthe line HERE
Placethe spacer
Inthe line HERE
P
la
c
ethe spa
c
er
I
nthe line HERE
Placethe spacer
Inthe line HERE
P
la
c
ethe spa
c
er
I
nthe line HERE
Placethe spacer
Inthe line HERE
P
la
c
ethe spa
c
er
I
nthe line HERE
CRemove a spacer
AGrab
here
ERemove another one in
the same way DSettle slowly
BLift (just few mm)
13.Remove one spacer by lifting one
side of the Battery Control Unit. After
that, remove the other spacer in the
same way.
* Be careful not to pull on the cables
by lifting the Battery Control Unit
too high. Doing so may cause
damage to the cables or cause the
unit to disconnect.
* Before setting down the Battery
Control Unit, the cable connection
should be checked once more.
Placethe spacer
Inthe line HERE Place the spacer
Inthe line HERE
Placethe spacer
Inthe line HERE
Placethe spacer
Inthe line HERE
Placethe spacer
Inthe line HERE
P
la
c
ethe spa
c
er
I
nthe line HERE
Placethe spacer
Inthe line HERE
P
la
c
ethe spa
c
er
I
nthe line HERE
Placethe spacer
Inthe line HERE
P
la
c
e
thespa
c
er
I
nthe line HERE
Placethe spacer
Inthe line HERE
P
la
c
ethe spa
c
er
I
nthe line HERE
Placethe spacer
Inthe line HERE
P
la
c
ethe spa
c
er
I
n
theline HERE
Placethe spacer
Inthe line HERE
P
la
c
et
hespa
c
er
I
nthe line HERE
Placethe spacer
Inthe line HERE
P
la
c
ethe spa
c
er
I
nthe line HERE
Placethe spacer
Inthe line HERE
P
la
c
ethe spa
c
er
I
nthe line HERE
Placethe spacer
Inthe line HERE Place the spacer
Inthe line HERE
Placethe spacer
Inthe line HERE
Placethe spacer
Inthe line HERE
14.Realign the Battery Control Unit.
Placethe spacer
Inthe line HERE
P
la
c
ethe spa
c
er
I
nthe line HERE
Plac
ethe spacer
I
nthe line HERE
P
la
c
ethe spa
I
nthe line HERE
Placethe spacer
Inthe line HERE
Placethe spacer
Inthe line HERE
Placethe spacer
Inthe line HERE Place the spacer
Inthe line HERE
Placethe spacer
Inthe line HERE
Placethe spacer
Inthe line HERE
M5xL65 Flange Bolt
Top Cover
15.Loosen 4 bolts and remove the Top
Cover.
M5xL200 Flange long Bolt
16.Tighten six (6) long ange bolts with
a torque of 5N·m.
* While assembling, open the front
cover and check that all M5 Flange
long bolts are placed accordingly.

13
TOP VIEW
17.Plate the Wall Mounting Bracket Top
Support in right plate as shown in
gure and x on Battery Control Unit
using three (3) M6 Flange Bolts
* Tighten the M6 Flange Bolts with a
torque of 5Nm.
Placethe spacer
Inthe line HERE
P
la
c
ethe spa
c
er
I
nthe line HERE
Placethe spacer
Inthe line HERE
P
la
c
ethe spa
c
er
I
nthe line HERE
Placethe spacer
Inthe line HERE
ethe spa
c
er
nthe line HERE
Placethe spacer
Inthe line HERE
Placethe spacer
Inthe line HERE Place the spacer
Inthe line HERE
Placethe spacer
Inthe line HERE
Placethe spacer
Inthe line HERE
18.Re-attach the top cover.
* Tighten the M5xL65 Flange Bolt
(4ea) with a torque of 5N·m.
Placethe spacer
Inthe line HERE
P
la
c
ethe spa
c
er
I
nthe line HERE
Placethe spacer
Inthe line HERE
P
la
c
ethe spa
c
er
I
nthe line HERE
Placethe spacer
Inthe line HERE
P
la
c
ethe spa
c
er
I
nthe line HERE
Placethe spacer
Inthe line HERE
P
la
c
ethe spa
c
er
I
nthe line HERE
Placethe spacer
Inthe line HERE Placethe spacer
Inthe line HERE
Placethe spacer
Inthe line HERE
Placethe spacer
Inthe line HERE
Handle
Front Cover
19.Open the front cover.
* Hold the handle and turn it
counterclockwise.
M5 PH Bolt 6ea
Front Protection Cover
20.Loosen 6 bolts and remove the Front
Protection Cover.
* Be careful not to drop the bolts into
the pack at this stage.
Connector for
Ethernet cable
Hole #2
Hole #1
21.Assemble the adapter or cap
according to regional regulations.
Insert the RMD ethernet cable
through Hole #2 and connect the
cable. Then proceed to Section 3.2
Installation for Remote Monitoring
Device (RMD).
Internal cable
Hole #2 Communication cable
Hole #1 Power cable
22.Assemble the adapter or cap
according to regional regulations.
Then insert the power and
communication cables through the
holes from outside of the pack.
* Arrange the internal cable as
required to avoid blocking the holes
for external cables.
23.Connect the cables according to their
application.
* Refer to Section 3.3 Cable
Connections.
24.Arrange the power cables and
communication cables separately
using cable ties.

ENGLISH
14
M5 PH Bolt 6ea
Front Protection Cover
25.Re-attach the Front Protection Cover
with M5 PH bolt 6ea.
Placethespacer
Intheline HERE
P
la
c
ethespa
c
er
I
ntheline HERE
Placethespacer
Intheline HERE
P
la
c
ethespa
c
er
I
ntheline HERE
Placethespacer
Intheline HERE
P
la
c
ethespa
c
er
I
ntheline HERE
Placethespacer
Intheline HERE
P
la
c
ethespa
c
er
I
ntheline HERE
Handle
26.Close the front cover.
* Hold the handle and turn it
clockwise.
* Make sure the Front Cover is
closed.
3.2InstallationprocessforRemoteMonitoringDevice
(RMD)
Remote monitoring device (RMD) is a remote device that can install and monitor a battery
pack through App. and web.
3.2.1 Prepare for installation using RMD
3.2.1.1 Installer Sign In
3.2.1.1.1 Visit https://resumonitor.lgensol.com
A
B
C
1. Select the “Installer”option.
2. Enter your ID and Password.
3. Click the “Sign In” button.
※ If you don’t have your account, please visit LG ESS Battery website and make an account.
https://www.lgessbattery.com/us (in case of North America)
https://www.lgessbattery.com/au (in case of Australia)
https://www.lgessbattery.com/eu (in case of all EU-countries in general)
https://www.lgessbattery.com/de (in case of Germany)
https://www.lgessbattery.com/it (in case of Italy)
https://www.lgessbattery.com/es (in case of Spain)
3.2.1.2 Obtaining IoT Hub String
A
B
C
D
E
F
3-1
4-1
4-1
1. Select “Commissioning” → “Create Commissioning Info” on the left sidebar to
access the commissioning information creation screen.
2. Select a continent (ex. Europe, North America, Oceania).
3. Click the “+” button to the right of “Country”, and double-click the appropriate
country from the drop-down list.
4. Click the “+” button to the right of “City”, and enter two (2) or more letters in the
search eld. Find the appropriate country and double-click it.
5. Select the appropriate BLG RESU Model.
6. Click the “Execute” button to complete product registration. The device
connection string information will sent to the account e-mail address.

15
3.2.1.3 User Registration
3.2.1.3.1 Visit https://resumonitor.lgensol.com
3.2.1.3.2 Create an Owner account.
A
B
1. Select the “Owner” option.
2. Select “Create Account”.
C
C
3. Review the General Data Protection
Regulation (Privacy Policy) and check
“I Agree” to indicate consent. Click the
“Next” button to proceed to the next
step.
D
E
F
G
H
4. After entering your ID (e-mail address),
click the “Check Overlap” button to
check for duplicates.
5. Enter your new password and con rm
the same password in the next eld.
Password requirements: 10 to 25
characters long, including letters,
numbers, and special characters (!, #, $,
%, ^, &, +, =).
6. Click the “Request Authentication Key”
button to receive your authentication key
at the e-mail address you provided.
7. Enter your authentication key within 3
minutes to verify your account.
8. Click the “Con rm” button.
L
J
K
9. Select the “Owner” option.
10.Enter your ID and Password.
11. Click the “Sign In” button.
3.2.2 InstallationviaRMD
Click the link on the RESU Monitor website to download the APK le of the ‘RESU Installer’
App.
NOTE
Depending on the device, ‘RESU Installer’ App may not work.
‘RESU Installer’ App is available in the version of the software as follows;
- Android OS: Pie(9.0) or higher
※ For iOS users, please Refer to Section 7.2.3.InstallationviaRMDforwebuser.
3.2.2.1 Powering On the Product
To proceed with product installation, turn on the product.
* Open the front cover and turn on the
circuit breaker switch.
3.2.2.2 RMDAppLog-in
When you run the app, you are the rst to log in. (It is assumed that you have created an
account in advance.)

ENGLISH
16
3.2.2.3 UserAgreement
1. Search the product which you will install.
2. Get the agreement of privacy policy for the customer.
3. If the customer agrees the privacy policy, have customer’s personal information.
AA
B C
3.2.2.4 RMDWi-FiDirectConnection
In order to install using RMD, you must rst use RMD’s Wi-Fi direct connection.
For the RMD’s Wi-Fi direct connection, see below.
Search and access the SSID of the RMD AP from a device capable of supporting WLAN
Station functions (ex. smartphone).
RMD SSID has a structure of “RESU_(or RMD) + RMD WLAN STM MACADDRESS”.
For the devices below, the SSID of the RMD SoftAP is “RESU_44CBXXXC14F(or
RMD44CBXXXC14F)”. The password is 12345678(changeable).
When Wi-Fi connection is complete, click the “Next” button.
3.2.2.5 QR Code Scan
The QR code scanning method is as follows.
Select
Prime: Fixed at 2
FLEX: Select from 2 to 4
S/N of consecutive QR
codes are automatically
displayed(Maximun 5)
When the QR code registration is complete, click the “Next” button.
If the scanned serial number matches the actual serial number, it will proceed to the next
section.
There are three (3) QR codes: Battery Control Unit, Battery Module A, and Battery Module B.
1. Battery Control Unit QR Code
WallWall
WallWall
2. Battery Module QR Code
3.2.2.6 External Internet Connection
(※ If the end user does not wish to use an external internet connection, simply press the
“Next” button.)
3.2.2.6.1 Ethernet Connection (primary)
Connect the ethernet cable to a router with internet access.
For Ethernet use, it is enough to connect the cable. Since you have already connected the
cables earlier, no additional con guration is required.

17
3.2.2.6.2 Wi-Fi Connection
If you are using an ethernet connection and do not wish to use Wi-Fi, simply click the “Next”
button.
Scan AP(A): Wi-Fi-network currently available for connection is displayed in B.
SSID(B): Enter the name of the Wi-Fi-network to connect(You can enter it manually without
going through A.).
Password: Enter the password of the Wi-Fi-network to connect.
When internet connection is successful, click the “Next” button.
* In case the WLAN connection is unstable, enhance the signal by using a WLAN repeater.
3.2.2.7 RMDCongurationSetup
Proceed with the below RMD con guration settings.
Continent : Select your continent
Time Zone: Hour: Select your time zone.
RMD Power Save Timer: OFF(default)
RMD Operation Mode: Normal Mode(default)
Server Use: Choose whether the cloud server (external internet) will be used.
3.2.2.8 ServerConnectionandBatteryStatusCheck
IoT Hub Connection String: Enter the unique string provided to you in order to access the
Azure IoT Hub (cloud server).
The string format is as follows:
HostName=emashub.azure-devices.net;DeviceId=XXXX;SharedAccessKey=OOOO=
* For more information on how to obtain strings, refer to Section 3.2.1.2 Obtaining IoT Hub
String.
Server Connection Check: Check the server connection.
Battery Status: Check if the product has diagnosed any issues.
When the server connection is complete, click the “Next” button.
3.2.2.9 RMDWi-FiDisconnection
Disable Wi-Fi in the same way that you connected Wi-Fi in Section 3.2.2.4 RMD Wi-Fi Direct
Connection
Disconnect Wi-Fi
When the server connection is complete, click the “Complete” button.
3.2.2.10 Connect to RESU Monitor to Check Product Registration
After product installation via RMD is complete, check if the product has been registered on the
server by selecting “RESU Monitor” below. (https://resumonitor.lgensol.com)
When you log-in, you can check
the product registration as shown
in the picture.

ENGLISH
18
3.3 Cable Connections
1
2
3
3.3.1 Cable Conguration
Section A Section B Section D Section E
Section C
1. Section A: Inverter communication ports including CAN/RS485 and enable lines
2. Section B: DIP switch for setting communication termination resistor.
3. Section C: DIP switch for setting primary/secondary packs.
4. Section D: Do not connect the internal communication ports
5. Section E: Battery power ports including positive/negative pole and ground
(POS: power terminal plus, NEG: power terminal minus, GND: ground)
3.3.2 Guide for cable connection and setting the DIPswitch
1 2 3 4 5 6
1. Section A: Inverter communication
ports
a) First, connect the enable ground
wire to Terminal 2.
b) Connect the enable 12V positive
line to Terminal 1.
c) Select the method that matches the
inverter communication method
in the part marked. If the inverter
uses RS485, connect the RS485
(A+, B-) lines to Terminals 3 and 4.
If inverter uses the CAN method,
connect the CAN (high, low) lines
to Terminals 5 and 6.
※ Refer to Section 3.3.3 Spring Terminal Blocks, when choosing the communication cable
and cable sheath for peeling.
2. Section B: DIP switch for setting
communication termination resistor
of primary/secondary packs
Lower the DIP switch (Communication
Termination resistor) all downwards for
single pack.
※ When you install two packs, refer
to the appendix about setting for
communication termination resistor.
3. Section C: DIP switch for setting
primary/secondary packs
Raise all DIP switch upward when
you want to use as a primary pack.
And also, when you want to use as a
secondary pack, lower the switch on
the right side only when viewed from
the front
1 2 3
4. Section E: Battery power port
a) Connect the ground wire to
Terminal 2.
b) Connect the negative line of the
power cable to Terminal 3.
c) Connect the positive line of the
power cable to Terminal 1.
※ Refer to 3.3.3 Spring Terminal
Blocks when choosing the battery
power cable and cable sheath for
peeling.
※ When you install two packs, refer to the appendix about power cable.
3.3.3 Spring Terminal Blocks
1. Power terminal block
•Max. cable length: 10 m
(35 ft)
•Cable type: 8mm² (8 AWG)
•DC 600V insulated
•Pinning
•Phoenix contact
•PCB terminal block SPT
5/3-H-7,5-ZB
•P/N: 1719202
( + )
GND
( - )
2. Communication terminal block
•Max. cable length: 10 m
(35 ft)
•Cable type: 0.2~1.5mm²
(18~22AWG)
•Pinning
•Phoenix contact
•PCB terminal block SPT
2,5/6-H-5,0
•P/N: 1991011
ENABLE 12V
ENABLE GND
RS485 A+
RS485 B-
CAN Hi
CAN Lo
※ Peel cable sheaths (15 mm for the power terminal cable and 10 mm for the communication
terminal cable).
NOTE
Check all cable are rmly in place. Loose power cables can cause arcing and may damage
the battery and/or inverter.

Other manuals for HBP10H
1
This manual suits for next models
1
Table of contents
Other LG Camera Accessories manuals

LG
LG LGES-5048 Original operating instructions

LG
LG RESU 10H User manual

LG
LG LPT-A100L User manual

LG
LG AJ-LAH2 User manual

LG
LG ESS HB 10.0 User manual

LG
LG BUEL011HBC1 User manual

LG
LG CHEM RESU10H User manual

LG
LG RESU FLEX Operating and maintenance instructions

LG
LG RESU16H Prime User manual

LG
LG Energy Solution RESU10H Prime User manual