VOICE SERVICES
CUSTOMIZABLE FEATURES
CAMERA FEATURES
CONNECTIVITY FEATURES PERSONAL INFORMATION TOOLS
>>>
>
>
>
>
>
>
>
>
1. From standby mode, press and hold the side .
2. Press to start recording.
3. Press to stop recording.
: Recorded voice memos can be found in the > >
menu.
1. From standby mode, press the ® icon (right) on the Navigation Key.
2. Select a category from the ® menu and press .
3. Select and press to initiate the download.
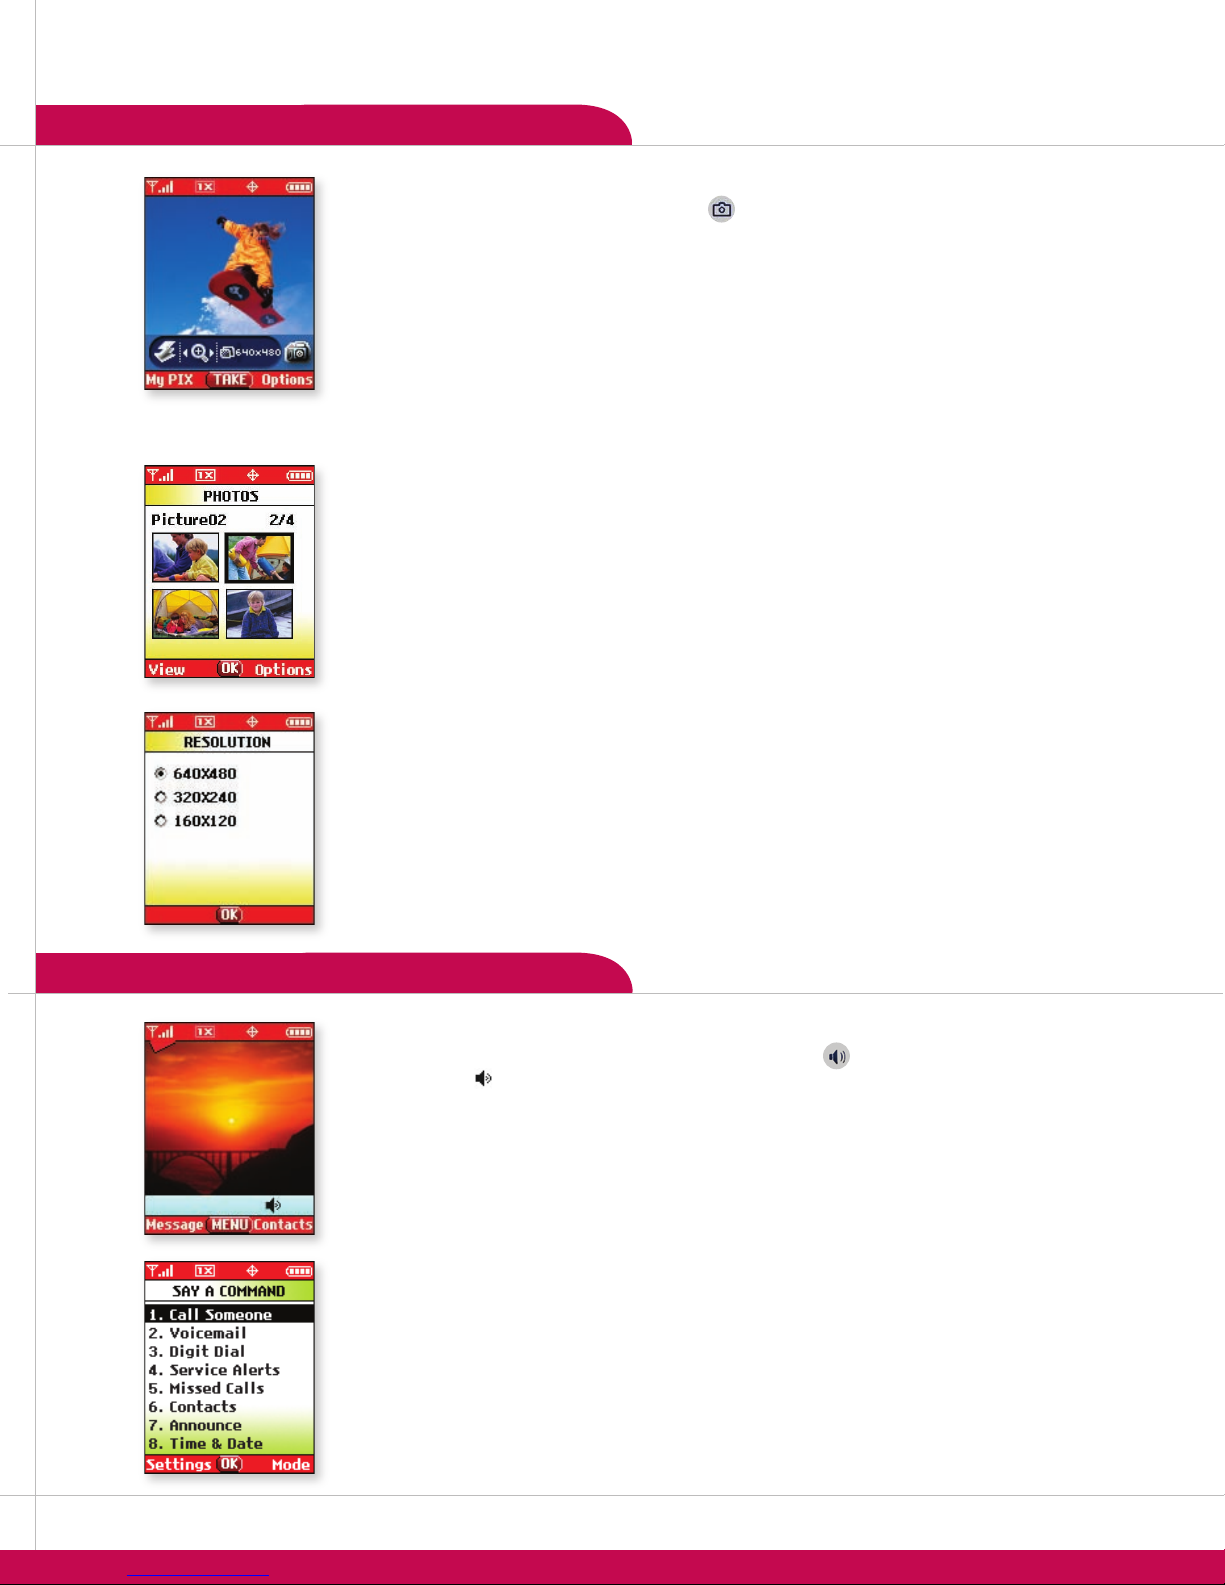
1. From standby mode, press the icon (up) on the Navigation Key.
2. Once the web browser is launched you will see the Home Page.
3. You can end a browser session by pressing at any time.
1. Press for , select .
2. Press for to select a recipient from the or lists,
or use the keypad to enter a new e-mail address or phone number and press . Up to 10 recipients can
be added.
3. Scroll down and enter the message (up to 160 characters) using the keypad.
4. Press for , select and choose from , ,
, or .
5. Once your message is complete, press for .
The ability to send messages is subject to network service availability.
1. Press , press on the Navigation Key twice for the menu.
2. Select .
3. Select.
4. Select .
5. Select either , , , or .
6. Choose from the list of available default or downloaded ringtones and press .
While in standby mode, press the side volume keys to adjust the ringtone volume.
During a conversation, press the side volume keys to adjust the earpiece volume.
While in standby mode, press the lower volume key until it reads to mute
all sounds.
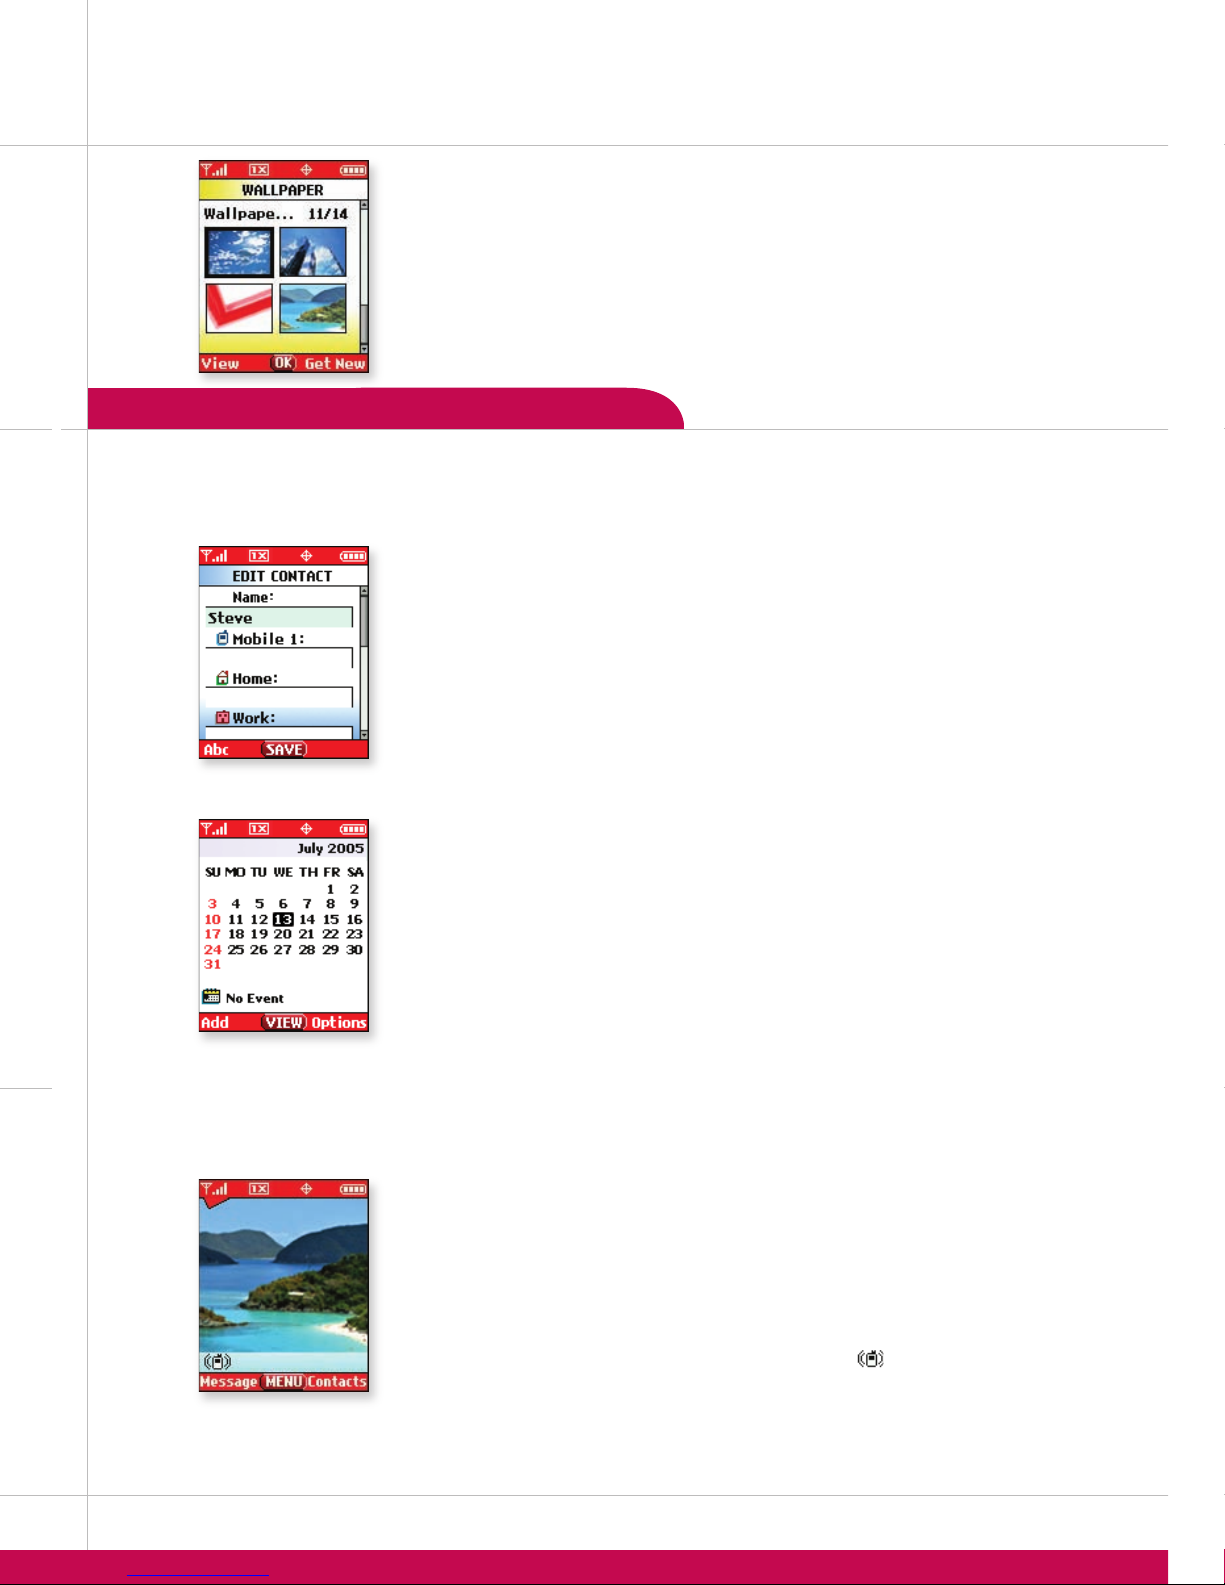
1. Press , press on the Navigation Key twice for the menu.
2. Select .
3. Select .
4. Select or .
5. Scroll to select an image and press .
The internal phone book is capable of storing up to 500 contacts with up to 5 numbers,
2 e-mail addresses, and 1 photo caller ID per entry.
1. Press and select .
2. Enter a name for the entry.
3. Scroll down with the Navigation Key to enter content into the other available elds.
4. To set the speed dial, highlight the number and press for .
5. Select . Enter the speed dial number (2-99) and press twice.
6. Press to save the entry.
: While in standby mode, press to access your .
1. From standby mode, press the icon (down) on the Navigation Key.
2. Highlight the event date using the Navigation Key and press for .
3. You may set the appropriate appointment subject, date, time, recurrence (if any), alert tone
and reminder by scrolling to the corresponding eld.
4. Press for .
: To quickly jump to a date while you’re in the Calendar, press for
, then .
1. Press , press right on the Navigation Key twice for the menu.
2. Select .
3. Select .
4. Select , or .
5. Set the appropriate time, recurrence (if any) and alarm tone by scrolling to the
corresponding eld.
6. Press for .
1. From standby mode, activate Vibrate Mode by pressing the for
3 seconds. The phone will vibrate when activated and the icon will appear on the screen.
2. To release Vibrate Mode, press the key until is displayed.
>
>
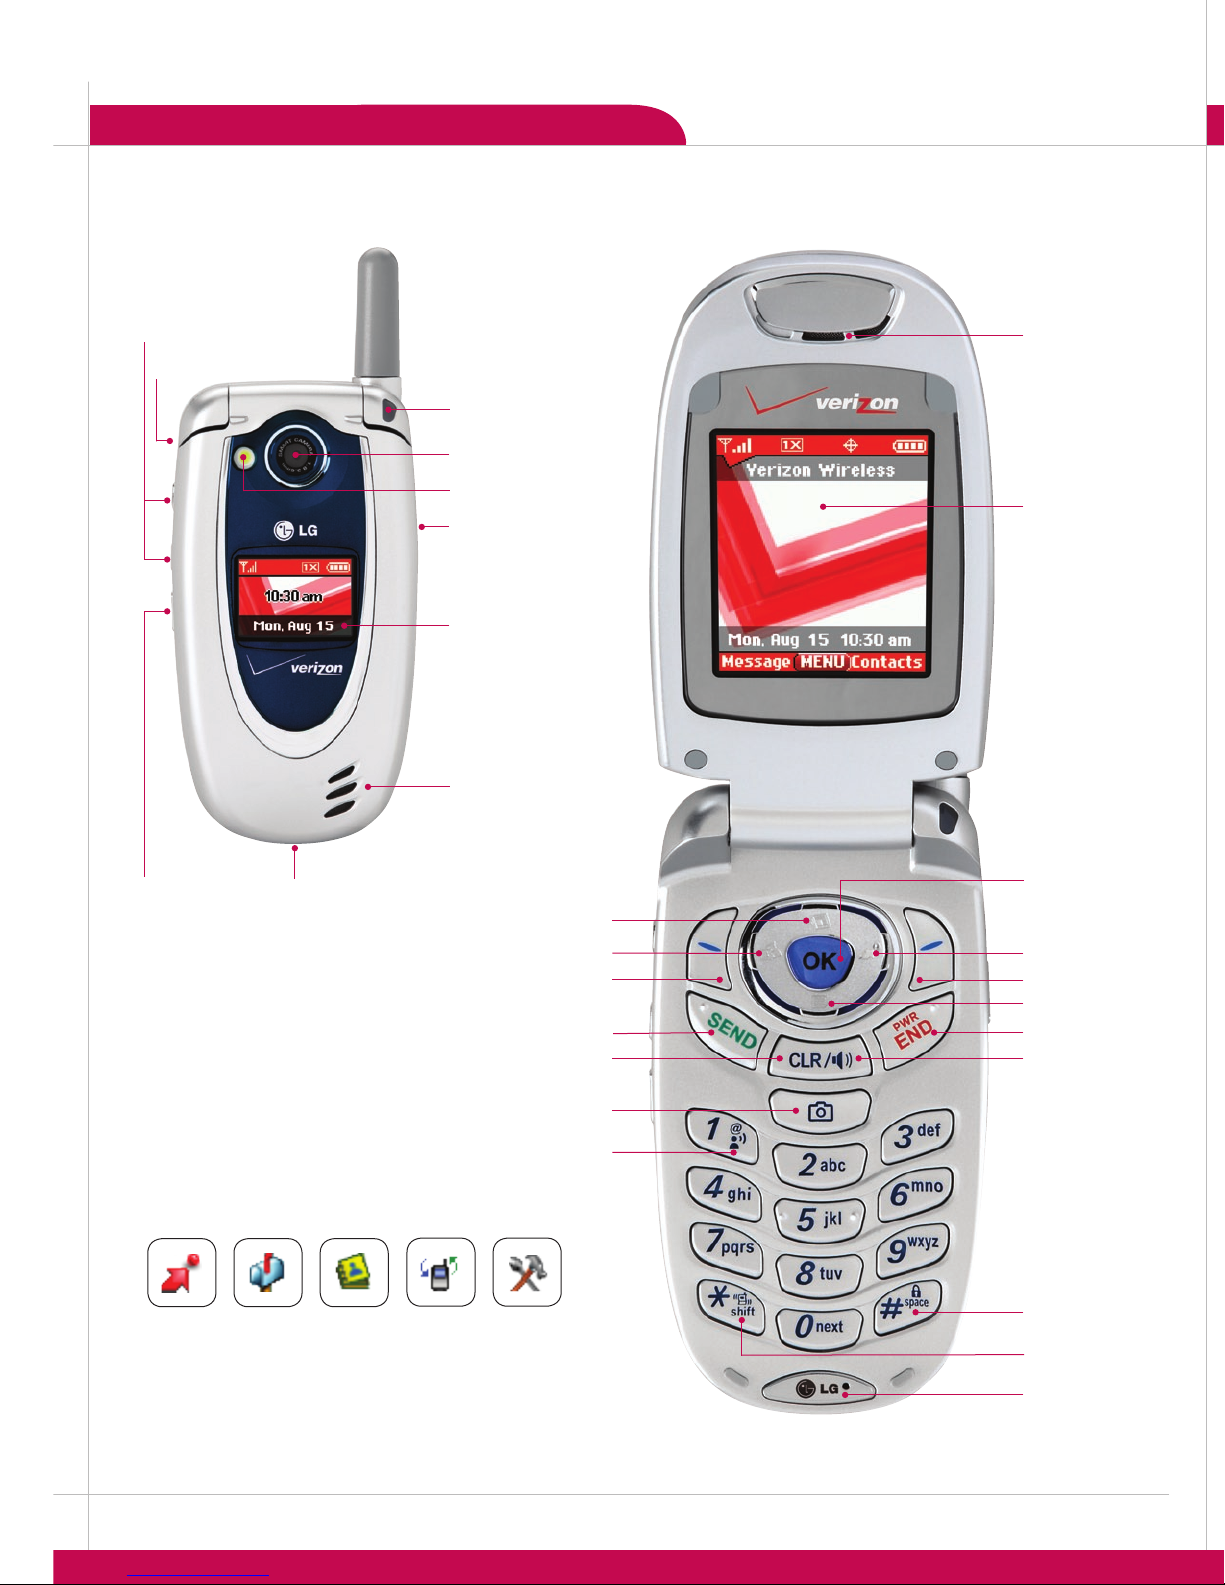
1. From standby mode, press the .
2. Press or on the Navigation Key to zoom, and or to adjust the brightness. To use the
ash, press the on the left side of the phone, below the volume keys.
3. Press for .
4. Press for or for .
5. To send the image, press .
6. Press for to select a recipient from the , or
lists, or use the keypad to enter a new e-mail address or phone number. Up to 10 recipients can be
added.
7. Scroll down using the Navigation Key to enter the , and you wish to add to the
message and press for .
The VX5200 enables you to access the camera feature with the handset closed.
1. Press and hold the on the right side of the phone for three seconds.
2. Use the external LCD as a viewnder and press the to take the photo.
3. When nished, the photo is automatically saved to .
1. From standby mode, press and select .
2. Use the Navigation Key to highlight the desired contact and press for .
3. Scroll to the Picture eld and press for.
4. Use the Navigation Key to highlight the desired photo and press .
5. Press to save.
1. From standby mode, press the .
2. Press for and select .
3. Use the Navigation Key to select from , or and press .
1. From standby mode, press and hold the and will appear on the
screen. The icon will remain on the bottom of the standby screen while enabled.
2. To deactivate, press and hold the key again and will appear on screen.
1. From standby mode, press the side .
2. You will be asked to “Please Say a Command”. Clearly speak a command from the list:
to call a contact from your phone book.
to call your voicemail.
to dial a phone number by speaking the digits.
to alert you of missed calls, new voicemails or new messages.
to check your missed calls.
to create, read or erase a contact.
to activate audio conrmation of menu navigation.
to hear the current time and date.
to learn the status of your battery, signal strength, service mode, GPS location, roaming
and sound status.