Warnings and Cautions
The Trackit Mk3 Amplifier must only be used by a healthcare
professional, within a hospital or clinical setting, who has the
training and knowledge to undertake EEG examinations and
is familiar with EEG equipment and practice. The User Manual
must be read in its entirety before the equipment is used.
Do not modify this equipment without the authorization of the
manufacturer.
Federal (USA) law restricts this device to sale by or on the order
of a physician.
Quick Start Guide
51341-006 - Trackit Mk3 Quick Start Guide, Iss 1.1
Lifelines Ltd, 1 Tannery House. Tannery Lane, Woking, Surrey, GU23 7EF. UK
Important: Read first
Please read all these special instructions before using the Trackit Mk3
•The user manual will be found on the enclosed CD (or USB Flash drive)
and is available from the Lifelines Neuro tech support webpage (https://
www.lifelinesneuro.com/tech-support.html). Please read this before using
the Trackit Mk3 and pay particular attention to all Cautions and Warnings.
A PDF reader* is required to view the user manual. A hard copy of the
User Manual can be requested using the email contact address below.
• The Trackit setup and control program can be found on the enclosed
CD (or USB Flash drive) and the Lifelines Neuro tech support webpage.
Follow the instructions in the Readme file.
• The Trackit Mk3 uses a USB interface and the drivers will be found on the
enclosed CD or on the Lifelines Neuro Support website. After connecting
the unit for the first time, at the Windows prompt, browse to the folder CD
Drive:\USB Drivers. From there, Windows will find the correct drivers for
the version of Windows being used.
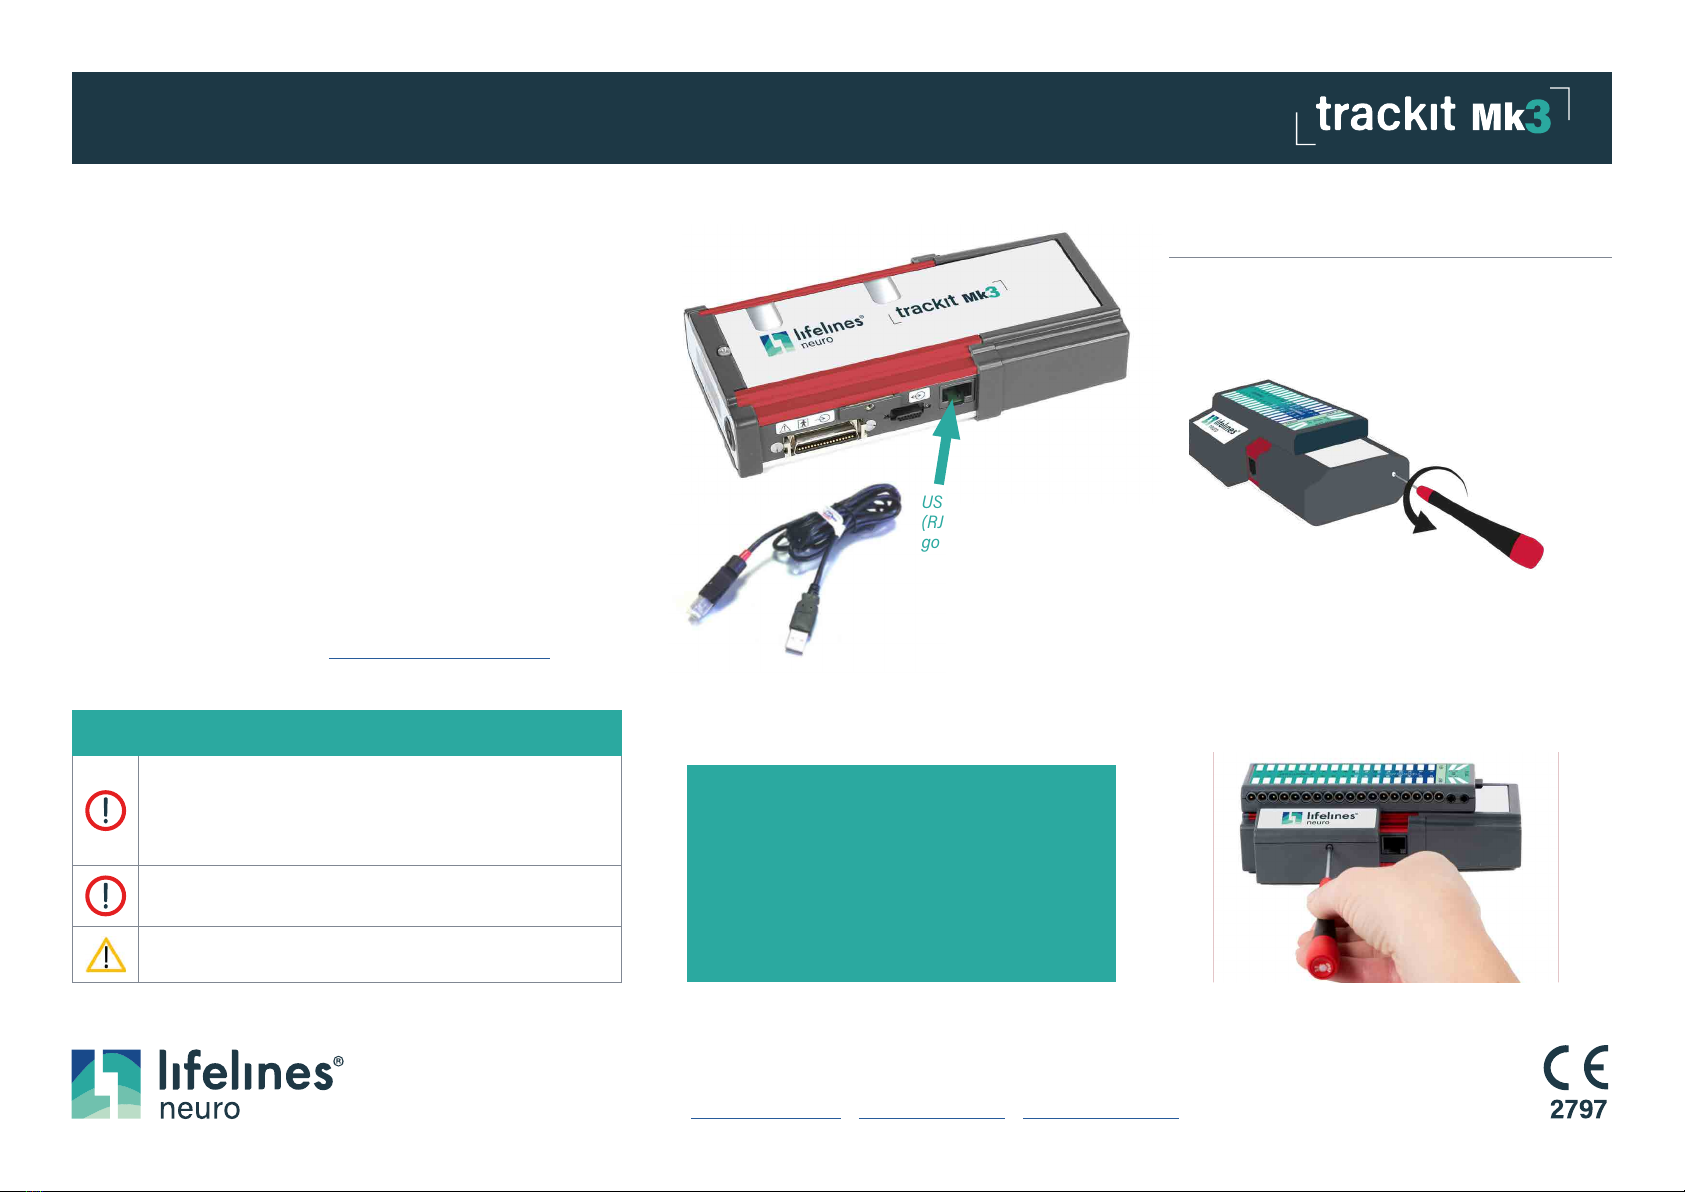
USB cable
(RJ45 Connection)
goes here
Only use the special USB cable supplied, part no. 1277.
This cable has a red tip at the trackit end. The USB
connector is plugged into a free PC USB port.
Important Information:
The Trackit Mk3 will be supplied fully assembled
with its Battery Box and Clickon PCU fitted to
the unit. Please read these instructions for the
correct method for attaching and detaching these
accessories and ejecting the CF Card.
Retaining Screw locations
a) Release the Battery Box by unscrewing the retaining
screw as shown with the special tool provided.
b) Lock by screwing up the retaining screw.
Caution: Do not over tighten
a) Release the Clickon PCU (if applicable)
by unscrewing the retaining screw as shown with the
special tool provided.
b) Lock by screwing up the retaining screw.
Caution: Do not over tighten
Fig 1
Fig 2
* For free PDF reader software, go to: https://get.adobe.com/uk/reader/


