manuals.online logo
Brands
  1. Home
  2. •
  3. Brands
  4. •
  5. Lightware
  6. •
  7. Transmitter
  8. •
  9. Lightware UMX-OPT-TX150R User manual

Lightware UMX-OPT-TX150R User manual

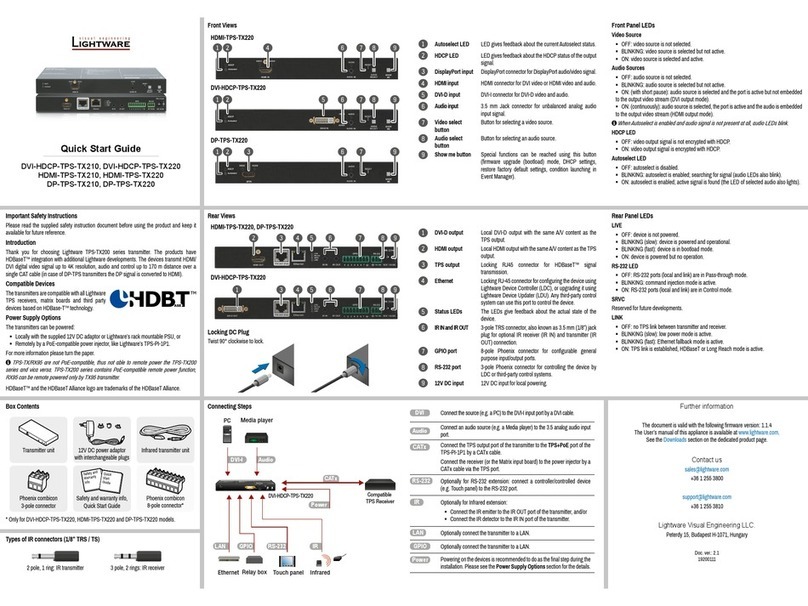
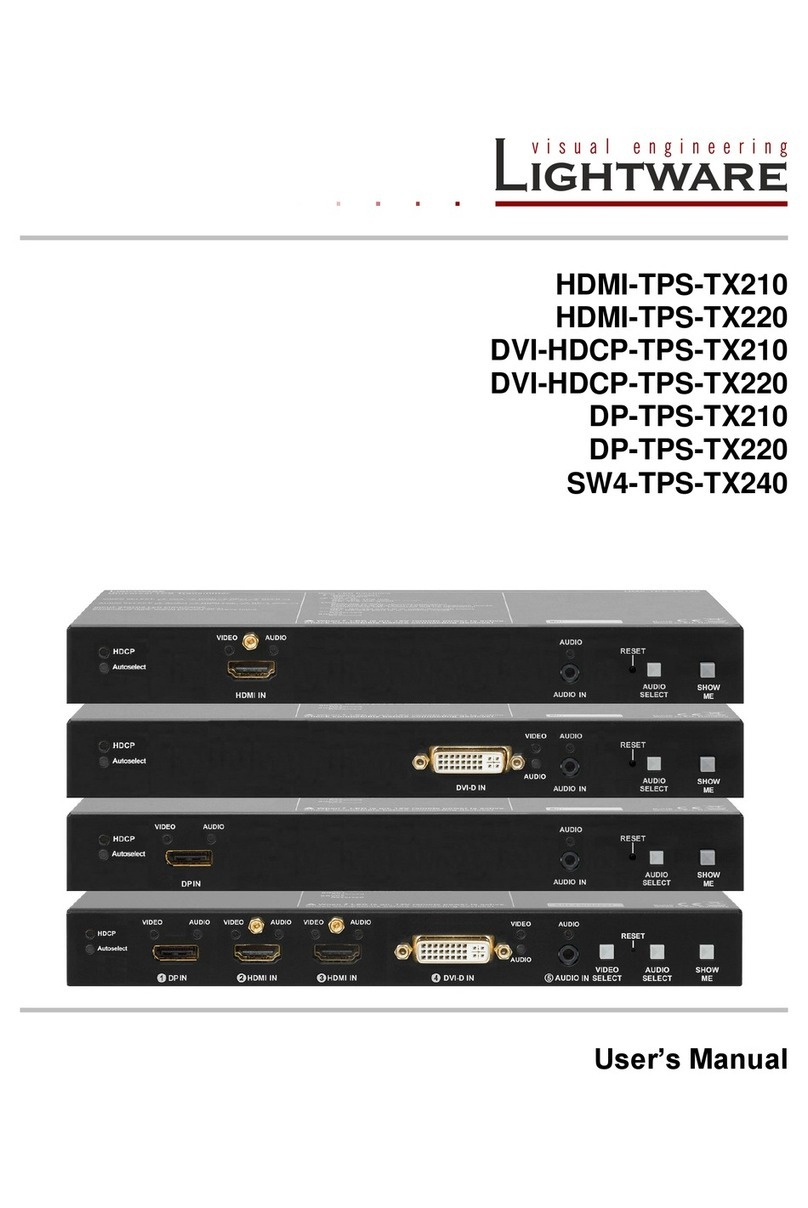
Quick Start Guide
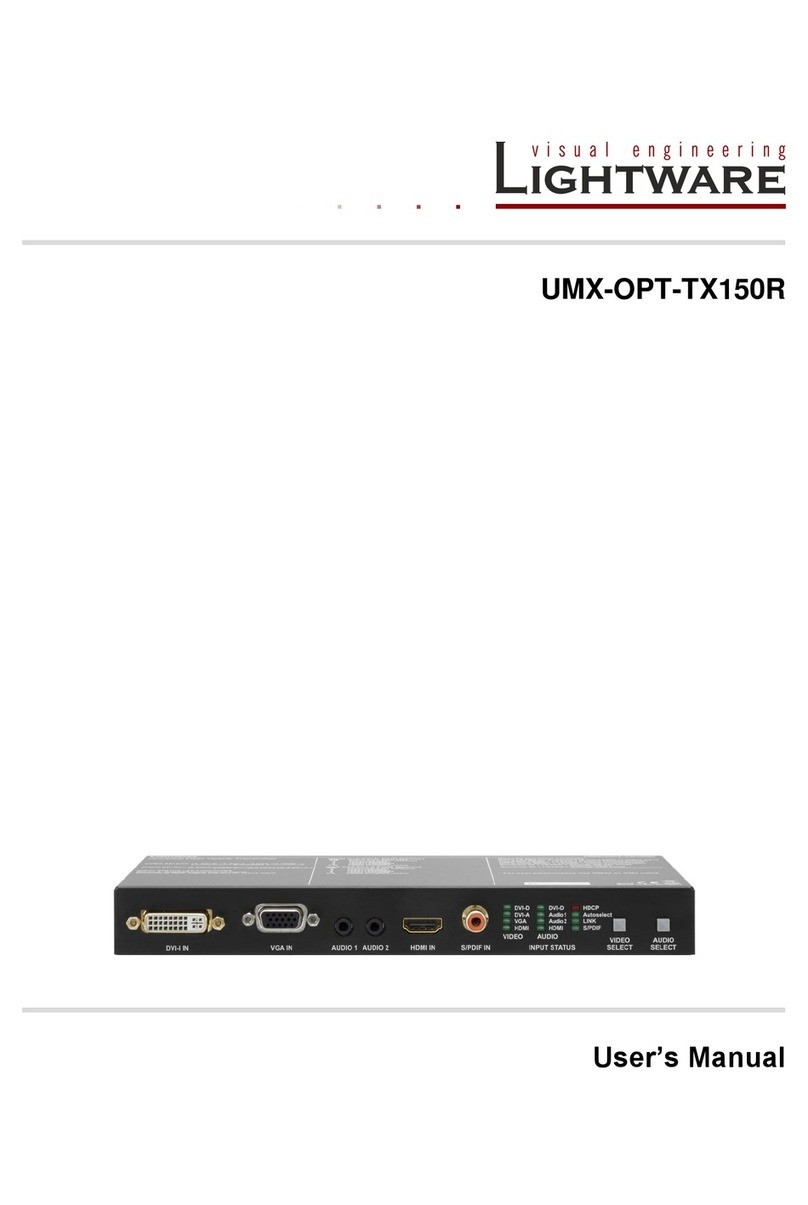
UMX-OPT-TX150R
Further information
The document is valid with the following rmware version: 1.0.4b1
The User’s manual of this appliance is available on www.lightware.eu.
See the Downloads section on the website of the product.
Contact us
[email protected]
+36 1 255 3800
[email protected]
+36 1 255 3810
Lightware Visual Engineering LLC.
Peterdy 15, Budapest H-1071, Hungary
Doc. ver.: 2.1
19200059
Safety and
Warranty
Info
Quick
Start
Guide
Important Safety Instructions
Please read and keep the information in the attached safety instructions supplied with the
product before you start using the device.

The transmitter is a Class 3R laser product.

Caution! Invisible Class 3R laser radiation! Avoid exposure to the beam!
Introduction
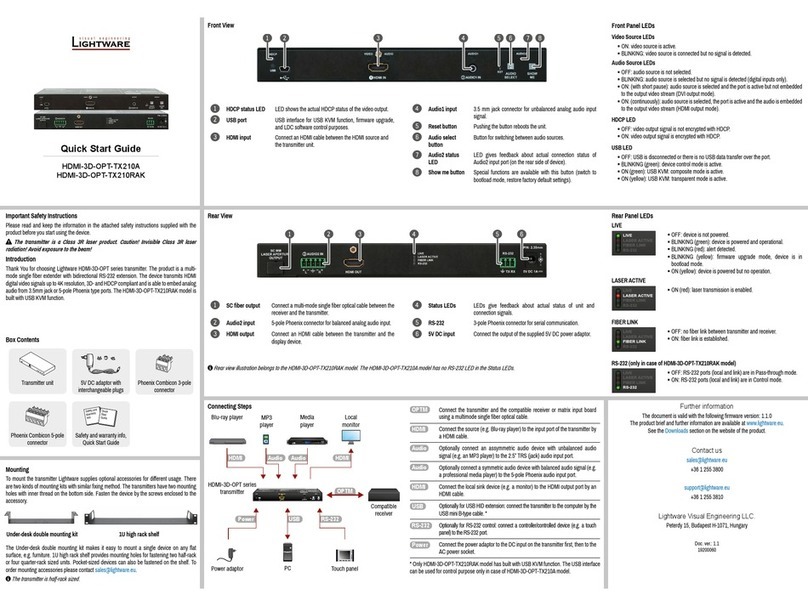
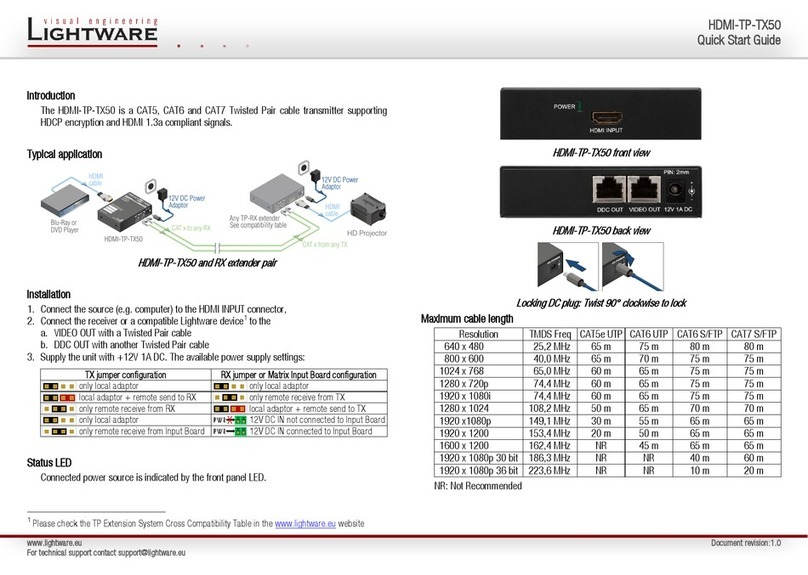
The Lightware UMX-OPT-TX150R is a universal video and audio transmitter (TX) device,
providing signal extension over a single multimode ber cable up to 2500m. The transmitter
was designed to handle digital and analog signals for both video and audio e.g. VGA,
DVI and HDMI with analog stereo, 5.1 S/PDIF and even 7.1 HDMI embedded audio. The
UMX-OPT-TX150R handles bidirectional RS-232 pass-through, HDCP encryption and has
an HDCP enable/disable function.
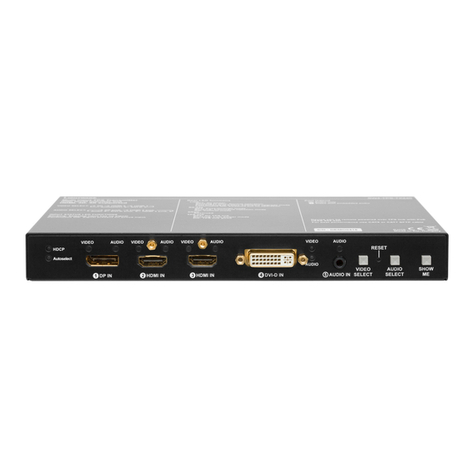
Box Contents
Transmitter unit 5V DC power adaptor with
interchangeable plugs
Safety and Warranty Info
Quick Start Guide
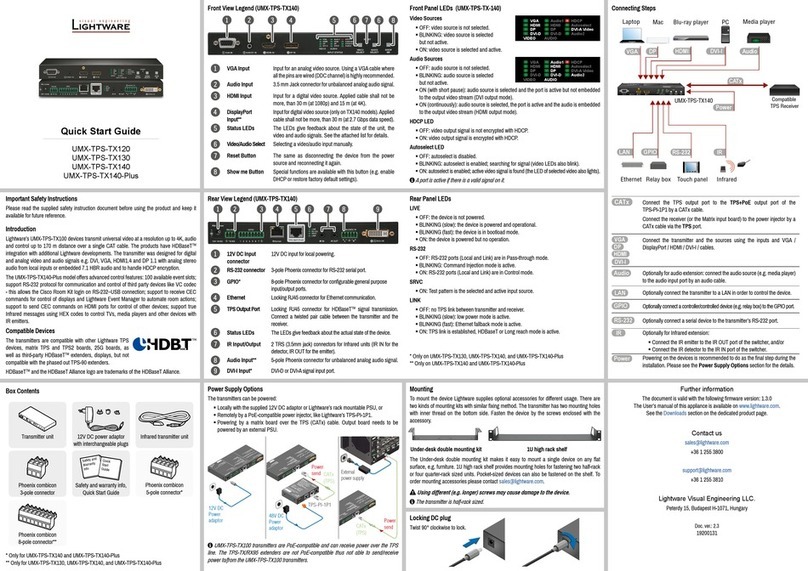
1
DVI-I In DVI-I connector for connecting the video source to the transmitter
via DVI cable.
2
VGA In D-sub connector for analog video signal.
3
Audio 1-2 In 3.5 mm jack connector for unbalanced analog stereo audio
input signal with right and left channel.
4
HDMI In HDMI connector for DVI video or HDMI video and audio.
5
S/PDIF In RCA jack connector with S/PDIF digital audio signal.
6
Status LEDs The LEDs give feedback about state of the unit and the video and
audio signals.
7
Video Select Button for switching between video inputs (DVI-D / DVI-A /
VGA / HDMI / Autoselect).
8
Audio Select Button for switching between audio inputs (DVI-D / Audio 1 /
Audio 2 / HDMI / S/PDIF).
Front and Rear View Front Panel LEDs
VIDEO Sources
ON when the video input port is selected and
there is a valid video signal on it.
BLINKING when the video input port is selected
and there is no valid video signal on it.
OFF when the video input port is NOT
selected. Another port is active or there was
a disconnect command.
AUDIO Sources
ON when the audio input port is selected.
OFF when the audio input port is NOT
selected. Another port is active or there was
a disconnect command.
Rear Panel LEDs
HDCP LED is
ON when the HDCP setting of the output video signal is Always.
OFF when the HDCP setting of the output video signal is AUTO.
Autoselect LED is
ON when the autoselect mode is selected and a valid video signal is found.
BLINKING when the autoselect mode is selected and video signal searching is in progress.
OFF when autoselect mode is not selected and video input port can be chosen manually.
LINK LED is
ON when the TX and the RX (or OPT-IB) are connected to each other via the optical cable
and they can communicate.
OFF when the TX and RX (or OPT-IB) are not connected or they CANNOT communicate.
RS-232 LED is
ON when the RS-232 port is in Control mode.
OFF when the RS-232 port is in Pass mode.
EDID LED is
ON when there is a valid EDID on the currently active input port.
BLINKING FAST continuously when there is an invalid EDID on the currently active input
port.
BLINKS FAST THREE TIMES when EDID learning was unsuccessful.
BLINKS SLOW THREE TIMES when EDID learning was successful.
PWR LED is
ON when the transmitter unit is powered with 5V DC and ready to use.
BLINKING when the transmitter unit is powered but an error occurred.
OFF when the transmitter unit is NOT powered or out of order.
KVM LED is always off and reserved for future developments.
DVI-D
DVI-A
VGA
HDMI
DVI-D
Audio1
Audio2
HDMI
HDCP
Autoselect
LINK
S/PDIF
VIDEO AUDIO
DVI-D
DVI-A
VGA
HDMI
DVI-D
Audio1
Audio2
HDMI
HDCP
Autoselect
LINK
S/PDIF
VIDEO AUDIO
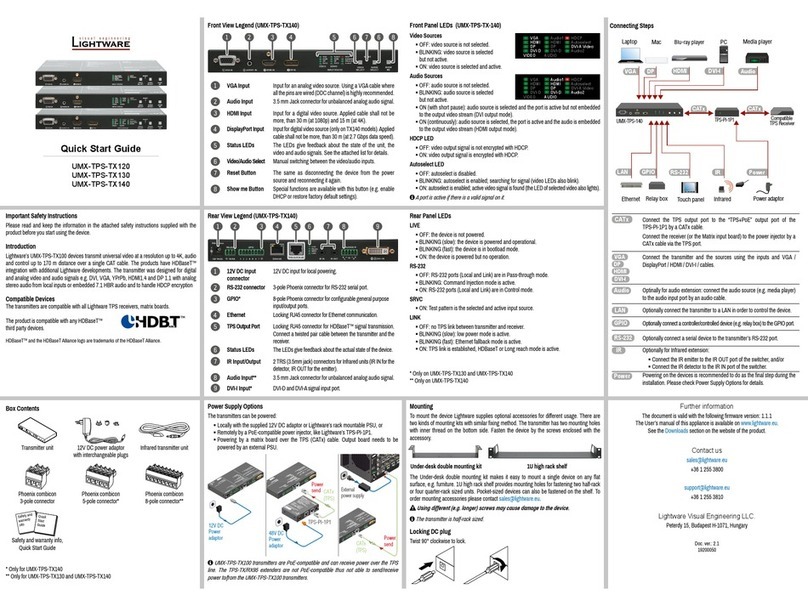
Connecting Steps
1
SC Fiber Out Optical connector for 50/125 multimode ber optical cable
(OM4 is recommended).
2
RS-232 Port 9-pole D-sub female connector for standard RS-232 port.
3
Baud Rate
Rotary Switch
The rotary switch selects one of the ve speeds of the serial
communication (#1 .. #4) or the Software Control mode
(#0). The #8 is used for special functions.
4
USB Port USB mini-B type port for software control and rmware upgrade.
5
Learn Button Stores the EDID of the display device attached to receiver
device’s video output in the selected memory address.
6
Status LEDs The LEDs give feedback about the state of the device.
7
EDID Memory
Rotary Switch
The rotary switches select one of the EDID memory addresses.
8
RESET Button Hardware reset button. It resets the whole device, however
saved settings and EDIDs will be preserved.
9
DC 5V In Local power in; connect the output of the supplied 5V DC
power adaptor.
Compatible Devices
Thanks to the Lightware design, UMX-OPT-150R transmitters are compatible with the
following receivers and input boards:
DVIDL-OPT-RX100
DVI-OPT-RX110
DVI-OPT-RX220-Pro
HDMI-3D-OPT-RX150RA
HDMI-OPT-RX100
HDMI-OPT-RX100R
HDMI-OPT-RX200R
MX-DVI-OPT-IB
MX-HDMI-OPT-IB
HDMI
DVI
VGA
Connect the transmitter and the sources using the proper (VGA / DVI-I
/ HDMI) cables.
Audio
Optionally connect an audio device (e.g. the VGA laptop) to one of the
audio input port.
S/PDIF Audio
Optionally connect a digital audio device (e.g. the Media player) to the
S/PDIF audio input port.
USB
Optionally connect a USB A – Mini USB B cable between the transmitter
unit and the computer in order to control the device.
RS-232
Optionally for RS-232 control: connect a controller/controlled device
(e.g. Touch panel) to the RS-232 port.
OPTM
Connect a multimode (OPTM) ber cable to the SC ber output port
of the transmitter to the SC ber input port of the compatible receiver.
Power
Firstly connect the power adaptor to the DC input of the transmitter,
then to the AC power socket.
Setup the RS-232 Baud Rate
Turn the BAUD RATE rotary switch to the desired position
to select the speed of the serial communication. (Speed
of the RS-232 extension and also the RS-232 control.)
In case of #0 the baud rate can be set with protocol commands to a
desired value (default is 57600).
RS-232 Extension (PASS mode)
A serial device (e.g. controller) can be connected to the RS-232 port to use the serial data
pass-through function. The speed of the extended serial communication (baud rate) is set up
by the BAUD RATE rotary switch. To select the best tting baud rate on the transmitter please
read the user’s manual of all serial devices.
Toggle between PASS and CONTROL mode
Turn the BAUD RATE rotary switch to the #8 (set RS-232 mode) position and press and hold
the LEARN button for approximately 3 seconds to change the RS-232 working mode. Set the
RS-232 baud rate to the desired value after changing.
#0: SW set. #1: 9600 #2: 19200 #3: 38400 #4: 57600
#5: Not used #6: Not used #7: Not used #8: Set RS-232 mode #9: Not used
Locking DC plug
Twist 90° clockwise to lock.
Mounting
To mount the transmitter Lightware supplies optional accessories for different usage. There
are two kinds of mounting kits with similar xing method. The switcher has two mounting
holes with inner thread on the bottom side. Fasten the device by the screws enclosed with
the accessory.
The Under-desk double mounting kit makes easy to mount a single device on any at surface,
e.g. furniture. 1U high rack shelf provides mounting holes for fastening two half-rack or four
quarter-rack sized units. Pocket-sized devices can also be fastened on the shelf. To order
mounting accessories please contact [email protected].

Using different (e.g. longer) screws may cause damage to the device.

The switcher is half-rack sized.
Under-desk double mounting kit 1U high rack shelf
5V 1.5A DC
PIN:2.35mm
5V 1A DC
PIN:2.35mm
12 3 45 86 97
1 2 43 8
7
5
6
PC
UMX-OPT-TX150R
Power adaptor Touch panel
Power
VGA
OPTM
Media player
Compatible
receiver
RS-232
  

Laptop
Laptop
HDMI
USB
DVI-I
Audio S/PDIF Audio
Audio
HDMIINVGAIN S/PDIFIN INPUTSTATUS
VIDEO AUDIO
SELECT SELECT
VIDEO AUDIO
DVI-IIN AUDIO1 AUDIO 2
LINK
Autoselect
HDCP
S/PDIF
DVI-D
HDMI
Audio1
Audio2
DVI-D
HDMI
DVI-A
VGA
0
1
2
3
4
5
6
7
8
9
BAUD RATE
Safety and
Warranty
Info
Quick
Start
Guide
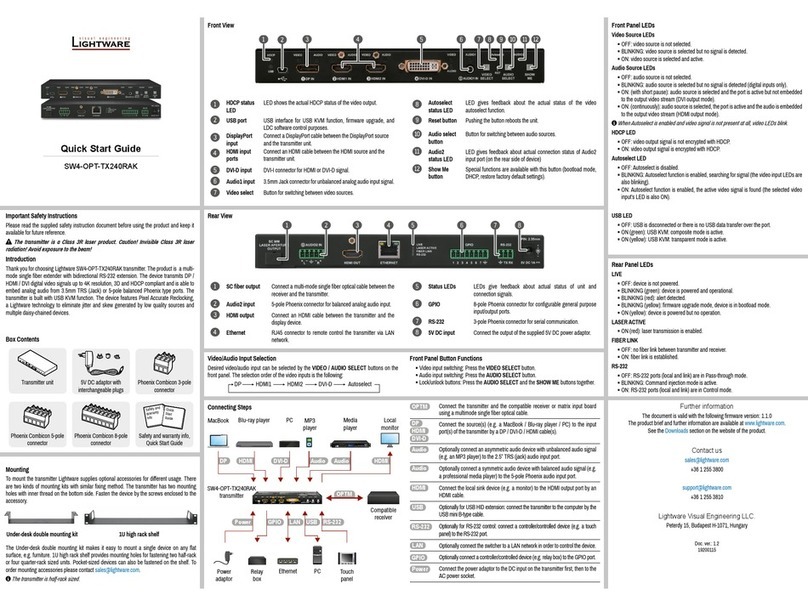
Video Input Selection
The desired video input can be selected by the Video Select button on the front panel. The
selection order of the inputs is following:
Audio Input Selection
The audio selection depends on the selected video input. After the Audio Select button is
pushed, the next input will be chosen. Audio LEDs give you a feedback.
If analog video input is selected (DVI-A and VGA) all audio inputs can be chosen.
In case of digital video inputs, you can select the embedded audio input of the selected video
input (either DVI-D or HDMI, only one of them), the analog audio 1, analog audio 2 and the
S/PDIF audio inputs.
The inputs can be also selected by using LDC (Lightware Device Controller), sending a
protocol command, or using Autoselect.
Autoselect
DVI-D HDMI
VGA
DVI-A
Standalone Application
Port Diagram
Factory EDID List
0
1
2
3
4
5
6
7
8
9
DVI-D
DVI-D EDID Rotary EDID reference
in protocol
#0 Copy from SC MM OUT (Dynamic EDID) D01
#1 Factory EDID Universal HDMI (default) F01
#2 Factory EDID (DVI) 1024x768@60 F02
#3 Factory EDID (HDMI) 1280x720p@60 F03
#4 Factory EDID (HDMI) 1920x1080p@60 F04
#5 Factory EDID (DVI) 1920x1200@60 F05
#6
User EDID (default: Univ. HDMI EDID)
U01
#7 U02
#8 U03
#9 U04
0
1
2
3
4
5
6
7
8
9
DVI-A
DVI-A Rotary EDID reference
in protocol
#0 Copy from SC MM OUT (Dynamic EDID) D01
#1 Factory EDID Universal Analog (default) F06
#2 Factory EDID (Analog) 1024x768@60 F07
#3 Factory EDID (Analog) 1280x720@60 F08
#4 Factory EDID (Analog) 1920x1080@60 F09
#5 Factory EDID (Analog) 1920x1200@60 F10
#6
User EDID (default: Univ. Analog EDID)
U05
#7 U06
#8 U07
#9 U08
0
1
2
3
4
5
6
7
8
9
VGA
VGA Rotary EDID reference
in protocol
#0 Copy from SC MM OUT (Dynamic EDID) D01
#1 Factory EDID Universal Analog (default) F11
#2 Factory EDID (Analog) 1024x768@60 F12
#3 Factory EDID (Analog) 1280x720@60 F13
#4 Factory EDID (Analog) 1920x1080@60 F14
#5 Factory EDID (Analog) 1920x1200@60 F15
#6
User EDID (default: Univ. Analog EDID)
U09
#7 U10
#8 U11
#9 U12
0
1
2
3
4
5
6
7
8
9
HDMI
HDMI Rotary EDID reference
in protocol
#0 Copy from SC MM OUT (Dynamic EDID) D01
#1 Factory EDID Universal HDMI (default) F16
#2 Factory EDID (DVI) 1024x768@60 F17
#3 Factory EDID (HDMI) 1280x720p@60 F18
#4 Factory EDID (HDMI) 1920x1080p@60 F19
#5 Factory EDID (DVI) 1920x1200@60 F20
#6
User EDID (default: Univ. HDMI EDID)
U13
#7 U14
#8 U15
#9 U16
EDID Memory

Switching EDID for any inputs is available only with rotary switches.
Each video input has own, separated EDID rotary switch and has the same EDID memory structure.
Address #0: copy of the last attached monitor’s EDID from connected receiver.
Address #1: Lightware’s UNIVERSAL EDID.
Address #2..#5: factory preprogrammed EDIDs and cannot be changed.
Address #6..#9: user programmable.
Selecting and EDID
Turn the EDID ADDRESS rotary switches
to the desired position. Use a at head
screwdriver to change the address. The
EDID status LED provides feedback.

Avoid the use of keys, coins, knives and other sharp objects.
Learning EDID
The input ports have separate EDID memory. To use the same EDID on different inputs, each
input has to be taught separately.

Learning is not available in Autoselect mode.
1. Connect the sink device to the RX’s MONITOR OUT (or select an EDID on OPT-IB).
2. Turn the EDID ADDRESS rotary switches to the desired position, where you want to store
the attached display’s EDID (between user addresses #6..#9).
3. Press and hold the LEARN button for approximately 3 seconds. The EDID Status LED
provides feedback.
0
1
2
3
4
5
6
7
8
9
0
1
2
3
4
5
6
7
8
9
0
1
2
3
4
5
6
7
8
9
0
1
2
3
4
5
6
7
8
9
DVI-D DVI-A VGA HDMI
Software Control – Using Lightware Device Controller (LDC)
Connect the device to the computer by a USB Mini-B cable or in RS-232
CONTROL mode an RS-232 straight (male – female) serial cable and start
the Lightware Device Controller software to access the advanced settings.
In case of serial connection the RS-232 baud rate must be set.
Firmware Upgrade - Using Lightware Device Updater (LDU)
Threre is an easy and comfortable way to keep your device up-to-date.
Steps of rmware upgrade are the following:
1. Download and install LDU software from the company’s website
www.lightware.eu.
2. Get the latest rmware package from Lightware Support ([email protected]).
3. Establish the connection between the extender and the computer over USB or serial cable.
4. Start LDU software and select the Extender mode.
5. Load the new rmware le.
6. Please read the displayed instructions related to this model.
7. Select your upgradeable device.
8. Review the list of selected devices.
9. Start rmware upgrade.
10. Please wait until it is completed and device is rebooted.
11. Ready.

In certain cases new rmware version requires a factory reset to apply all new
features in the device. In this case “Factory reset” option is enabled by default and not
changeable by the user.
Restore Factory Default Settings
Factory default settings can be reloaded with the procedure below:
+ = Restore factory defaults
Turn all of the rotary switches to address #0, and press and hold the LEARN button for
approximately 10 seconds. LEDs give you a feedback as they light up from top to bottom.
Input port DVI-D
HDCP Enabled
No sync color Enabled
No sync color 7F7F7F (grey)
Output video mode Auto
Output HDCP mode Auto
Video Auto Select NonPriority, First detect
Audio Auto Select First detect: Embedded, S/PDIF, Analog 2
Control protocol LW2
Baud rate 57600
Databits 8
Parity No
Stopbits 1
Operation mode Pass-through
S/PDIF
DVI-D (embedded) HDMI (embedded)
Audio 1 Audio 2
S/PDIF
Video input: HDMI
HDMI (embedded)
Audio 1 Audio 2
Video input: DVI-D
DVI-D (embedded)
DVI-I in
HDMI in
VGA in
Analog
audio in 1
Analog
audio in 1
S/PDIF
4:1 digital
audio switch
Analog video A/D converter
Digital video
Fiber
out
EmbedderDe-embedder
Digital video
+ Digital audio
4:1 digital
A/V switch
A/D converter
A/D converter
Digital video
+ Digital audio
Analog audio
Analog audio
Digital audio
Digital audio
Digital audio
Digital
audio
Digital
audio
HDMI
Single fiber
multimode
optical cable
up to 2500m
5V DC
Power
adaptor
5V DC
Power
adaptor
HDMI-3D-OPT-
RX150RA
HDMI
TV
AV Receiver
5.1 Channel
Surround
Analog
audio
Touch
panel
RS-232
Laptop
VGA
Analog
audio
UMX-OPT-
TX150R
PC
S/PDIF
audio
0
1
2
3
4
5
6
7
8
9
0
1
2
3
4
5
6
7
8
9
0
1
2
3
4
5
6
7
8
9
0
1
2
3
4
5
6
7
8
9
DVI-D DVI-A VGA HDMI
LEARN

Other manuals for UMX-OPT-TX150R

3

Other Lightware Transmitter manuals

Lightware DVI-OPT-TX110 User manual

Lightware

Lightware DVI-OPT-TX110 User manual

Lightware UMX-OPT-TX150R User manual

Lightware

Lightware UMX-OPT-TX150R User manual

Lightware UMX-TPS-TX120 User manual

Lightware

Lightware UMX-TPS-TX120 User manual

Lightware HDMI-3D-OPT-TX210A User manual

Lightware

Lightware HDMI-3D-OPT-TX210A User manual

Lightware UMX-TPS-TX100 Series User manual

Lightware

Lightware UMX-TPS-TX100 Series User manual

Lightware SW4-OPT-TX240RAK User manual

Lightware

Lightware SW4-OPT-TX240RAK User manual

Lightware DVI-OPT-RX110 User manual

Lightware

Lightware DVI-OPT-RX110 User manual

Lightware WP-UMX-TPS-TX120-US Black User manual

Lightware

Lightware WP-UMX-TPS-TX120-US Black User manual

Lightware HDMI-TP-TX50 User manual

Lightware

Lightware HDMI-TP-TX50 User manual

Lightware SW4-TPS-TX240 User manual

Lightware

Lightware SW4-TPS-TX240 User manual

Lightware HDMI-TPS-TX210 User manual

Lightware

Lightware HDMI-TPS-TX210 User manual

Lightware UMX-TPS-TX130 User manual

Lightware

Lightware UMX-TPS-TX130 User manual

Lightware UMX-TPS-TX140 User manual

Lightware

Lightware UMX-TPS-TX140 User manual

Lightware HDMI-3D-OPT-TX210A User manual

Lightware

Lightware HDMI-3D-OPT-TX210A User manual

Lightware HDMI-TP-TX100R User manual

Lightware

Lightware HDMI-TP-TX100R User manual

Lightware DVI-HDCP-TPS-TX210 User manual

Lightware

Lightware DVI-HDCP-TPS-TX210 User manual

Lightware UMX-TPS-TX120 User manual

Lightware

Lightware UMX-TPS-TX120 User manual

Popular Transmitter manuals by other brands

Philips LBB 6030 installation instructions

Philips

Philips LBB 6030 installation instructions

Diehl IZAR RADIO EXTERN M-BUS installation guide

Diehl

Diehl IZAR RADIO EXTERN M-BUS installation guide

Steren MP3-055 instruction manual

Steren

Steren MP3-055 instruction manual

Galaxy Audio Any Spot Traveler AS-TV8 user guide

Galaxy Audio

Galaxy Audio Any Spot Traveler AS-TV8 user guide

Salcom 12-86-0000 product manual

Salcom

Salcom 12-86-0000 product manual

PRAXSYM PathTrax Series user manual

PRAXSYM

PRAXSYM PathTrax Series user manual

VIETA NM84BT user manual

VIETA

VIETA NM84BT user manual

Emerson Rosemount 5408 quick start guide

Emerson

Emerson Rosemount 5408 quick start guide

Sennheiser GP SK 3202 Instructions for use

Sennheiser

Sennheiser GP SK 3202 Instructions for use

Freelap Tx Track Pro quick start guide

Freelap

Freelap Tx Track Pro quick start guide

LightViper VIS-4832 user manual

LightViper

LightViper VIS-4832 user manual

Interlogix UFT installation instructions

Interlogix

Interlogix UFT installation instructions

ARTEX AIRCRAFT SUPPLIES B406-4 Operation, installation, and maintenance manual

ARTEX AIRCRAFT SUPPLIES

ARTEX AIRCRAFT SUPPLIES B406-4 Operation, installation, and maintenance manual

Emerson Rosemount 848T quick start guide

Emerson

Emerson Rosemount 848T quick start guide

Endress+Hauser Proline Promag 50 Installation instruction

Endress+Hauser

Endress+Hauser Proline Promag 50 Installation instruction

Eaxus 82690 manual

Eaxus

Eaxus 82690 manual

Rosemount 148 quick start guide

Rosemount

Rosemount 148 quick start guide

Luxi Electronics TPR-150CR Presenter quick start guide

Luxi Electronics

Luxi Electronics TPR-150CR Presenter quick start guide

manuals.online logo
manuals.online logoBrands
  • About & Mission
  • Contact us
  • Privacy Policy
  • Terms and Conditions

Copyright 2025 Manuals.Online. All Rights Reserved.